Pololu Blog » User Profile: Jon » Posts by Jon »
Posts by Jon (Page 5)
You are currently viewing a selection of posts from the Pololu Blog. You can also view all the posts.
Popular tags: community projects new products raspberry pi arduino more…
Ibex: a wall-climbing robot by Operative RC
Forum user Lukeness made a detailed post about the design of his wall-climbing robot, Ibex, which is now available for purchase on his website, Operative RC.
 |
The lightweight and compact RC-controlled wall-climbing robot uses a brushless DC motor for suction, and features a drive solution that uses four of our micro metal gearmotors, each driving a 32mm Pololu wheel and mounted with our micro metal gearmotor brackets.
The post includes pictures and videos of various iterations of Ibex and includes Luke’s reflection on the disheartening results of one of Ibex’s iterations. We’re glad to hear that Luke “stuck” with it, and now has a robot he is happy enough to market! We look forward to hearing more about Operative RC when more products become available.
Related products


Zumo tennis ball collector
Forum user patman715 posted to the forum about his modified Zumo Robot. The video above shows a Zumo with a two-servo gripper and arm capable of lifting tennis balls into an on-board storage bin. It is all controlled by an Arduino Leonardo, and two of our 100:1 micro metal gearmotors (we suspect they are HP versions) seem to give it plenty of oomph for carrying around the extra load.
Related products

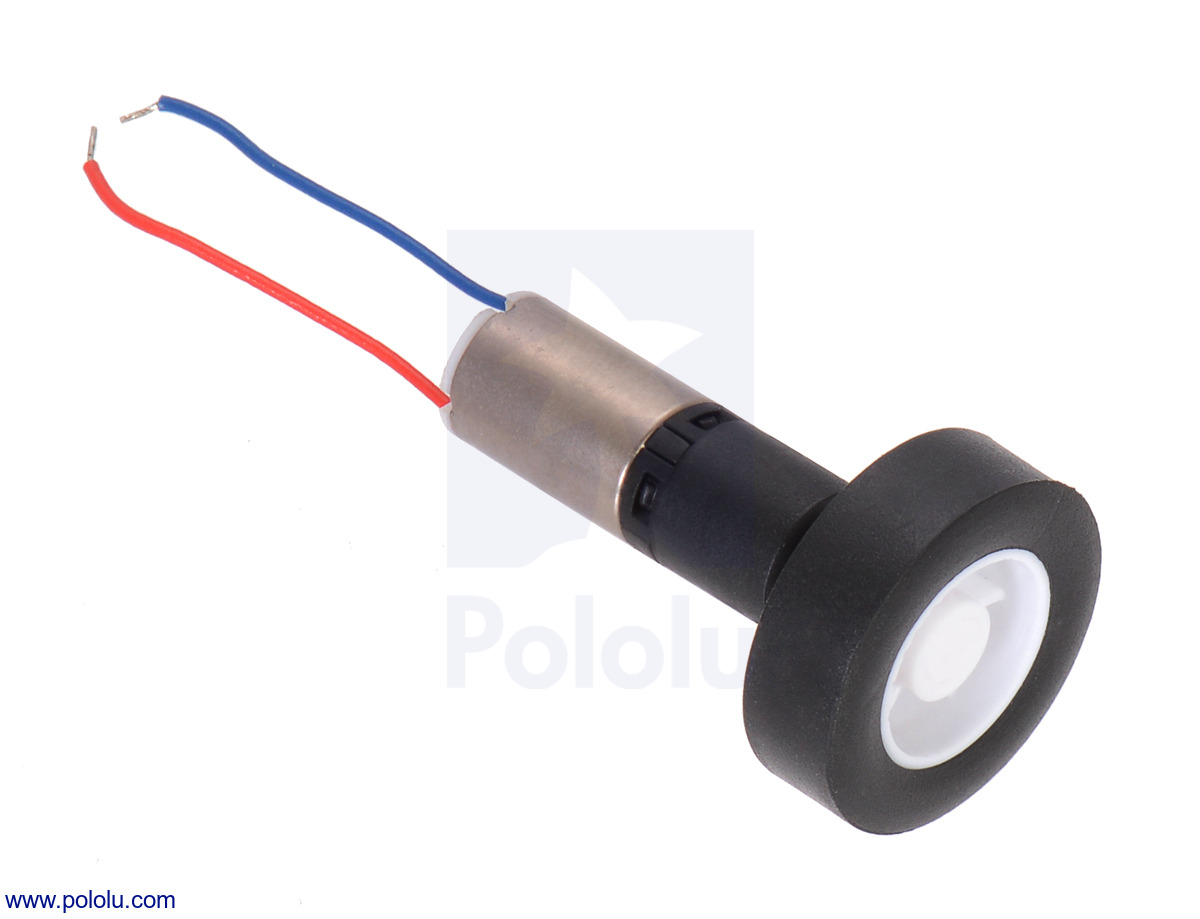
New products: sub-micro plastic planetary gearmotors & compatible wheels
 |
Need a “little” help with your next electronics project? Get it up and running with our sub-micro plastic planetary gearmotors! Measuring a minuscule 6 mm in diameter and weighing just over a gram, these gearmotors are even smaller (and much lighter) than our popular micro metal gearmotors.
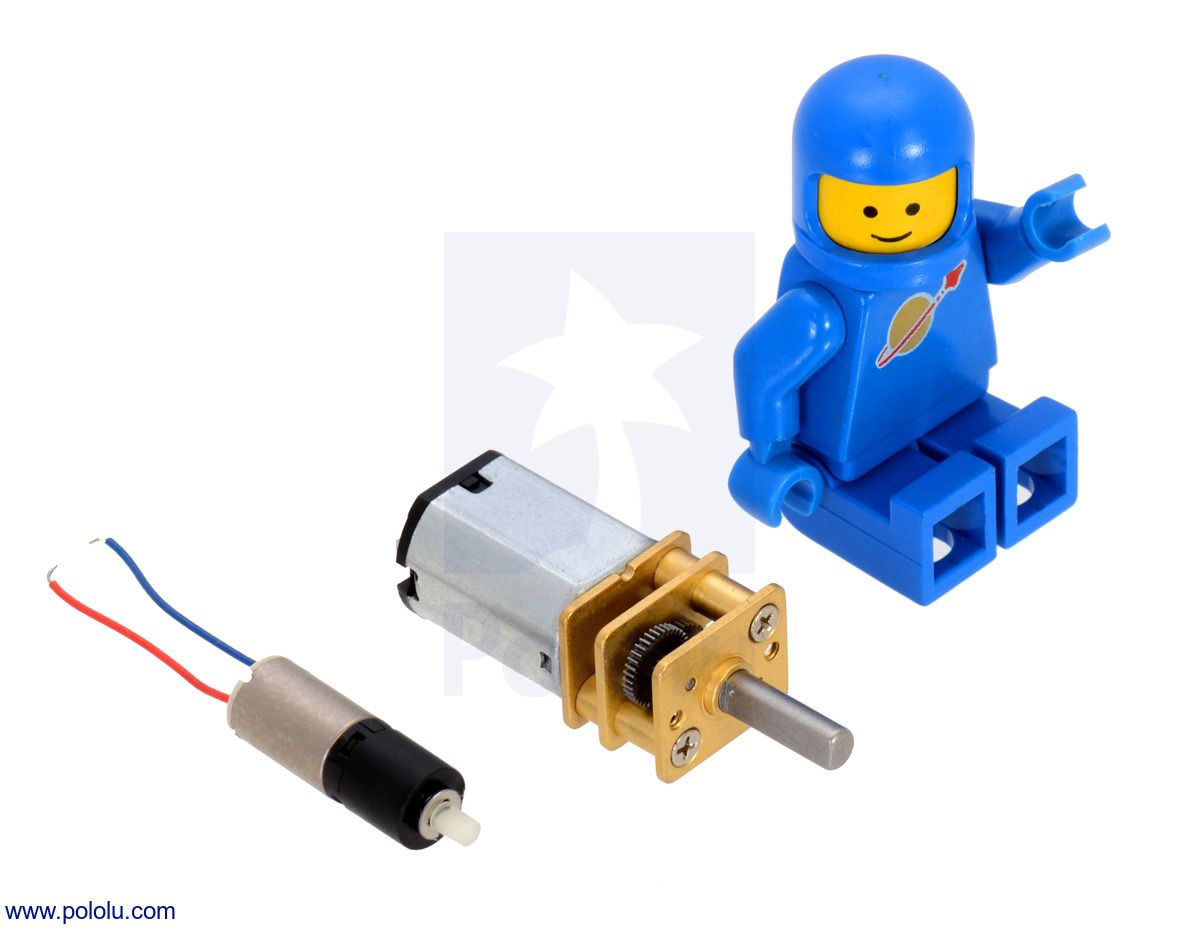 |
26:1 sub-micro plastic planetary gearmotor next to a Micro Metal Gearmotor and a LEGO Minifigure for size reference. |
|---|
Our sub-micro plastic gearmotors are available in two gear ratios: 26:1 and 136:1. Click on those ratios to learn more about each motor!
Motor accessories
While there are no mounting holes, their cylindrical bodies makes them perfect for snapping into 1/4″ (6 mm) fuse clips, and their small scale makes it easy to affix them with tape or glue. We are also now carrying tiny 14 × 4.5 mm wheels, which are compatible with the sub-micro plastic gearmotor output shafts.
|
|

But, Jon, what can I do with such a tiny, adorable motor?
I’m glad you asked! The way I see it, you really only have two options:
- Spin something really tiny and adorable.
- Make something tiny and adorable like this line follower made by Pololu engineer Kevin (blog post coming soon!):
|
|
I’m just kidding; there are definitely plenty of interesting things that can be made with these motors. We can’t wait to see what you use these motors for!
Related products


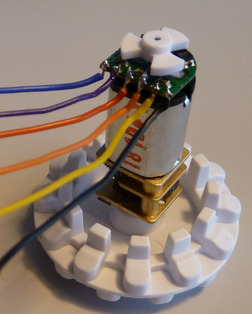
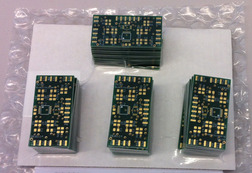
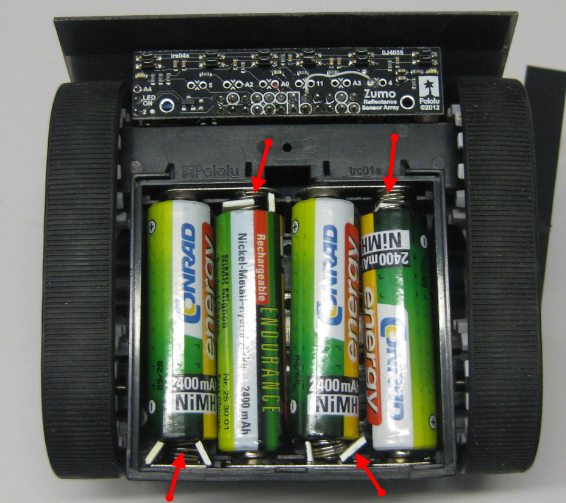
Custom optical encoder signal processing board for the Zumo
 |
Erich, a professor at the Lucerne University of Applied Sciences and Arts in Switzerland, posted to our forum about a circuit he designed for the robots he’s building based on our Zumo chassis for his embedded system programming course. His Zumos are retrofitted with our micro metal gearmotors with extended backshafts and optical encoder board. The custom circuit he designed converts the analog output of our optical encoder boards to digital waveforms, which makes them more easily interpreted by microcontrollers and other devices. His board uses a Digital-to-Analog Converter (Microchip’s MCP4728) and four op-amps (Microchip MCP6004) to generate the modified quadrature output. The DAC can be controlled directly over I²C and can be calibrated automatically. After verifying that it works, Eric ordered a bunch more boards to use in his course:
|
|
||||
|
|

We look forward to seeing how they work with the Zumos!
You can read more about Erich’s signal processing boards on this blog post from his website. You can follow the progression of the robots used in his course by visiting these forum posts:
March 2013: Zumo Robot with FRDM-KL25Z Board
September 2013: Zumo Robot with Pololu Plug-in Modules
October 2013: Zumo Robot with Pololu Plug-in Modules, assembled
December 2013: Zumo Tournament Videos
Related products


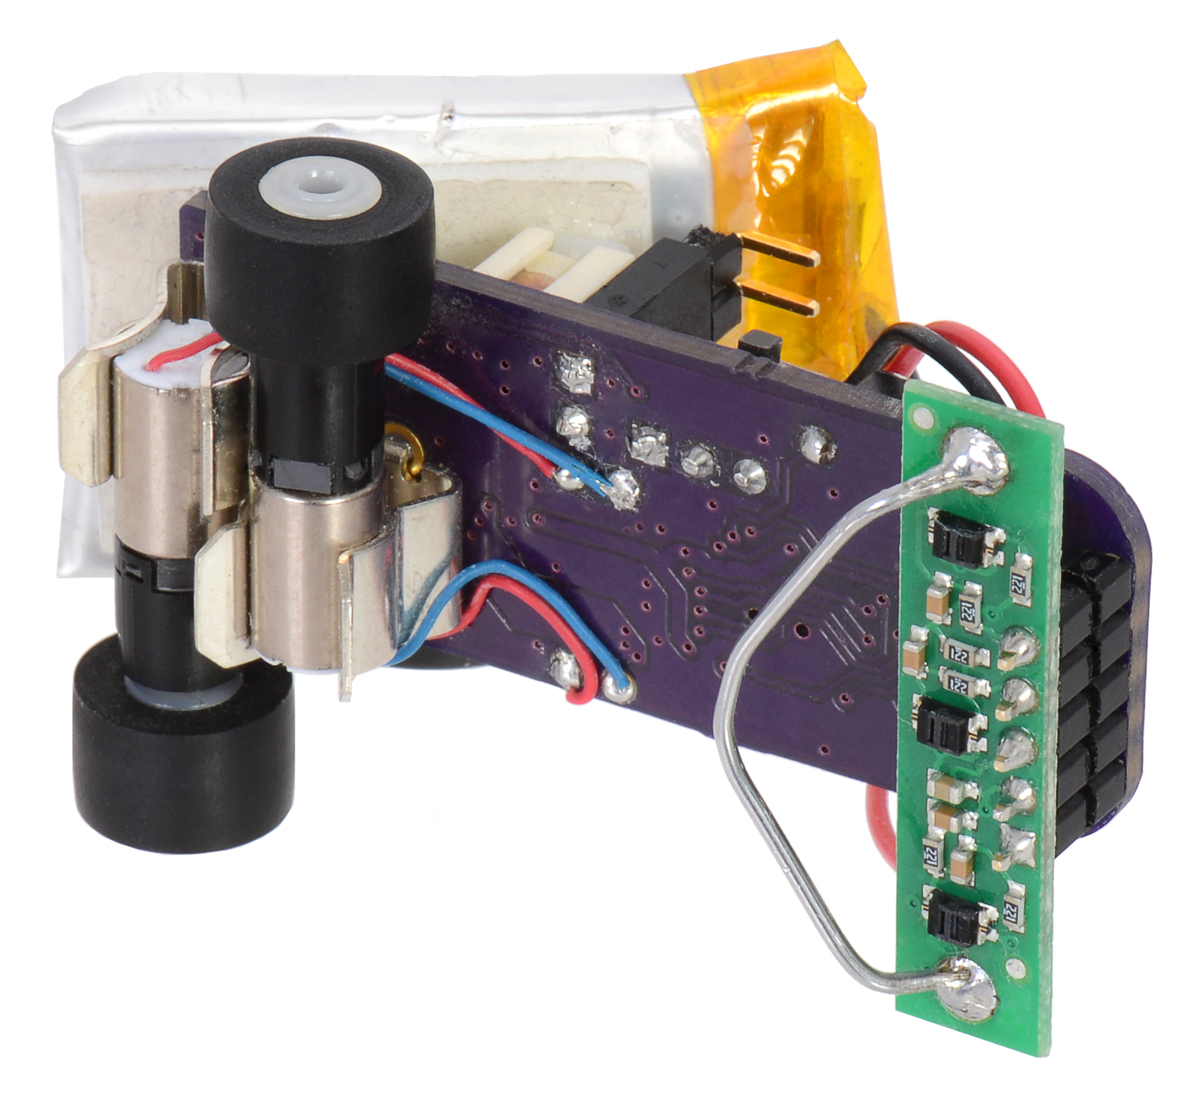
New product: Advancer Technologies Muscle Sensor v3
Looking for a way to pump up your next project? Let the Muscle Sensor v3 from Advancer Technologies do the heavy lifting!
This small, easy-to-use, 1″ × 1″ board measures muscle activation via electric potential; this is referred to as electromyography (EMG). The sensor measures, filters, rectifies, and amplifies the electrical activity of a muscle; as the muscle flexes, the output voltage increases, resulting in a simple analog signal that can easily be read by any microcontroller with an analog-to-digital converter (ADC), such as our A-Star or an Arduino.
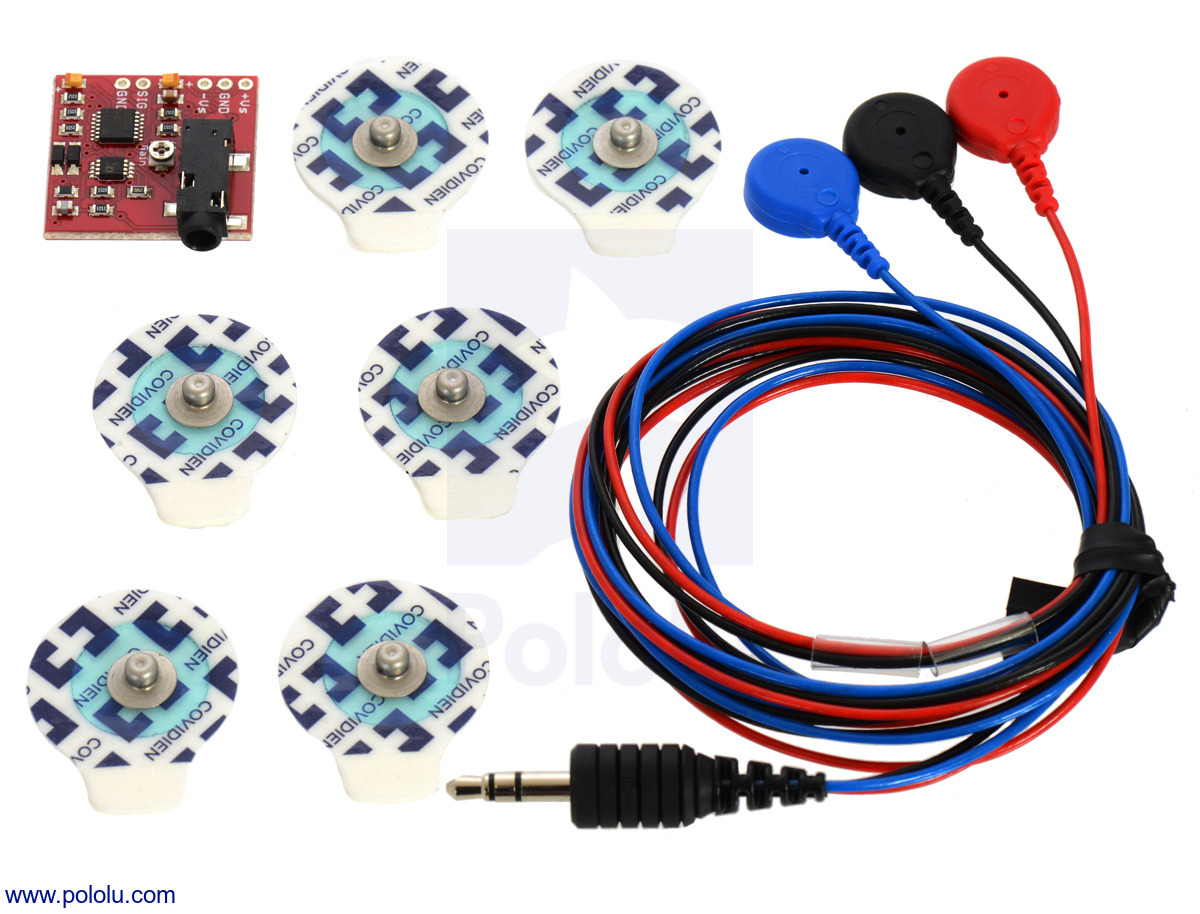 |
Muscle Sensor v3 with included hardware. |
|---|
The engineers here were pretty excited to play with these when we got our first samples, as many of us hadn’t used anything like it before. While thinking of various ways to test the sensor, a few of us remembered this ridiculously awesome video of Terry Crews making music with his muscles. (Gets me every time! #MuscleEnvy.) Without getting ahead of ourselves, we decided to try something much quicker and more straightforward with some of our electronics.
In the demonstration video at the beginning of this post, you can see the muscle sensor in action as it measures the muscle activity of my bicep. The demo uses the muscle sensor with a Maestro servo controller to update the position of a hobby RC servo based on how hard I flex. The setup was very simple; the analog output signal from the muscle sensor is connected directly to channel 0 on the Maestro, and the two boards share a common ground. The muscle sensor is powered by two 1S LiPo batteries and the Maestro and servo (connected to channel 1) are powered from a separate 6 V battery pack.
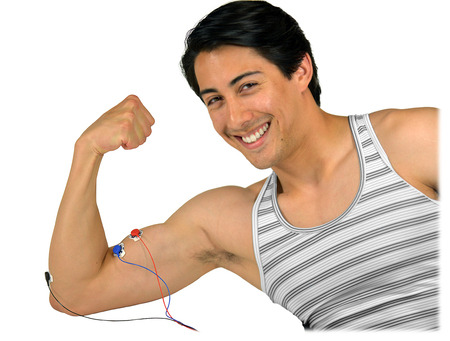 |
Here I am modeling with electrodes on my bicep for the Muscle Sensor v3. |
|---|
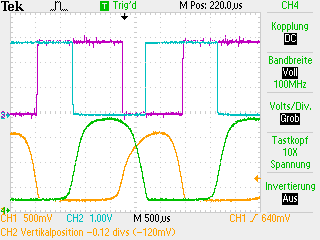
The Maestro script we used is very similar to the “Using an analog input to control servos” example script provided in the Maestro user’s guide with a couple of modifications. We changed the scaling of the input channel (since our signal was from 0 V to 3.7 V) as well as the channel numbers to match our setup. The whole script is only a few lines long:
# Sets servo 1 to a position based on the analog input of the Muscle Sensor v3.
begin
  0 get_position       # get the value of the muscle sensor's signal connected to channel 0
  6 times 4000 plus    # scale it to roughly 4000-8092 (approximately 1-2 ms)
  1 servo              # set servo 1 accordingly
repeat
We can’t wait to see all of the amazing things you come up with when you engage your brain (and your muscles) with this sensor!
Related products


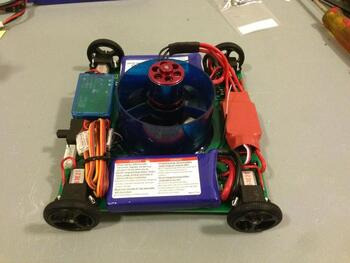
Jon's dead reckoning robot
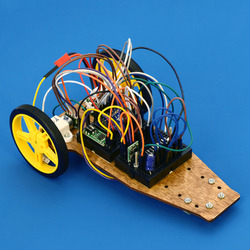
Like other engineers here, I made a robot for the LVBots dead reckoning competition. Before I knew about this competition, I hadn’t made a successful dead reckoning robot. By the end of this competition, I still hadn’t made a successful dead reckoning robot. However, I did learn more about myself and a little more about line following. This post describes my robot, Usain Volt, and details some of what I was thinking when I designed it. Continued…
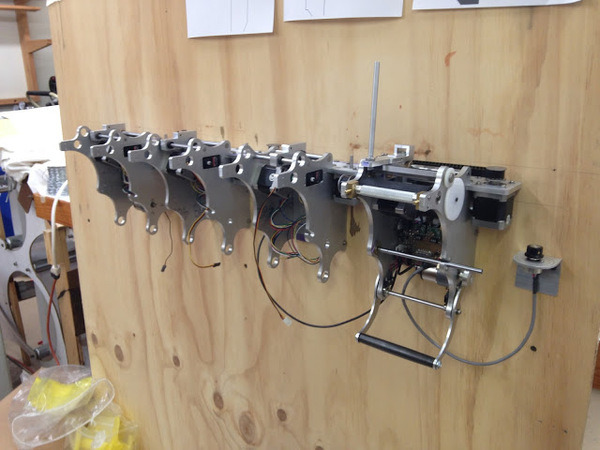
ToDo and Babel by Chris Eckert
Chris Eckert makes devices that explore the artistic potential of factory automation. One of his works, entitled ToDo, is an automated wall mounted device that seems to continuously write a never-ending list of things to do. Two stepper motors control the position of a pen over a roll a paper, and a servo controls the pen’s up/down movement. The device is controlled by an Arduino Uno and two of our A4988 stepper motor drivers. You can find more details about the construction in Chris’s blog posts about Todo and see more of Todo on its gallery page.
Chris is currently working on another project called Babel, which will feature about 20 devices similar to ToDo.
 |
You can learn more about Chris and his artwork on his personal website.
Related products


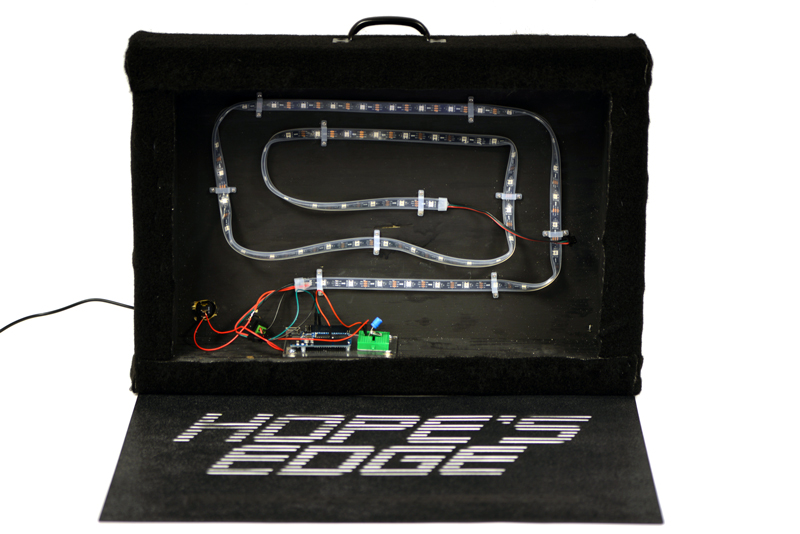
Hope's Edge LED Banner
 |
Local indie artist and Pololu employee Tracey, intent on reviving her programming skills and exploring her budding interest in electronics, shed some light on her creative personality by making an LED banner for her band, Hope’s Edge. The banner is a briefcase-sized container that uses an addressable LED strip to shine through a stencil of the band’s logo in a wave of brilliantly changing colors. The stencil and the rest of the panels in the container are made from 1/16" black ABS, all of which were cut with our custom laser cutting service, and a sheet of gift-wrap tissue paper is taped to the inside of the front panel to act as a diffuser. The banner runs off of a 5V wall wart, which is boosted to 9V to power an Arduino Uno that runs Ben’s Christmas light LED code.
|
|


New product: 5V wall power adapter with USB port
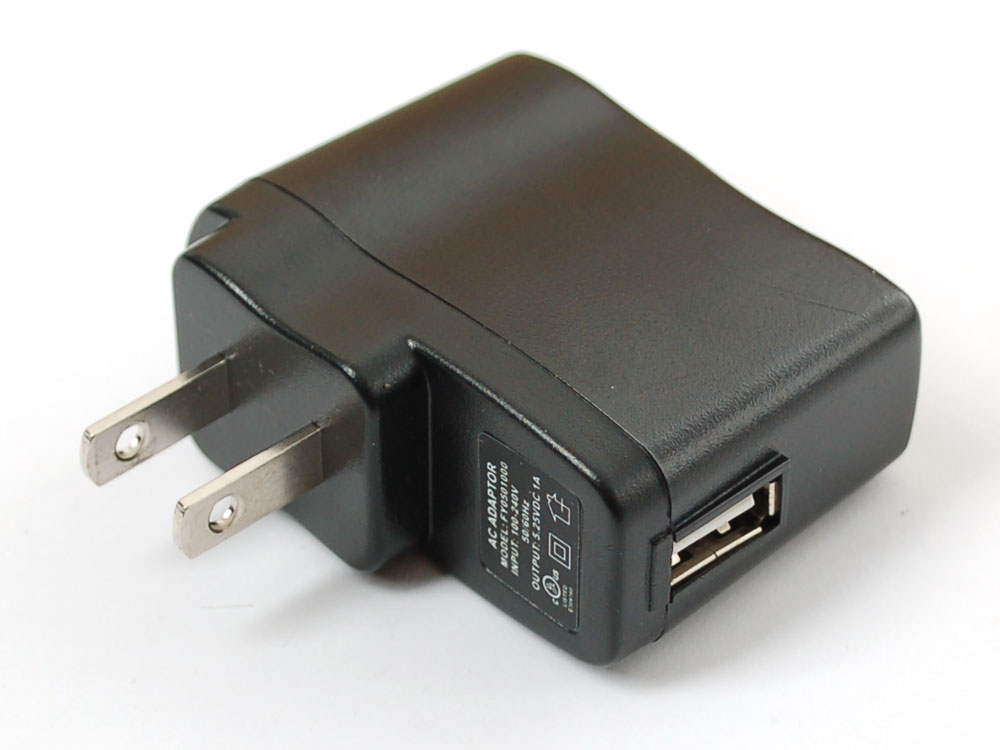 |
Looking for a power supply for your Raspberry Pis, Arduinos, Wixels, or Maestro servo controllers? Look no further!
This UL-certified AC-to-DC converter gives you an easy way to deliver up to 1 A to your USB-powered device from a US-style AC electrical socket. It has been specifically designed to supply 5.25 V instead of 5 V to help ensure that the device it is powering receives close to 5 V even when the current draw is high. This converter is safe for use with USB-compliant devices.
This adapter does not include a USB cable, but it features a USB “A” port that you can plug a standard USB cable into, which makes it great for transitioning your project from USB to wall power.
For more information, see the 5V wall power adapter product page.
Related products

Mini Sumo Tournament (with Zumos!)
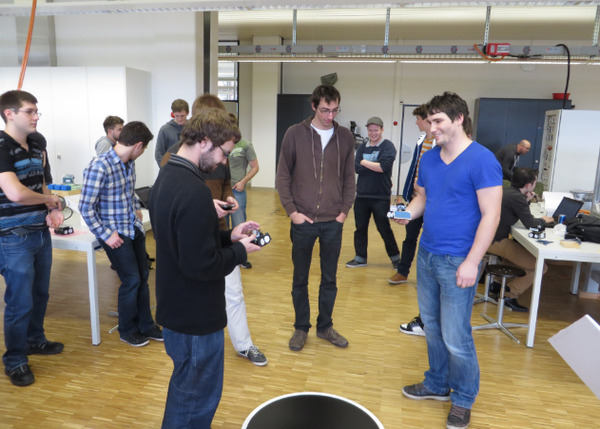 |
Erich, a professor at the Lucerne University of Applied Sciences and Arts in Switzerland, posted to our forum about their first Mini Sumo tournament, which took place this past weekend. The tournament was a part of Erich’s embedded systems programming class, for which he created a custom Mini Sumo robot platform for his students to modify. His robots use a custom PCB that mounts to the Zumo chassis kit and connects to the reflectance sensor array. Instead of an Arduino, his PCB uses a Freescale FRDM-KL25Z as the microcontroller board. Students customized the modified Zumos with their own sensors (we saw at least a few of them using our IR proximity sensors). 21 robots were entered into the competition, and a winner was determined over 5 rounds. Links to a competitor showcase video, several battle videos, and more information about the competition can be found in his forum post.
We are also excited to see a list of performance tweaks that Erich created for Zumo robots to be more competitive in Mini Sumo. We have made this available as a resource on the Zumo product pages.
|
|
While he was experimenting with our Zumo chassis, Erich posted to our forums a few times updating us on the progress of his modifications. You can follow his robot’s progression by visiting these forum posts:
March 2013: Zumo Robot with FRDM-KL25Z Board
September 2013: Zumo Robot with Pololu Plug-in Modules
October 2013: Zumo Robot with Pololu Plug-in Modules, assembled
Related products


Home | Forum | Blog | Support | Ordering Information | Lists | Distributors | BIG Order Form | About | Contact
© 2001–2026 Pololu Corporation


