Pololu Blog » User Profile: Claire » Posts by Claire »
Posts by Claire (Page 3)
You are currently viewing a selection of posts from the Pololu Blog. You can also view all the posts.
Popular tags: community projects new products raspberry pi arduino more…
New product: 5V, 2.5A Step-Down Voltage Regulator D24V25F5
 |
Just about every integrated switching regulator datasheet I come across advertises how easy it is to use the chip, which is probably a good sign that it’s not necessarily that easy. I have designed several of our regulator boards, and for the most part, following the manufacturer recommendations and warnings about short traces and small loops led to working designs without much drama. But, as we push for higher performance, it can get tricky, and I thought I would share some fun pictures of what goes into troubleshooting a design that ought to work but did not.
This instance is about the D24V25F5 step-down regulator we just released today. It should have been straightforward because the basic circuit is very similar to that of the higher-power D24V60F5 and D24V90F5 regulators we released earlier this year. Because this board was supposed to be really small, I designed it with components tightly packed on both sides, which meant I had to make compromises on some of those trace lengths and loop sizes. It wasn’t even clear that the circuit would be routable with just two PCB layers, so when I did find a solution, the design team wanted to try it even though we knew we were pushing our luck.
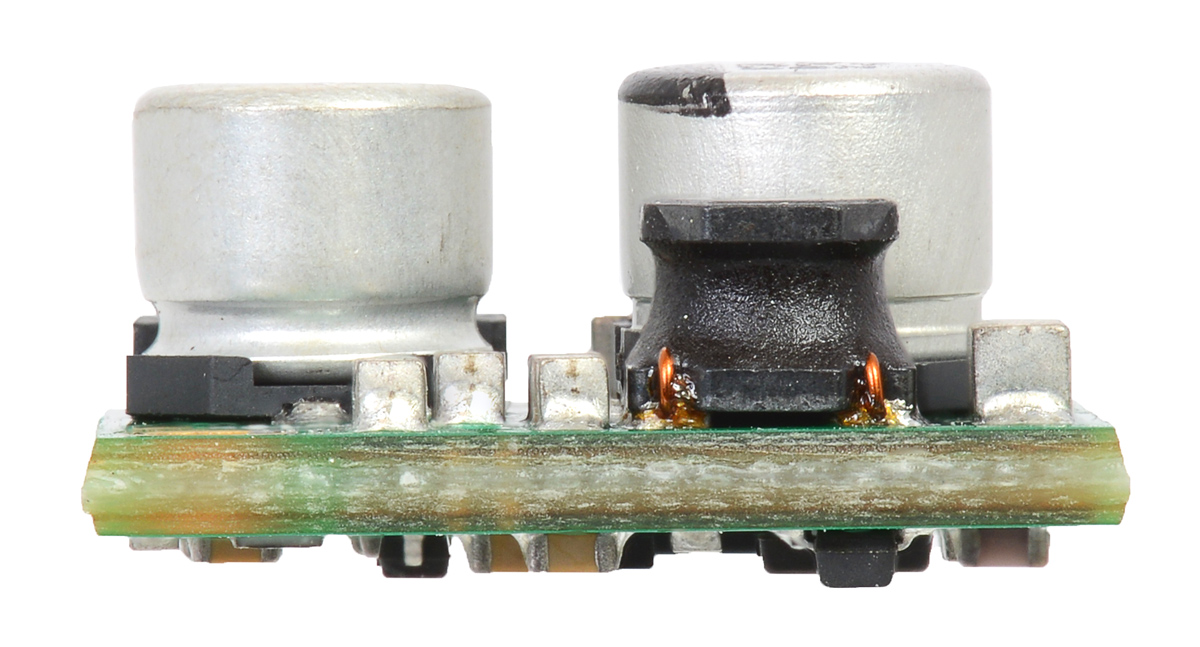 |
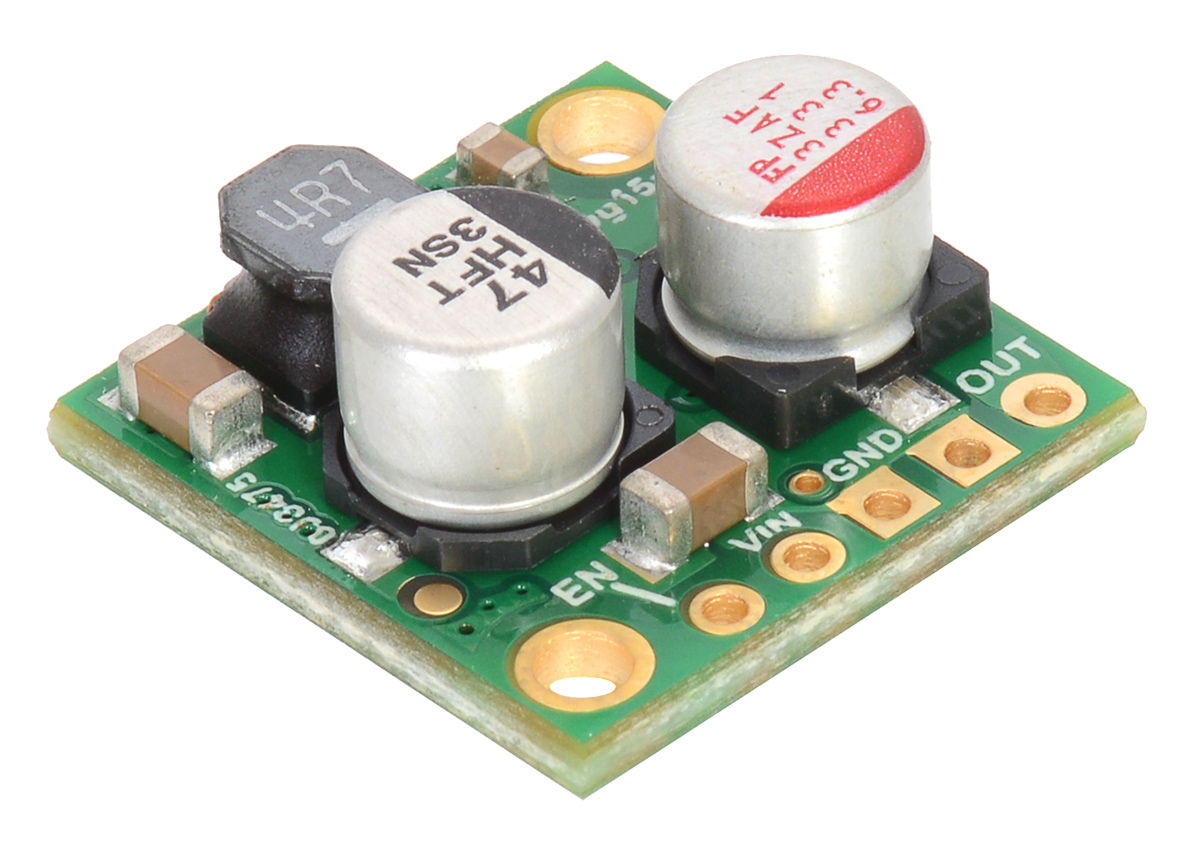
Pololu 2.5A Step-Down Voltage Regulator D24V25Fx, side view. |
|---|
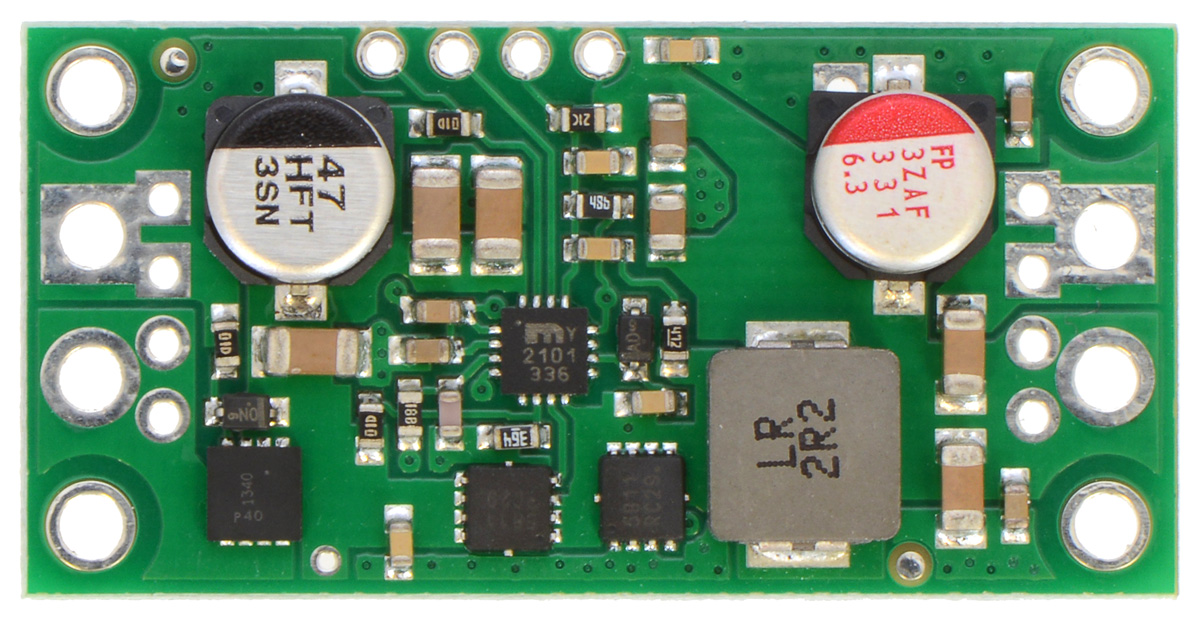
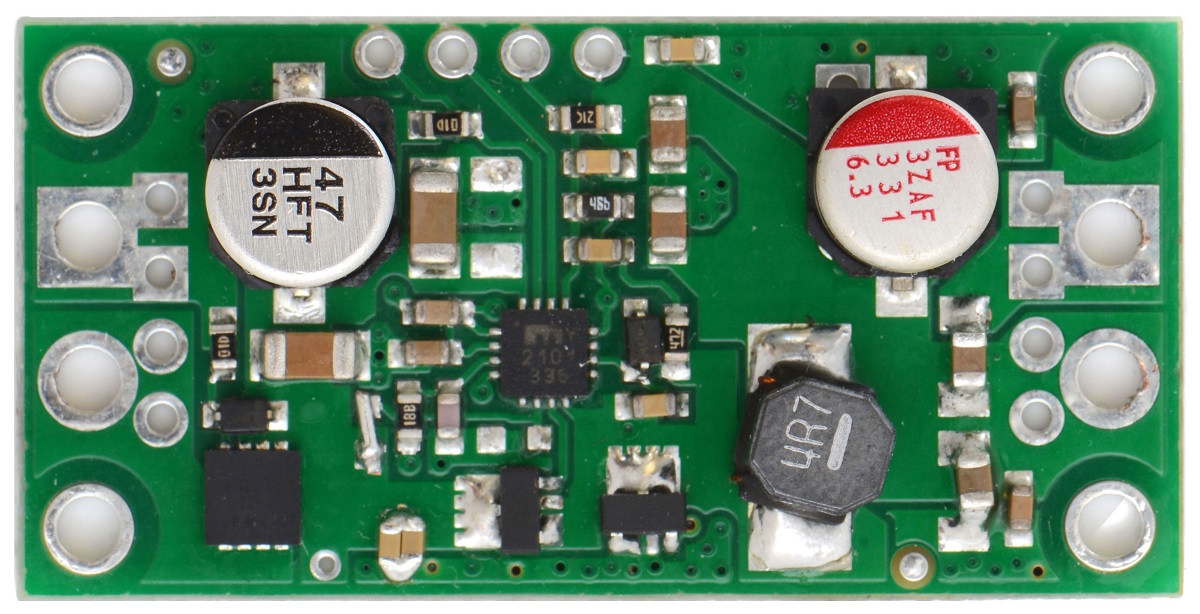
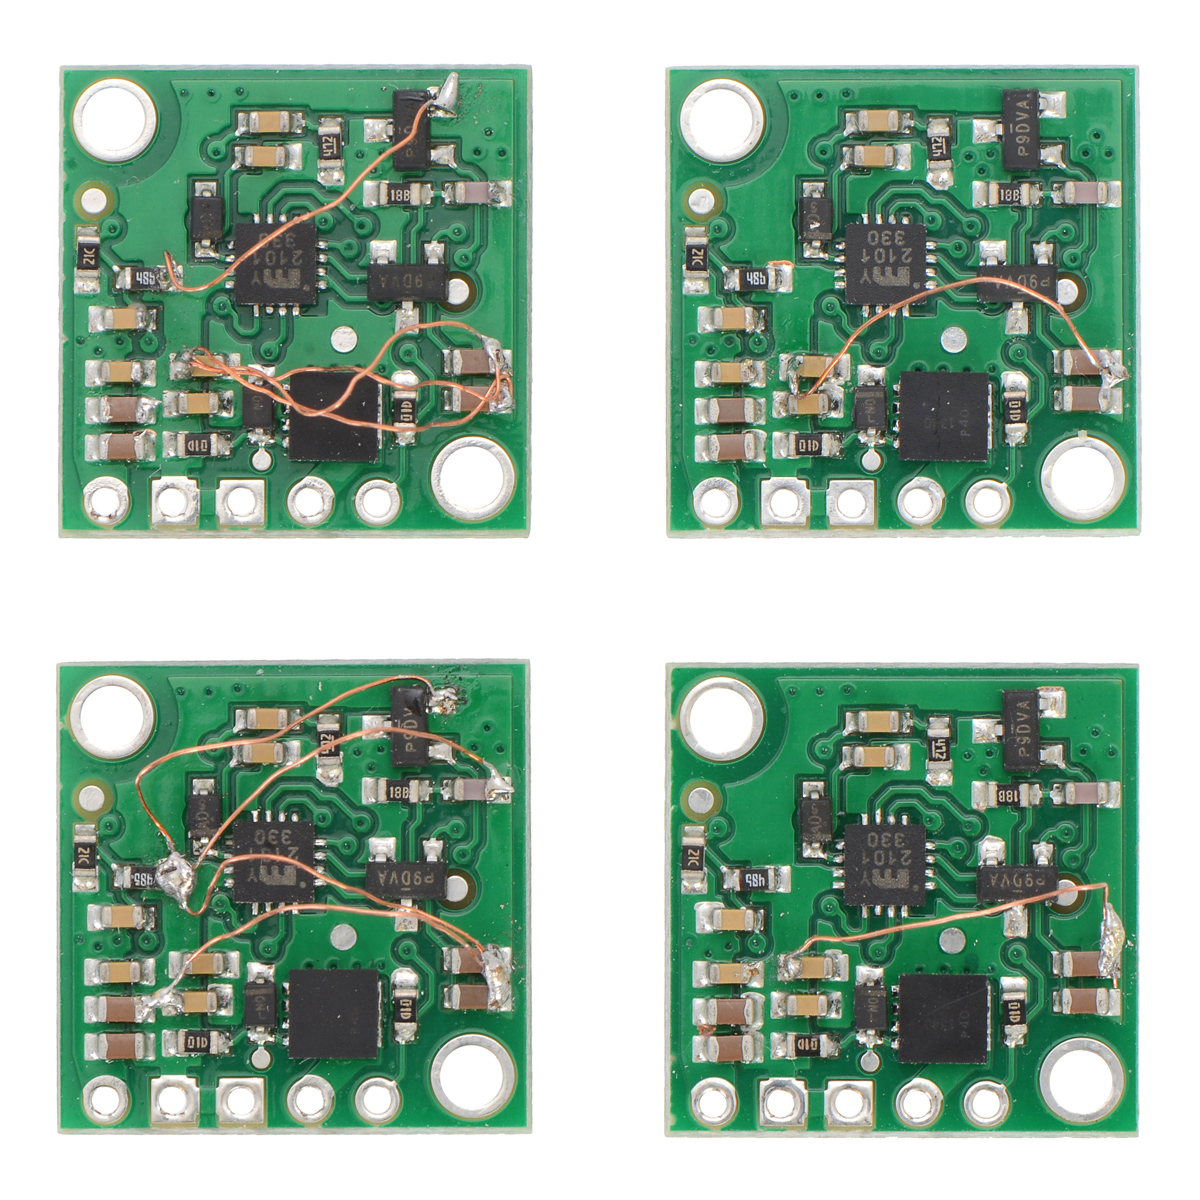
Well, if we had been lucky, you might have been reading a less interesting version of this new product announcement three weeks ago. As is typical for these borderline cases, it was the especially hope-dashing kind of failure where a casual test indicated that the board was working, but more in-depth tests revealed stability and performance issues. To make sure the components were not the source of the problem, we put the exact same components onto the PCB of the larger version that already worked. The pictures below show the D24V60F5 regulator (left) populated with its standard components and the D24V60F5 regulator’s PCB populated with the components for the new D24V25F5 (right).
|
|
The new components on the old board worked, so after some final checks that the new prototypes were assembled correctly, we knew it was a layout issue. We wanted assurance that the design could work before just diving into a four-layer revision, so I took some prototypes and added redundant connections to see their impact. The pictures below show some of my test boards with varying numbers of additional ground connections.
|
|

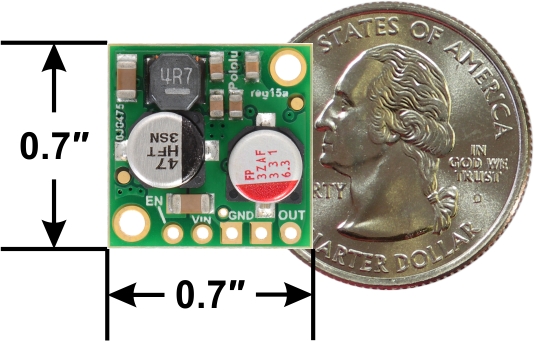 |
I was able to see that the more additional ground connections there were, the more the issues went away. So, I routed the four-layer board, and after a week of tests on over a dozen prototypes, I am happy to announce the release of our most sophisticated regulator yet! The D24V25F5 buck regulator generates 5 V from input voltages of up to 38 V with typical efficiencies of 85% to 95%. The board measures only 0.7″ × 0.7″, but it allows a typical continuous output current of up to 2.5 A.
We are quite happy with how manufacturing of these units is going, so we expect to be moving toward more dense designs like this in future products.
Related products


New products: Perma-Proto breadboard PCBs from Adafruit
Securely connecting and mounting the electronics for your robot or other project is a key step in taking it from a prototype to a finished design. These perma-proto boards from Adafruit use the same basic through-hole layout as standard solderless breadboards while allowing for permanent solder connections, which makes it easy to transfer your electronics from one to the other.
We are now carrying four types of perma-proto boards:
The quarter-size perma-proto board, at 1.7″ × 2.0″, is slightly larger than a 170-point breadboard and has labels, 15 rows of pins, and two mounting holes.
|
|

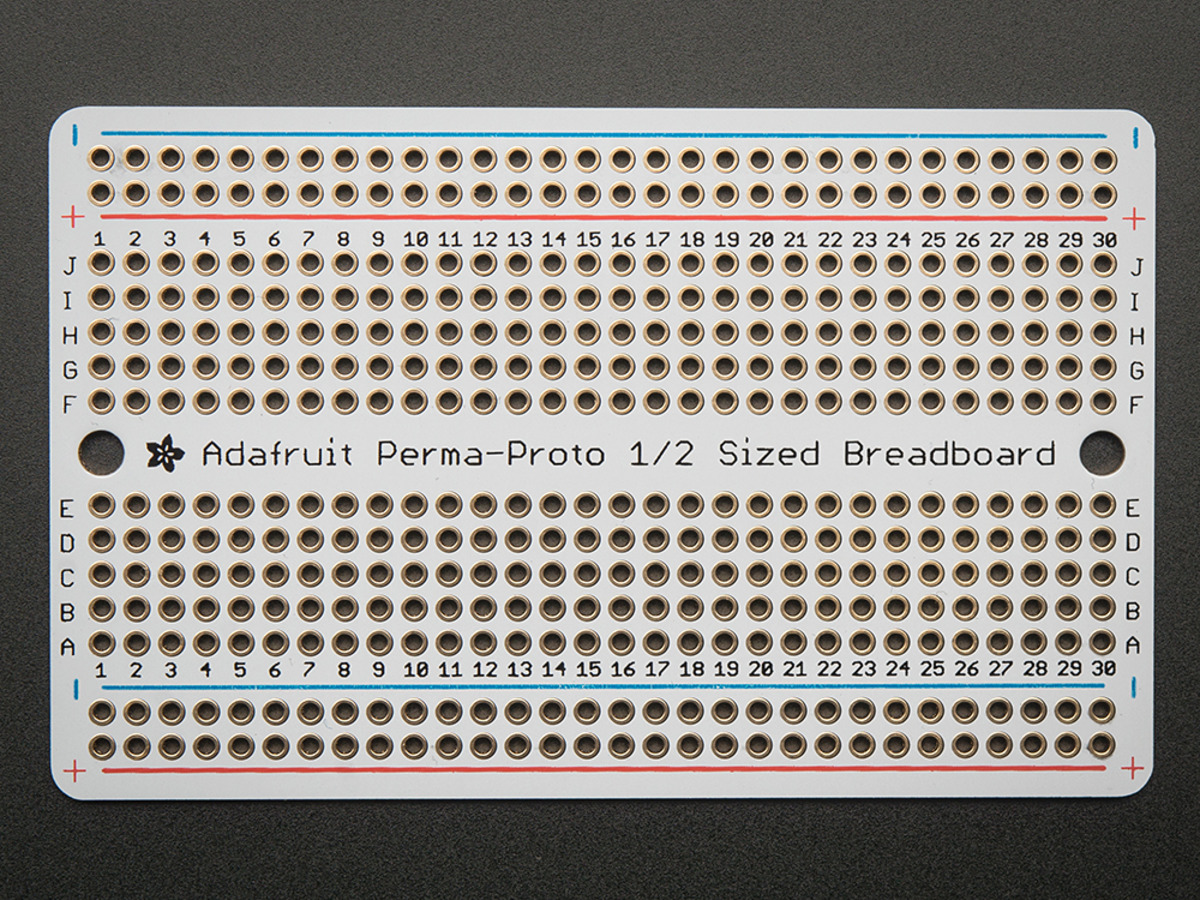
The half-size perma-proto board is 3.2″ × 2.0″, which is about the same size as our 400-point beardboard, and has labels, 30 rows of pins, and two mounting holes.
The full-size perma-proto board is similar in size to our 830-point breadboard. It measures 6.2″ × 2.0″ and has labels, 60 rows of pins, and three mounting holes.
|
|

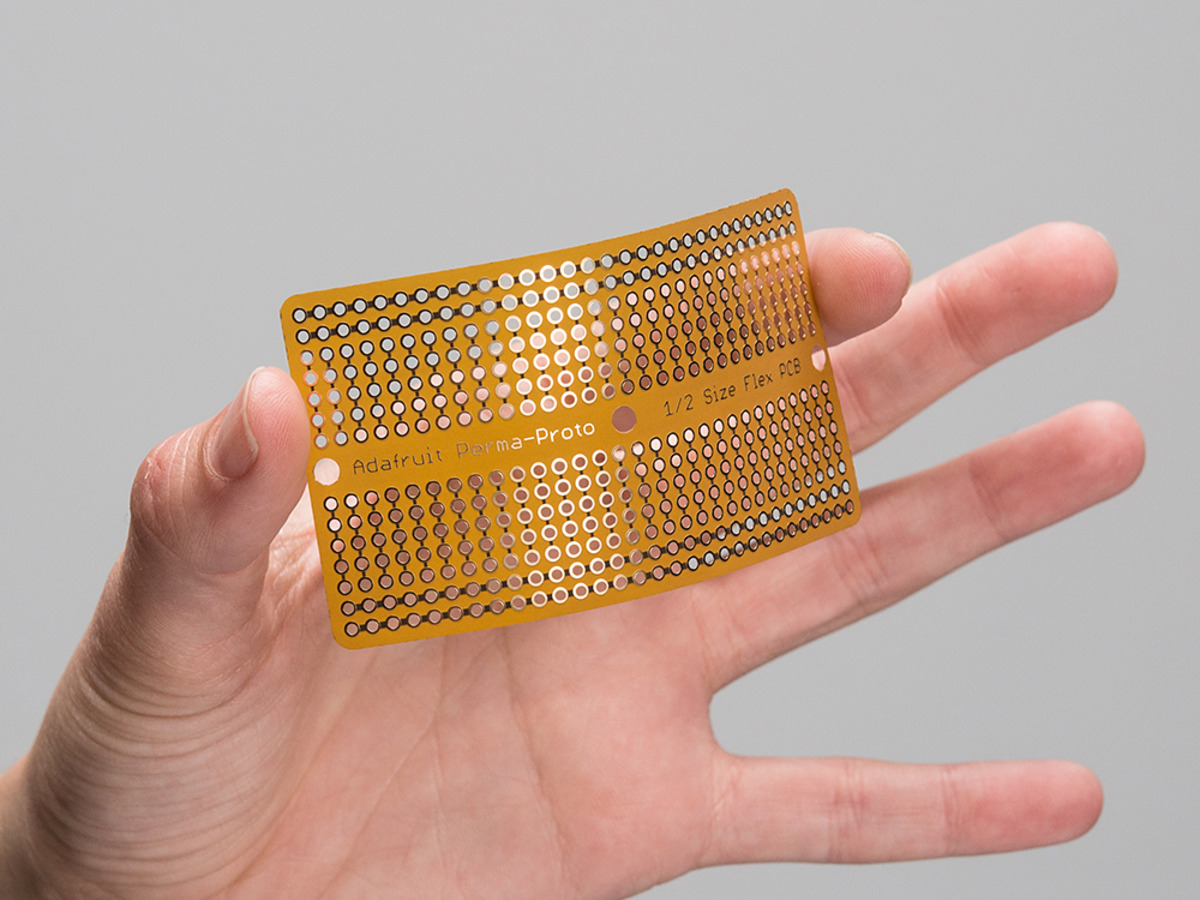
The flexible perma-proto board is made of a thin polyamide film that allows it to be bent, flexed, and cut to fit your project. This version is 3.1″ × 1.7″ (similar in size to the half-size board) and only 0.005″ thick. It contains 30 rows of pins and three mounting holes.
Each board uses 47 mil (1.2 mm) diameter through holes to accommodate parts with thick leads and is through-plated for strength, which means that the pads are less likely to be ripped of during soldering or rework.
Related products


Geiger counter using A-Star
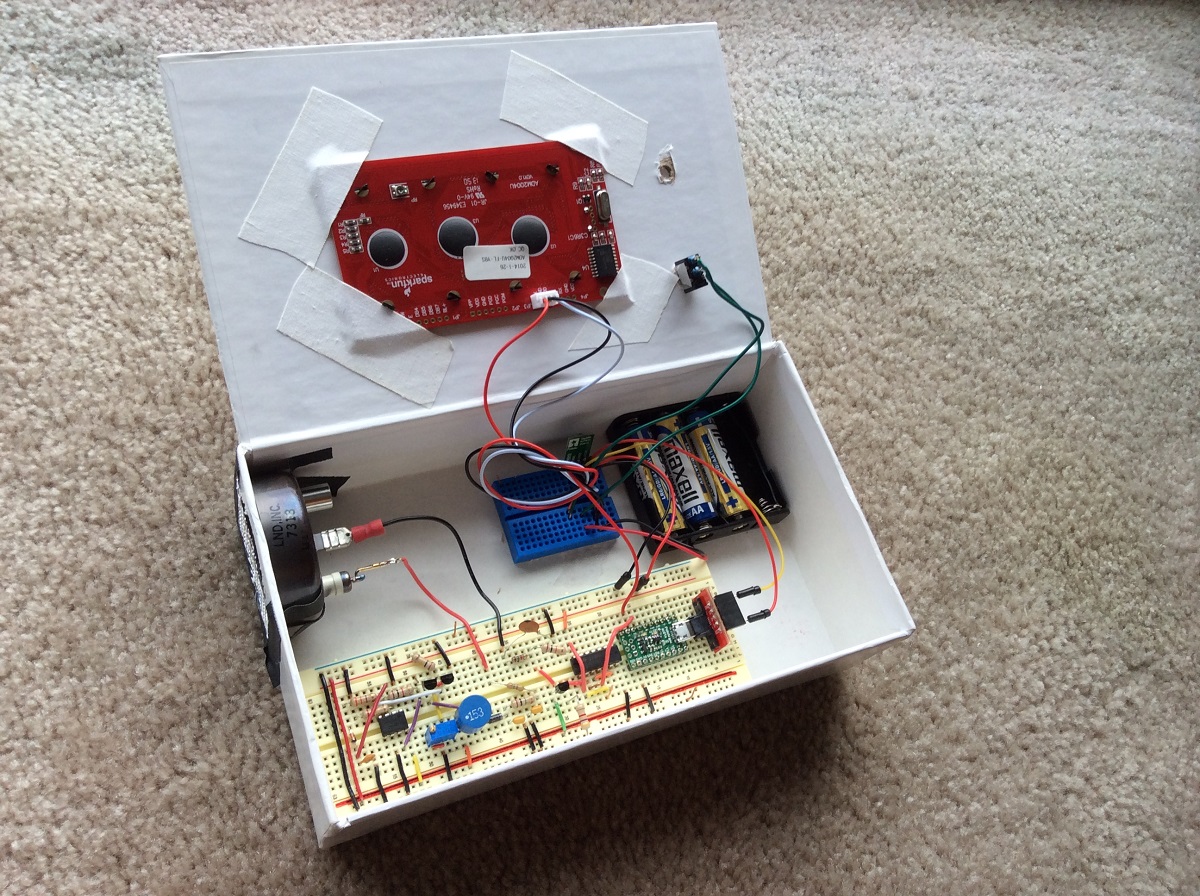 |
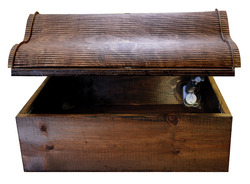
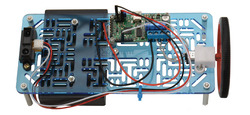
The inside of the Geiger counter. |
|---|
The home-made Geiger counter featured in this post by forum user bob_day uses an A-Star 32U4 Micro, LND 7313 Geiger tube, and LCD to measure and display Geiger tube counts. The LCD displays the counts detected during the last minute, the average counts per minute, and the maximum counts in a minute. The project was originally designed for the Arduino Micro, but the program was able to run on the A-Star without any software modifications. The entire project is powered from one S7V8A adjustable step-up/step-down voltage regulator, and the conditioning part of the circuit, which shapes the output into narrow pulses, was designed by bob_day . Schematics and code for the project are included in the forum post.
 |
The case and display of the Geiger counter. |
|---|
Related products


New products (and demo): Force-sensing linear potentiometers and resistors
We are now carrying four exciting new sensors from Interlink Electronics:
- 0.25″-diameter circle, short tail force-sensing resistor (FSR)
- 0.6″-diameter circle, short tail FSR
- 1.4″ × 0.4″ force-sensing linear potentiometer (FSLP) strip
- 4.0″ × 0.4″ customizable-length FSLP strip
The two force-sensing resistors (or FSRs, for short) are short-tail versions of the small, circular FSRs we already carry, which allows them to be integrated into applications with tighter space constraints. These sensors act just like variable resistors that depend on the applied pressure, so you can put them into a simple voltage divider circuit and measure the force on them with a single analog-to-digital (ADC) microcontroller input.
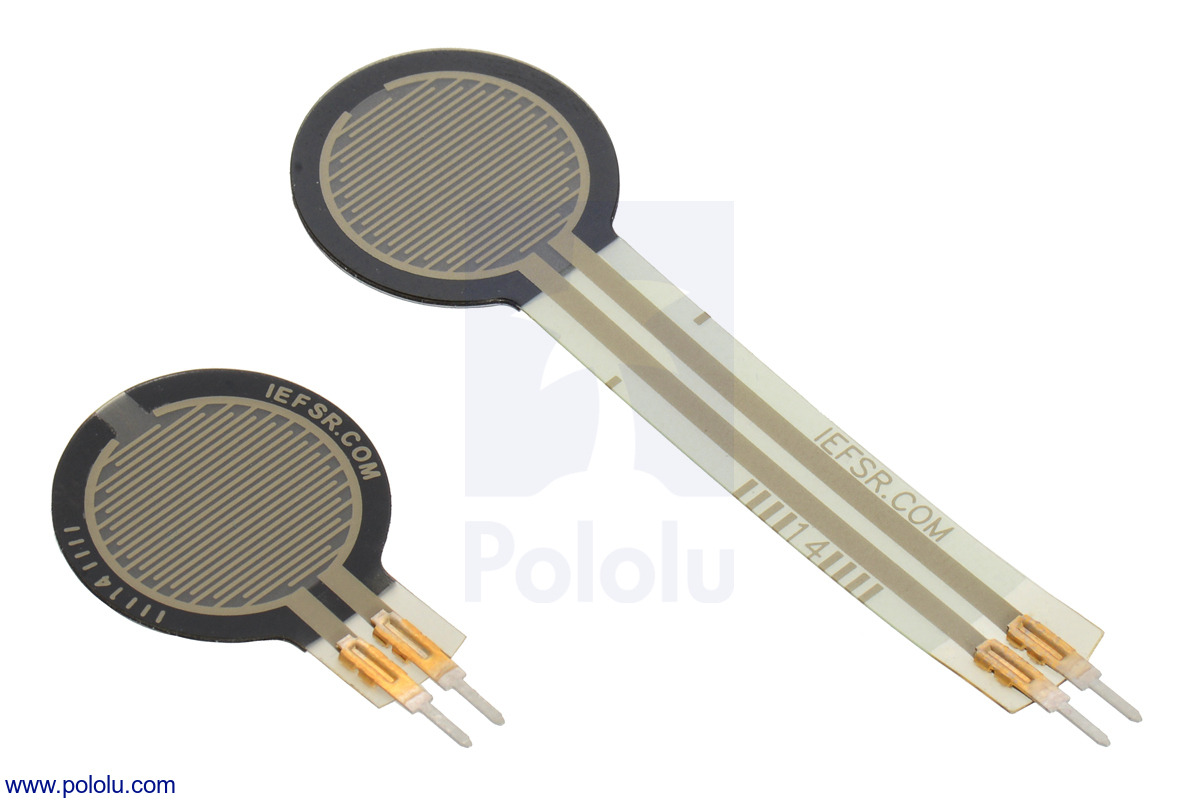 |
0.6″-diameter short-tail force sensing resistor (FSR) next to a 0.6″-diameter FSR with a standard tail. |
|---|
The two force-sensing linear potentiometers (or FSLPs) take the force-measuring functionality of FSRs and add in the ability to detect the location of the force, all while being an entirely passive component that is incredibly easy to use.
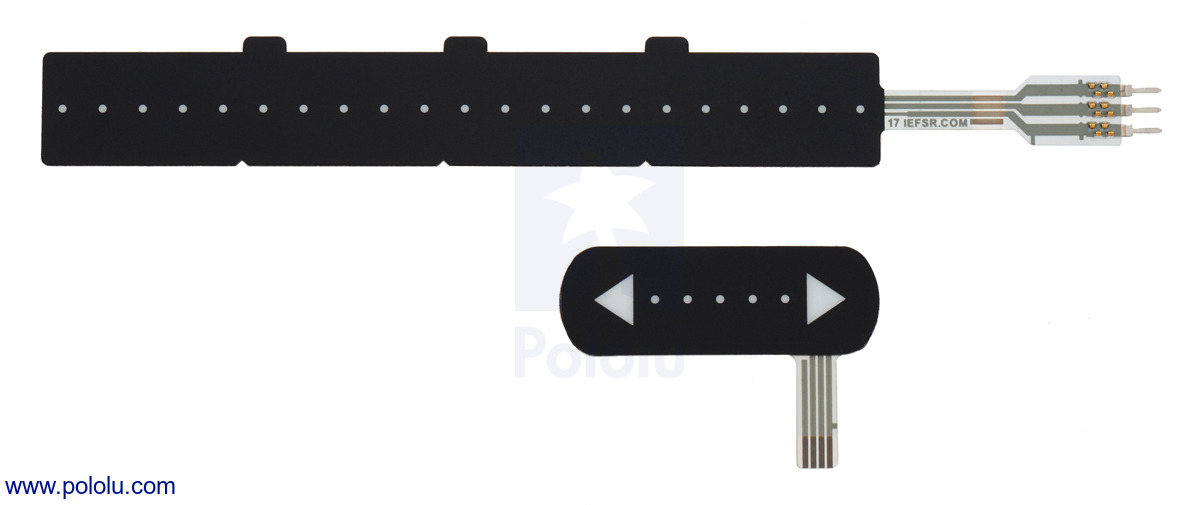 |
The two force-sensing linear potentiometers (FSLPs). |
|---|
These FSLPs are exciting because they enable fun new touch interfaces, not only for you to interact with your project but for your project to interact with the world. We decided to make a quick demo for the Las Vegas Mini Maker Faire 2014 to show just how easy it was to do something cool with this sensor. The video at the top of this blog post shows the demo in action.
 |
In the demo, a 4.0″×0.4″ FSLP is used with an Arduino Uno R3 to meassure the position and pressure of the user’s finger. (For applications where space is tight, smaller modules like our Arduino-compatible A-Star Micro can be directly substituted for the Uno.) Using the strip requires four connections to a microcontroller and one additional resistor. Two of the required connections must be analog inputs. Four connections for one sensor might seem like a lot to deal with, but step-by-step procedures in section 5 of the sensor’s integration guide (513k pdf) make it easy to get the sensor working, and the Arduino code used in this demo is available on github to help get you started. A diagram of the connections made between the sensor, Arduino, and LED strip in this demo are shown below.
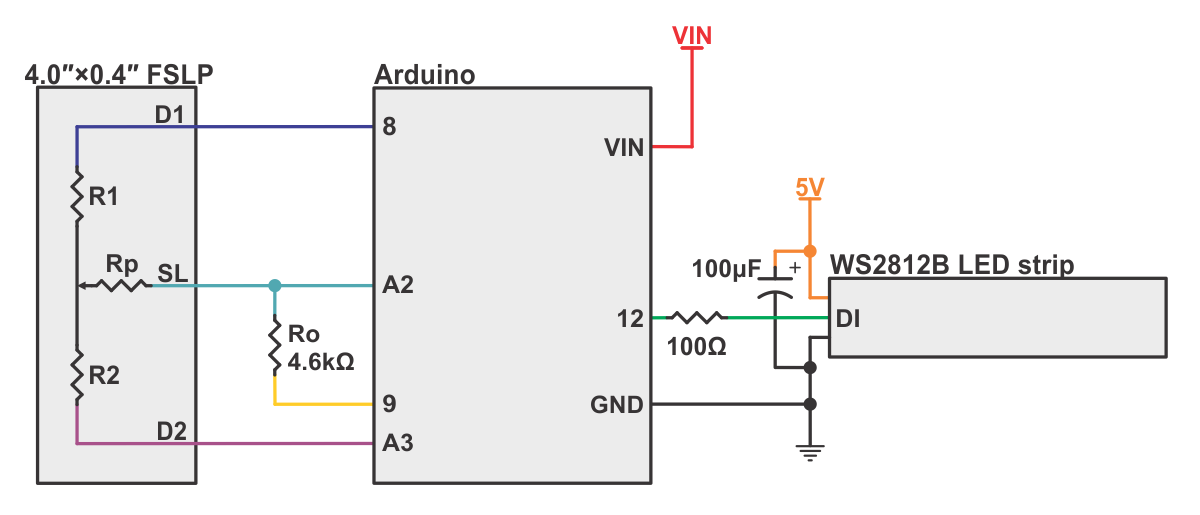 |
The connections shown in the diagram also work with the shorter 1.4″×0.4″ FSLP (referred to as “standard FSLP” in the integration guide), though the pin numbers that correspond to each of the sensors outputs (SL, D1, and D2) are different for the two sizes of FSLP. The pin numbers for each FSLP can be seen in Figure 9 of the FSLP Integration Guide. In the guide the 4.0″×0.4″ FSLP is referred to as a “10 cm FSLP”.
Once the Arduino reads the position and pressure data from the sensor, it sends signals to a WS2812B addressable LED strip that control the number of LEDs that turn on and their color. The further along the strip your finger moves the greater the number of LEDs that light up, and the more pressure you apply the more the color of all the LEDs changes from blue to red.
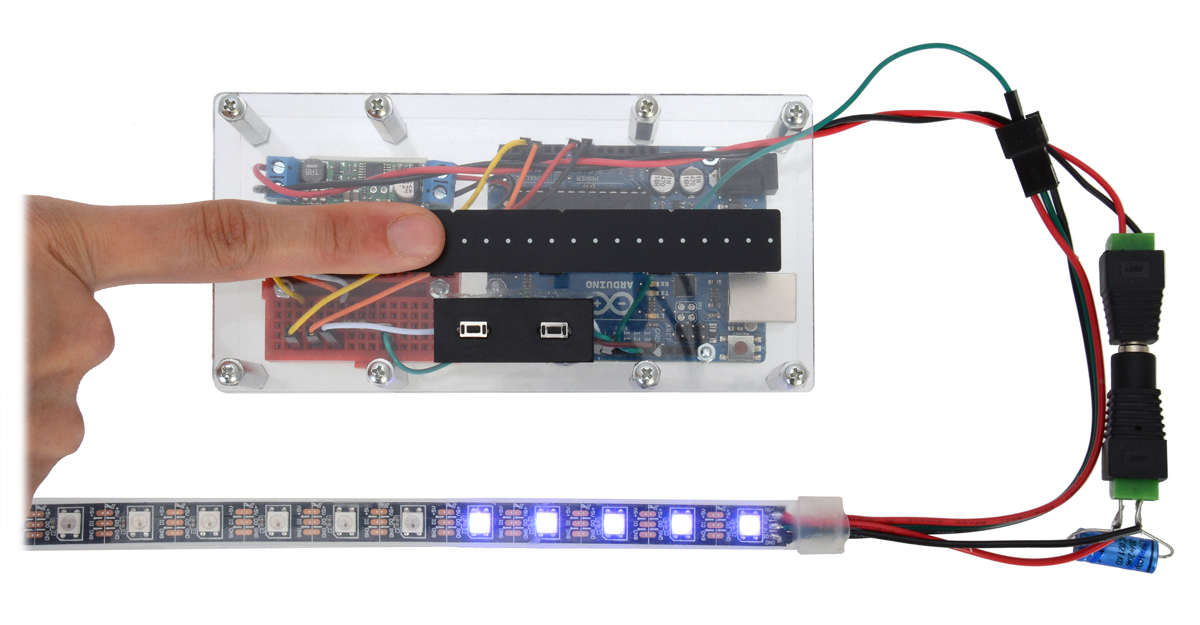 |
To make the demo easy to transport and able to be left on all day, a 9V wall adapter was used to power the Arduino and 5V step-down regulator. The power connections from the regulator’s 5V output to the power input of the LED strip were also simplified by using a DC barrel jack to terminal block adapter and a DC barrel plug to terminal block adapter. The structure of the demo was laser cut from 1/8″ clear acrylic, and aluminum standoffs were used as spacers.
If you guys do something cool with our force-sensing linear potentiometers or resistors, we’d love to hear about it!
Related products


Maker Faire demo: automated treasure chest with jrk motor controller and linear actuator
This blog post is part of a continuing series of blogs about the demos that Pololu displayed at our booth at Las Vegas Mini Maker Faire 2014. For more about the Faire and a video, see my previous blog post. This blog post will focus on our automated treasure chest demo. Continued…
Maker Faire demo: Simple Motor Controller and Sharp analog distance sensor
The Las Vegas Mini Maker Faire 2014 was on April 5th, and as you might have heard, we had a booth there with demos of our products. For more about the faire and a video, see my previous blog post. This post details the Simple Motor Controller and Sharp analog distance sensor demo that we brought. The demo was popular at the faire with both kids and adults, and though it is simple, it is a great tool for showing those who are just getting interested in robotics what one of the first steps to building a robot might look like. Continued…
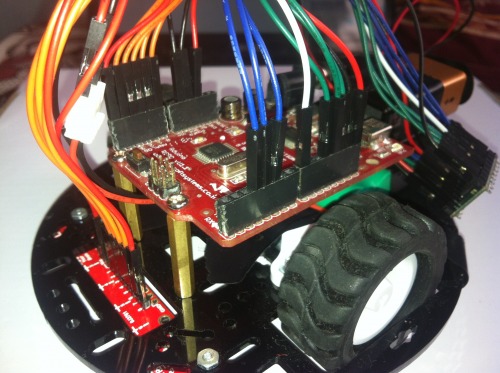
PID line follower with 5" robot chassis
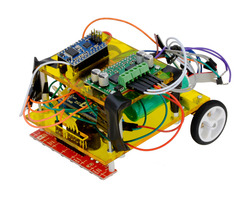
This PID line follower, originally featured in this Let’s Make Robots post by user Enigmerald, uses our 5" Robot Chassis along with 30:1 MP micro metal gearmotors, extended brackets, and our 42×19 mm wheels. Our QTR-8RC Reflectance Sensor Array is used to sense the line and our TB6612FNG carrier, along with an Arduino-compatible controller, is used to control the motors. A diagram of how everything is connected and the code for the robot are available in Enigmerald’s post. The post also has a link to a basic tutorial on PID tuning using the QTR array.
 |
Related products


Pololu at the Las Vegas Mini Maker Faire 2014
Last weekend Las Vegas had its second Mini Maker Faire. The event was hosted by the local hacker space Syn Shop and included booths with displays ranging from 3D printers, electric cars, and a full-size R2-D2 to art exhibits and handmade steampunk clothing. Pololu had a booth at the event with several demos of products like our Simple Motor Controllers, linear actuators, LED strips, and Zumo Robots. We will be following up this post later with others that detail some of the specific demos, but in the meantime, check out this video of the event!
Claire's dead reckoning robot
Like several of the other engineers here at Pololu, I made a robot to compete in the LVBots Dead Reckoning Competition that took place recently. This post describes my robot, Tryangle, and the decisions that went into making it. For more information about what dead reckoning is and how it is judged, see the LVBots dead reckoning rules. Continued…
New products: 500mA Step-Down Voltage Regulator D24V5Fx
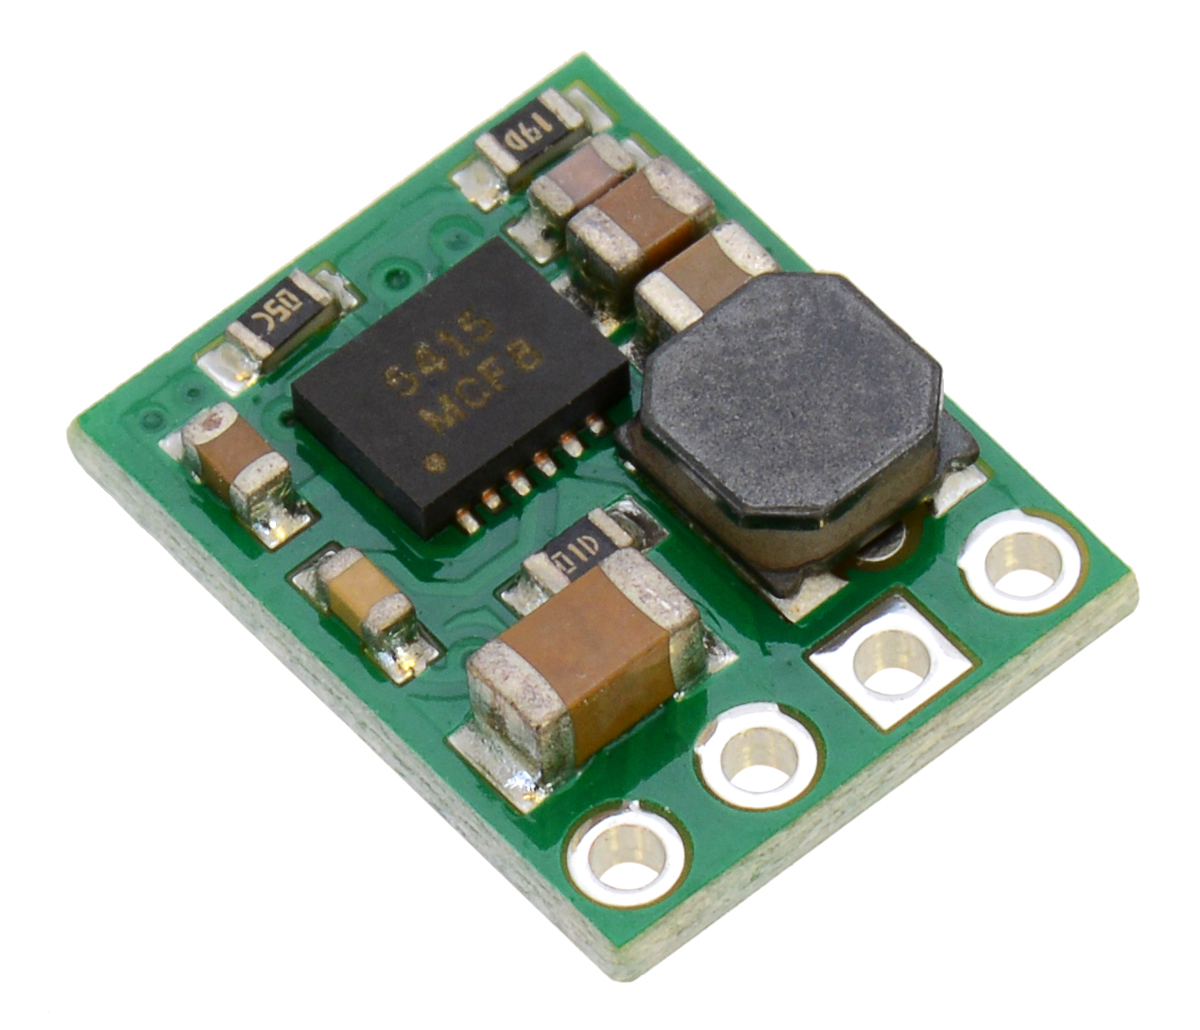 |
We are happy to introduce our D24V5Fx voltage regulator family, a next-generation version of our tiny D24V3Fx and D24V6Fx buck (step-down) regulators, which have been some of our most popular products. These new regulators are synchronous, which results in better efficiency, especially at light loads, and they have much lower dropout voltages (e.g. the 5 V version has just over 1 mV of dropout per mA of output current).
So far we have versions with 3.3 V, 5 V, 9 V, and 12 V outputs, and we will soon be releasing 1.8 V, 2.5 V, and 6 V versions; you can contact us for custom voltages, too. They operate with input voltages up to 36 V and have typical efficiencies of 80% to 93%. These regulators have integrated over-temperature and over-current shutoff, and they reduce their switching frequency from the typical 500 kHz to improve efficiency at light loads, making them well suited for low-power applications that are run from a battery.
At only 0.5″ × 0.4″ × 0.1″ (13 mm × 10 mm × 3 mm) these buck regulators are also smaller than standard through hole linear regulators with DIP packages. The picture below shows a D24V5Fx next to a 7805 voltage regulator in a TO-220 package.
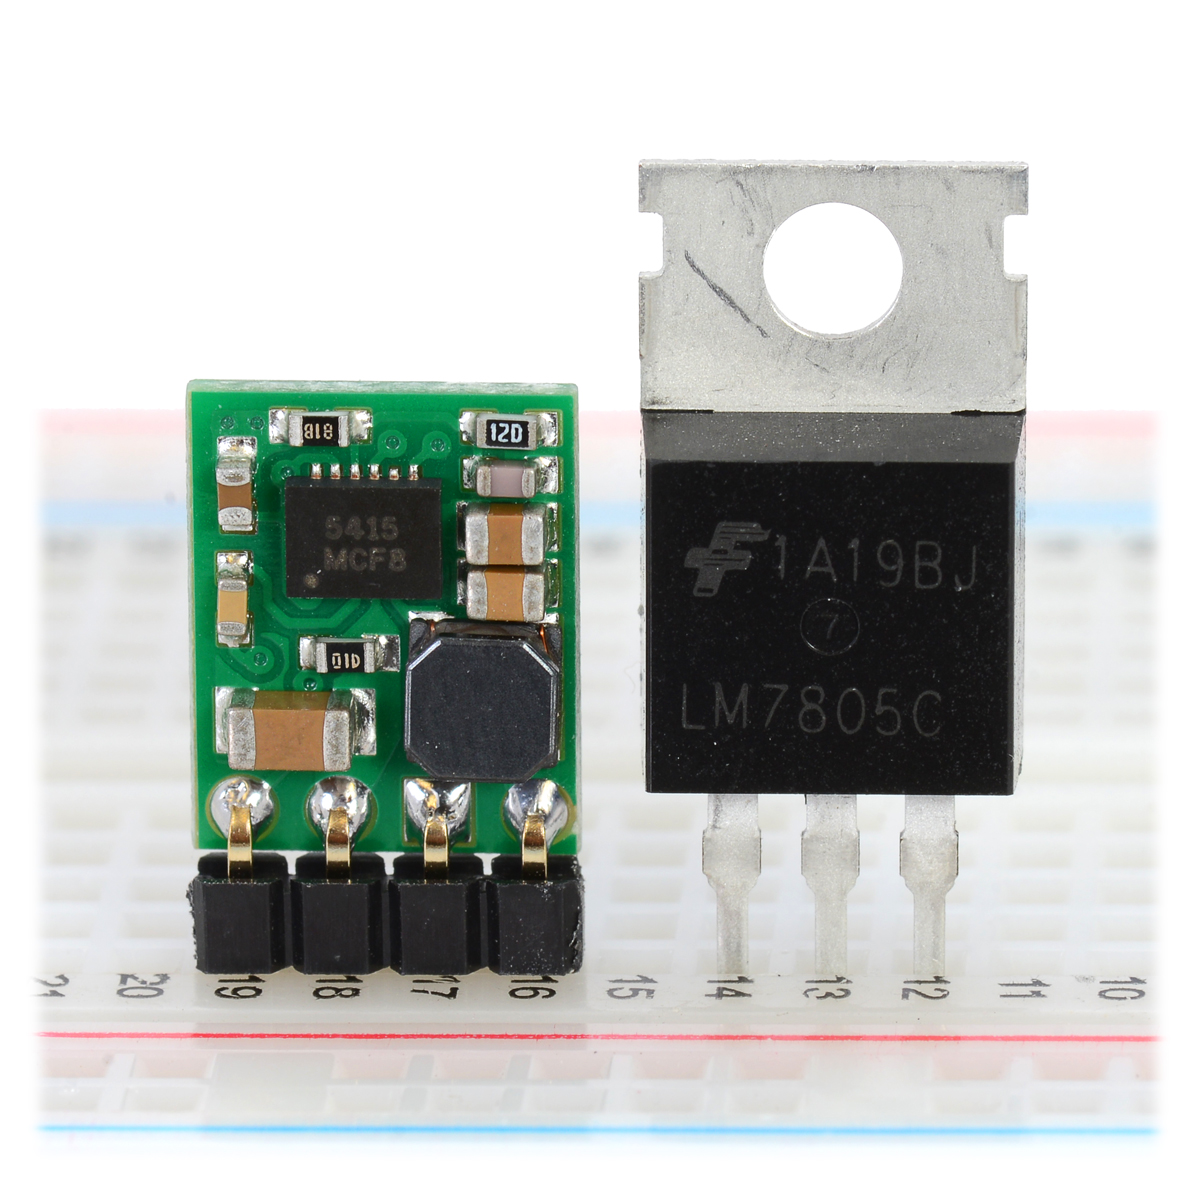 |
For other regulator options, you can take a look at our full selection of step-up voltage regulators, step-down voltage regulators, and step-up/step-down voltage regulators.
Related products


Home | Forum | Blog | Support | Ordering Information | Lists | Distributors | BIG Order Form | About | Contact
© 2001–2026 Pololu Corporation


