Pololu Blog » User Profile: Brandon » Posts by Brandon »
Posts by Brandon (Page 3)
You are currently viewing a selection of posts from the Pololu Blog. You can also view all the posts.
Popular tags: community projects new products raspberry pi arduino more…
New products: Six new Mini Plastic Gearmotors
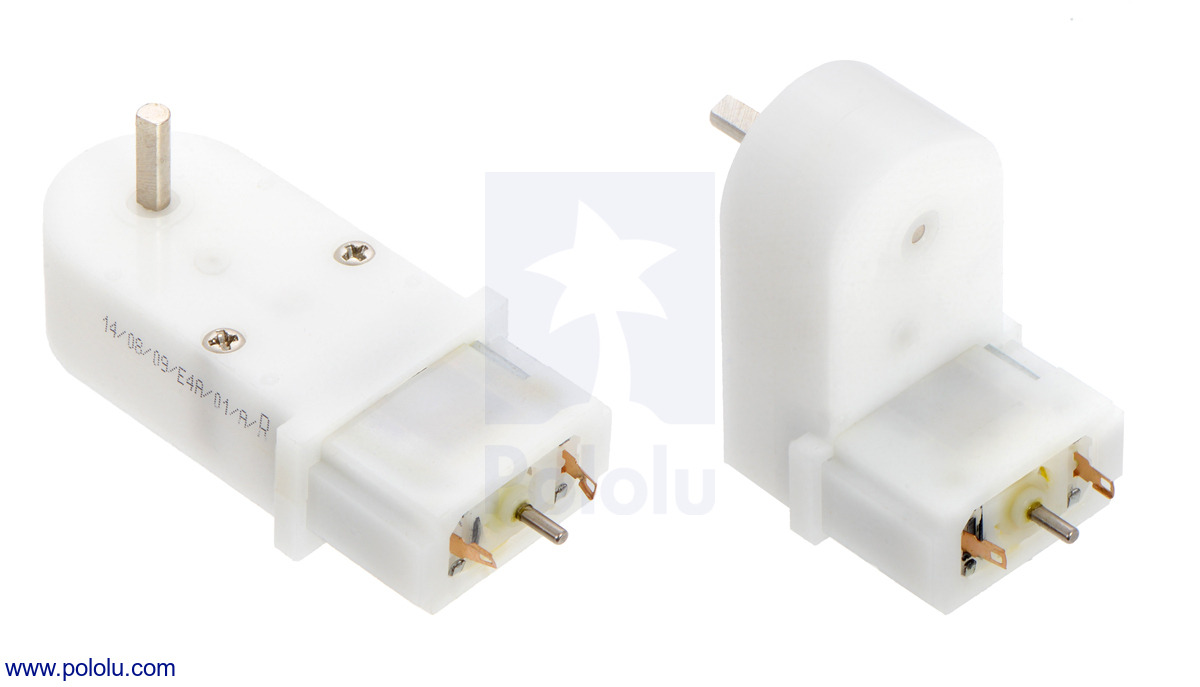 |
Our family of Mini Plastic Gearmotors is growing! We have added HP versions with more powerful motors for increased torque and speed, and we are now carrying versions with extended motor shafts intended for use with custom encoders for motor speed and position feedback. (These extended-shaft versions are not compatible with the magnetic encoders we just released for our Micro Metal Gearmotors; we will have a similar encoder solution for these plastic gearmotors at some point, but for now we are offering them for people who want to make their own encoders.) The following table shows the current state of our Mini Plastic Gearmotor family:
| Motor Type | Stall Current @ 4.5 V |
No-Load Speed @ 4.5 V |
Stall Torque @ 4.5 V |
 90° output |
 90° output + motor shaft |
 offset output |
 offset output + motor shaft |
|---|---|---|---|---|---|---|---|
| high-power (HP) |
1250 mA | 150 RPM | 25 oz-in | 120:1 mini HP | 120:1 mini HP | 120:1 mini HP | 120:1 mini HP |
| low-power | 800 mA | 120 RPM | 20 oz-in | 120:1 mini | 120:1 mini | 120:1 mini | 120:1 mini |
| 80 RPM | 30 oz-in | 180:1 mini | 180:1 mini |
We are particularly excited about these gearmotors because they offer a great combination of performance and affordability; don’t be surprised if you find these motors in some of our future robots and robot kits! For more information about all of these gearmotors, see our Mini Plastic Gearmotors category.
Related products


Motion tracking skull Halloween prop

If you read Grant’s Creepy eyes Halloween prop post, then you already know that several of us here at Pololu are working on Halloween projects. I based my project on a motion tracking Halloween prop tutorial by Jason Poel Smith that I saw last year on the Make magazine website. The concept is simple: make a Halloween prop mysteriously follow an unsuspecting person as they walk by. The tutorial by Jason Smith uses photoresistors to track a person by detecting their shadow and moving a servo with a Halloween prop attached to it. This works well, but there are a few things that I thought could be improved. Continued…
RoboNUC: Netduino and LIDAR robot
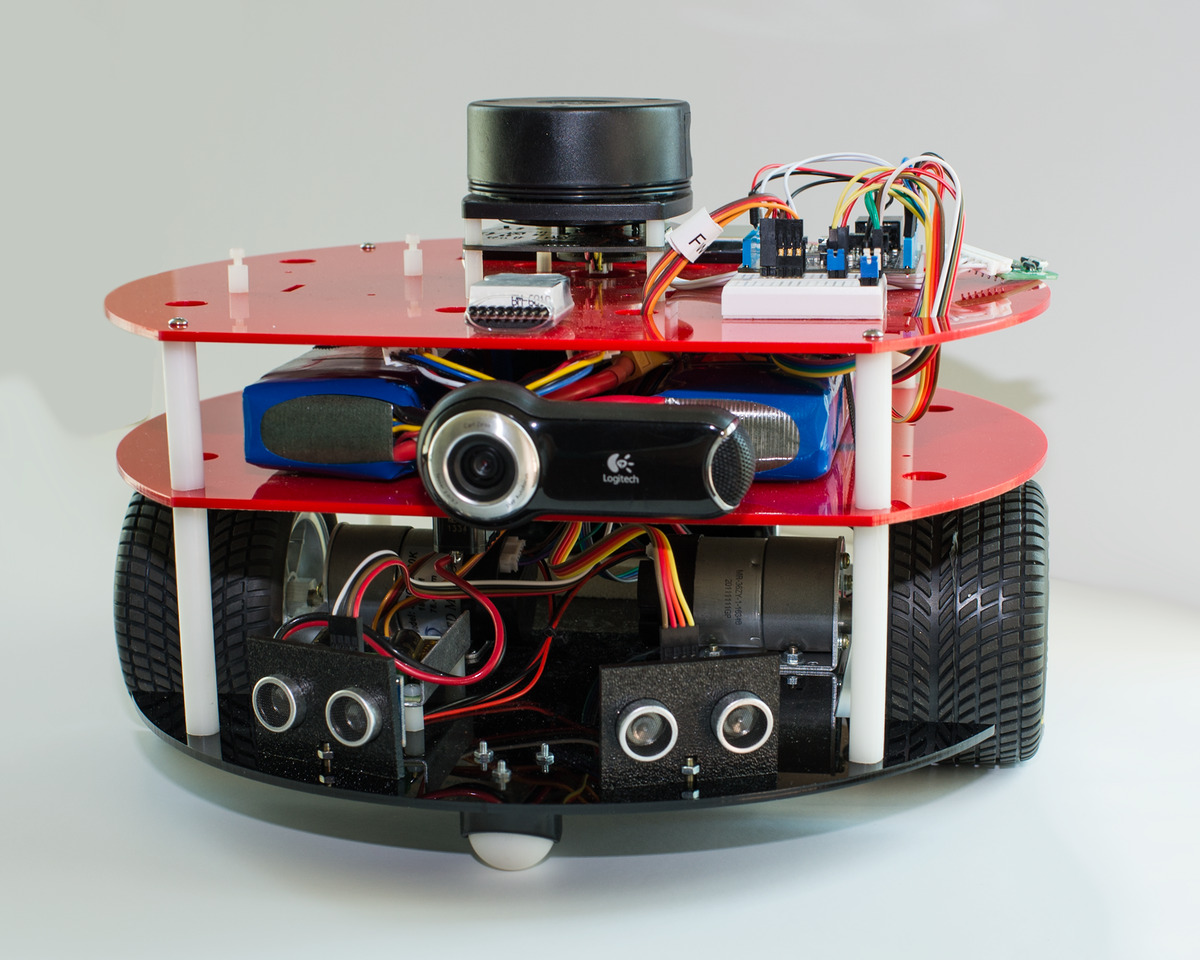 |
Pololu forum member spiked3 recently shared a sophisticated robot he made called RoboNUC. It uses a Netduino and a LIDAR module and was intended to help him learn simultaneous localization and mapping (SLAM). SLAM is a technique used to map an unknown environment and keep track of the device’s location within the environment. Using SLAM, the robot is able to characterize the surrounding areas without needing to physically navigate them. RoboNUC uses our 1″ plastic ball caster, and the acrylic chassis was laser cut using our custom laser cutting service.
For more information about this robot, including a parts list, please see the RoboNUC Recap blog post at Spiked3.com.
Related products

New product: Breakout Board for microSD Card
 |
Last week, Jon mentioned how several of the mechanical engineers here at Pololu were assigned a simple board to develop. Well, our new Breakout Board for microSD Card is the first board that I designed!
Electrically, this board is pretty basic. It breaks out all of the connections available on a microSD card into two rows of 0.1″-spaced pins for easy prototyping use with standard perfboards, solderless breadboards, and 0.1″ connectors. We tried to arrange the pins in a convenient order by placing all of the pins needed for SPI mode on one side of the board (along with the card detect pin). What makes this board interesting mechanically is that it is the first of our products to use a connector for a microSD card. The push-push type connector is positioned so that when a microSD card is fully inserted, it protrudes slightly beyond the edge of the board to allow easy access to the card. The integration of our electrical and mechanical procedures allows us to make 3D models such as the one below to help support our products. We currently use models like this in the dimension diagrams we publish for our boards, but we hope to eventually make the models themselves available too.
 |
Breakout Board for microSD Card rendered in Solidworks. |
|---|
Integration with 5 V systems
There are no other components on the board aside from the microSD card connector. Since standard microSD cards use 3.3 V logic, no extra considerations need to be taken to use it with a 3.3 V microcontroller, but signal conditioning is required for use with 5 V microcontrollers. We did some tests using our 4-channel level shifter and an Arduino Uno to read and write from a microSD card using the Arduino SD library, and we had successful results; however upon closer inspection, we noticed the level shifter did not have time to shift the 3.3 V signals all the way up to 5 V, so this setup only worked because the Arduino Uno registered 3.3 V as a high signal. With a 5 V microcontroller that accepts a 3.3 V signal as high, the microSD card outputs can be connected directly to the microcontroller, and the microcontroller’s 5 V outputs can be shifted to 3.3 V using a simple voltage divider. We found the resistor values needed to be fairly low – we settled on 500 Ω and 1 kΩ resistors. Since we used the standard Arduino SD library, our tests were done at SPI speeds of 4 MHz. In systems operating at higher speeds or with more stringent logic voltage requirements, it might be necessary to use a buffer IC or other high-speed level-shifting solutions.
For more information about this breakout board, see its product page.
Related products

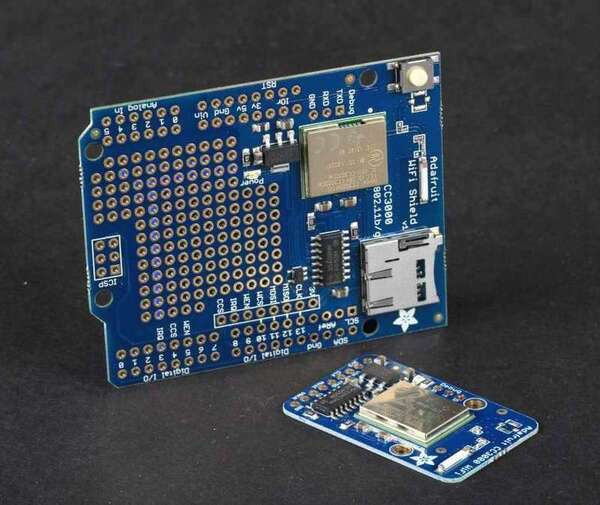
New products: CC3000 Wi-Fi breakout board and Arduino shield from Adafruit
 |
Adding wireless connectivity to an electronics project is a great way to enhance functionality and make it stand out. Our selection of wireless electronics includes radio frequency modules, such as the Wixel, and Bluetooth modules, like the BlueSMiRF Silver from SparkFun, but until recently, we did not carry a good solution to adding Wi-Fi to a project. That’s where the newest additions to our wireless selection come into play.
We are now carrying two CC3000 Wi-Fi module carrier boards from Adafruit: the CC3000 Wi-Fi Shield for Arduino and CC3000 Wi-Fi breakout board. The CC3000 is a self-contained wireless network processor with an SPI interface, so it is not limited to a fixed UART baud rate, and the Adafruit carrier boards include level shifters, so they should be simple to connect to almost any microcontroller. Adafruit’s CC3000 Arduino library and example sketches make them especially easy to use with an Arduino-compatible board.
|
|

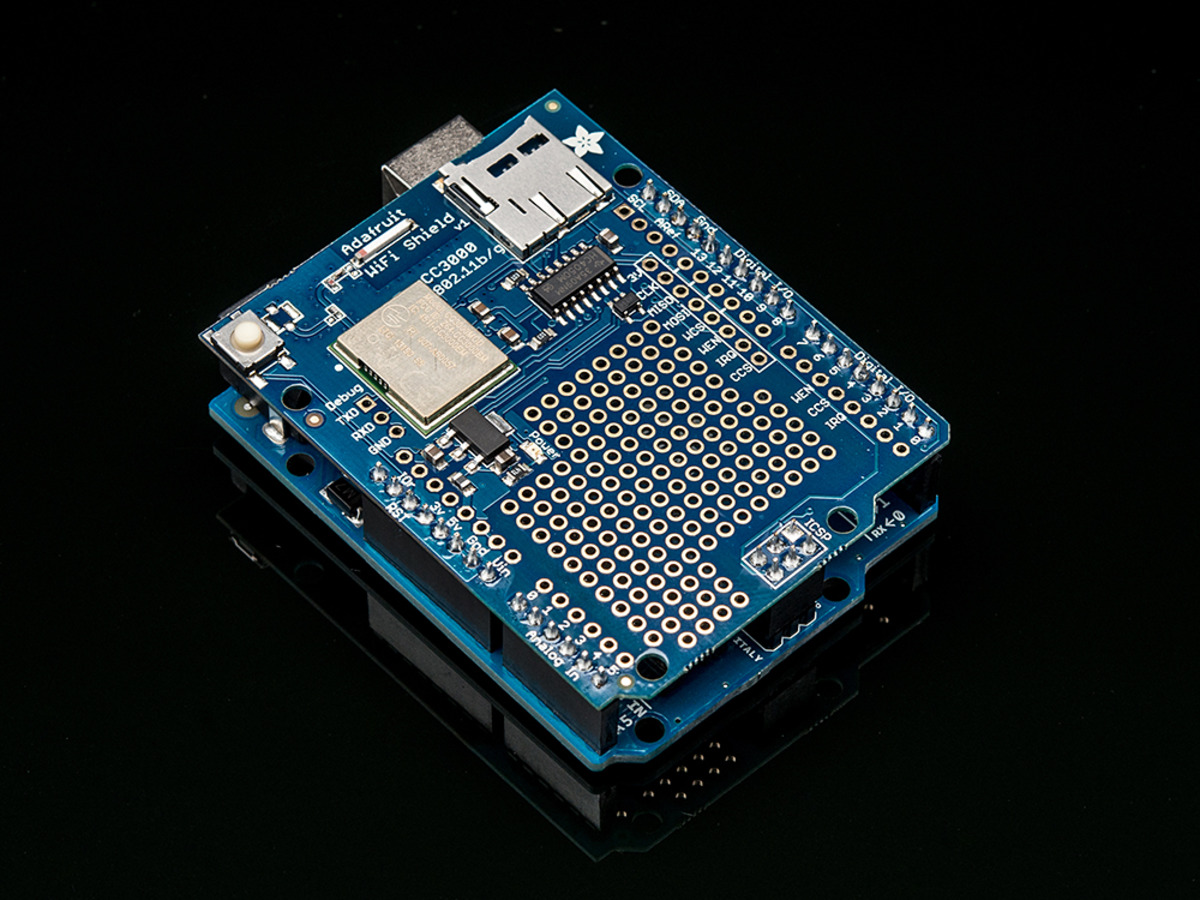
The CC3000 Wi-Fi Shield for Arduino offers a MicroSD card socket, a prototyping area for soldering extra circuitry, and a button for resetting the Arduino. The CC3000 Wi-Fi breakout board (v1.1) is much more compact and is also breadboard-compatible. Both products include an onboard ceramic antenna.
Related products


Wi-Fi controlled Zumo Chassis with DRV8835 and GoPro
 |
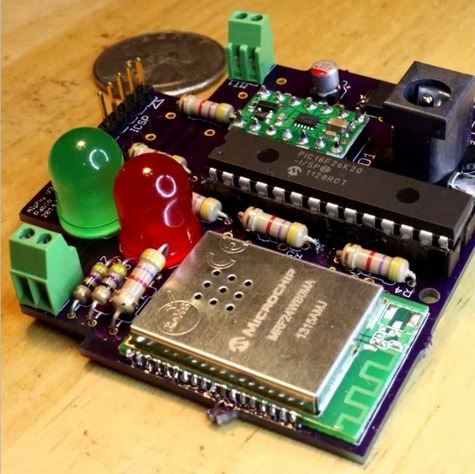
Forum user Pablo shared his Wi-Fi controlled robot with pictures and videos from his Instagram. In Pablo’s forum post, he summarizes his project, which consists of a custom PCB that he designed himself to interface a PIC18F26K20 with a MRF24WB0MA Wi-Fi module. His custom board also carries a DRV8835 motor driver and is mounted on a Zumo Chassis. The robot is controlled through Wi-Fi using a custom Android app and has a GoPro camera mounted on the Zumo blade. Finally, to top it all off, he placed a 6" Domo plush doll on top.
The picture below shows his fully assembled PCB, and Pablo posted a sped up video of its assembly.
 |
For more details, including links to more of Pablo’s Instagram videos of his project like this one, please see Pablo’s original post.
Related products


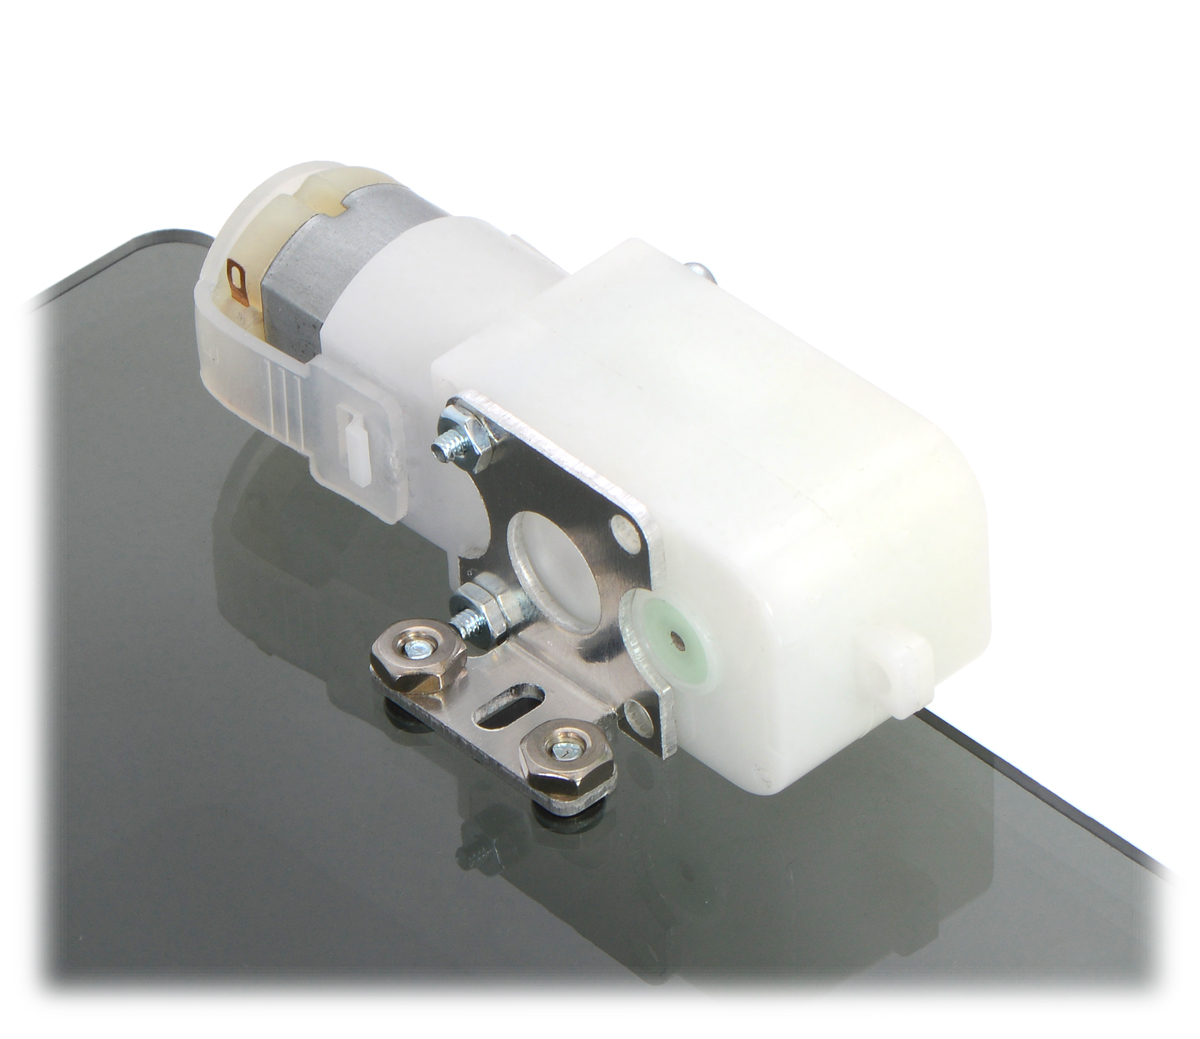
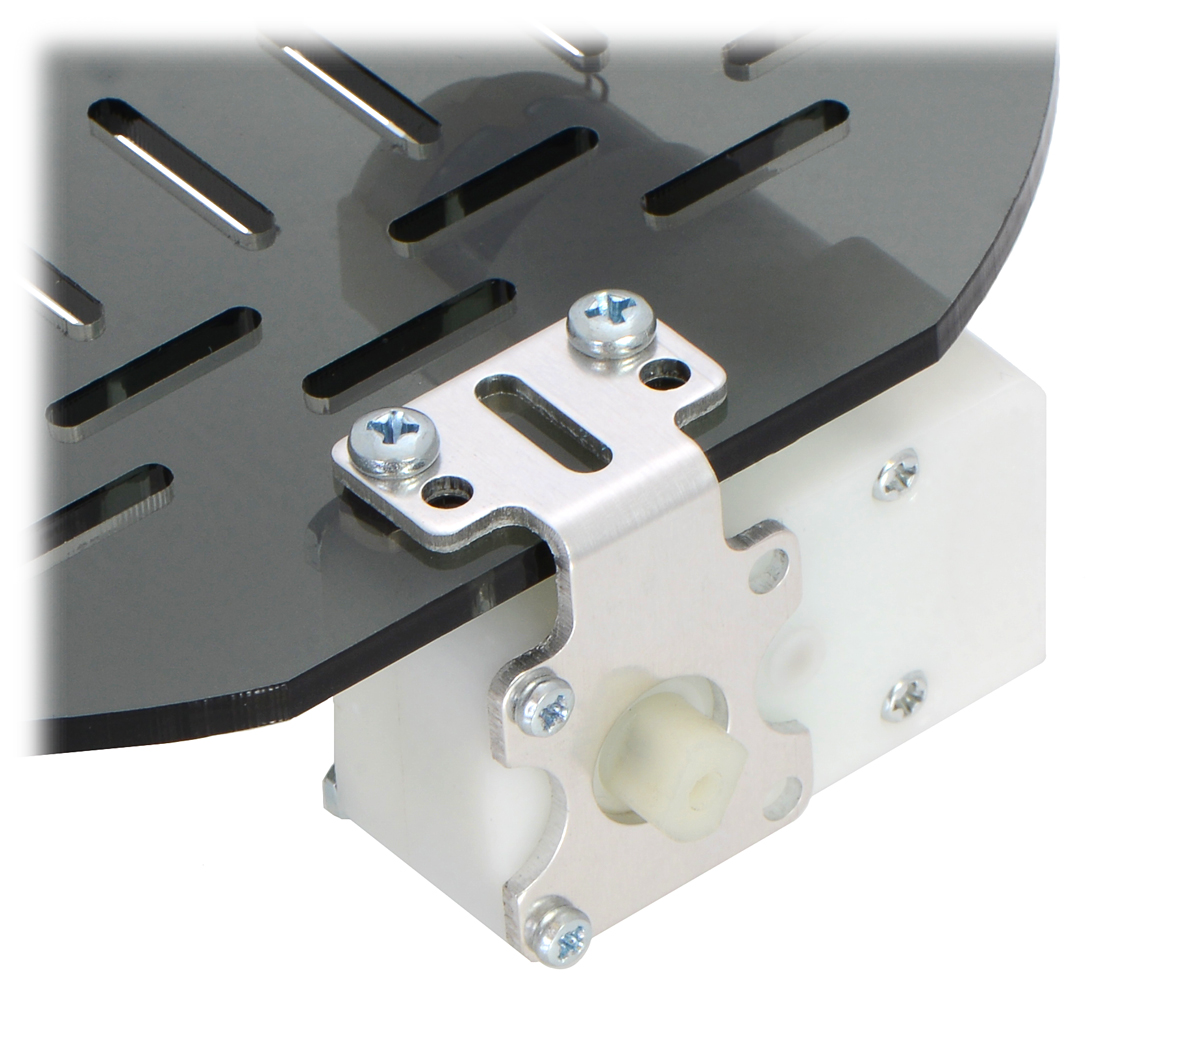
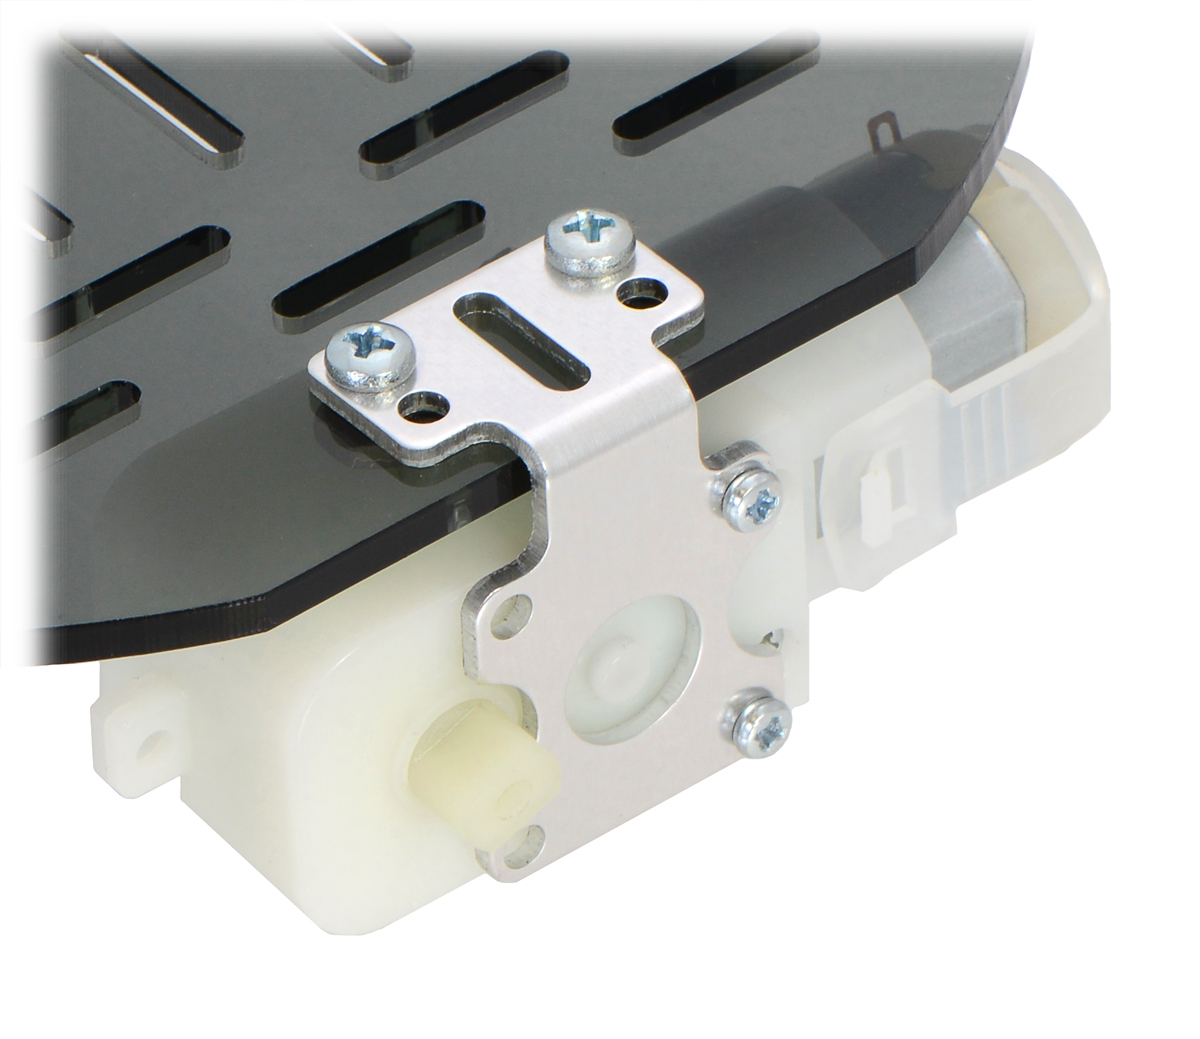
New products: Aluminum mounting brackets for Pololu Plastic Gearmotors
|
|
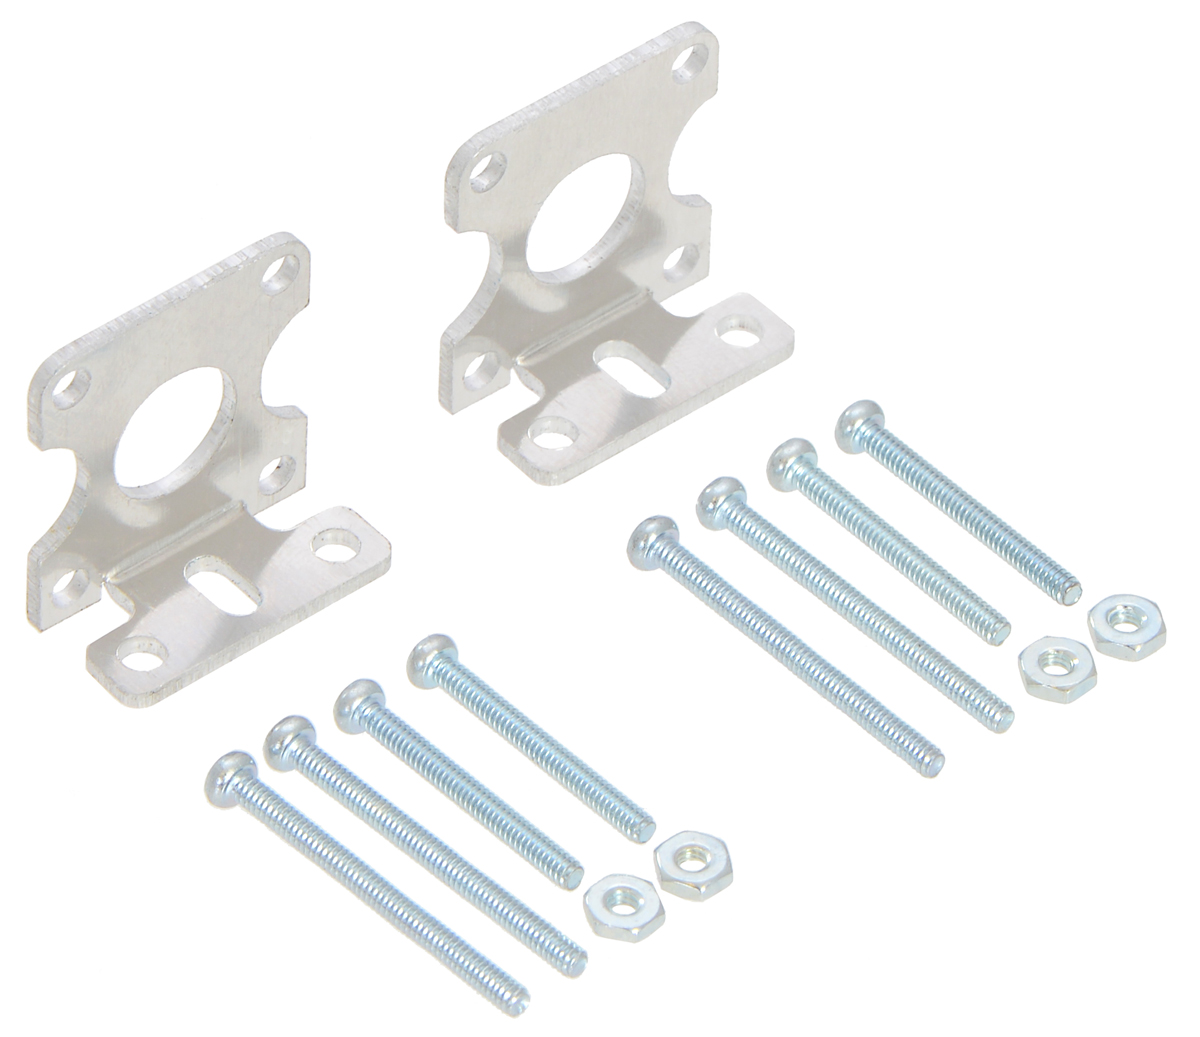
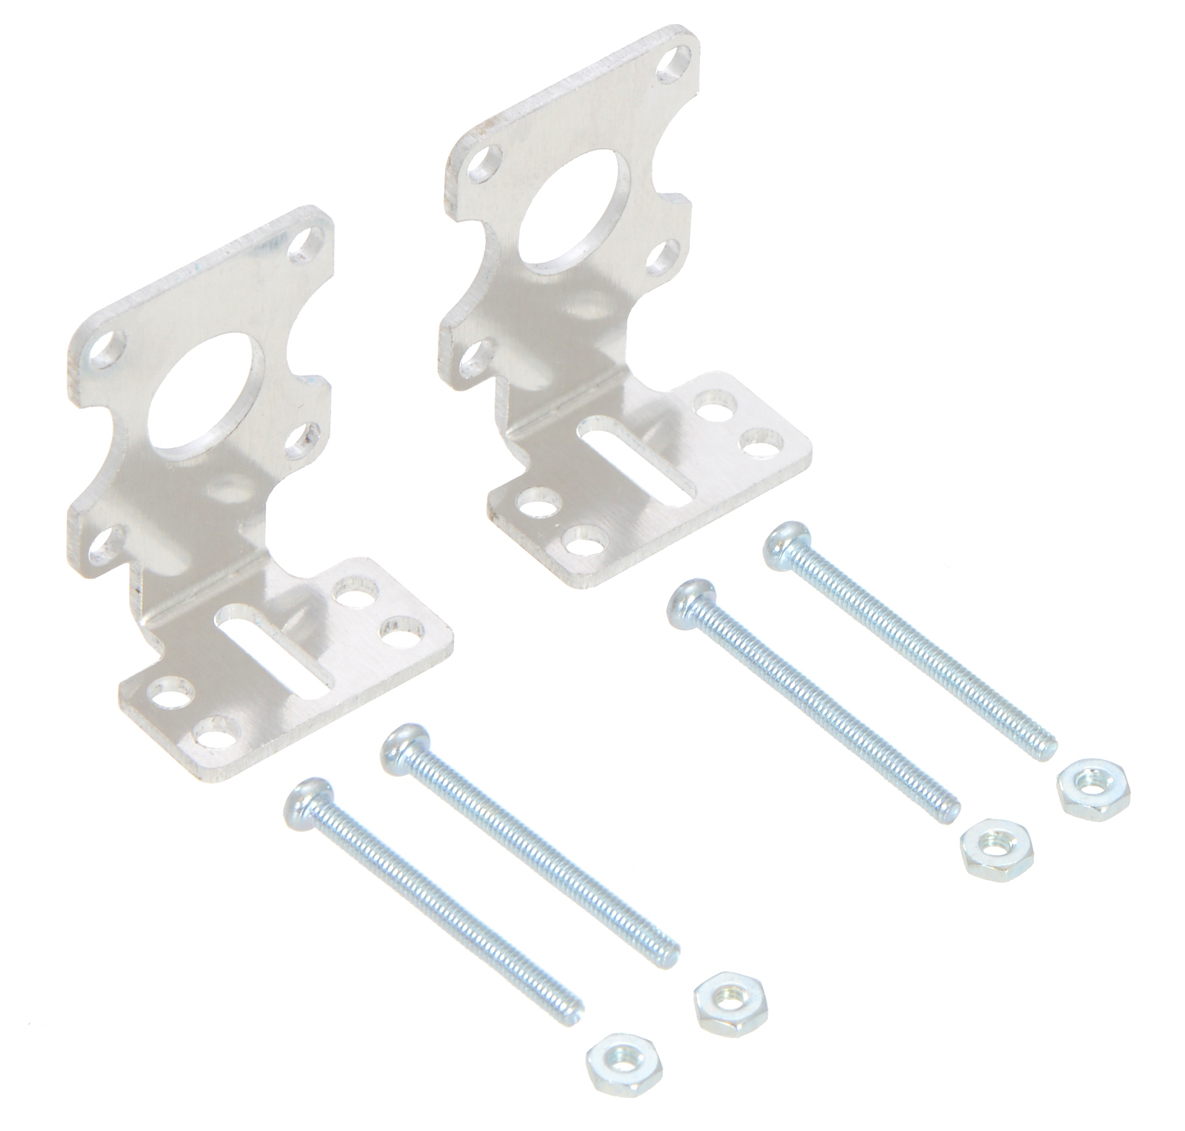
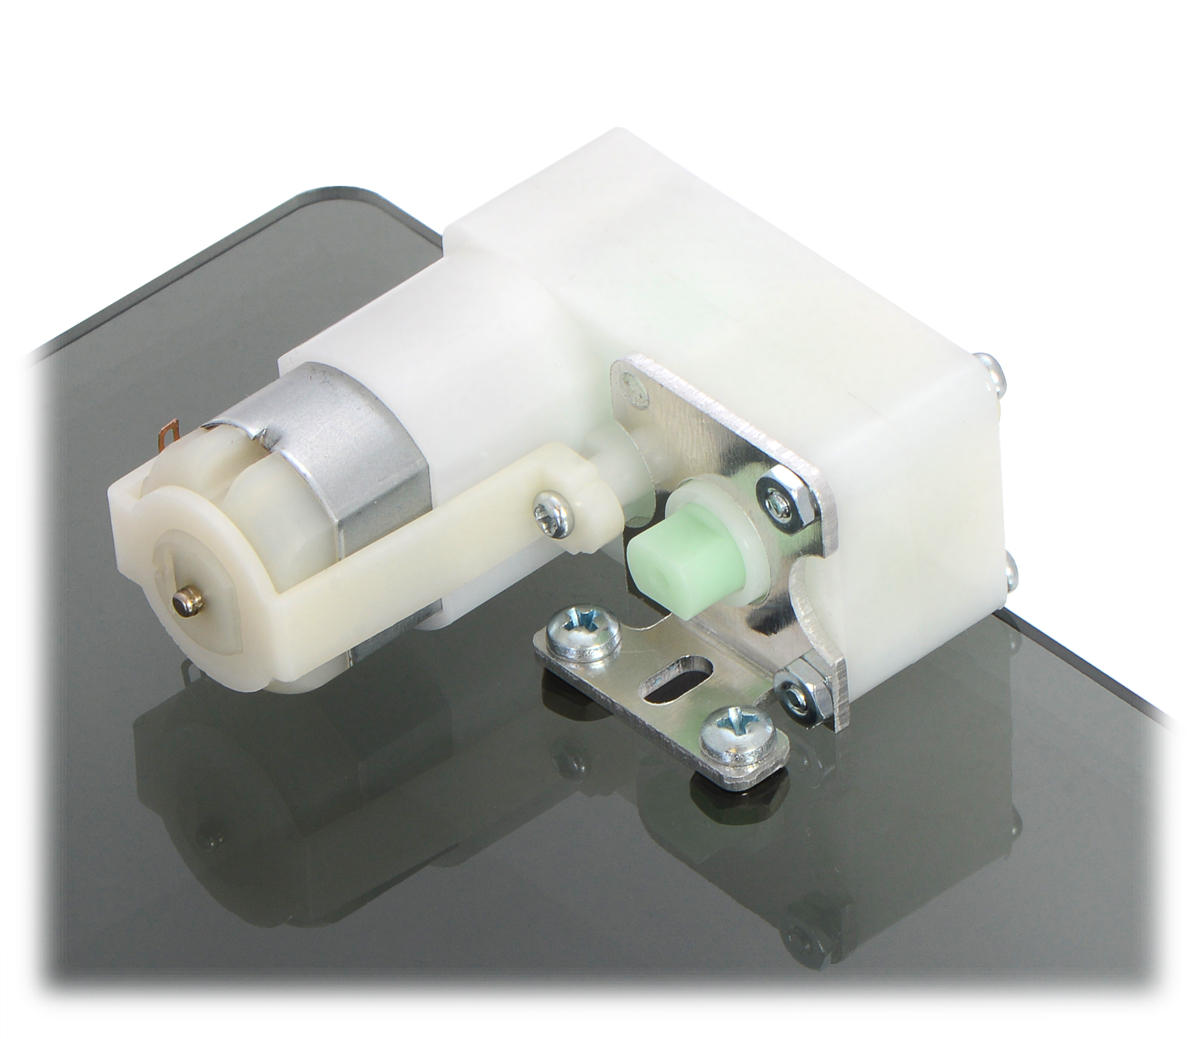
We designed these new stamped aluminum L-brackets specifically for our larger Pololu plastic gearmotors (228:1 offset, 120:1 offset, 200:1 90-degree, and 120:1 90-degree). There are two versions of this L-bracket to choose from – a compact version and an extended version, which allows for a wider variety of mounting options. The brackets are sold in pairs and come with the hardware required to secure a motor to each bracket. As a bonus, they are also compatible with the Solarbotics plastic gearmotors (GM2, GM3, GM8, and GM9) and make great alternatives to the GMB39 and GMB28 brackets.
|
|
||
|
|
See the product pages for additional information:
- Pololu Stamped Aluminum L-Bracket Pair for Plastic Gearmotors
- Pololu Extended Stamped Aluminum L-Bracket Pair for Plastic Gearmotors
Related products


Nick Moxley's DIY racing simulator
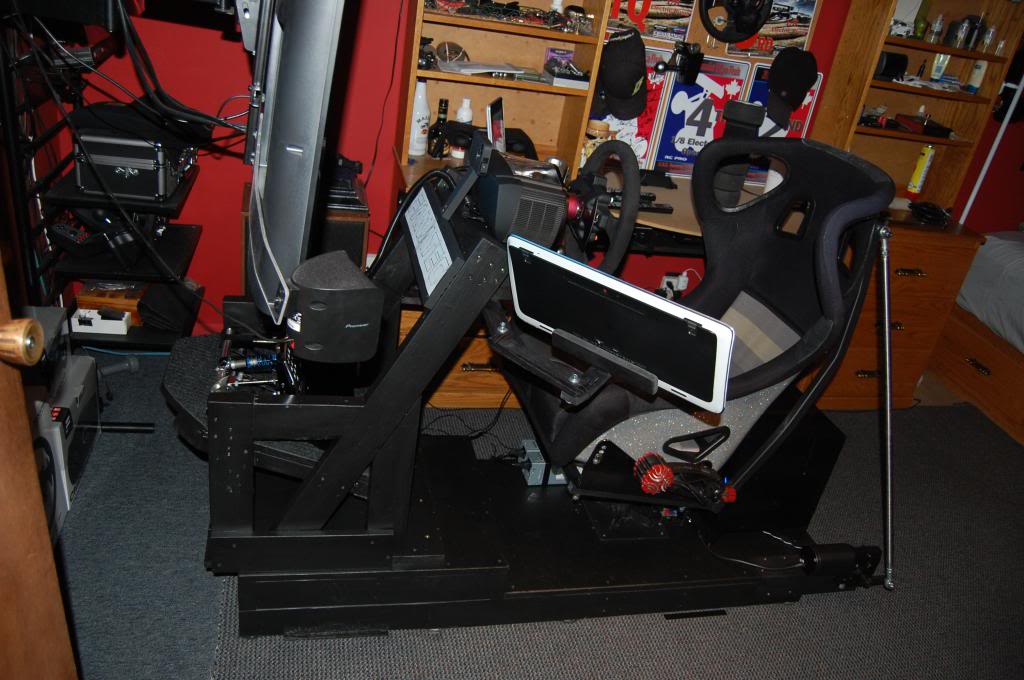 |
Nick Moxley made a DIY seat mover (with two degrees of freedom) and shared his build on our forum. This racing simulator is powered by two of our Jrk 12v12 USB Motor Controllers with Feedback and controlled from the popular XSimulator software. The picture below shows Nick’s jrk motor controllers, which he modified by adding heat sinks for additional cooling.
 |
This is one impressive build that I highly recommend checking out, especially if you are interested in making your own DIY racing simulator. You can find details about the parts he used (including where he found some of them) as well as many pictures documenting different parts of his build in Nick’s post on the Inside Sim Racing forum. A shorter version of this can be found in Nick’s post on our forum.
Related products

New products: Colored miniature tank tracks
 |
We have expanded our selection of miniature tank tracks to include a variety of colors. The new tracks are identical in function to the black miniature track links, but now come in blue, red, and yellow. Track links of different colors can be combined to create fun and interesting patterns to give your robot some added character.
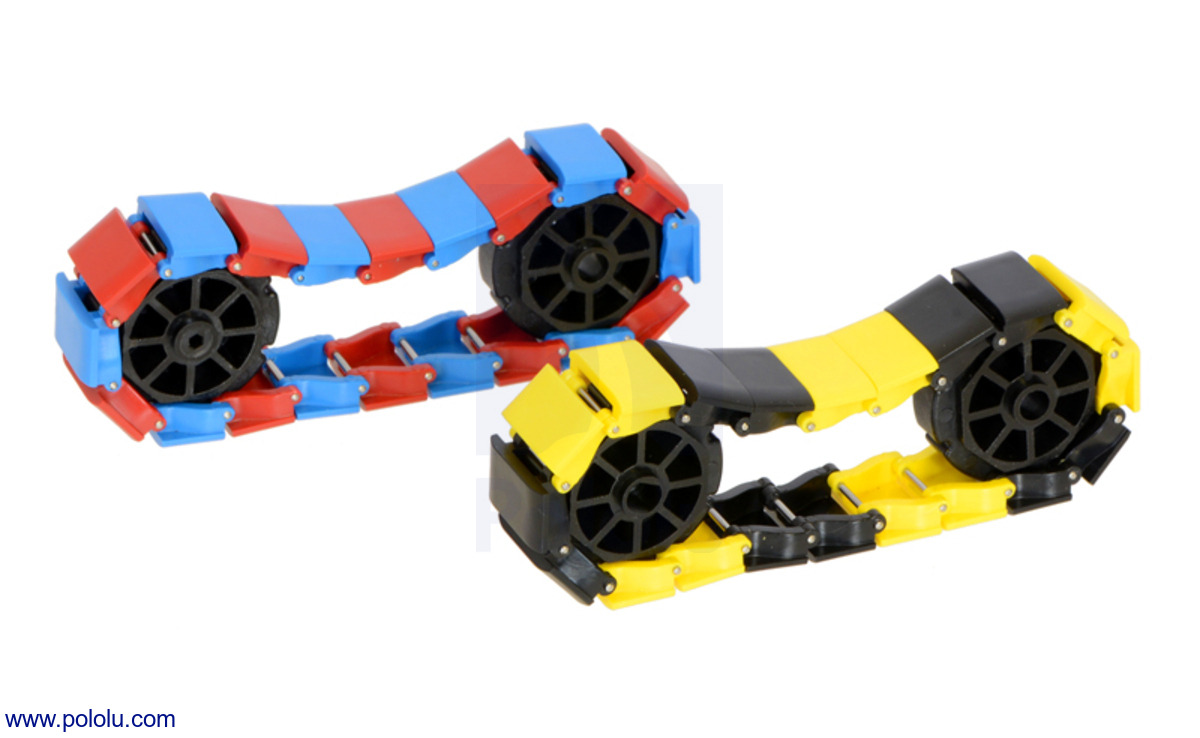 |
These miniature track links work great for small indoor robots, especially on carpet, and they are compatible with a variety of injection-molded sprocket sets such as:
- 8T Hex for use with Tamiya gearboxes
- 8T Futaba for use with continuous rotation servos with Futaba-compatible servo splines
- 8T GM for use with Solarbotics GM gearmotors and Pololu plastic gearmotors
Related products


L3-G0: the full-size, LEGO R2-D2
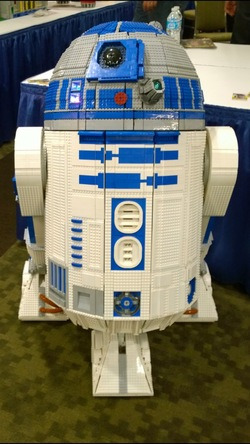
Shawn and Lara Steele, known on the Pololu forum as kresty, built a functional, full-size, LEGO R2-D2 named L3-G0. L3-G0’s design is based on plans from the R2-D2 Builder’s Club, and it is made from around 16,000 LEGO bricks. It weighs roughly 30 kg (65 lbs) and can travel at a speed of 8 km/h (5 mph). The astromech has a fully functional rotating dome with multiple blinking lights. The dome is rotated using our 80mm wheel fitted with a high-traction sticky tire and powered by one of our 37D gearmotors. L3-G0 is controlled using a 9-channel RC transmitter and features an Arduino along with dedicated motor controllers and sound boards. Electric scooter motors were used for the drive wheels. The astromech also uses Pololu motor controllers and voltage regulators, as well as a SparkFun MP3 Trigger for audio. Continued…


Home | Forum | Blog | Support | Ordering Information | Lists | Distributors | BIG Order Form | About | Contact
© 2001–2026 Pololu Corporation


