Pololu Blog » Posts tagged “raspberry pi” »
Posts tagged “raspberry pi” (Page 3)
You are currently viewing a selection of posts from the Pololu Blog. You can also view all the posts.
Popular tags: community projects new products raspberry pi arduino more…
New product: A-Star 32U4 Robot Controller with Raspberry Pi Bridge
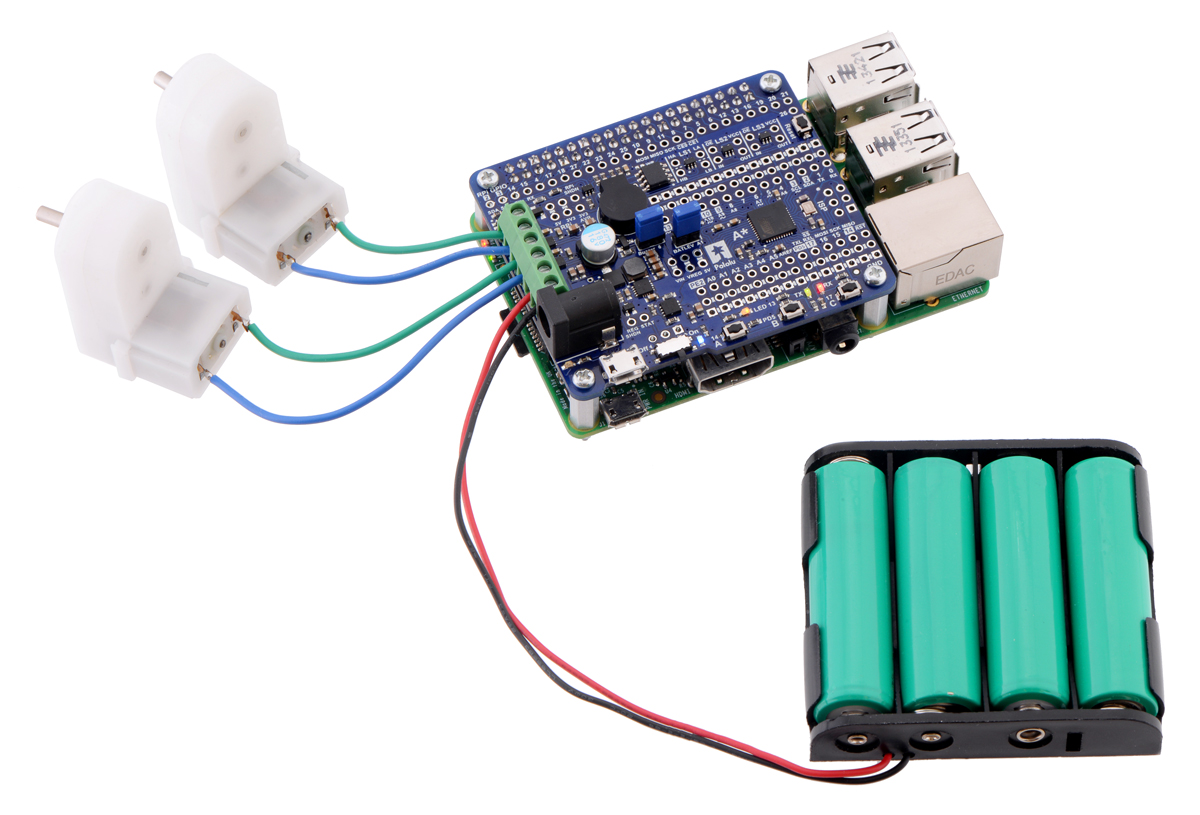 |
I am excited to announce our new A-Star 32U4 Robot Controller LV with Raspberry Pi Bridge, a general-purpose robot controller based on Atmel’s ATmega32U4 microcontroller.
This new robot controller is the latest model in our A-Star line of Arduino-compatible USB microcontroller boards. We started with the A-Star 32U4 Micro and have been gradually expanding the line, adding peripherals and various form-factor and voltage options, with the goal of eventually replacing our older Orangutan robot controllers. The Zumo 32U4 was a major step in that direction, since its controller board is essentially an A-Star 32U4 plus extra peripherals for motor control and sensing. But while the Zumo 32U4 is a complete robot kit, this board is for people who want to design their own robot.
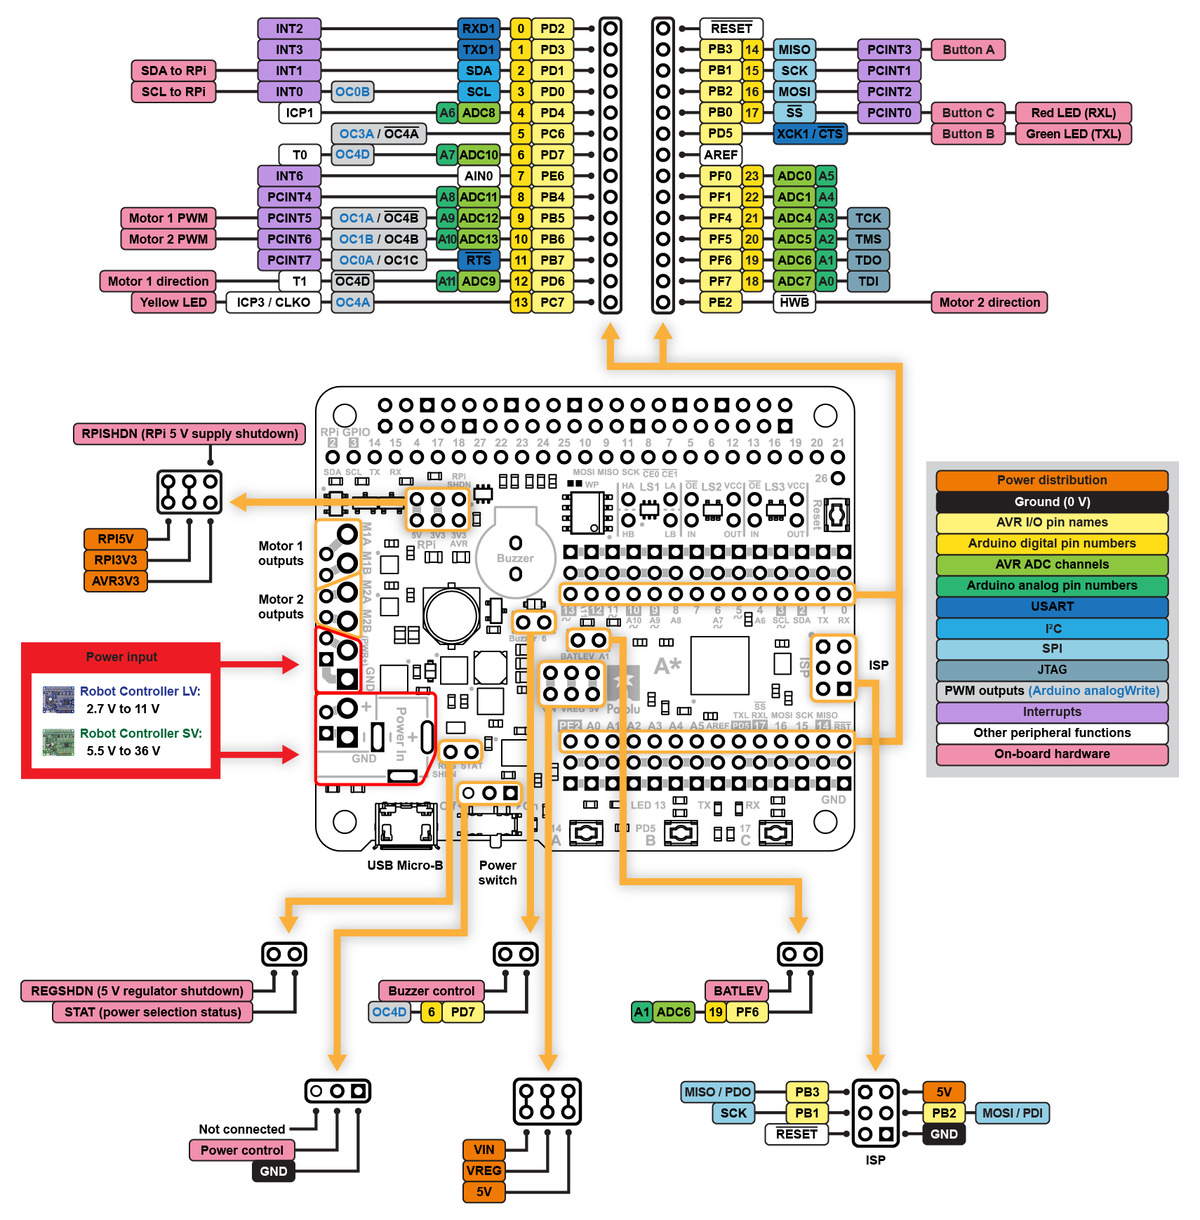
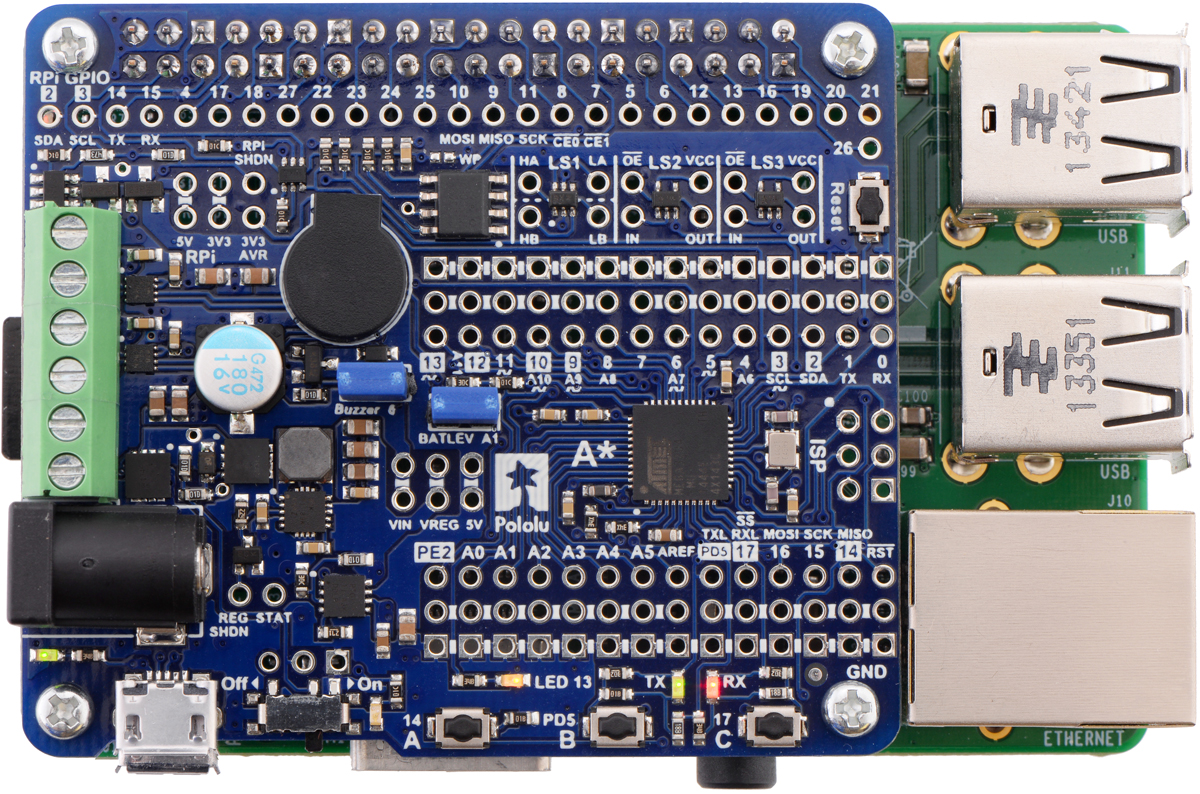
The A-Star 32U4 Robot Controller LV includes most of the features of the A-Star 32U4 Prime LV, including an Arduino-compatible USB bootloader, an efficient step-up/step-down regulator, and handy peripherals like the buzzer and buttons, and it expands on the A-Star line by adding a pair of Texas Instruments DRV8838 1.8 A motor drivers, the same motor drivers as on the Zumo. All of the AVR’s GPIO lines are broken out, and we have included handy power and ground rails so you can easily connect lots of things like servos and sensors:
 |
This board is well-suited for small robots that would have otherwise used an Orangutan controller like the SV-328 or SVP-1284. While we did not include an LCD like on the Orangutans, you can get far better display, monitoring, or data logging by making use of the Raspberry Pi connection, which I will talk about next.
Using the robot controller with a Raspberry Pi
The Raspberry Pi is a great board for an embedded project that needs serious computational power or connectivity. We have released a couple of Raspberry Pi motor driver boards over the past year, which give you a way to get started exploring robotics with your Raspberry Pi. But robotics projects tend to use a lot of analog sensors, timing-sensitive devices like servos, and other peripherals that are not compatible with the limited I/O capabilities of the Raspberry Pi. These types of things are what microcontrollers are designed for, so you can do a lot more if you pair your Raspberry Pi with a complete microcontroller board.
That’s why instead of using the standard Arduino form factor like the Prime, we built the A-Star 32U4 Robot Controller LV to double as a Raspberry Pi HAT:
 |
A-Star 32U4 Robot Controller LV with Raspberry Pi Bridge on a Raspberry Pi Model B+. |
|---|
The Robot Controller fits on top of a Raspberry Pi A+/B+/2, powers the Pi, and connects to it as an I²C slave device, giving you a bidirectional channel of communication between the two processors. We have broken out all of the GPIO of the Raspberry Pi, and there are a few general-purpose level-shifters included on the board to help you experiment with other communications protocols or interface other hardware to your system. We even include the EEPROM required by the HAT specification, though we have not found it to be particularly useful – we ship it blank and unlocked for you to experiment with.
For more information about the A-Star 32U4 Robot Controller LV, or to order, see the product page. You can also check out our open-source A-Star 32U4 Arduino library, which provides easy access to the main features of the Robot Controller, including its motor drivers; we will be adding examples showing I²C communication with the Raspberry Pi soon.
Related products


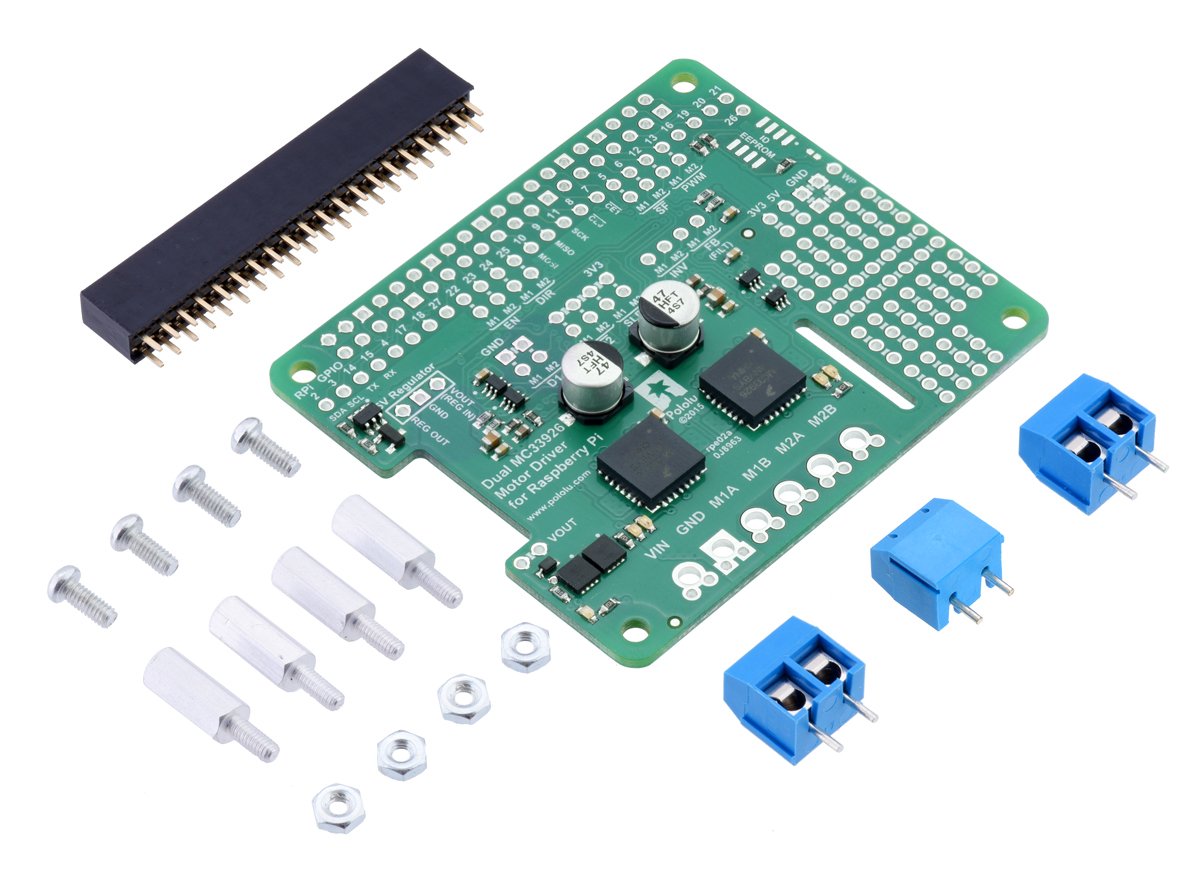
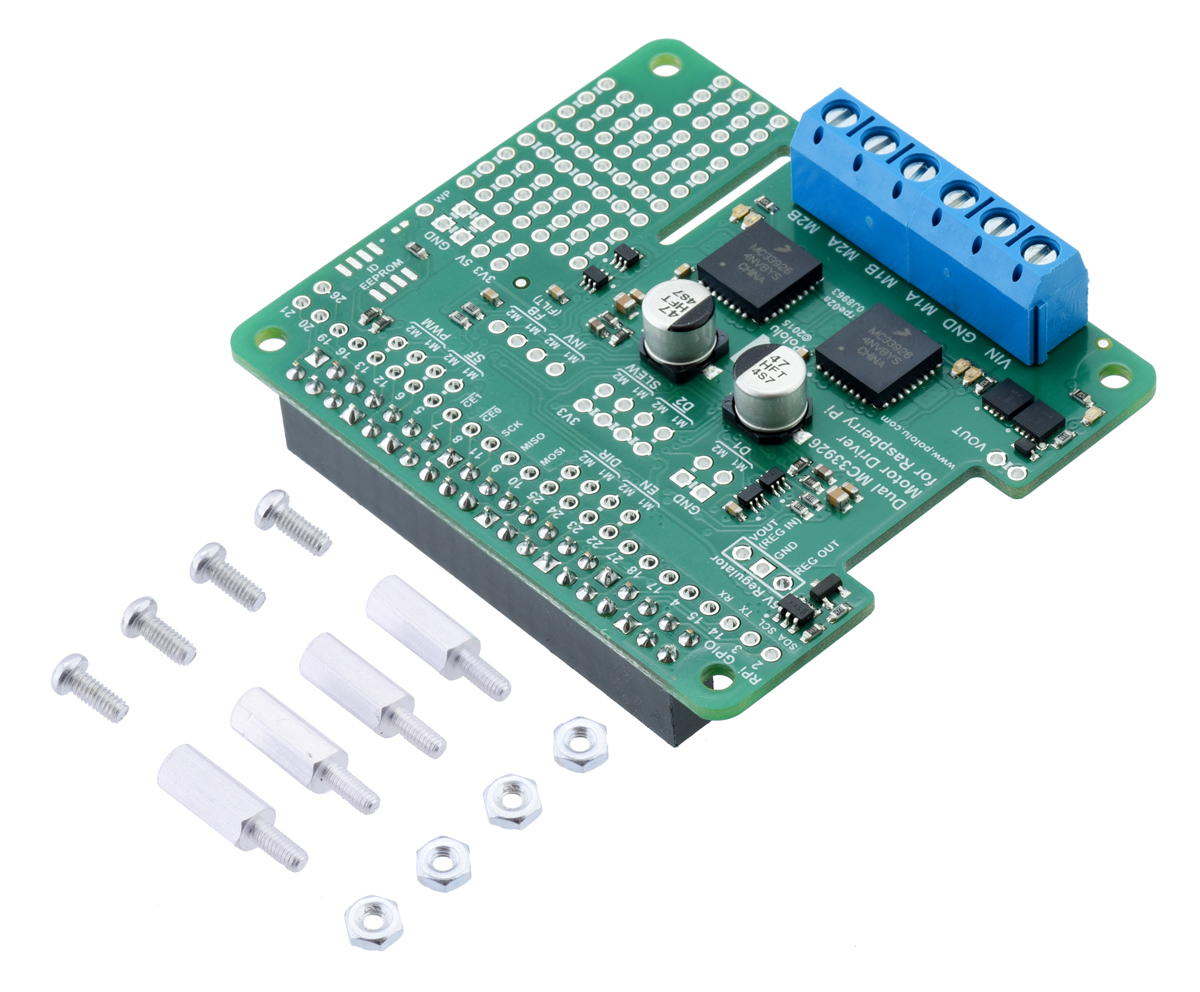
New product: Pololu Dual MC33926 Motor Driver for Raspberry Pi
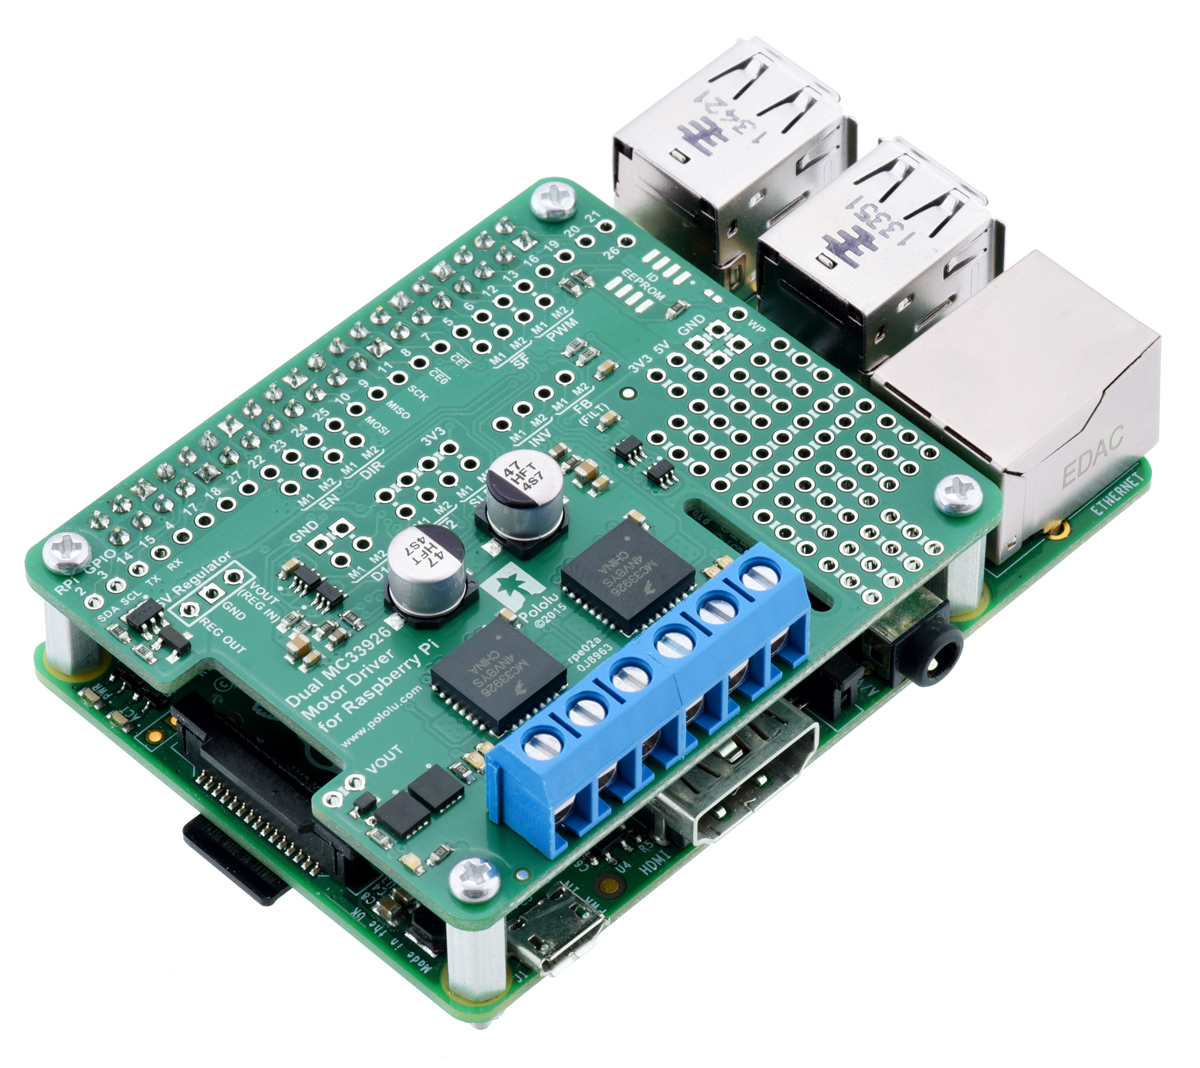 |
The Pololu Dual MC33926 Motor Driver for Raspberry Pi is our latest offering designed to help you build a robot around the powerful and versatile Raspberry Pi single-board computer. It features a pair of Freescale MC33926 motor drivers, each capable of supplying a motor with up to 3 A continuous (5 A peak) at voltages from 5 V to 28 V. This makes it a good choice for driving bigger things like our 25D and 37D motors and even linear actuators.
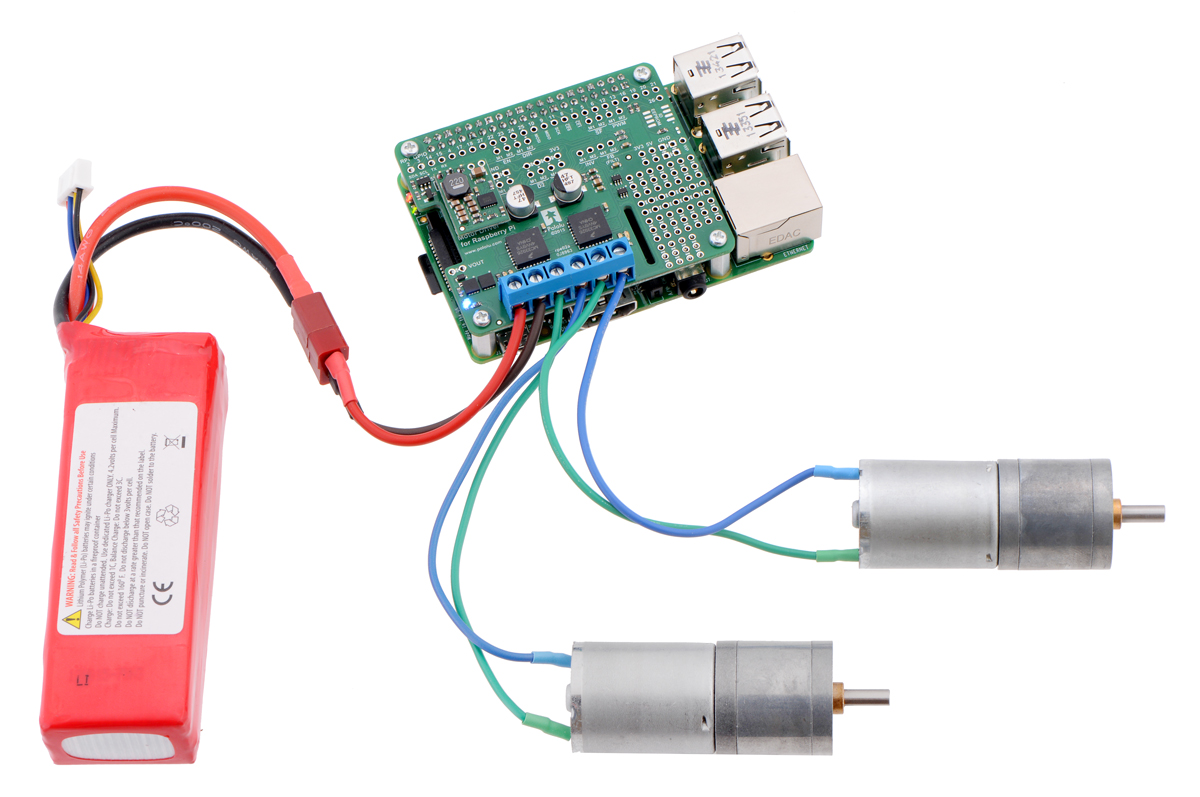 |
Driving motors with a #2756 dual motor driver on a on a Raspberry Pi Model B+ or Pi 2 Model B. A step-down regulator provides 5 V to the Raspberry Pi. |
|---|
We particularly like using the MC33926 because of its robustness: it can withstand voltage transients up to 40 V, and it has a current regulation feature that actively limits the output current to a safe amount. Furthermore, the driver automatically lowers the current limit as its temperature increases, allowing it to gracefully reduce the motor current instead of abruptly shutting down.
This add-on board is a step up from the relatively minimal, lower-power DRV8835 motor driver expansion we released last year, but it is just as easy to use. Our Python library helps you quickly get your motors running with the board’s default pin mappings, which use logic gates to enable drive/brake operation of the MC33926 drivers with only two control pins per motor.
Additional inputs and outputs on the MC33926 drivers are exposed for advanced users who want to make use of other configurations and control methods, and a small prototyping area on the side of the board provides a convenient space for adding custom circuits. As with the DRV8835 board, you can optionally connect a voltage regulator (not included) to power the Raspberry Pi from the motor power supply.
The motor driver board is available in two versions:
- a partial kit, with connectors included but not soldered in
- fully assembled, with the female header and terminal blocks soldered to the board
|
|
If you’re familiar with other Raspberry Pi add-on boards, you might find it unusual that we are not calling this board a “motor driver HAT”. In fact, it meets most of the requirements needed to qualify as a Raspberry Pi HAT (Hardware Attached on Top): it matches the HAT mechanical specification, and it even includes the recommended ideal diode circuit, allowing the optional regulator and the Raspberry Pi’s usual USB Micro-B power supply to be safely connected at the same time.
The reason the board does not qualify as a HAT is the absence of an ID EEPROM. Such a component is intended to allow the Raspberry Pi to identify a HAT board and configure itself to work with that board. We spent some time looking into how an ID EEPROM might help make this motor driver expansion better or easier to use, and we made provision for adding one in the design of the PCB, but eventually we concluded that it seems to offer no substantial value for this kind of board. (We’ve even seen some similar HATs from other manufacturers that ship with a completely blank EEPROM!)
Automatic configuration might be useful for making the Raspberry Pi automatically load a Linux device driver for an I²C or SPI add-on, but since this motor driver expansion is controlled with direct manipulation of GPIO pins, the responsible program or library can easily set up the pins itself before it begins driving and reading them. Other use cases, like enabling the Raspberry Pi to detect whether the HAT is connected and potentially distinguish between different versions of the HAT, would require much more complex support software to take advantage of while being of questionable benefit.
As a result, we’ve decided to omit the ID EEPROM from the board, even if that means it doesn’t meet the full HAT specification and shouldn’t be called a HAT. The EEPROM format specification still appears to be preliminary and subject to change, so it’s possible that future Raspberry Pi updates will make the EEPROM more useful; if so, we will likely reconsider the decision not to populate the EEPROM chip. However, if you think we’ve missed an argument for including an ID EEPROM now or have any other thoughts on its value, we’d be interested to hear your observations.
Related products


Wixel software now works on the Raspberry Pi
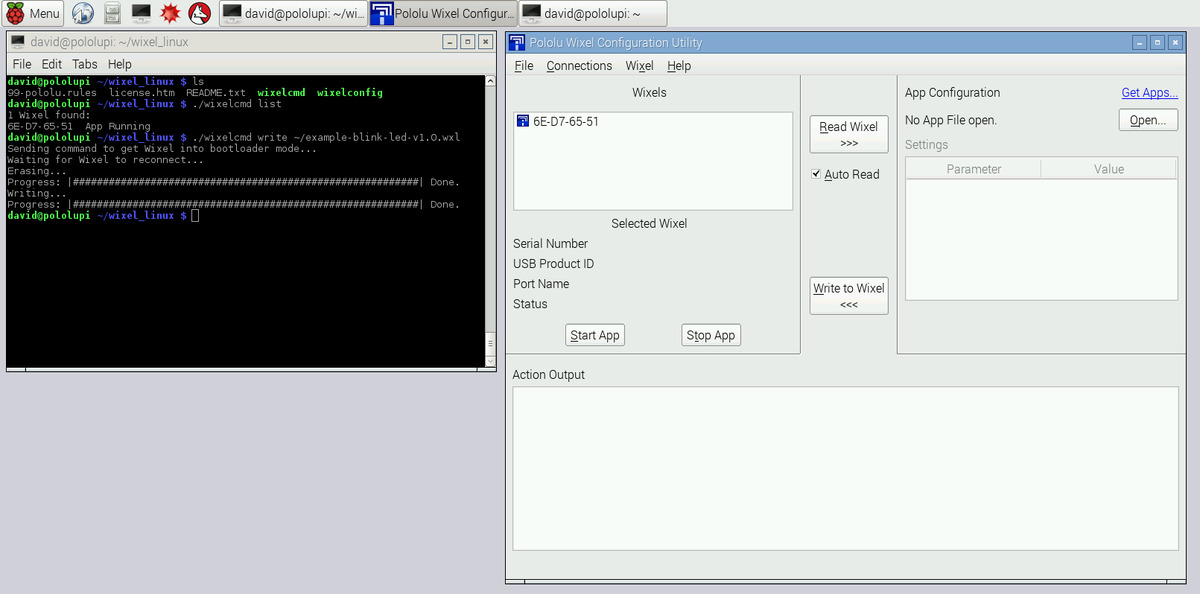 |
We have released a new build of the software for our Wixel Programmable USB Wireless Module that works on ARM Linux systems like the Raspberry Pi. This means that you can now upload apps to a Wixel from a Raspberry Pi, without needing a typical desktop computer. You can find the software download in the Wixel User’s Guide.
We have seen people use Wixels to help monitor blood glucose levels, create wireless quiz buttons, or wirelessly control servos. For a complete list of all the Wixel apps we know about, see the Wixel Apps list on our forum. We hope that the expanded software support for the Wixel will help people create new applications in the future.
 |
Wixel programmable USB wireless module. |
|---|
Related products


Happy Pi Day
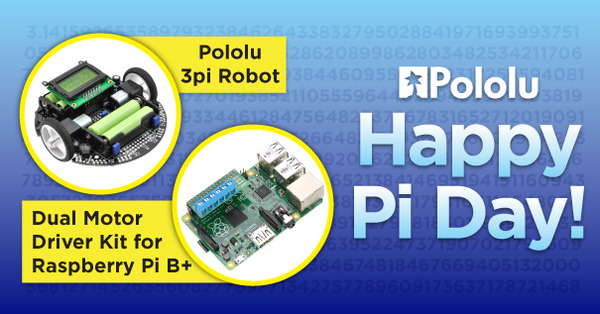 |
Tomorrow is Pi Day (3/14/15 in the standard US date format of month/day/year), and we are celebrating by having a special overly-pi-themed one-day sale:
- Use coupon code PIDAY975 to get 31.4% off a 3pi robot (limit 3 per customer).
- Use coupon code PIDAY2753 to get a DRV8835 Dual Motor Driver Kit for Raspberry Pi B+ for $3.14 (limit 3 per customer).
- Use coupon code PIDAY to get 3.14% off your entire order (this discount is only valid for order subtotals between $3.14 and $314.16 and cannot be combined with other coupon discounts).
The sale is live now and runs through the end of tomorrow (midnight Pacific Time).
PiBot-A: mobile robot with a Raspberry Pi
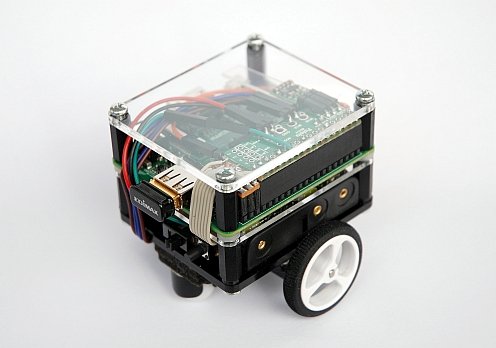 |
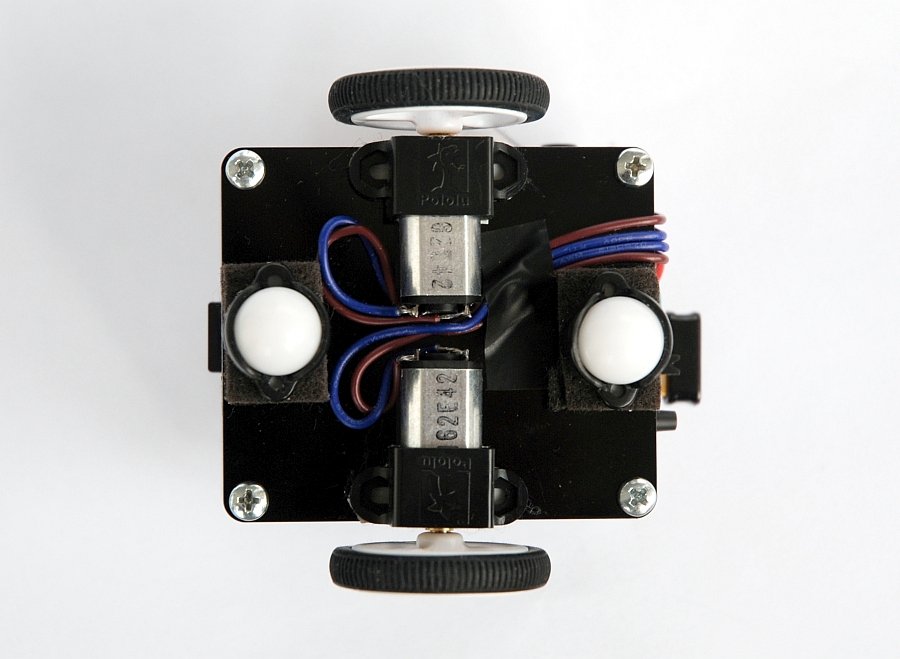
Thomas Schoch, who previously built the PiBot-B we blogged about, built another robot with a Raspberry Pi. His robot, the PiBot-A, uses our DRV8835 Dual Motor Driver Kit for Raspberry Pi B+ with a Raspberry Pi Model A+ to control two 100:1 Micro Metal Gearmotors. The robot also uses our S7V7F5 Switching Step-Up/Step-Down Regulator to supply the Raspberry Pi with 5 V from the motor power supply, allowing the whole robot to be powered form a single source.
|
|

The PiBot-A is controlled by a Web-App from Thomas’s iPhone. It communicates over WiFi to the Raspberry Pi, which is running lighttpd and PHP. The Python program on the PiBot-A uses the WiringPi library to send signals to the motor driver kit to drive two 100:1 Micro Metal Gearmotors that are connected to the chassis with our Micro Metal Gearmotor Brackets. Thomas also added an array of Sharp digital distance sensors to give the robot obstacle detection. You can find a video of the PiBot-A avoiding boxes below:
For a complete write-up of the robot, check out the PiBot-A page. It is written in German, but it has a link at the top to translate it into English using Google Translate.
11 February 2015 update: Thomas added support for our QTR-3A Reflectance Sensor Array to his PiBot-A to make a line follower and posted about it on Let’s Make Robots. The sensor array is interchangeable with the array of Sharp digital sensors used for obstacle detection. You can find a video of his robot following a line below:
Related products


New products: Stackable headers for the Raspberry Pi
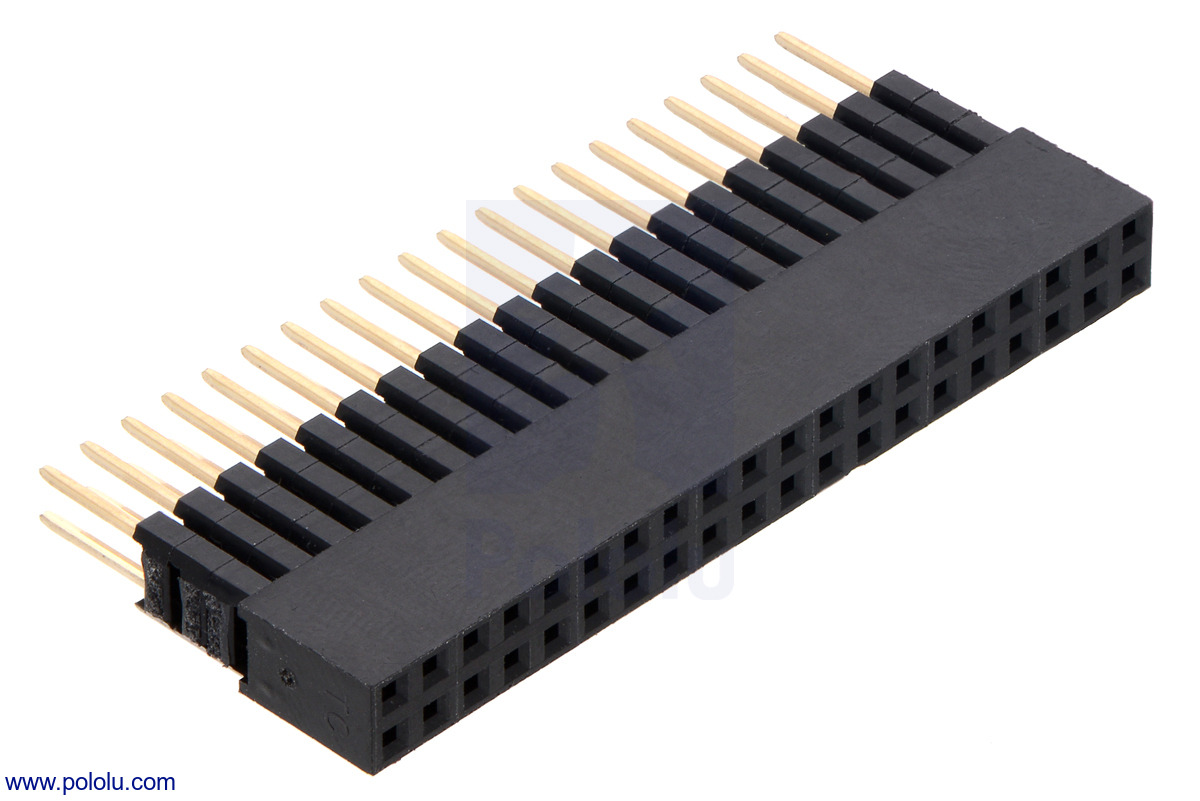 |
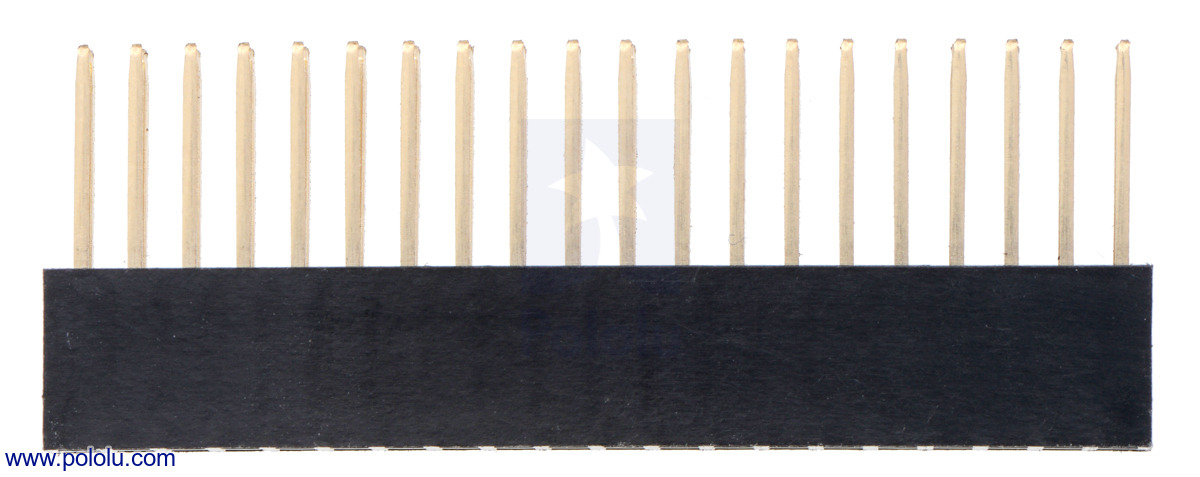 |
Stackable 0.100″ Female Header: 2×20-pin, Straight. |
|---|
We now have special extended, stackable female headers for the Raspberry Pi:
- Stackable 0.100″ Female Header with Extra 0.3″ Spacer: 2×20-pin, Straight
- Stackable 0.100″ Female Header: 2×20-pin, Straight
- Stackable 0.100″ Female Header with Extra 0.2″ Spacer: 2×13-pin, Straight
- Stackable 0.100″ Female Header: 2×13-pin, Straight
The 2×20 versions work with the Raspberry Pi Model B+ (and the just-released A+), while the 2×13 versions match the I/O header on the older Raspberry Pi Models A and B.
See our Raspberry Pi category for our full selection of Raspberry Pi accessories.
Related products


ToyCollect: A robot that collects toys from hard-to-reach places
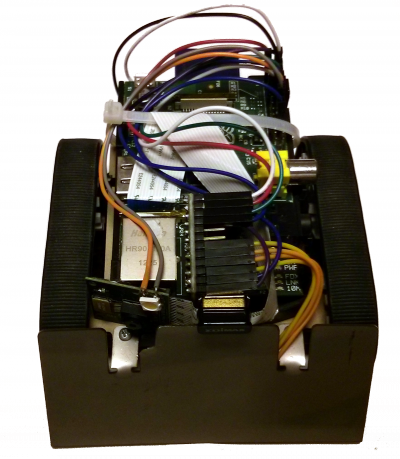 |
The people at Seewald Solutions posted about their Raspberry Pi-based robot they call ToyCollect. Inspired by the creator’s daughter, who hides her toys under the couch, the robot is controlled via Android and can be driven under the couch to allow the user to view the hidden toys via a Raspberry Pi camera module and retrieve them. Along with a Raspberry Pi, the ToyCollect robot uses a Zumo Chassis Kit, 100:1 Micro Metal Gearmotors HP, Qik 2sv1 Dual Serial Motor Controller, and a Zumo blade to push the toys. The video below shows the robot in action (in German; subtitles available):
For more information, including the source code and instructions for building your own ToyCollect robot, see the ToyCollect post on the Seewald Solutions website.
Related products


Video: Introducing the DRV8835 Dual Motor Driver Kit for Raspberry Pi B+
We have a new video for our DRV8835 Dual Motor Driver Kit for Raspberry Pi B+. The video gives an overview of some of its features and mentions a few considerations for working with it. Check it out, and get some ideas for a cool Raspberry Pi robot!
Raspberry Pi-controlled chicken coop
 |
Forum user bennard posted about his WiFi-enabled chicken coop, which uses a Raspberry Pi to monitor and log data about its environment, serve a web page, send emails, and open and close the coop door. The system has sensors for detecting temperature, humidity, motion, and light, and includes a 50W solar panel and solar charge controller for recharging its batteries. The automated door is a hinged piece of wood that is connected to a linear actuator (via this mounting bracket) and controlled by a jrk 21v3 motor controller.
You can learn more about bennard’s project in his forum post.
Related products


New product: Translucent Enclosure for Raspberry Pi Model B+
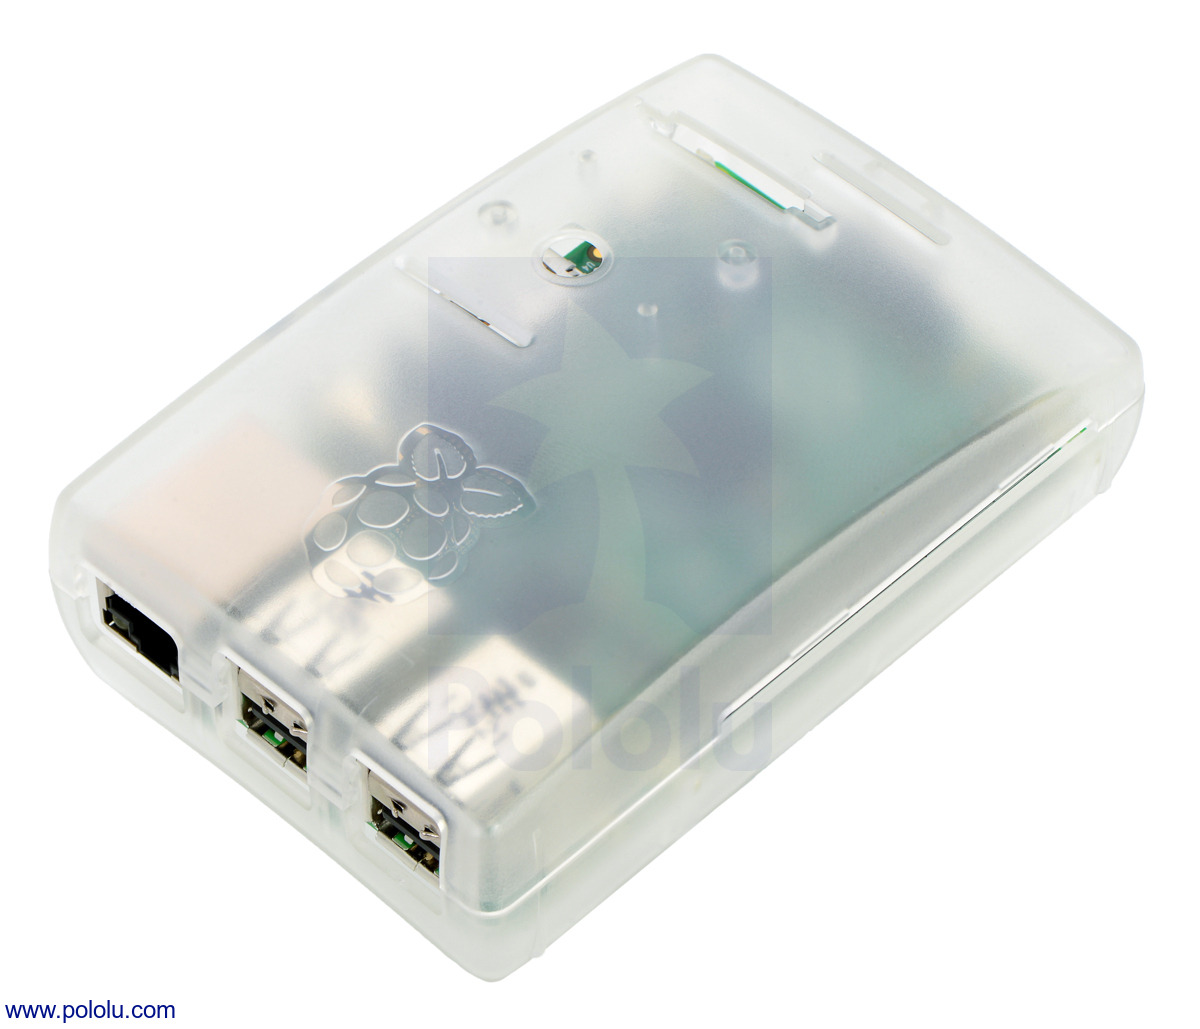 |
We are now carrying a translucent enclosure for the Raspberry Pi Model B+!


Home | Forum | Blog | Support | Ordering Information | Lists | Distributors | BIG Order Form | About | Contact
© 2001–2026 Pololu Corporation


