Pololu Blog » User Profile: David » Posts by David »
Posts by David (Page 2)
You are currently viewing a selection of posts from the Pololu Blog. You can also view all the posts.
Popular tags: community projects new products raspberry pi arduino more…
New products: APA102C-based addressable RGB LED panels
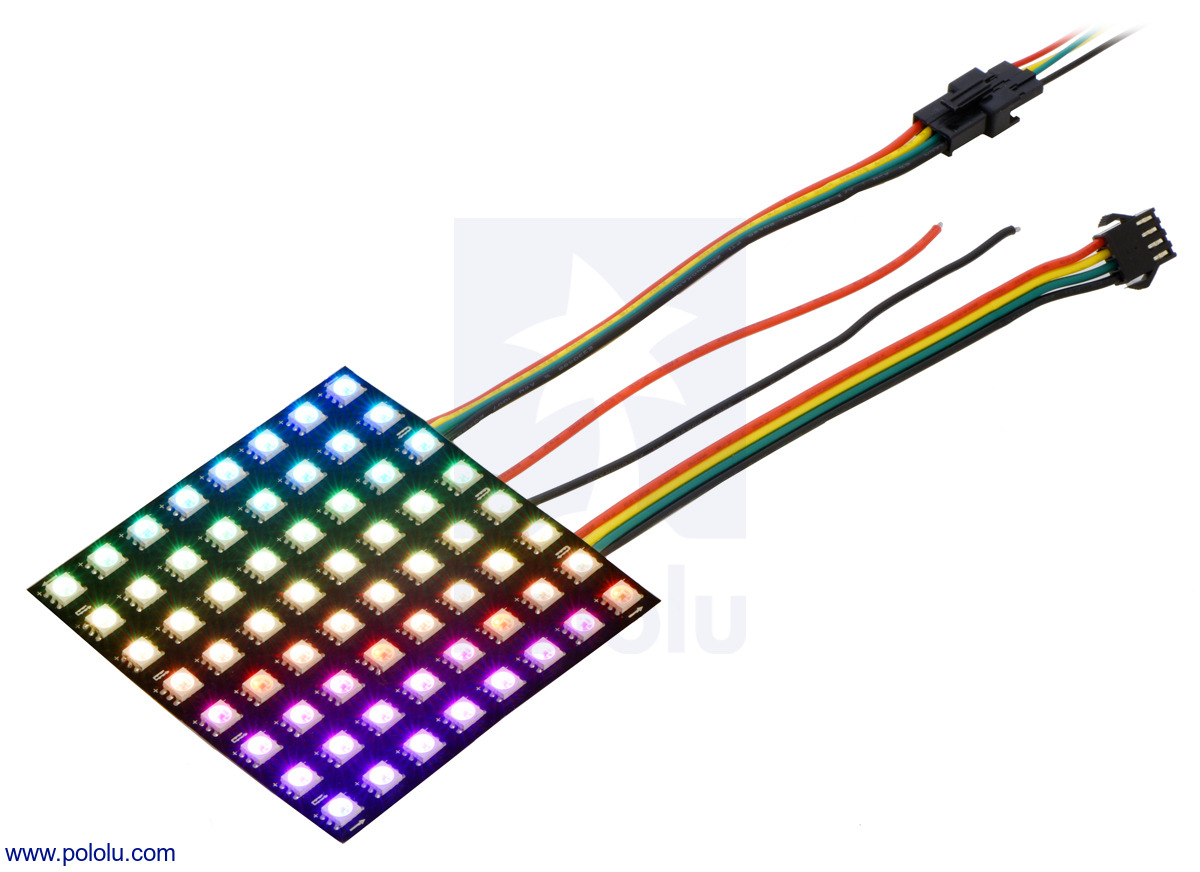 |
We’re excited to offer a series of APA102C-based addressable RGB LED panels, which make it easy to add colorful images, text, or lighting effects to your project. These panels use the same integrated APA102C LED driver as our APA102C-based addressable RGB LED strips, which means that you can control the LEDs using a standard SPI interface that works over a wide range of communication rates.
We offer APA102C LED panels in three different sizes:
For more information about our APA102C-based LED panels, including links to example code, see their product pages.
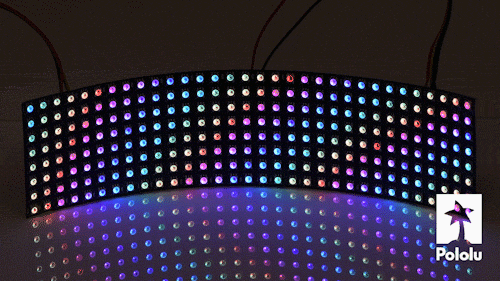 |
Addressable RGB 8×32-LED Flexible Panel, 5V, 10mm Grid (APA102C or SK9822) showing an animated rainbow. |
|---|
 |
An addressable RGB 16×16-LED panel with a plastic diffuser (not included) showing the Pololu logo. |
|---|
Related products


New product: Pololu USB AVR Programmer v2
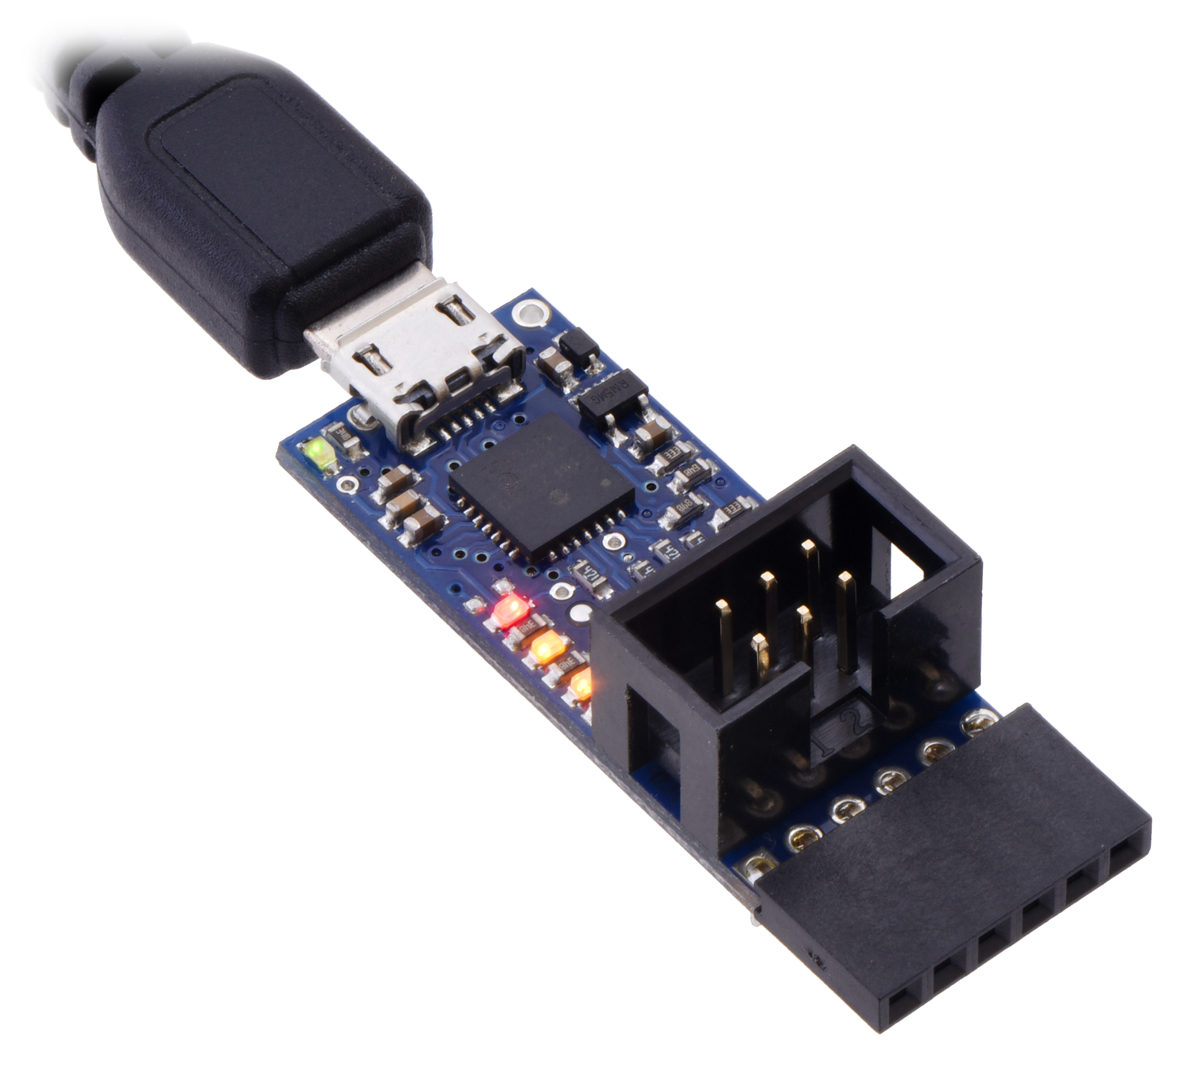 |
I am excited to announce the release of the Pololu USB AVR Programmer v2, a programmer for the popular AVR microcontrollers from Atmel.
Here at Pololu, we have been making AVR programmers for over eight years in order to support products like our Orangutan robot controllers and the 3pi robot. These programmers are used to transfer a compiled AVR program from your computer to the target AVR’s flash memory, allowing it to run the program.
 |
From left to right: the original Orangutan USB Programmer, the Pololu USB AVR Programmer, and the Pololu USB AVR Programmer v2 (which looks almost the same as v2.1). |
|---|
The new Pololu USB AVR Programmer v2 is our third-generation AVR programmer. It is an updated version of our Pololu USB AVR Programmer (product #1300) with many improvements and changes.
To support programming AVR microcontrollers running at 3.3 V, we added an adjustable voltage regulator that allows the programmer to set its own power voltage to either 3.3 V or 5 V. By default, the programmer will operate at 3.3 V, but it measures the voltage on its VCC pin and will automatically switch to 5 V if it detects a high-enough voltage on VCC. You can also disable the automatic switching and just set the programmer to always be 3.3 V or always be 5 V using our configuration software.
With the Pololu USB AVR Programmer v2, we made an effort to increase the programming speed for commonly-used types of AVRs, such as the ATmega328P. With the older Pololu USB AVR Programmer, if you wanted to program all 32 KB of the AVR’s flash memory, it would take about 6.8 s using the maximum ISP frequency of 2 MHz. With the Pololu USB AVR Programmer v2, it takes only about 4.8 s to do the same thing. Also, if your ATmega328P has a high-enough clock speed, you can increase the ISP frequency to 3 MHz and then it would only take 4.3 s. (These numbers are from tests done using AVRDUDE 6.2 in Windows.)
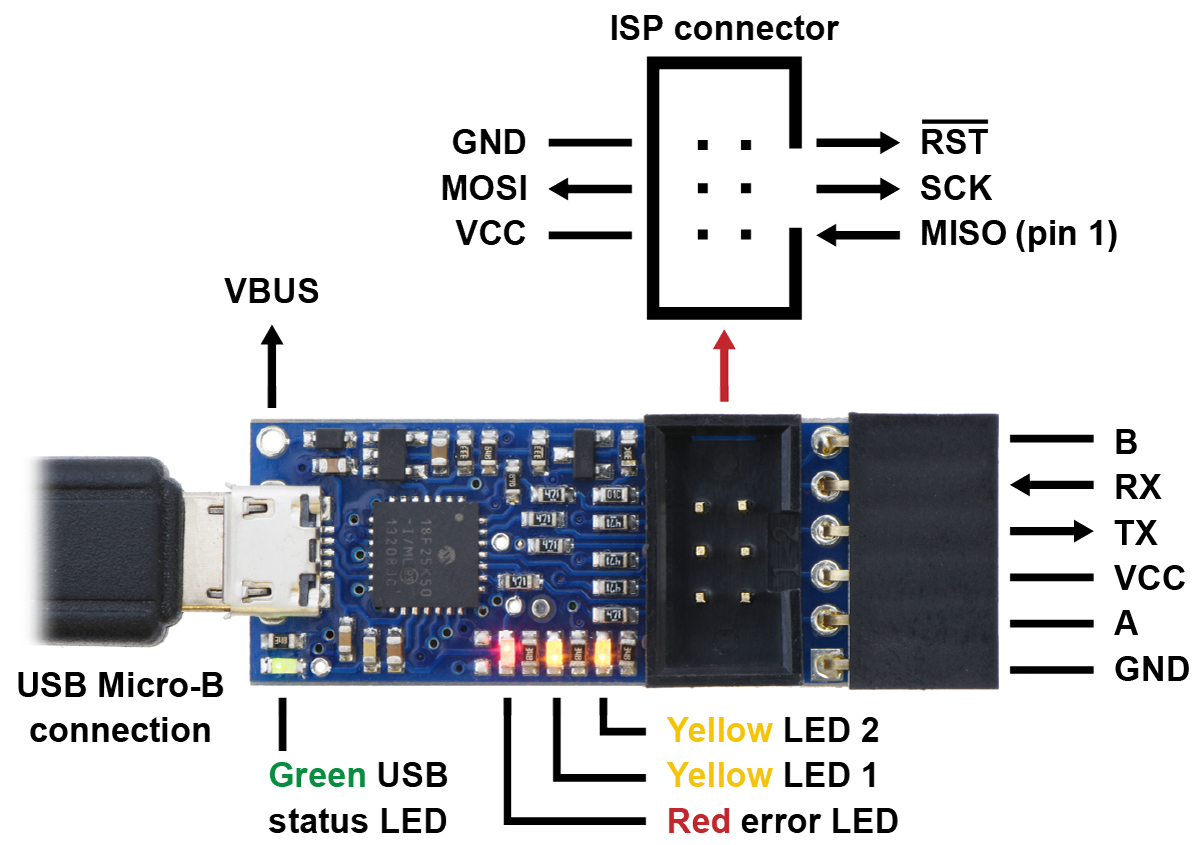 |
The Pololu USB AVR Programmer v2 has 470 Ω resistors on all of its I/O lines, which will help protect the programmer and your target system from damage in case there is a voltage mismatch or a short circuit.
Programming the fuse bits on an AVR has always been scary because you can accidentally program the wrong clock settings and brick your AVR. With the new Pololu USB AVR Programmer v2, it is a little less scary: the programmer provides a 100 kHz clock output that can be used to send a clock signal to your AVR, which can help you revive it when it has the wrong clock settings. We tested this on the ATmega328P and it probably works on many other AVRs as well. You should still be careful when setting the fuse bits though!
Like its predecessor, the Pololu USB AVR Programmer v2 can act as a USB-to-TTL serial adapter, so you can use it to debug or communicate with your projects over serial. We arranged the serial pins in a more standard arrangement that is similar to commonly-available FTDI USB-to-serial cables and breakout boards. The pins also come with a female header soldered in, so you can plug the programmer directly into a variety of Arduino boards and use it upload sketches via a serial bootloader.
The Pololu USB AVR Programmer v2 is compatible with commonly-used AVR programming software such as Atmel Studio, AVRDUDE, and the Arduino software (IDE).
You can use our open source configuration software for Windows, Linux, and Mac OS X, to change the configuration of your programmer and see useful information about it. We provide both a graphical user interface (GUI) and a command-line interface (CLI). Here is a screenshot of the GUI in Windows:
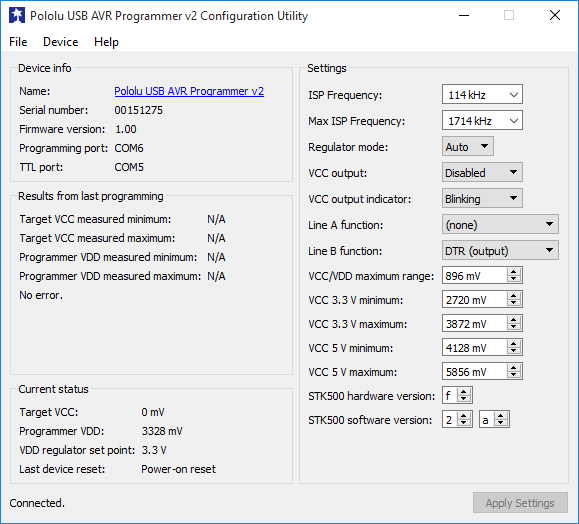 |
The Pololu USB AVR Programmer v2 Configuration Utility in Windows 10. |
|---|
The Pololu USB AVR Programmer v2 uses a relatively new PIC microcontroller, the PIC1825K50. We sell a user-programmable break-out board for this microcontroller called the P-Star 25K50 Micro. One of the exciting features of this microcontroller is that it can do full-speed USB without needing an external crystal or resonator. The USB specification requires devices to have a clock that is accurate to within ±0.25%. On previous products, we usually had to add an external resonator or crystal to the board to meet this requirement. However, the PIC18F25K50 has a neat feature called Active Clock Tuning, which means that it can automatically tune its internal oscillator by monitoring the timing of the USB signals from the computer. This allows the internal oscillator, which is normally not very accurate, to achieve the accuracy needed for USB. This feature allowed us to make the programmer a little smaller and a little less expensive.
For more information, see the Pololu USB AVR Programmer v2 product page.
Related products


Sumo ring border angle detection
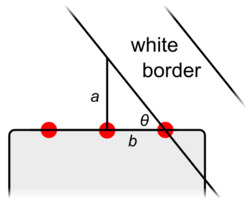
My robot from the last LVBots mini-sumo competition has a feature which I think is pretty interesting and sets it apart from a lot of other robots: when it detects the border of the sumo ring, it measures the angle of the border and uses that information to try to get to the center. Continued…
New support for Atmel Studio 7.0 and Windows 10
 |
We now support using the Orangutan Robot Controllers, 3pi robot, and the Pololu USB AVR Programmer with the new Atmel Studio 7.0 and Windows 10.
To make this possible, we updated the Windows installers for the Pololu AVR C/C++ Library to support Atmel Studio 7.0. This means that when you install the library on Windows, it will automatically copy its files into the AVR GCC toolchain inside Atmel Studio 7.0 and install project templates for the supported devices. Adding support for Atmel Studio 7.0 required us to add some code to detect its location and fix two unexpected problems. You can see the changes that were made in the libpololu-avr commit history on GitHub.
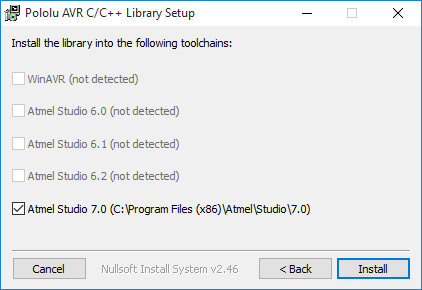 |
The second screen of the Pololu AVR C/C++ Library installer for Windows. |
|---|
We also tested the library installer, Atmel Studio 7, the Pololu USB AVR Programmer, and the Orangutan SVP on Windows 10. Everything worked fine, so we now support using those products on Windows 10.
Importing an Arduino sketch in Atmel Studio 7.0
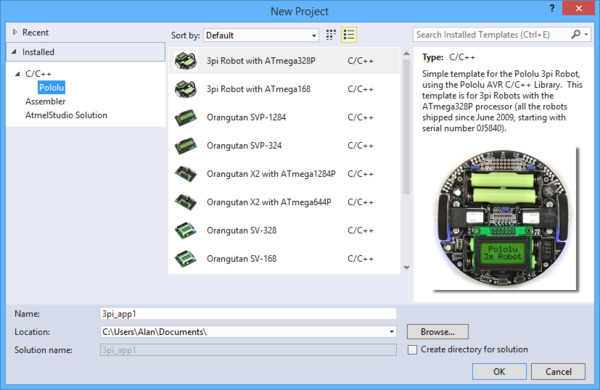
Atmel Studio 7.0 is the latest version of Atmel Studio, an integrated development environment (IDE) for AVRs from Atmel. It has an interesting new feature that allows you to create a new project from an Arduino sketch. The idea is that you could import an Arduino sketch, compile it with Atmel Studio, and then load it onto an Arduino-compatible board using a debugger from Atmel. This would allow you to step through the program one line at a time as it runs on real hardware and see what the program does at each step. It would also allow you to use the advanced code editing features of Atmel Studio. When you import a sketch into Atmel Studio 7.0, the source code of your sketch, along with the Arduino core source code and the code for any libraries you are using, gets copied into the directory for the new project.
However, the new feature only supports a certain small set of boards from Arduino and Adafruit, which means that you would have to select a board similar to your Orangutan, 3pi robot, or A-Star and then adjust the project settings (such as the F_CPU clock speed macro) to make it work. Atmel Studio does not support Arduino bootloaders, so it will not be easy to program an A-Star without getting an external programmer. Our Pololu USB AVR Programmer does not support debugging, so if that is the only programmer you have, then there is relatively little value in using Atmel Studio to program your device instead of just using the Arduino IDE. The feature does not appear to be very polished and still has bugs, which I encountered when I tried to import a sketch that has multiple .h and .cpp files.
If you want to try out the new feature, just open Atmel Studio 7.0, select File > New > Project…, and then select “Create Project from Arduino sketch”, which is a template that can be found in the “C/C++” category.
Related products


Wixel software now works on the Raspberry Pi
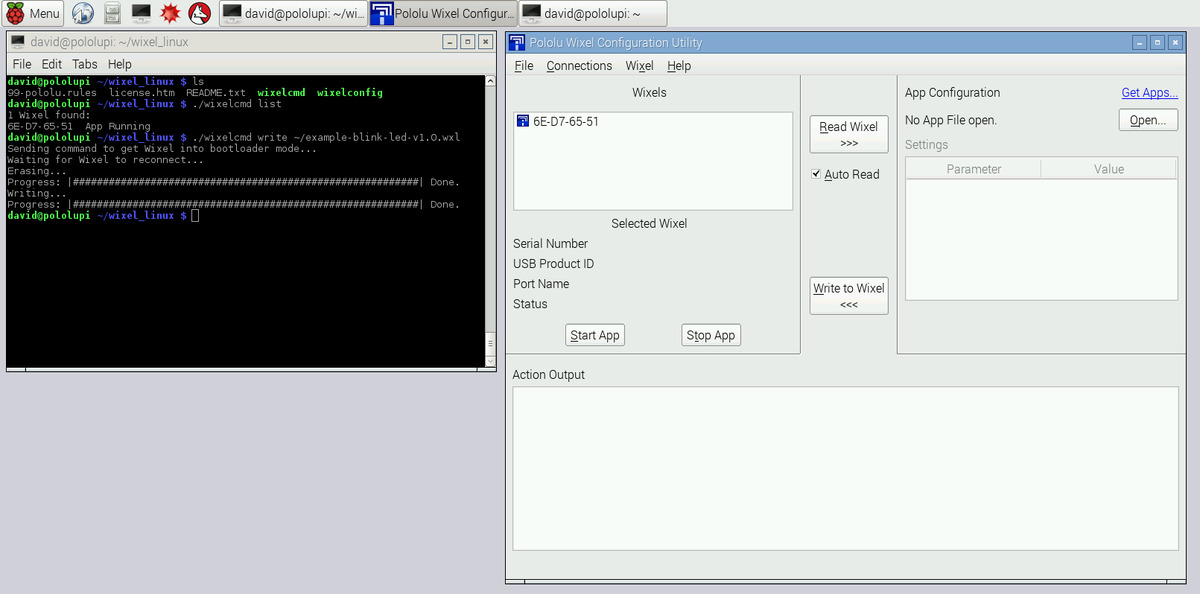 |
We have released a new build of the software for our Wixel Programmable USB Wireless Module that works on ARM Linux systems like the Raspberry Pi. This means that you can now upload apps to a Wixel from a Raspberry Pi, without needing a typical desktop computer. You can find the software download in the Wixel User’s Guide.
We have seen people use Wixels to help monitor blood glucose levels, create wireless quiz buttons, or wirelessly control servos. For a complete list of all the Wixel apps we know about, see the Wixel Apps list on our forum. We hope that the expanded software support for the Wixel will help people create new applications in the future.
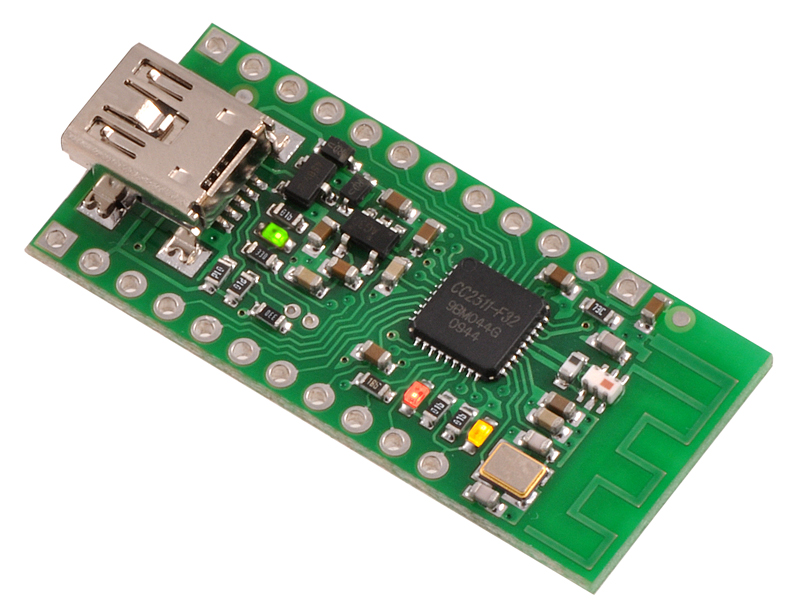 |
Wixel programmable USB wireless module. |
|---|
Related products


David's line following robot that learns the course
Several people here made robots to compete in the recent LVBots line following competition. The goal of the competition is to make an autonomous robot that follows a line on the ground as fast as possible. I made a robot called LearnBot for the competition. LearnBot is able to learn the line course on the first lap and then use that information to its advantage on the second and third laps. Continued…
Video: Zumo 32U4 Robot Example Projects
We have a new video showing several projects you can do with a stock Zumo 32U4 robot. The Zumo 32U4’s motors, encoders, line sensors, proximity sensors, accelerometer, gyroscope, LCD, LEDs, and buttons make it a versatile robot that can be used in a wide variety of projects. The ATmega32U4 microcontroller on the Zumo 32U4 robot can be programmed in C++ from the Arduino IDE.
All of the projects shown in the video use unmodified, stock Zumo 32U4 robots (except for the Zumo driving on the refrigerator, which had strong magnets taped to it). However, you can open up even more possibilities by adding your own electronics to the Zumo 32U4. The FuzzBot, Pixy Pet, and this smartphone-controlled tank are some example projects by our customers that involved adding hardware to our older Zumo Robot for Arduino.
The source code for many of the projects shown in the video is available as examples in Zumo32U4 library, and we are working on adding more of them. Check it out, and get some ideas for a cool Zumo 32U4 project!
Related products

Update: Orangutans and 3pi robot can be programmed with Arduino 1.6.0
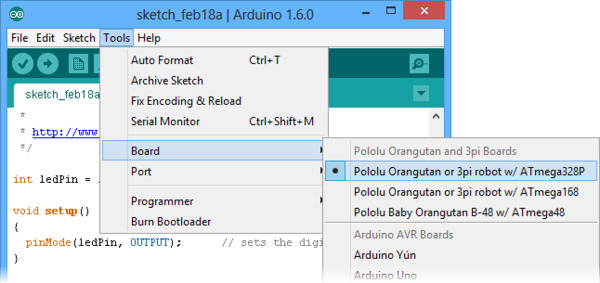 |
We have updated our Programming Orangutans and the 3pi Robot from the Arduino Environment document to support version 1.6.0 of the Arduino IDE, which is the latest stable version. Thanks to improvements in the Arduino IDE, we were able to make the instructions for getting started much easier.
|
|
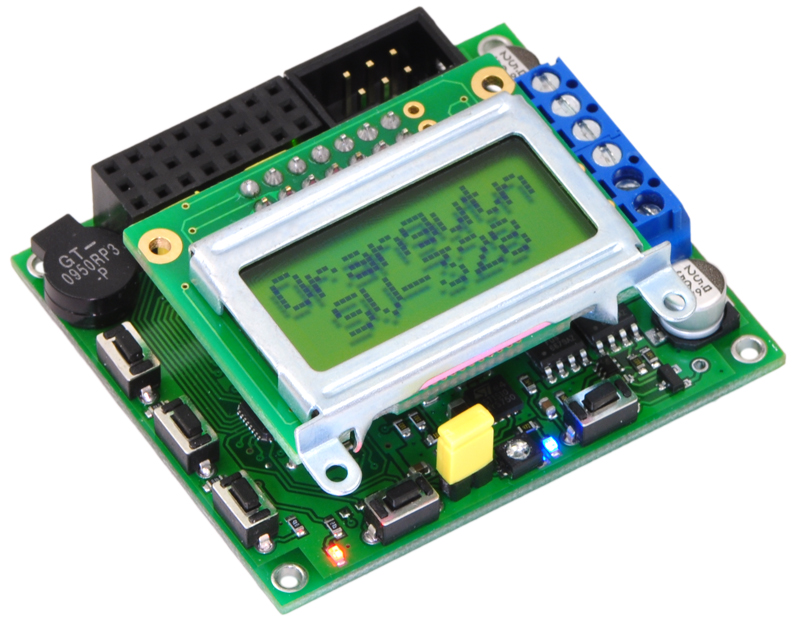
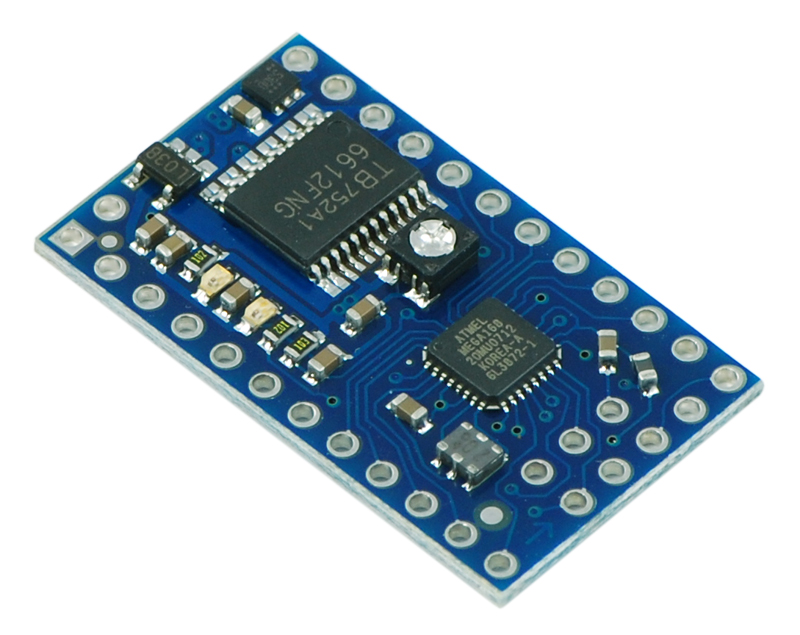
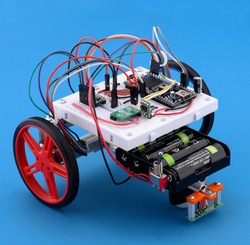
The Orangutan line of AVR-based robot controllers started ten years ago and has since expanded to include boards with a variety of AVR processors and on-board peripherals, from the minimal Baby Orangutan B-328 to the powerful Orangutan SVP-1284 and X2. Many of the Orangutans share handy features like a buzzer, LCD, and buttons, but the integrated dual motor drivers found on every Orangutan are what justify calling it a “robot controller”. Our 3pi robot is an extension of Orangutan concept to a complete robot, so we think of the 3pi as pretty much part of the Orangutan family.
(Don’t need integrated motor drivers? Check out our Arduino-compatible A-Star family of microcontroller boards.)
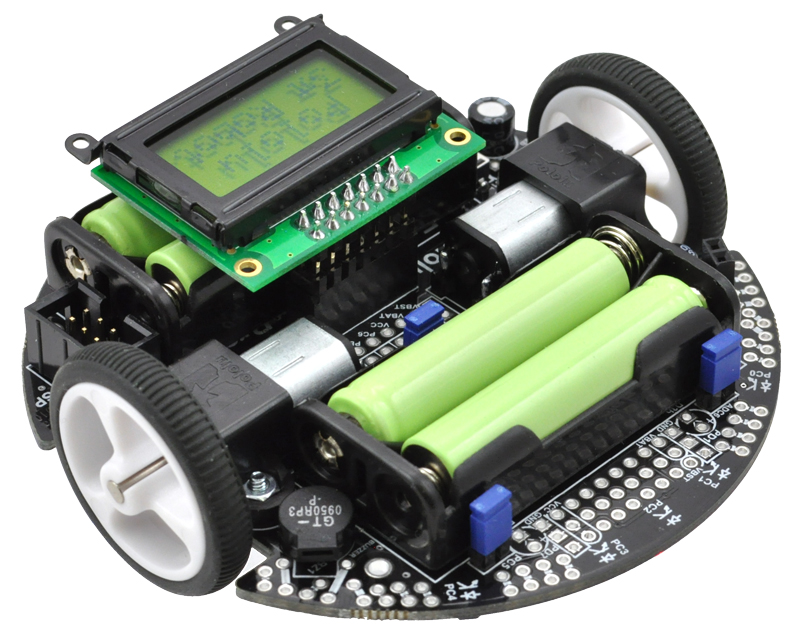 |
Original Pololu 3pi robot. |
|---|
The Orangutan SV-328, Baby Orangutan B-328, and 3pi all use the same AVR ATmega328P processor as the Arduino Uno, so it is natural to want to program them from the Arduino environment. However, there are a couple of key differences to overcome. First, the boards have no pre-installed Arduino bootloader or built-in USB-to-serial adapter. This simplifies the design and frees up some resources for your application, but it means you have to program them with an external programmer like the Pololu USB AVR Programmer. Also, the clock on these boards runs at 20 MHz, while the official Arduinos are at 16 MHz, so time-sensitive code might not be compatible.
Adding support for the Orangutans and programmer to the Arduino IDE used to involve manually editing a few configuration files with a text editor. With this latest update, you can simply copy a folder into your Arduino sketchbook directory.
Another notable Arduino change is improved support for AVRs running at different speeds. Functions such as delay and pulseIn now adapt to the clock frequency specified by the F_CPU macro and should work fine on an Orangutan running at 20 MHz.
To get started, see our guide.
Related products


Introducing RPicSim

RPicSim is an open source software library written in Ruby that provides an interface to the MPLAB X PIC simulator and allows you to write simulator-based automated tests of PIC firmware. While RPicSim has been available since early this year, we just released version 1.0.0 and are excited to share why we made it and to encourage people to start using it. Continued…
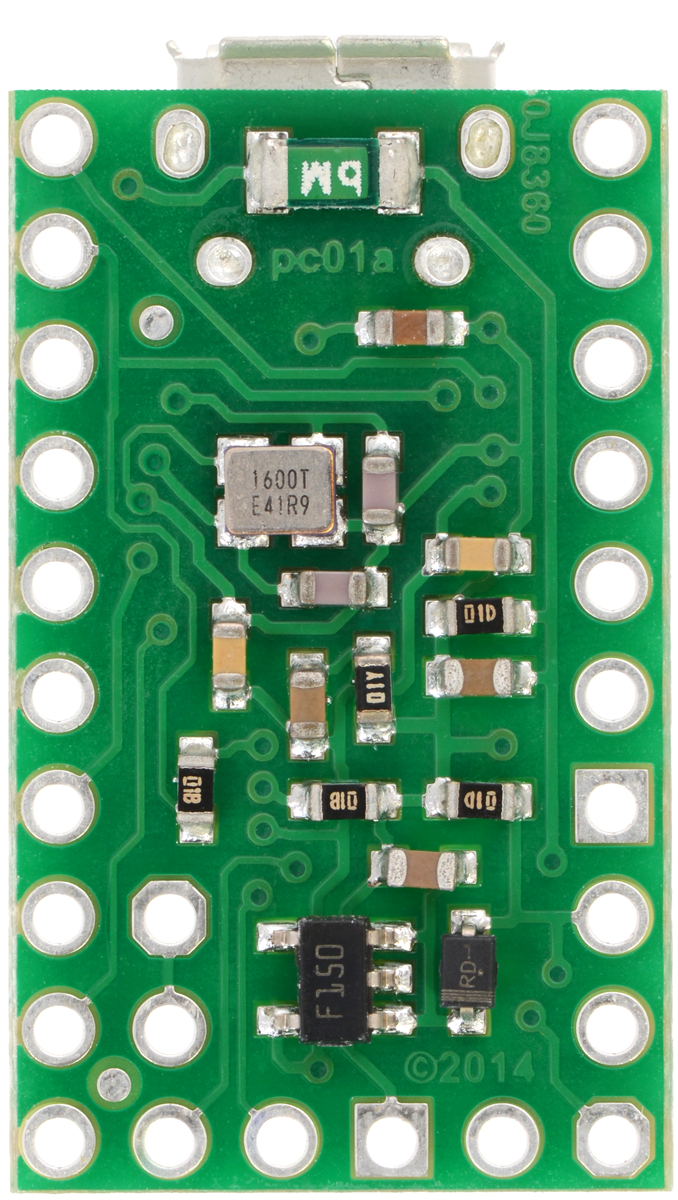
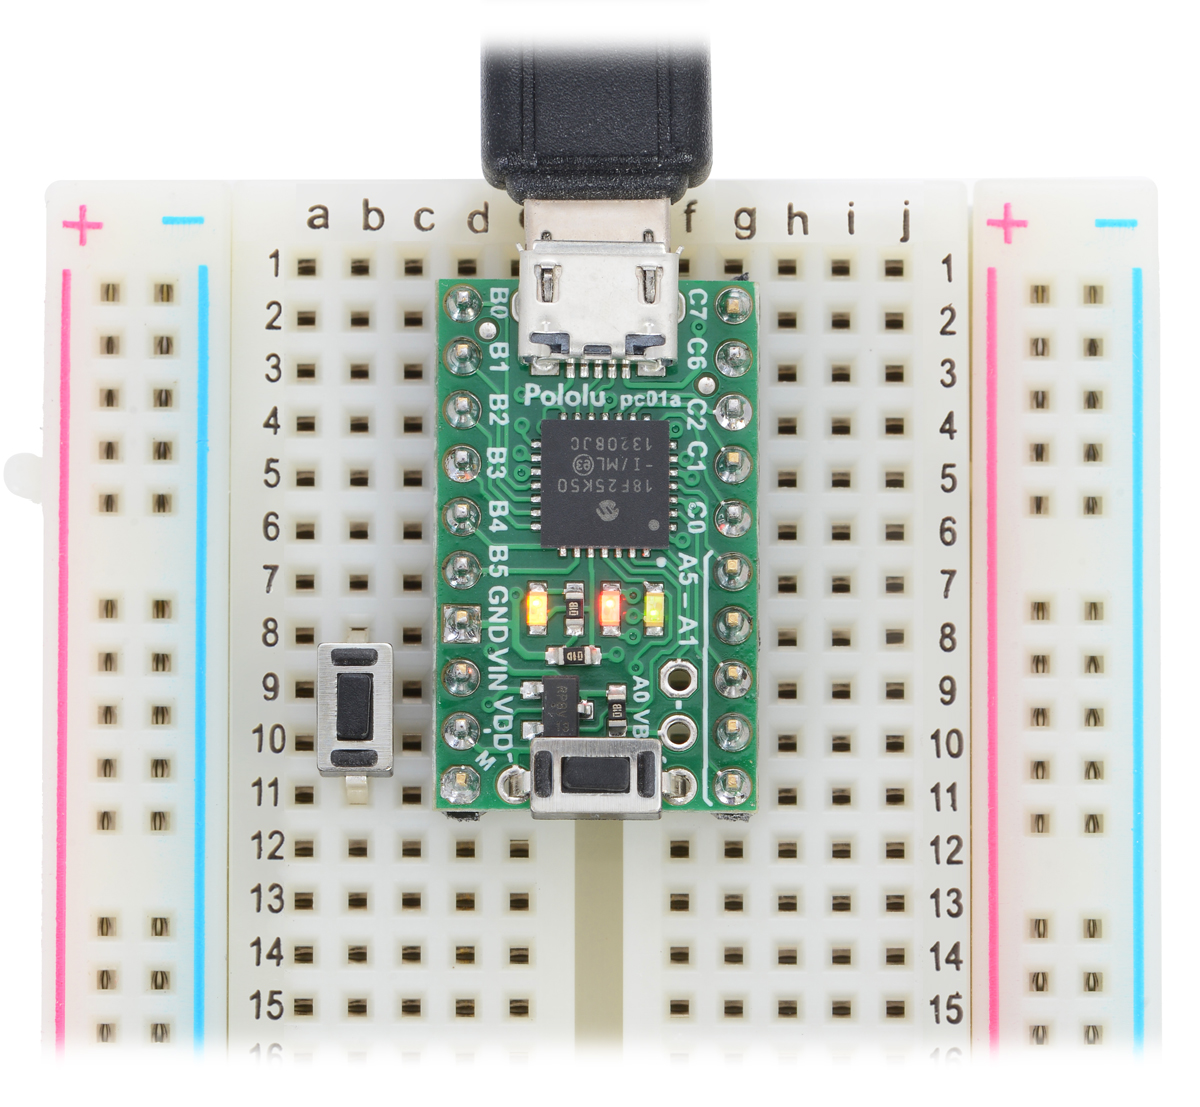
New product: P-Star 25K50 Micro
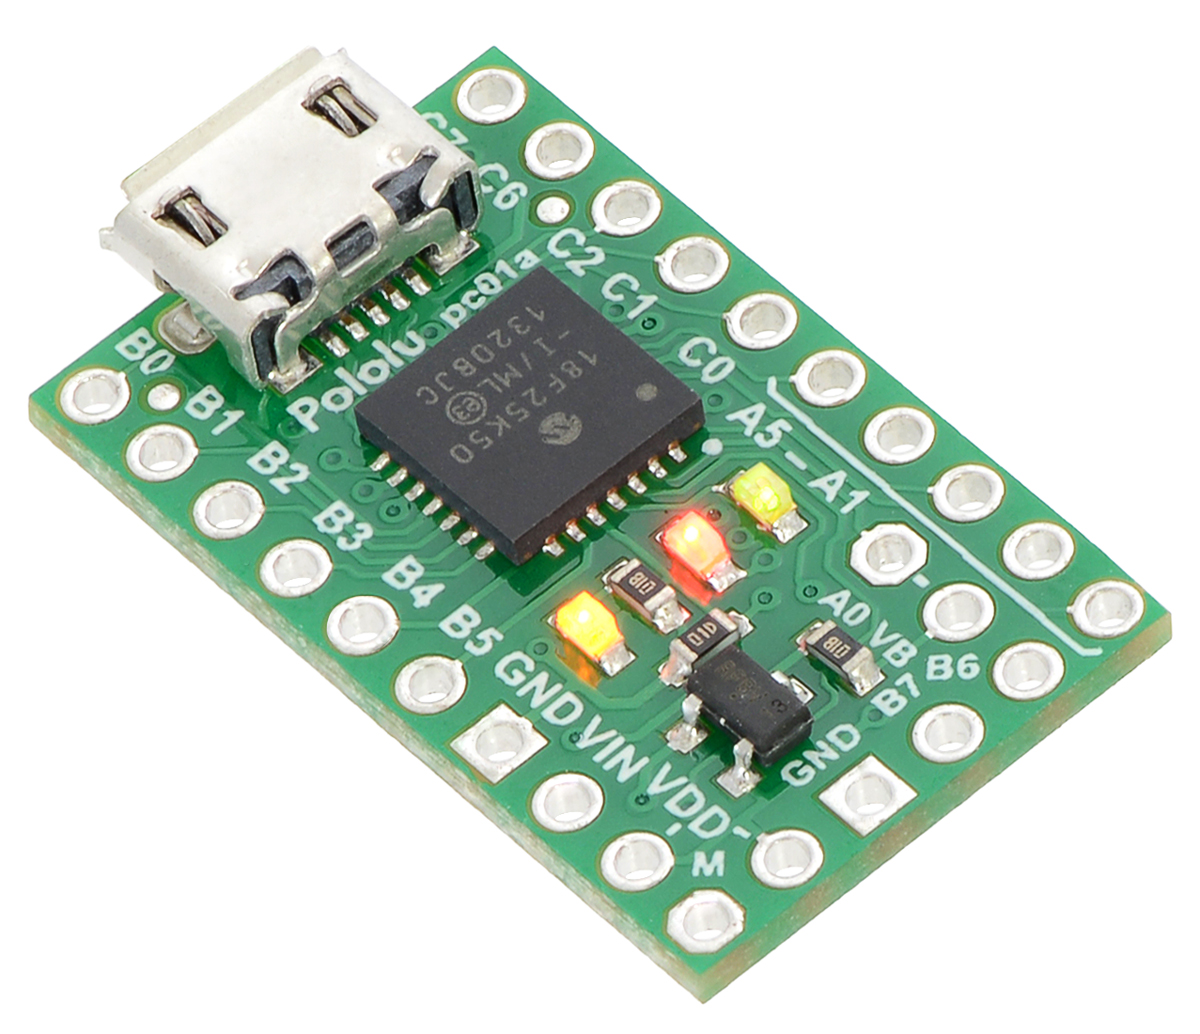 |
We just released the P-Star 25K50 Micro, a programmable breakout board for Microchip’s PIC18F25K50 microcontroller. Although we have been using PIC microcontrollers since our very first product, the P-Star 25K50 Micro (abbreviated P*) is our first product where the PIC microcontroller can be programmed by the user. The P-Star 25K50 Micro is the same size as our AVR-based A-Star 32U4 Micro, and we designed it with the hope that it would be small and cheap enough to go into (and stay in) almost any project.
The PIC18F25K50 has 32 KB of flash program memory, 2 KB of RAM, and built-in full-speed USB functionality. Applications can be developed using standard Microchip PIC compilers and development tools (such as MPLAB X and XC8).
The P-Star 25K50 Micro can be programmed via its proprietary USB bootloader using our open source software that is available for Windows, Linux, and Mac. The bootloader uses 8 KB of flash memory, leaving 24 KB for the user. Alternatively, an ICSP programmer can be used to erase the bootloader and access the full 32 KB of program memory. (Since the bootloader cannot be recovered, we recommend this option only for those who are comfortable programming exclusively with an external programmer.)
The P-Star 25K50 Micro features a precision 16 MHz crystal, a USB Micro-B connector, and three user-controllable LEDs. A voltage regulator and power selection circuit allow the board to be powered from either USB or an external 5.5 V to 15 V source, while a resettable PTC fuse on the USB VBUS supply and reverse protection on VIN help protect it from accidental damage.
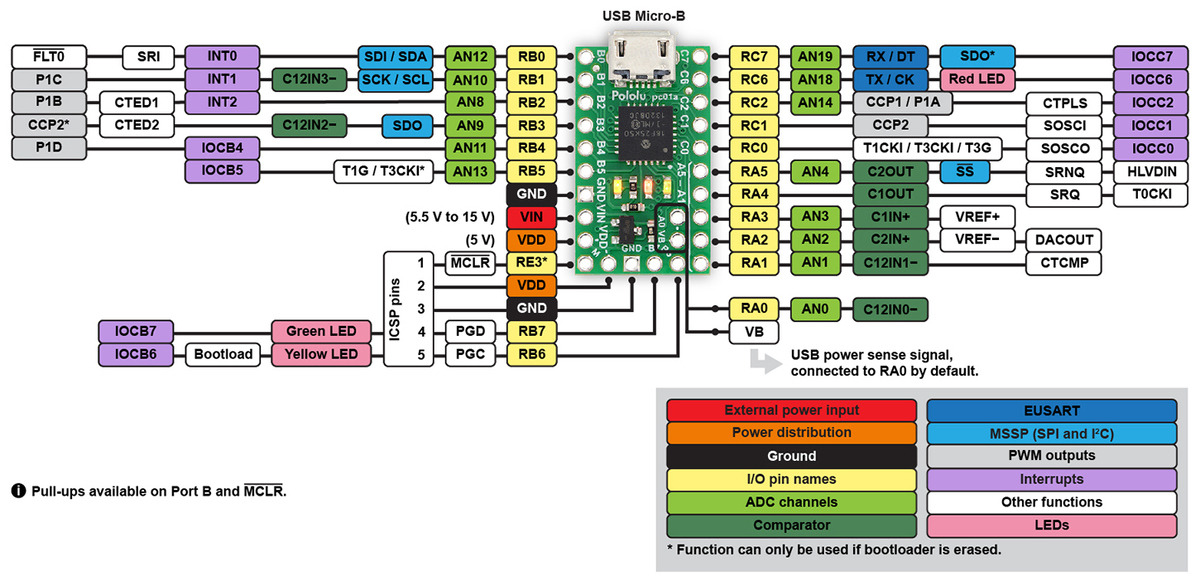 |
P-Star 25K50 Micro pinout diagram. |
|---|
Compared to the popular ATmega32U4 microcontroller, the PIC18F25K50 has nearly the same performance and memory capacity, but it also has some compelling features that are missing on the AVR. For example, the PIC18F25K50 uses the PIC18 architecture, which has two interrupt priority levels: interrupts can be assigned to either level, and a high-priority interrupt routine can run in the middle of a low-priority one. This powerful feature is what enables our Maestro servo controllers to generate precise servo signals while still using low-priority interrupts to assist with serial communication and other tasks. Unlike the ATmega32U4, the PIC18F25K50 can operate at full speed down to 2.7 V (though the brown-out reset on the P-Star is activated at 2.85 V by default).
|
|
The PIC18F25K50 also has a 5-bit digital-to-analog converter (DAC), which is a fun feature not available on many 8-bit microcontrollers.
 |
A 3 kHz triangle wave generated by the 5-bit digital-to-analog converter (DAC) on the P-Star 25K50 Micro. |
|---|
For more information, check out the P-Star 25K50 Micro page, and let us know what you think in the comments.
Related products


Home | Forum | Blog | Support | Ordering Information | Lists | Distributors | BIG Order Form | About | Contact
© 2001–2026 Pololu Corporation


