Pololu Blog » User Profile: Brandon » Posts by Brandon »
Posts by Brandon (Page 4)
You are currently viewing a selection of posts from the Pololu Blog. You can also view all the posts.
Popular tags: community projects new products raspberry pi arduino more…
New product: 130-size, high-power brushed DC motor
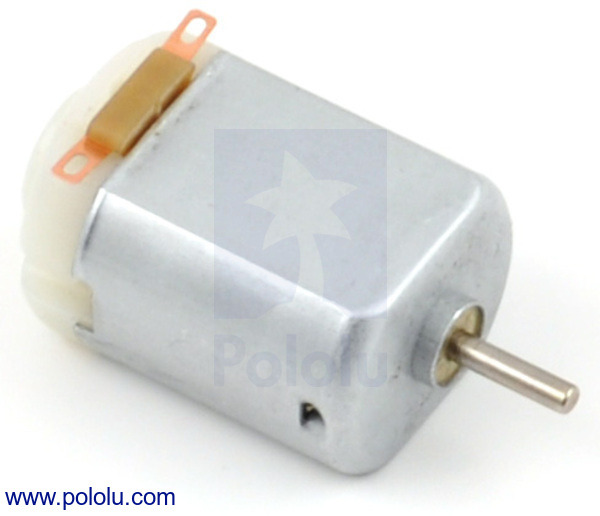 |
These new 130-size motors are great for applications that require a lot of power in a small package. They are a generic alternative the Solarbotics RM2 motors, which have the same form factor and nearly identical performance. With a free-run speed of 17,000 RPM at 3 V, they are great for upgrading projects driven by lower-power 130-size motors. For example, see this post from last year about upgrading flywheel NERF guns. This motor is also compatible with our larger Pololu plastic gearmotors (228:1 offset, 120:1 offset, 200:1 90-degree, and 120:1 90-degree) and Solarbotics plastic gearmotors (GM2, GM3, GM8, and GM9).
For more information see the Brushed DC Motor: 130-Size, 3V, 17kRPM, 3.6A Stall product page.
Related products


Brandon's dead reckoning robot

For the recent LVBots dead reckoning competition that was hosted here at Pololu, I decided to make a robot based on the Baby Orangutan robot controller. This post details my robot and some of the considerations made while I went through my design process. If you would like more details about the competition rules and how it was judged, see the LVBots dead reckoning rules (23k pdf).
I started by choosing my parts and making sure that my robot, which would later be named “Baby Blues”, would be able to function in the way I wanted. I decided on using the Baby Orangutan because of its integrated motor driver and compact size. Continued…
Maestro-controlled Pan, Tilt, and Zoom (PTZ) dome camera
Pololu forum member Dev255 modified a PTZ dome camera system to be controlled by an old Xbox joystick using a 24-channel Maestro servo controller. The Maestro reads 5 potentiometers on the Xbox joystick, along with some buttons, and correlates the readings to a speed and direction value. This data is converted to the Pelco D protocol that is used by the camera and gets sent to the camera from the Maestro. The LEDs on the joystick are used to indicate the program status. He also uses the Maestro to control a 4×20 character LCD display shown in the video below.
For more information on this project, see Dev255’s original forum post.
Related products

New product: SparkFun Inventor's Kit - V3.1
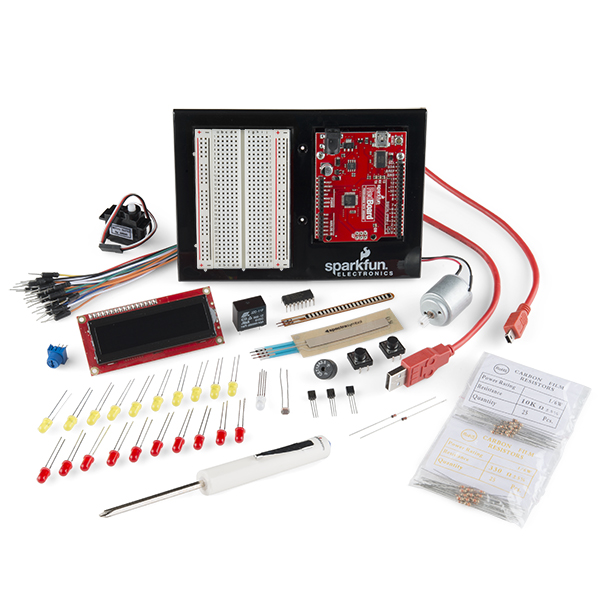 |
We are now carrying the latest version of SparkFun’s Inventor’s Kit (V3.1), which adds a mini screwdriver and replaces the translucent red breadboard from version 3 with an opaque white one that is easier to read. Version 3.1 includes everything else that was part of the previous version, such as the Arduino-compatible RedBoard and all of the additional components needed to build the 15 basic electronic circuits detailed in the guide.
For more information see the SparkFun Inventor’s Kit – V3.1 (with Arduino-Compatible RedBoard) product page.
Related products

New product: SparkFun Weather Shield for Arduino
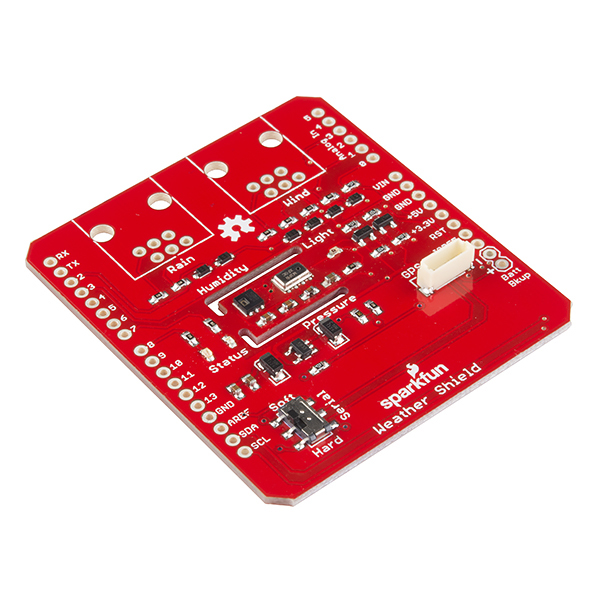 |
Do you want to build your own weather monitoring station? This weather shield from SparkFun might be what you are looking for. In the form of an Arduino shield, this easy-to-use weather board can measure relative humidity, temperature, barometric pressure, and luminosity.
For more information, see the SparkFun Weather Shield for Arduino product page.
Related products

New NEMA 17 stepper motor with optional integrated lead screw
|
|
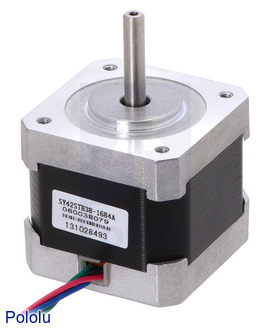
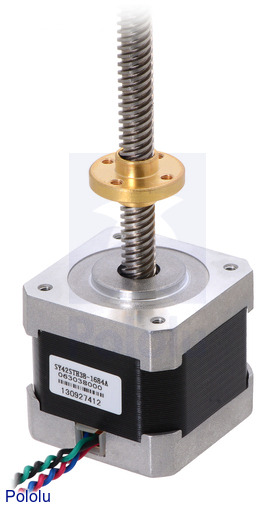
We have added a compact, powerful new NEMA 17-size stepper motor to our wide selection of stepper motors. This 42×38 mm stepper motor is available with a standard 5 mm D-shaft for general-purpose use, but perhaps more exciting is the version with a 28 cm threaded rod, which turns it into a linear actuator capable of precision open-loop position control. This latter version has the stainless steel lead screw built right into the stepper motor, so there is no need to deal with extra hardware such as shaft couplers and set screws, and the copper alloy traveling nut with mounting holes is included. Raise your next project to new heights with the precision (40 µm per full step) and control of a stepper motor!
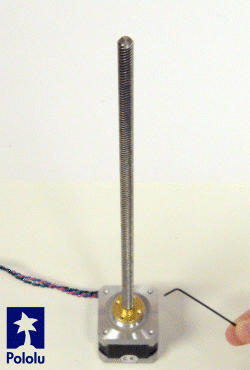 |
Please see the product pages for more information:
- Stepper Motor: Bipolar, 200 Steps/Rev, 42×38mm, 2.8V, 1.7 A/Phase
- Stepper Motor with 28cm Lead Screw: Bipolar, 200 Steps/Rev, 42×38mm, 2.8V, 1.7 A/Phase
For other options, you can take a look at our full selection of stepper motors.
Related products


New product: Hydra Smart DC Power Supply
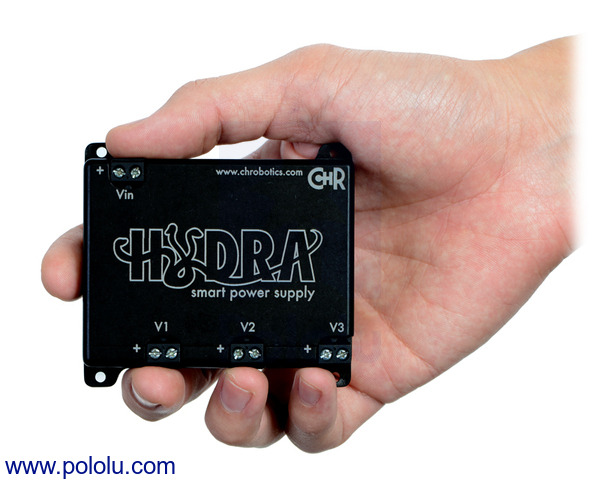 |
The Hydra is a triple-output power converter from CH Robotics designed to make it easier to get the power you need for your next project. The Hydra can quickly give you access to three independent, software-configurable DC output voltages to power your system. The easy-to-use Smart Power Supply Control Software makes it quick and simple to configure and control the Hydra’s outputs from your computer via USB. Bench-top power supplies can be large and bulky, but the Hydra fits in the palm of your hand and can also be configured from a user-programmable microcontroller via serial. This flexibility makes the Hydra a great fit for a large variety of projects, whether you are building an industrial system or a small mobile robot.
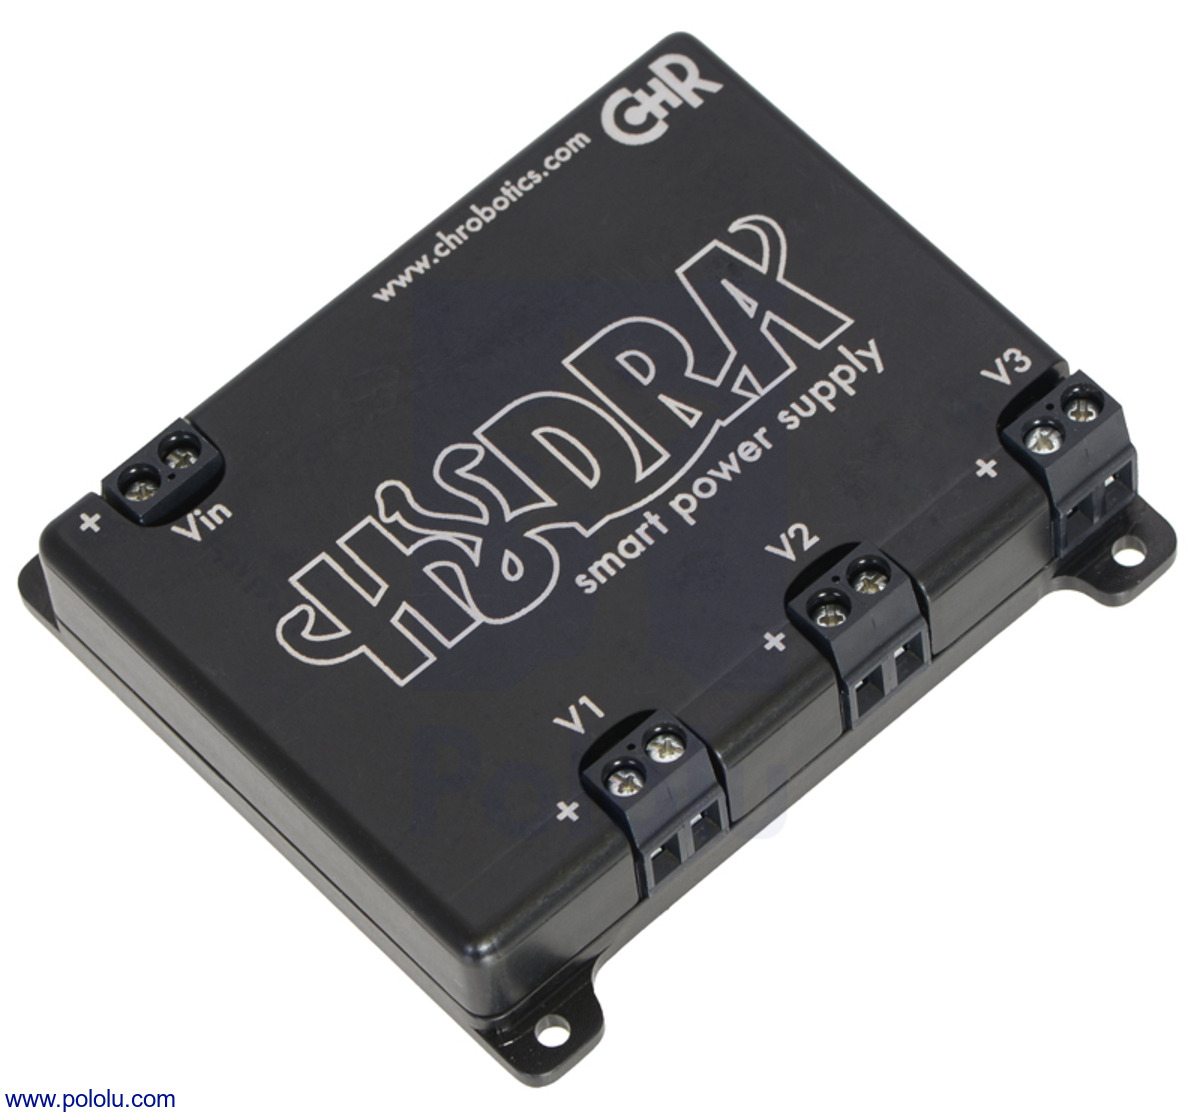 |
For more information, see the Hydra product page.
Related products

New products: Universal mounting hubs for 1/4″ shafts
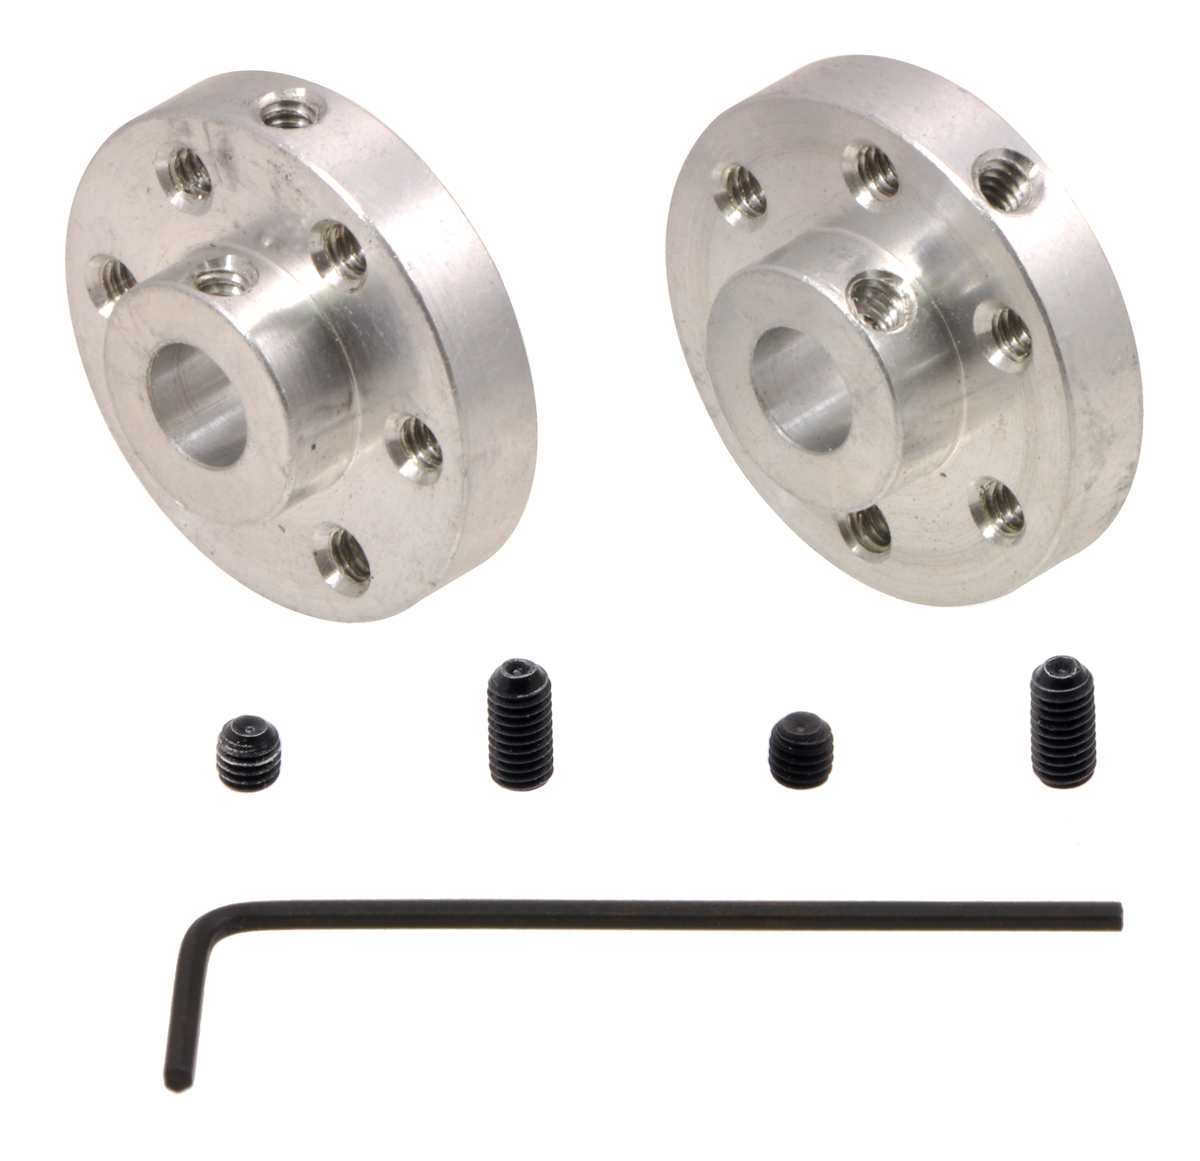 |
Are you having trouble mounting things to 1/4″ motor shafts? These new versions of our universal mounting hubs fit most 1/4″ shafts, including round and “D” shafts. Similar to our existing universal mounting hubs for 6 mm shafts, these hubs are sold in packs of two and come with two set screws each (4 total) and the appropriate Allen wrench. These new hubs are compatible with our NEMA 23 stepper motors and come in two different versions: the Universal Aluminum Mounting Hub for 1/4″ shaft, with #4-40 mounting holes or the Universal Aluminum Mounting Hub for 1/4″ shaft, with M3 mounting holes.
Related products

Controlling a Maestro in C using a Raspberry Pi
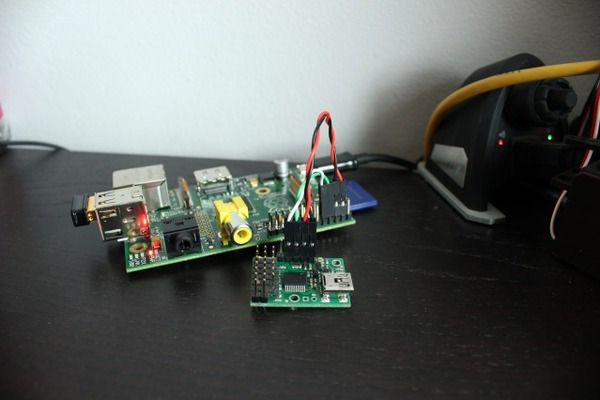 |
Shahmir Javaid tweeted about a tutorial he wrote that describes how he used a Raspberry Pi to control a Maestro servo controller in C. His tutorial documents the steps he took, including setting up the Raspberry Pi for UART, wiring, and programming. The setup is simple, and the code is provided.
Featured link: http://shahmirj.com/blog/raspberry-pi-and-pololu-servo-controller-using-c


Home | Forum | Blog | Support | Ordering Information | Lists | Distributors | BIG Order Form | About | Contact
© 2001–2026 Pololu Corporation


