Electronics » Motion Control Modules » Stepper Motor Drivers »
AMIS-30543 Stepper Motor Driver Carrier
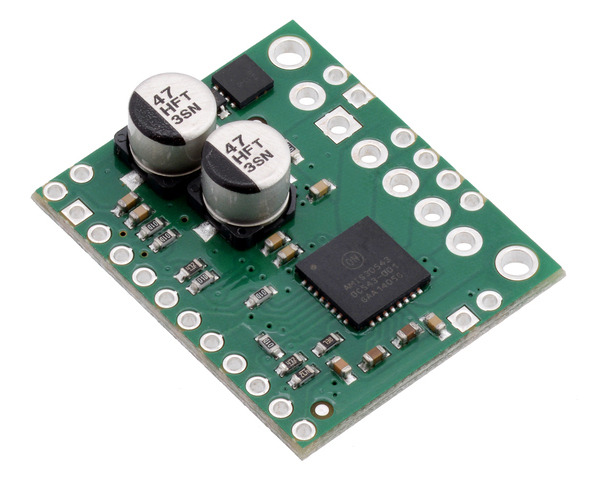
This is a breakout board for ON Semiconductor’s AMIS-30543 microstepping bipolar stepper motor driver, which features SPI-adjustable current limiting, 11 step modes (from full-step through 1/128-step), back-EMF feedback that can be used for stall detection or optional closed-loop control, and over-current and over-temperature protection. The board operates from 6 V to 30 V and can deliver up to approximately 1.8 A per phase without a heat sink or forced air flow (it is rated for 3 A per coil with sufficient additional cooling).
| Description | Specs (12) | Pictures (12) | Resources (8) | FAQs (4) | On the blog (1) | Distributors (45) |
|---|
- I want to control a 3.9 V, 600 mA bipolar stepper motor, but this driver has a minimum operating voltage above 3.9 V. Can I use this driver without damaging the stepper motor?
Yes. To avoid damaging your stepper motor, you want to avoid exceeding the rated current, which is 600 mA in this instance. All of our stepper motor drivers let you limit the maximum current, so as long as you set the limit below the rated current, you will be within spec for your motor, even if the voltage exceeds the rated voltage. The voltage rating is just the voltage at which each coil draws the rated current, so the coils of your stepper motor will draw 600 mA at 3.9 V. By using a higher voltage along with active current limiting, the current is able to ramp up faster, which lets you achieve higher step rates than you could using the rated voltage.
If you do want to use a lower motor supply voltage for other reasons, consider using our DRV8834 or STSPIN-220 low-voltage stepper motor drivers.
- Do I really need to set the current limit on my stepper motor driver before using it, and if so, how do I do it?
Yes, you do! Setting the current limit on your stepper motor driver carrier is essential to making sure that it runs properly. An appropriate current limit also ensures that your motor is not allowed to draw more current than it or your driver can handle, since that is likely to damage one or both of them.
Setting the current limit on our AMIS-30543 stepper motor driver carrier is done through its SPI interface (this is very different from our A4988, DRV8825, DRV8824, DRV8834, DRV8880, and TB67S249FTG stepper motor driver carriers, which have their current limits set through their on-board potentiometers). The AMIS-30543 defaults to its lowest possible current limit (132 mA) when it is first enabled; you will need to set this to an appropriate value for your stepper motor before your system will work properly. The AMIS-30543 data sheet (495k pdf) has more information on how to set the current limit through the SPI interface, and our AMIS-30543 Arduino library includes an example sketch showing how to implement this in software.
- My AMIS-30543 stepper motor driver is overheating, but my power supply shows it’s drawing significantly less than 1.8 A per coil. What gives?
Measuring the current draw at the power supply does not necessarily provide an accurate measure of the coil current. Since the input voltage to the driver can be significantly higher than the coil voltage, the measured current on the power supply can be quite a bit lower than the coil current (the driver and coil basically act like a switching step-down power supply). Also, if the supply voltage is very high compared to what the motor needs to achieve the set current, the duty cycle will be very low, which also leads to significant differences between average and RMS currents: RMS current is what is relevant for power dissipation in the chip but many power supplies won’t show that. You should base your assessment of the coil current on what the limit has been set to (through the SPI interface) or by measuring the actual coil currents.
While the AMIS-30543 driver IC is rated for up to 3 A (peak) per coil, the chip by itself will overheat at lower currents. We have found that it generally requires a heat sink to deliver more than approximately 1.8 A per coil, but this number depends on factors such as ambient temperature and air flow. For example, sealing three driver carriers in close proximity in a small box will cause them to overheat at lower currents than a unit by itself in open air. It is worth noting that it is possible to use the SPI-configurable current limit to selectively deliver higher currents for short durations without overheating the driver.
- How do I connect my stepper motor to a bipolar stepper motor driver?
- The answer to this question depends on the type of your stepper motor and how many wires it has. We have an application note that details possible methods for connecting stepper motors to bipolar drivers and controllers and the advantages and disadvantages of each option.


