Support » Pololu Romi Chassis User’s Guide »
6. Dimensions and mounting holes
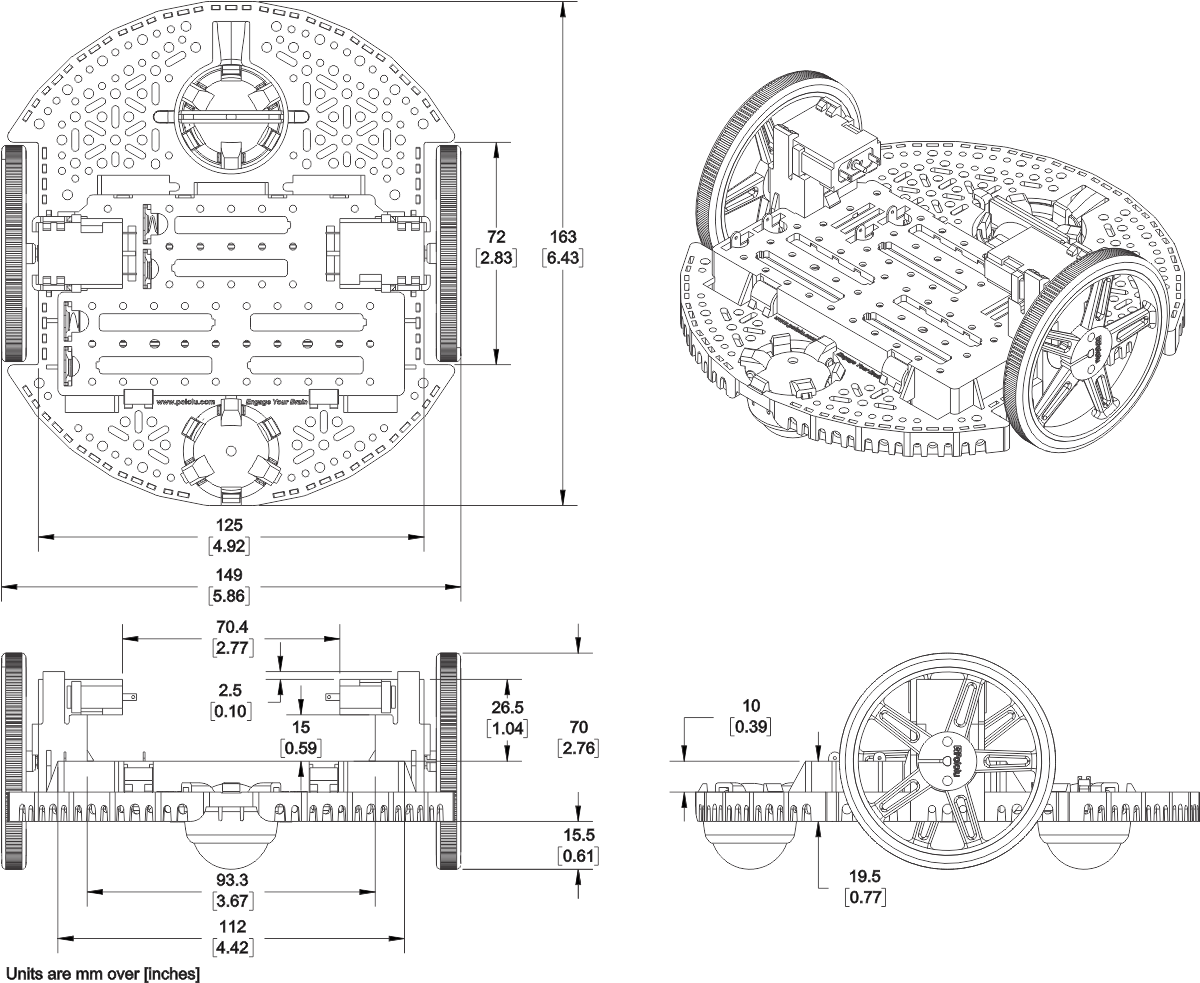
One of the features of the Romi chassis that makes it a great choice for a general purpose robotics platform is the multitude of mounting holes located all around the chassis. The mounting holes and slots are intended for various sizes of screws (not included) such as #2-56, #4-40, M2, and M3. Some of the key dimensions of the mounting holes are shown in the dimension diagram below, and additional dimensions can be found in the DXF file of the chassis (9MB dxf). An actual-size view of the top of the Romi chassis (115k pdf) is also available; just print it at 100% scale to make a template showing where all of the general-purpose mounting holes and slots are.
 |
 |
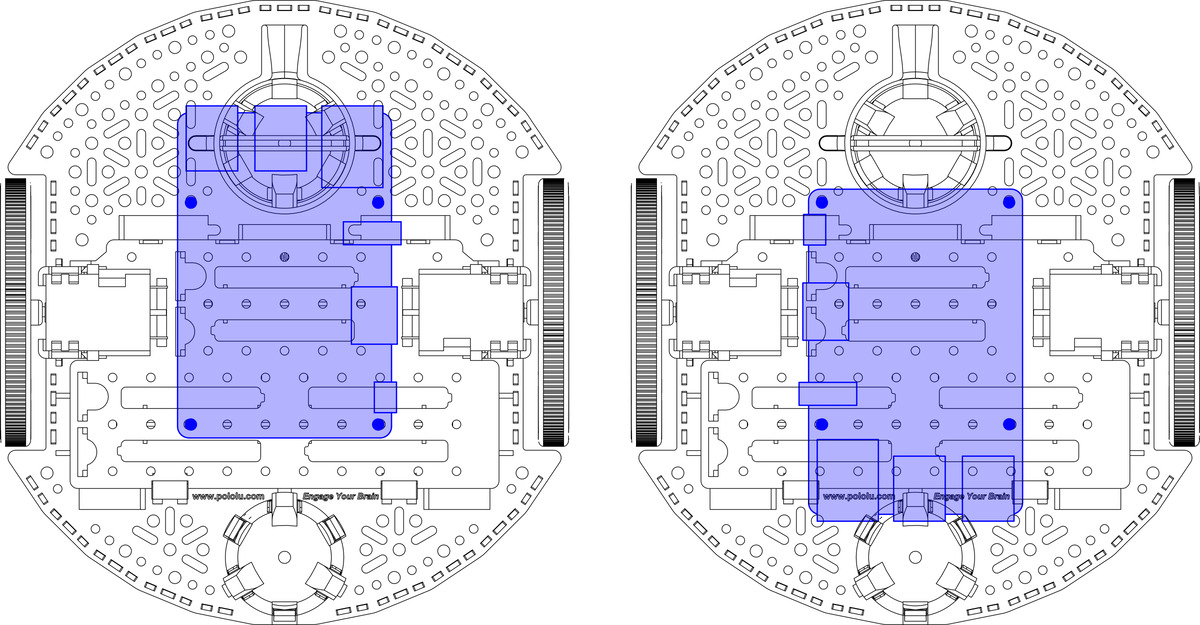
Mounting holes for the common Arduino form factor
The diagram below shows the mounting holes intended for electronics that use a common Arduino form factor, including the Arduino Uno R3 and A-Star 32U4 Prime.
 |
Please note that the two mounting holes indicated above are on two surfaces of differing heights. The top of the battery box sits 10 mm higher than the round base. One way to compensate for this is to use spacers. In particular, a 10 mm spacer can match the battery box height, then 4 mm or 6 mm spacers can raise the electronics enough to make room for components that protrude below the bottom surface of the PCB.
If you are using an Arduino for controlling the Romi, you might consider our DRV8835 Dual Motor Driver Shield for Arduino.
Mounting holes for the Raspberry Pi
The Romi chassis also has mounting holes intended for use with a Raspberry Pi. These holes support the form factor and mounting hole locations used on the Raspberry Pi A+, Raspberry Pi B+, Raspberry Pi 2 Model B, and Raspberry Pi 3 Model B. Additionally, our A-Star 32U4 Robot Controller with Raspberry Pi Bridge (which is an Arduino-compatible programmable module designed to be an auxiliary controller atop a Raspberry Pi or a stand-alone control solution on its own) has mounting hole locations as these Raspberry Pi boards.
 |
Similarly to the Romi mounting holes used for the Arduino, the mounting holes used for the Raspberry Pi are also on surfaces of two different heights. As mentioned above, a few spacers can be used to raise the board to an appropriate height. However, when using a Raspberry Pi, it can be beneficial to raise the board even more, enough to allow access to the HDMI port by simply removing a motor from a motor clip. To do this, the Raspberry Pi should be raised about 15 mm above the top of the battery box. This can be accomplished with two 25 mm spacers for the front mounting holes and two 15 mm spacers for the rear ones. Please note that using such long spacers will require some uncommonly long #2-56 or M2.5 screws.
An alternative solution is to use some of our 11 mm aluminum standoffs for the Raspberry Pi, which is especially helpful when using a Raspberry Pi HAT or expansion board since the same standoff can be used to mount that board to the Raspberry Pi. Stacking two of the 11 mm standoffs for the front mounting holes can help compensate for the longer distance; however, to reach the height previously mentioned to access the HMDI port through the motor clip, you will need to use some nuts or washers for the extra few millimeters as shown below:
 |
If you are using a Raspberry Pi for controlling the Romi, you might consider our DRV8835 Dual Motor Driver Kit for Raspberry Pi, the A-Star 32U4 Robot Controller with Raspberry Pi Bridge, or one of our other Raspberry Pi Expansion Boards.


Home | Forum | Blog | Support | Ordering Information | Lists | Distributors | BIG Order Form | About | Contact
© 2001–2026 Pololu Corporation
