Pololu Blog »
Jeremy's line following robot: Zumo Slim
 |
I recently competed in the LVbots line following robot challenge, where I took third place with the fourth fastest robot (due to lucky placement in the bracket). This was my second line following competition. I learned some valuable lessons from my first competition, such as bigger motors are not always good for going faster, so I focused my build on making a lightweight robot this time.
Design
 |
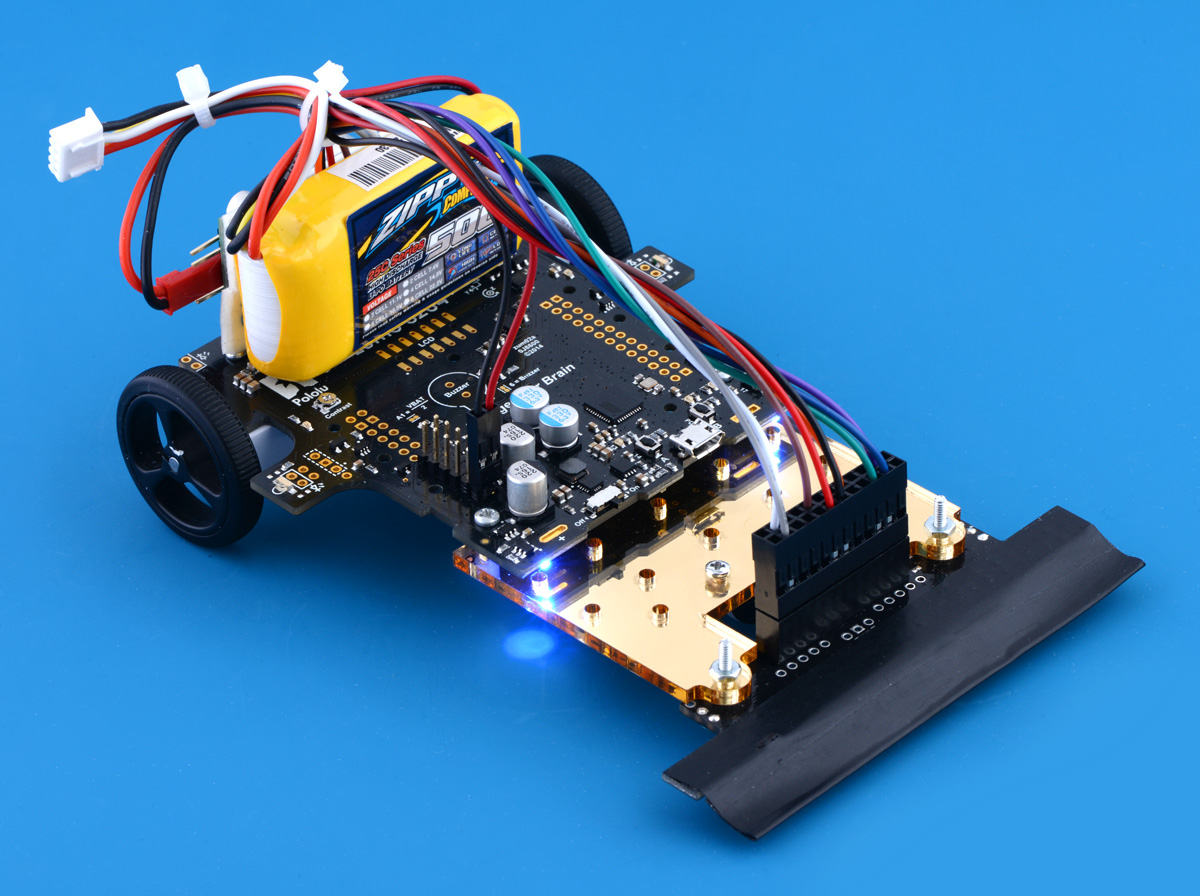
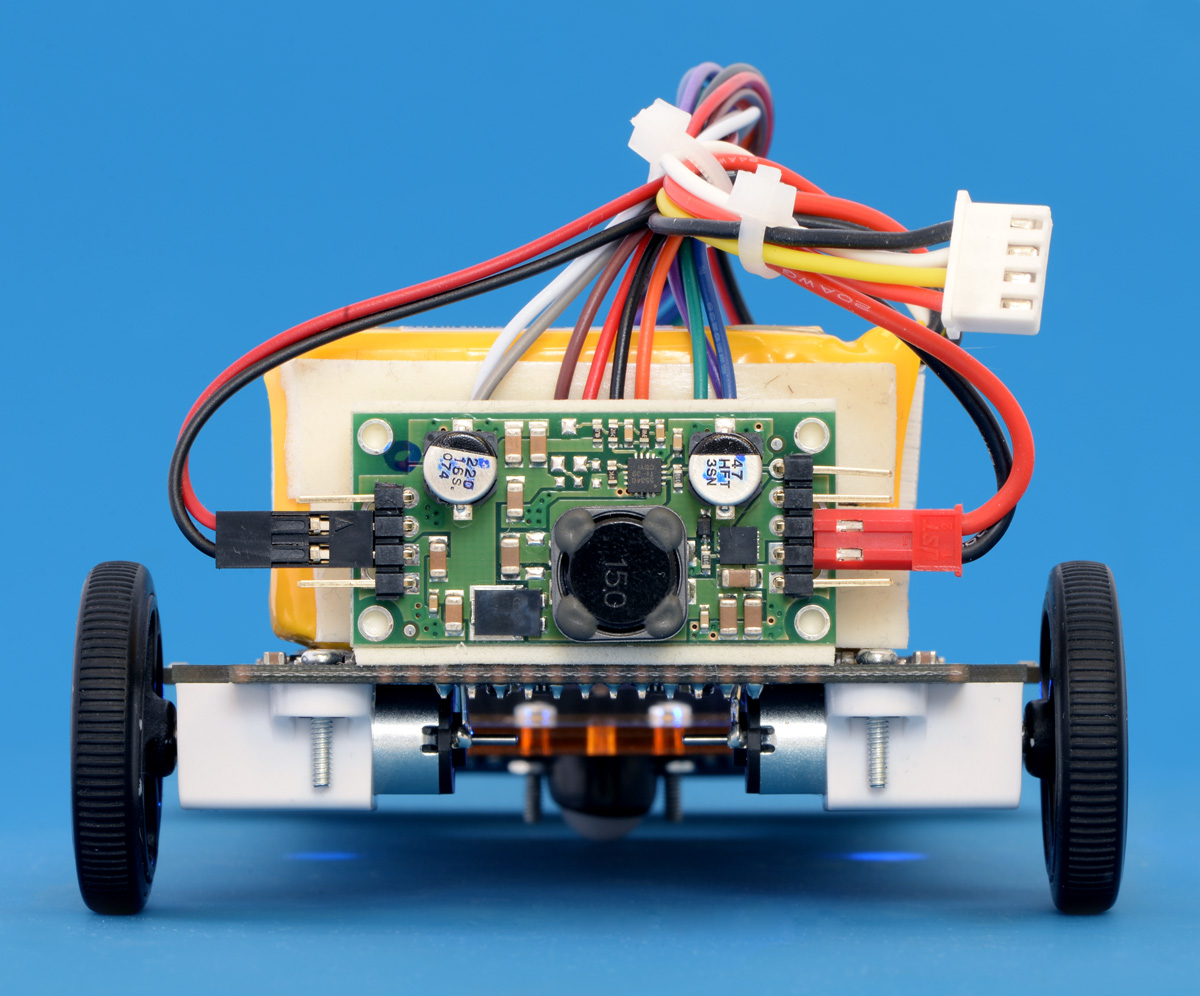
Front view of Zumo Slim. |
|---|
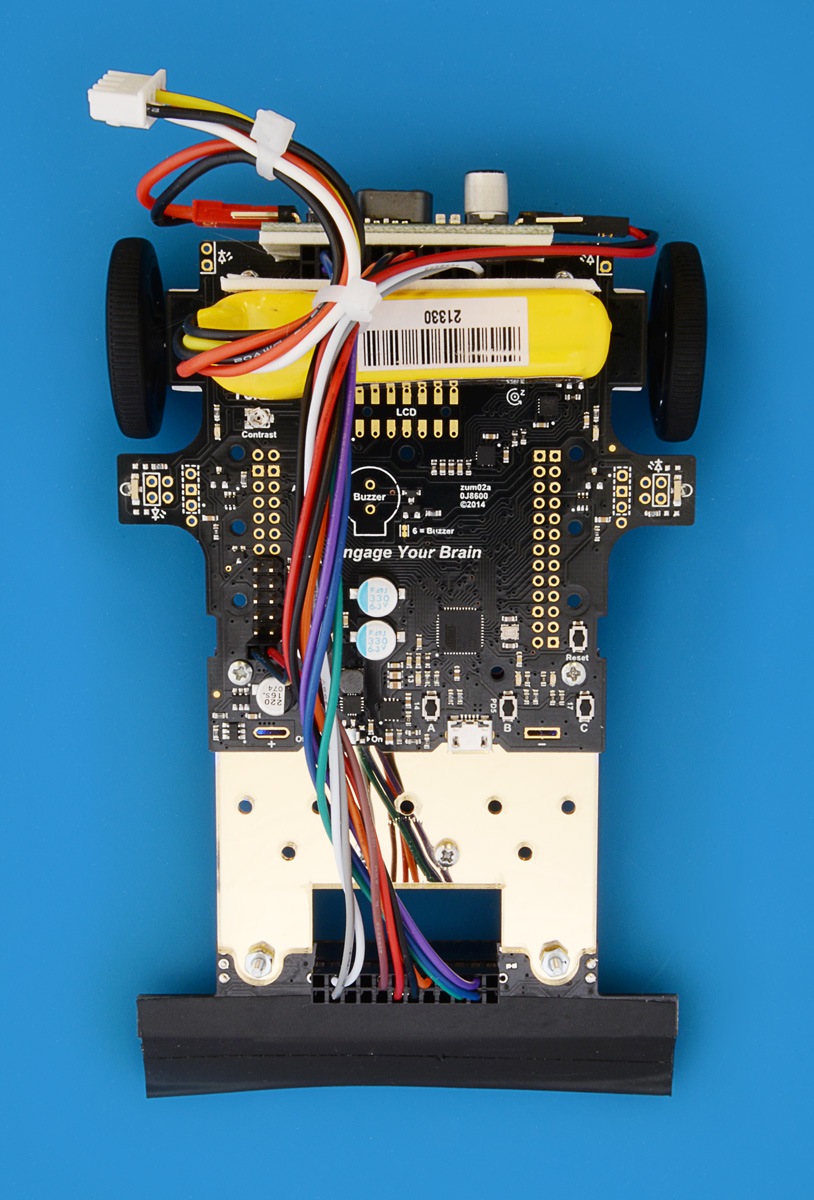
To minimize weight, I planned to not have a chassis to carry all my components (unlike most of my competition). I was planning on building a custom PCB that would have a microcontroller and motor drivers and allow for micro metal gearmotors to mount directly onto it; however, I noticed that the PCB for the new Zumo 32U4 I had in my office had all these components on it (and more), and one of the holes on the extended version of the micro metal gearmotor bracket fit perfectly (see bottom side photo). Instead of designing and waiting for the custom PCB for weeks, I was able to build my robot in just a few hours.
|
|
Along with keeping my robot as light as possible, I positioned most of the weight over the 32 mm wheels to minimize the moment of inertia of the robot. In theory, this should have allowed for the robot to turn the corners faster; however, in practice, my robot seemed to like to overshoot the corners quite a bit. I chose the medium-power 10:1 micro metal gearmotors with extended motor shafts for driving my robot. They have 3 oz-in of torque at 6 V, which is lower than the torque of the motors used on the 3pi (4 oz-in at 6 V), but I figured my robot was lighter and would be capable of higher speeds.
 |
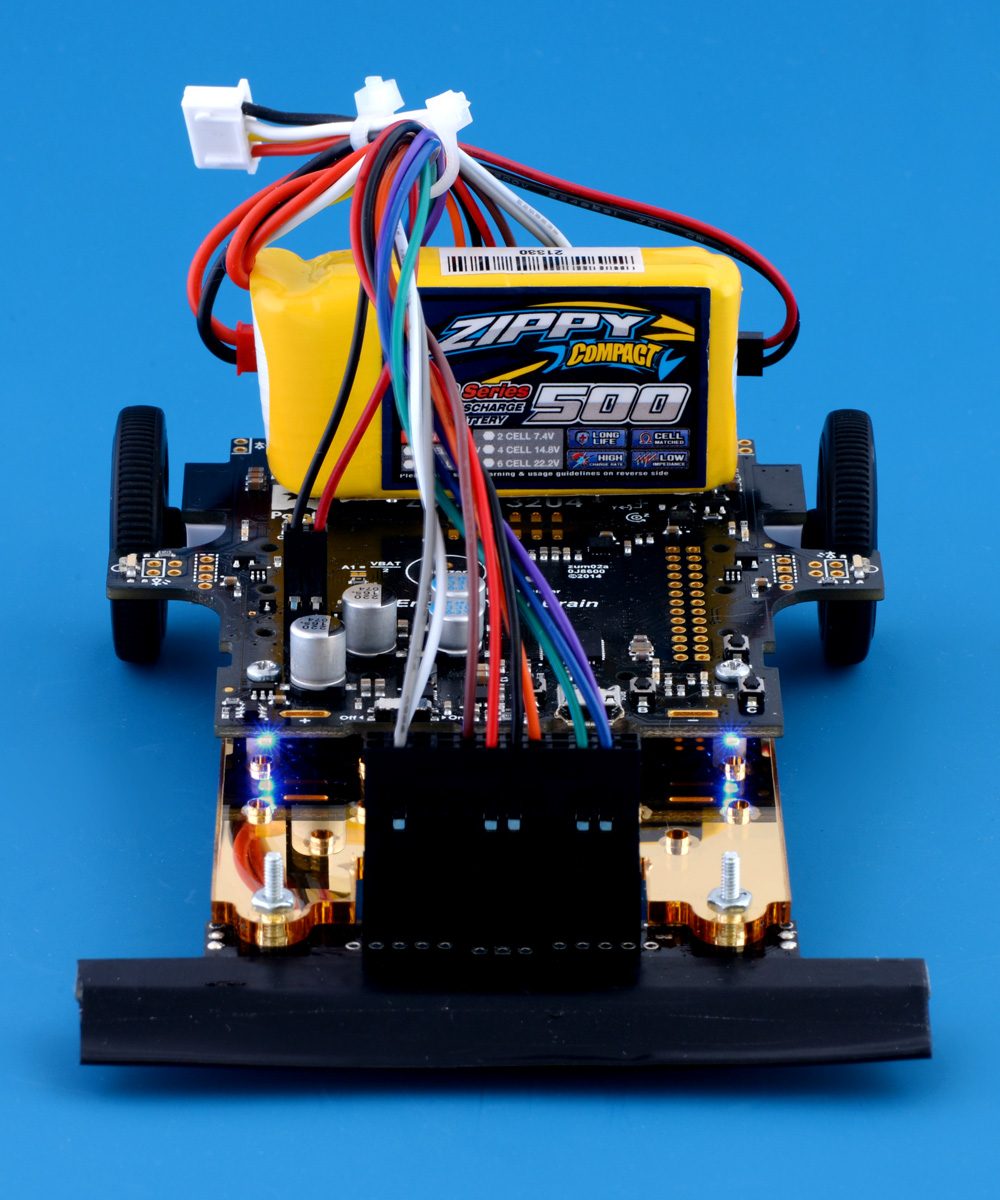
Side view of Zumo Slim. |
|---|
Early in my tuning process, I decided to add a regulator to the robot so performance would stay consistent even as my LiPo battery drained. Since I was constantly swapping between 2S and 3S LiPo batteries, I decided to use the S18V20F9 9V step-up/step-down regulator in my setup to accommodate the wide input voltage range.
 |
Back view of Zumo Slim. |
|---|
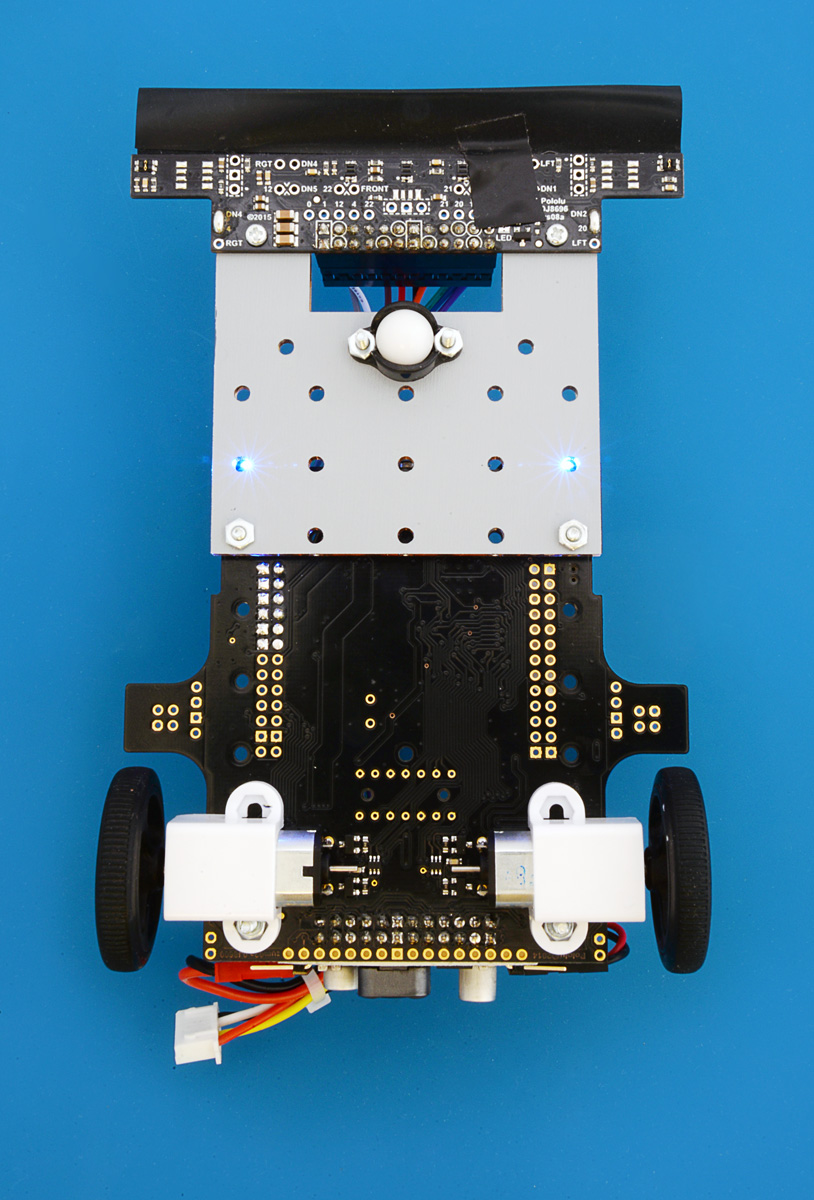
I initially used the 1/16″ acrylic mounting plate that comes with the Zumo chassis kit to mount the Zumo 32U4 front sensor array, but after I got my robot to follow the line well, I modified the DXF file for the mounting plate (the design file is available under the “Resources” tab on the Zumo chassis kit’s product page) to make a custom one in gold mirrored acrylic so it matched my robot’s black and gold theme. I used our wires with pre-crimped terminals with various crimp connector housings to make all my connections. The wire harness that connects the front sensor array to the rest of the board doubled as a handle and made it easy to catch the robot when it decided to go off course and run away.
Looking forward
As I mentioned earlier, I used medium-power 10:1 micro metal gearmotors with extended motor shafts for driving Zumo Slim. I plan to add magnetic encoder discs to the motor shafts, which should allow for the robot to map its path for dead reckoning or learn the line (David’s line following robot used this feature to go faster during the second and third laps of each match).
Related products


-

New distributors in Turkey
- 11 May 2015We have not been keeping up with announcing our new distributors on the blog, and I will be trying to catch up over the next week or two. To start...
-
New 0.1″ male header strips
- 20 May 2015Make your next project more colorful with our new red, white, blue, and yellow breakaway male header strips. You can use them to add some personal...
3 comments


We noticed that you asked similar questions on a few of these line-follower blog posts; we do not have all of these line following robots accessible anymore to measure them, but they all use a similar strategy with the motors in the rear and the line sensor extended toward the front.
The ideal distance between the ground and the sensor depends on the specific sensor you are using. We list the "Optimal sensing distance" for our QTR reflectance sensors on their respective product pages.
As far as the algorithm, most of our line following robots have used PID control. You can find a good breakdown of how this works from the "Example Project #1: Line Following" section from our 3pi Robot's user's guide.
If you are looking for more advice or have more questions about using our parts in a line following robot, I recommend posting a request for help on our forum.
Brandon
Post a comment


Home | Forum | Blog | Support | Ordering Information | Lists | Distributors | BIG Order Form | About | Contact
© 2001–2026 Pololu Corporation
