Support »
Custom Laser Cutting Guide
View document on multiple pages.
- 1. Capabilities
- 2. Pricing
- 3. Limitations and issues to consider
- 4. File set up instructions
- 5. Materials
- 6. UV printing
1. Capabilities
With our custom laser cutting service, you can create custom parts for a variety of projects!
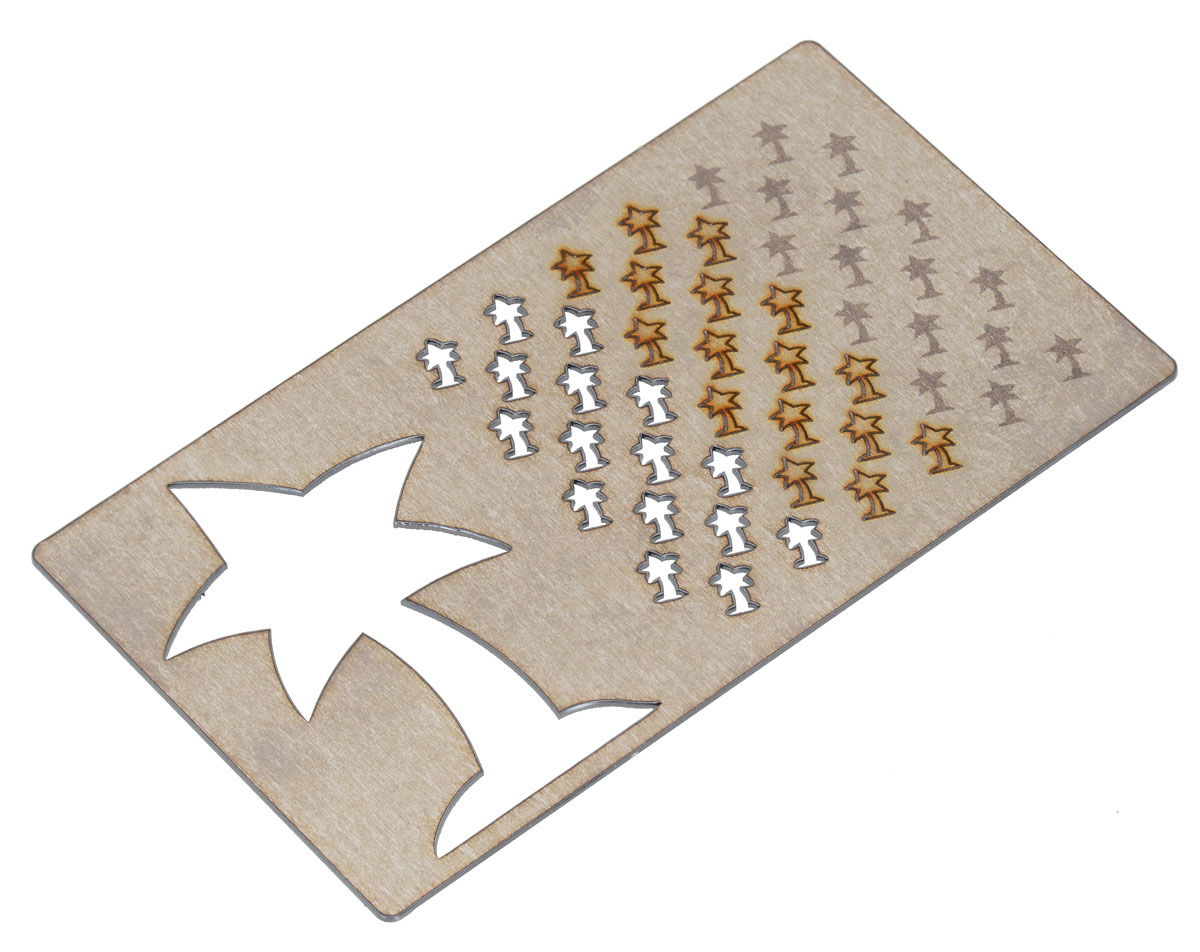
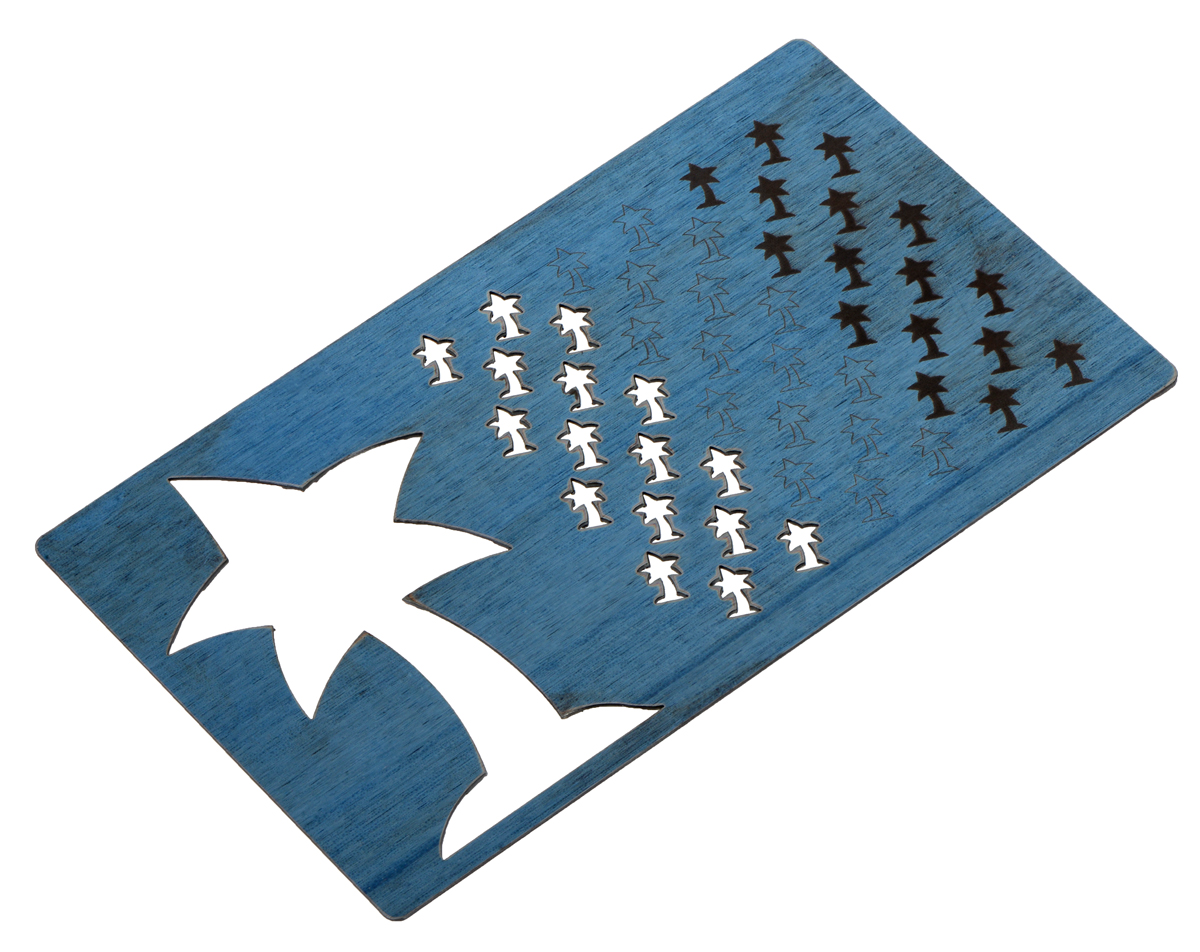
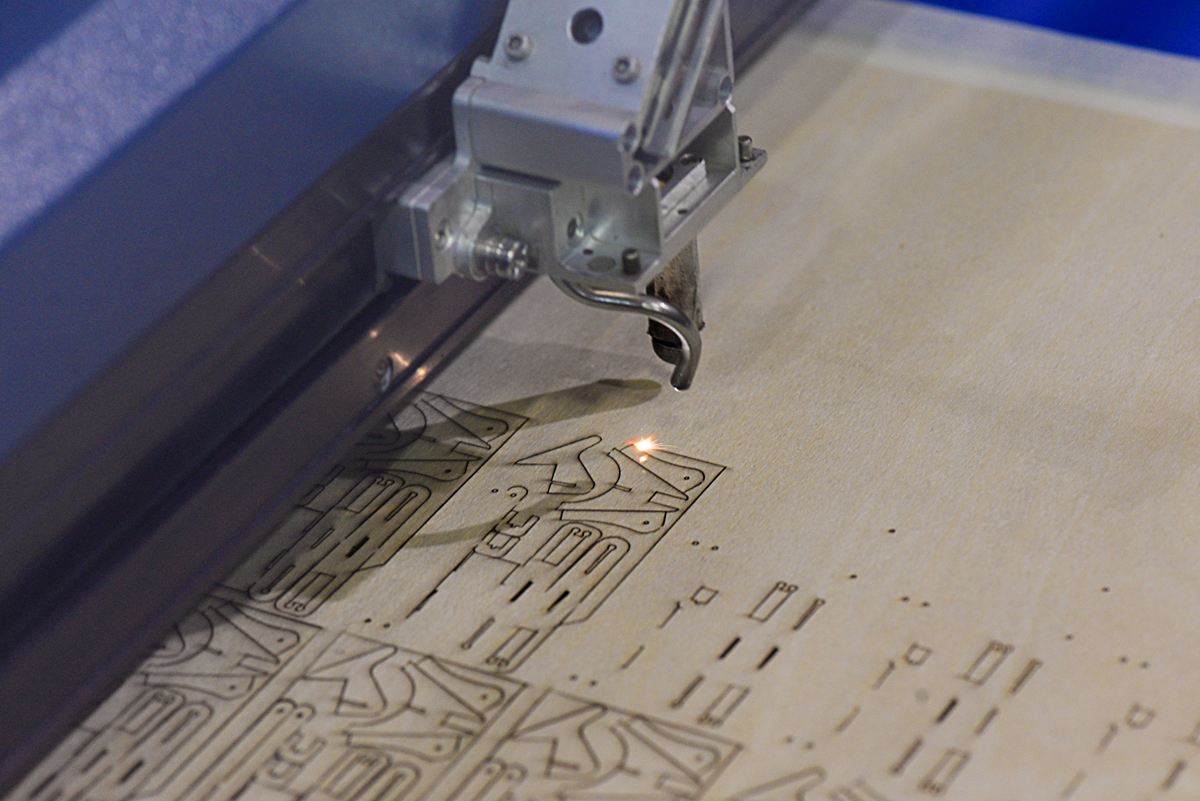 |
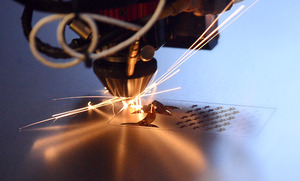
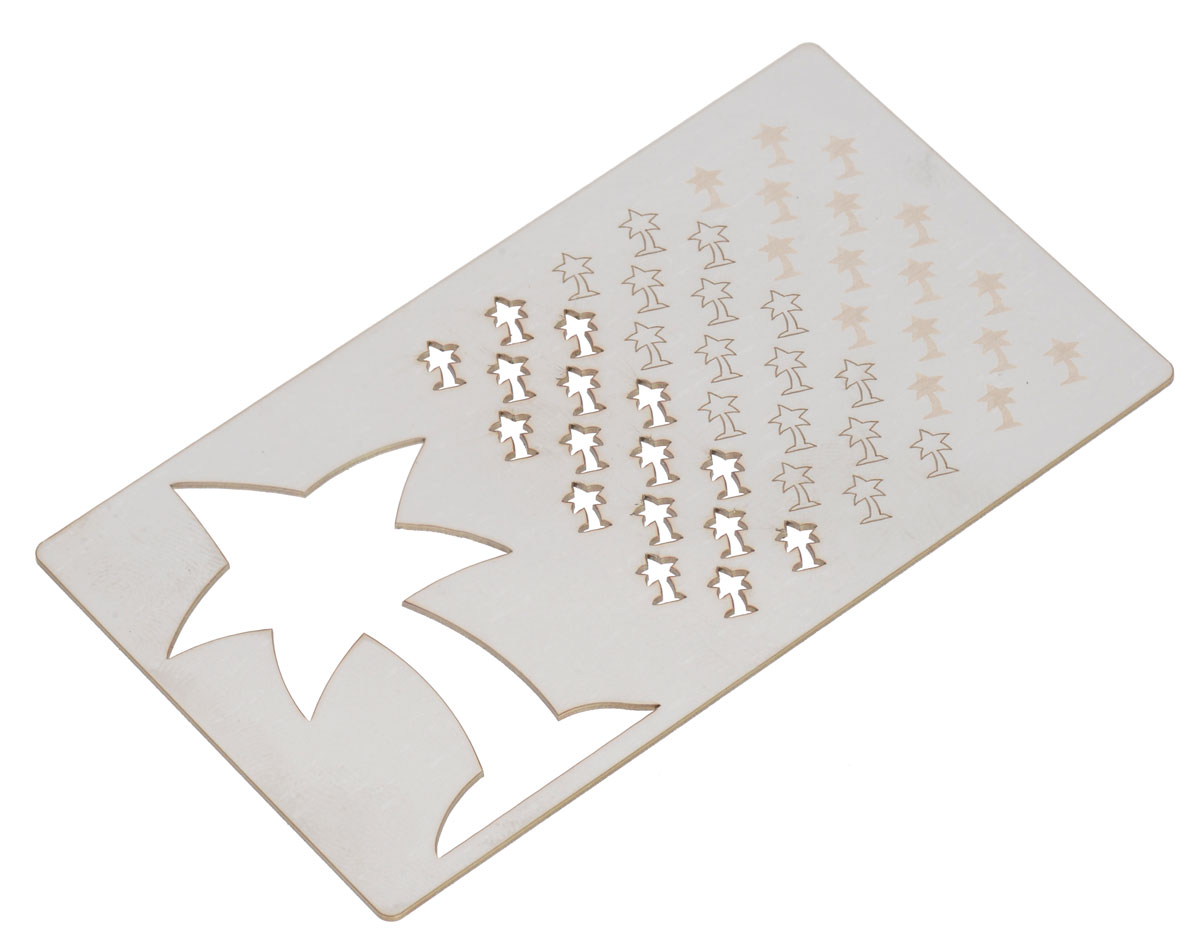
Custom laser cutting of thin plywood. |
|---|
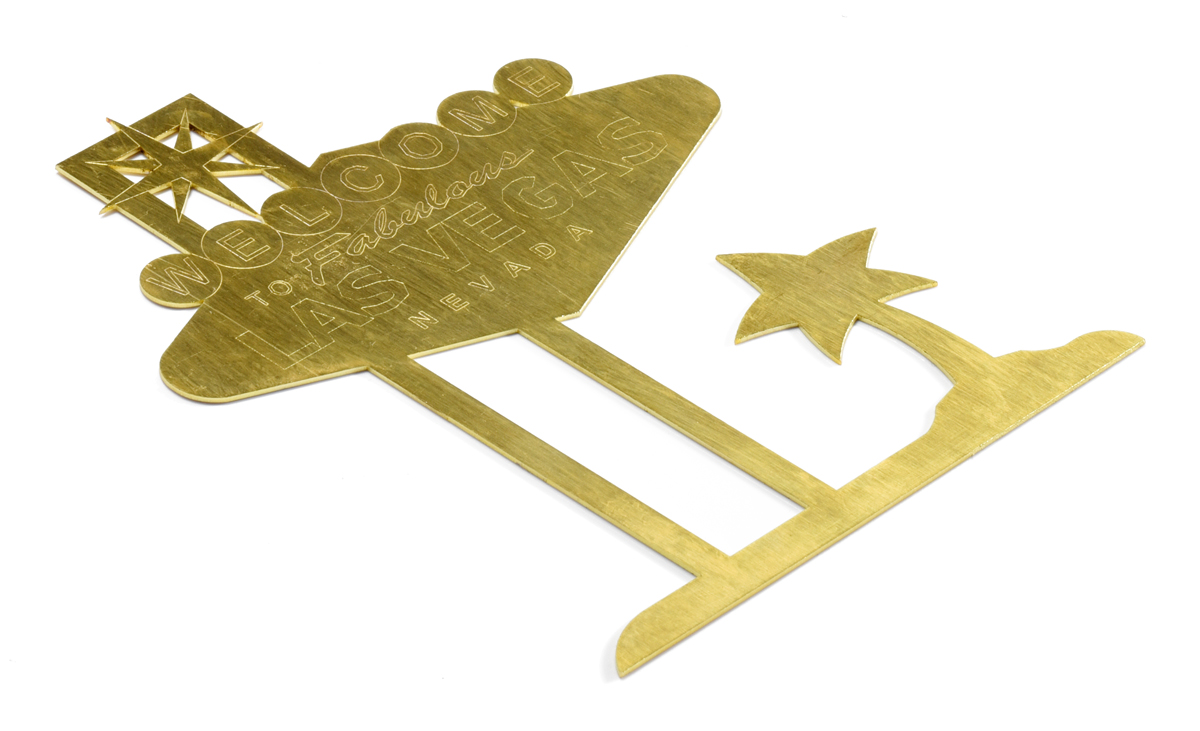
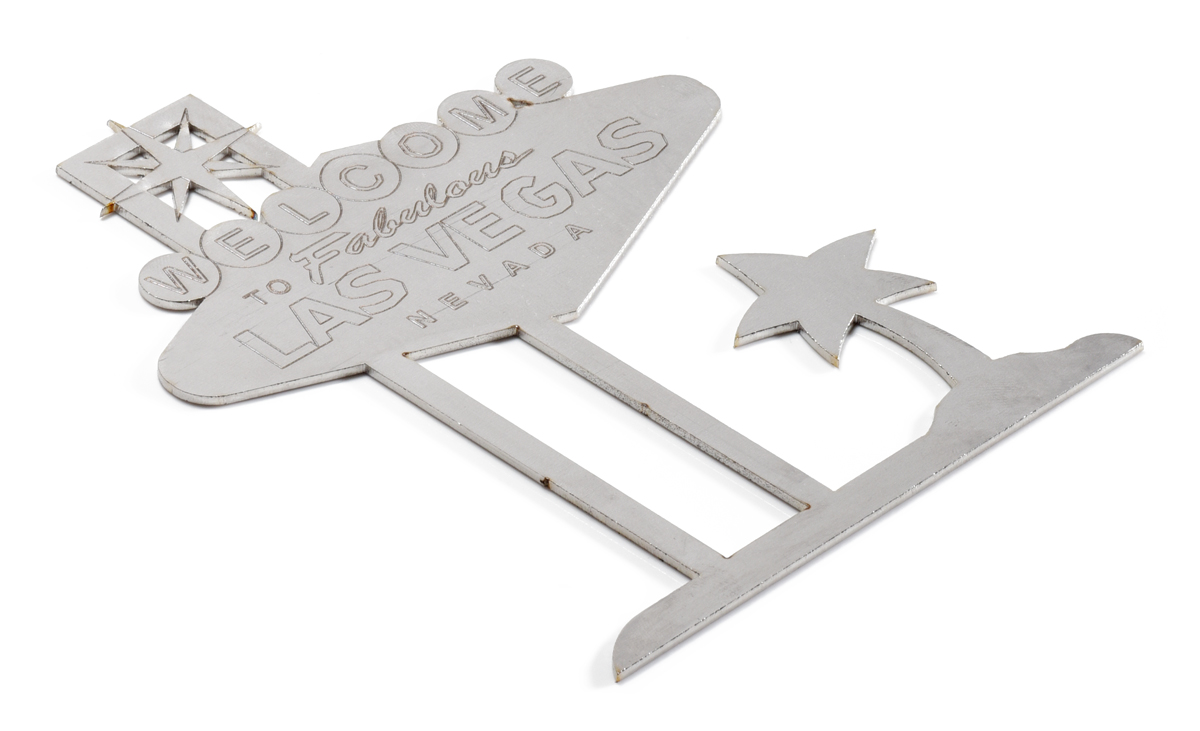
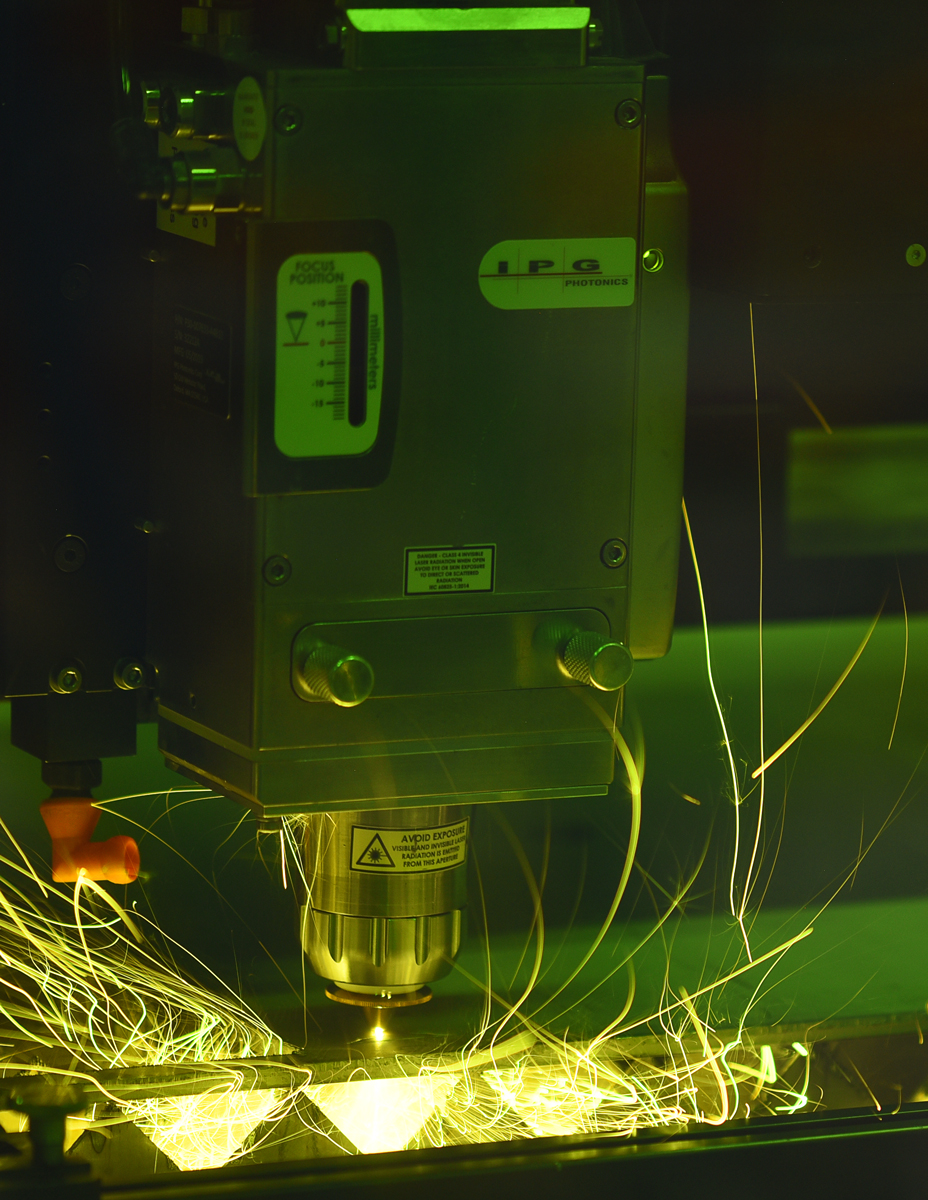 |
LaserCube cutting 1/4″ mild steel. |
|---|
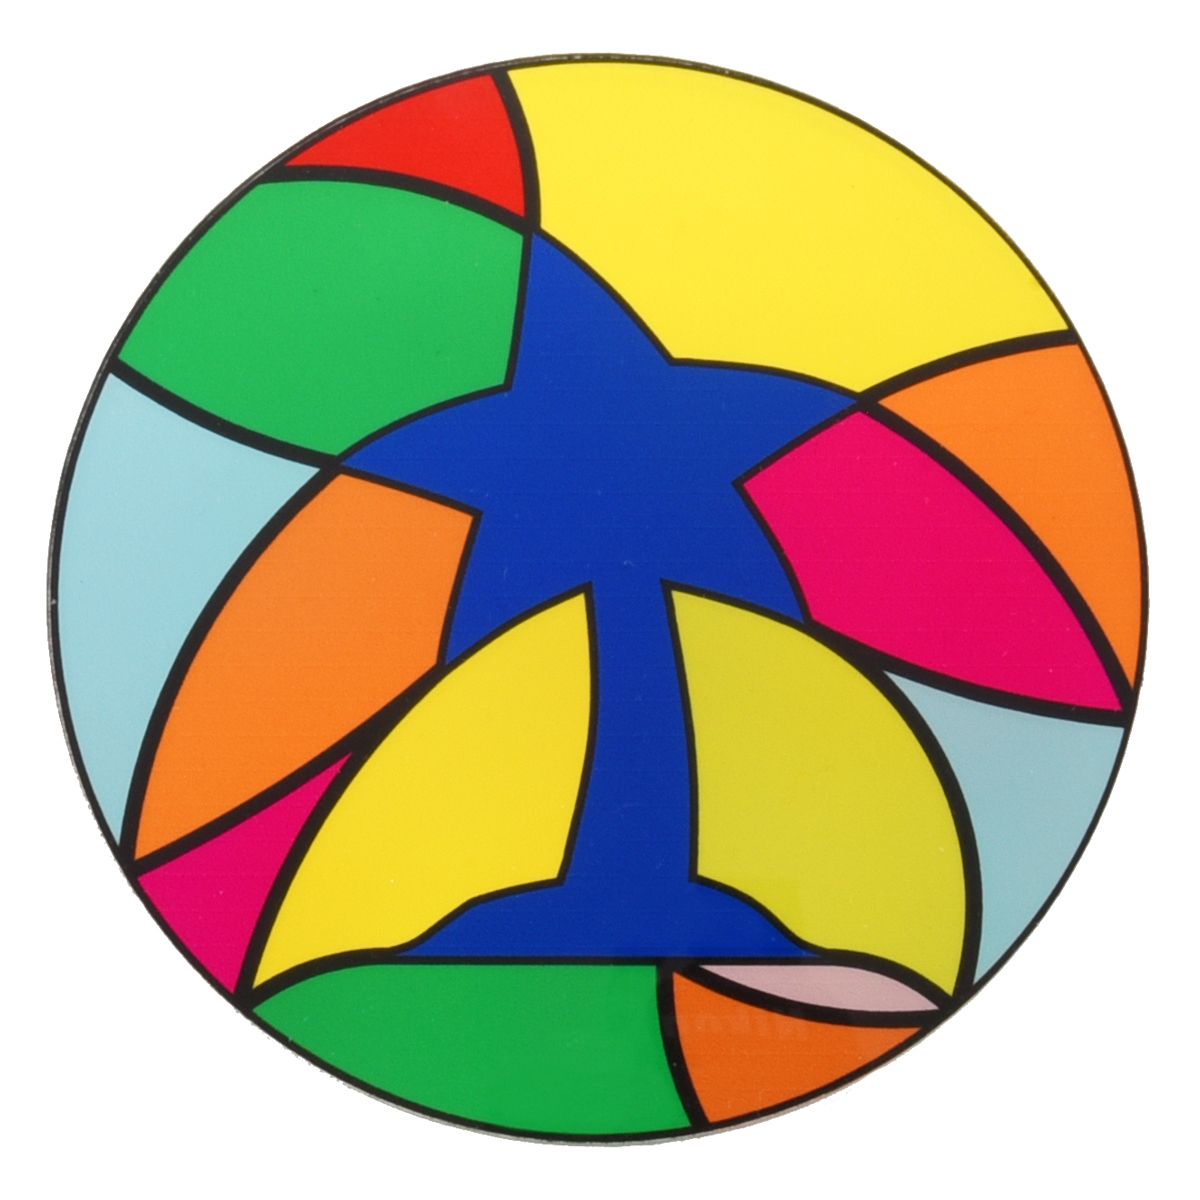 |
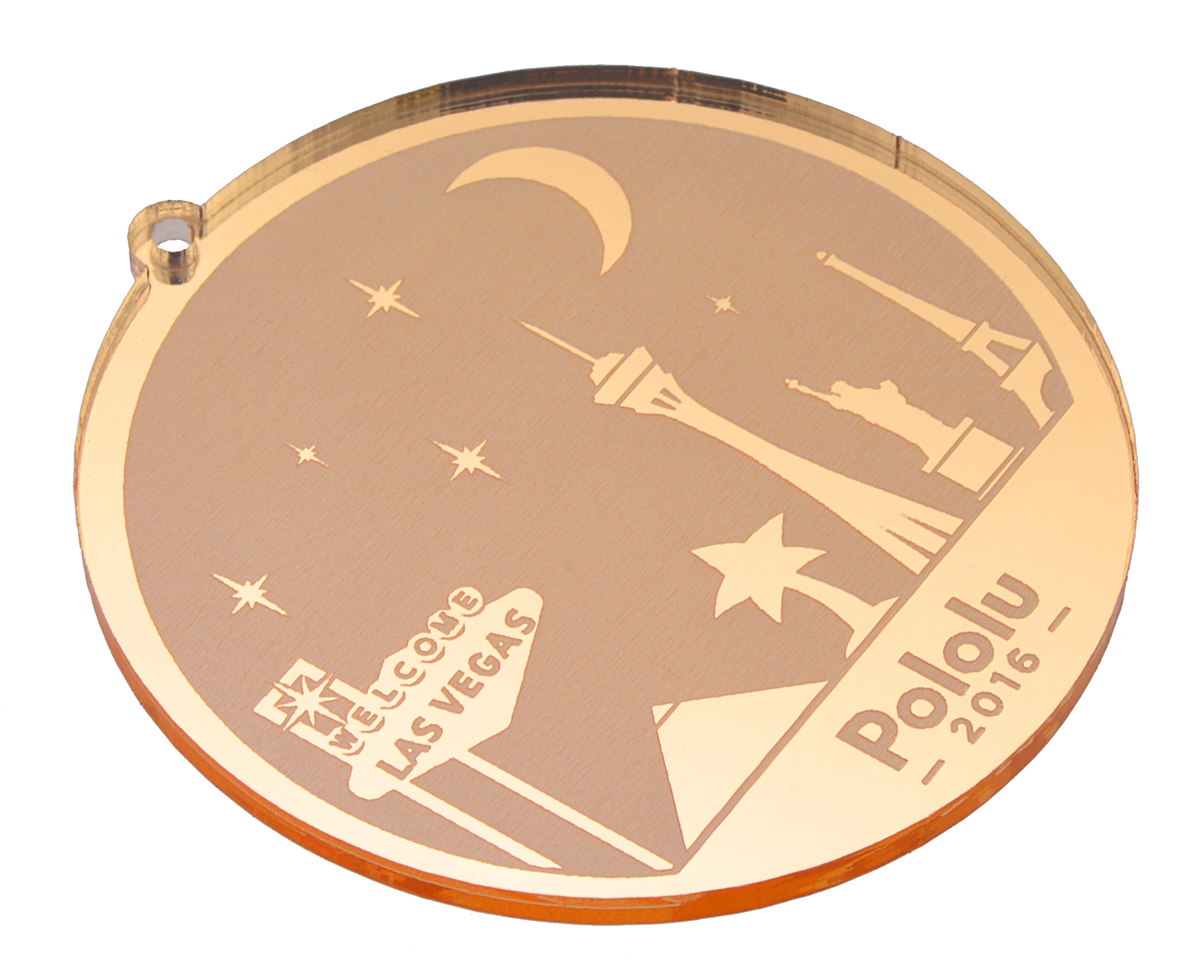
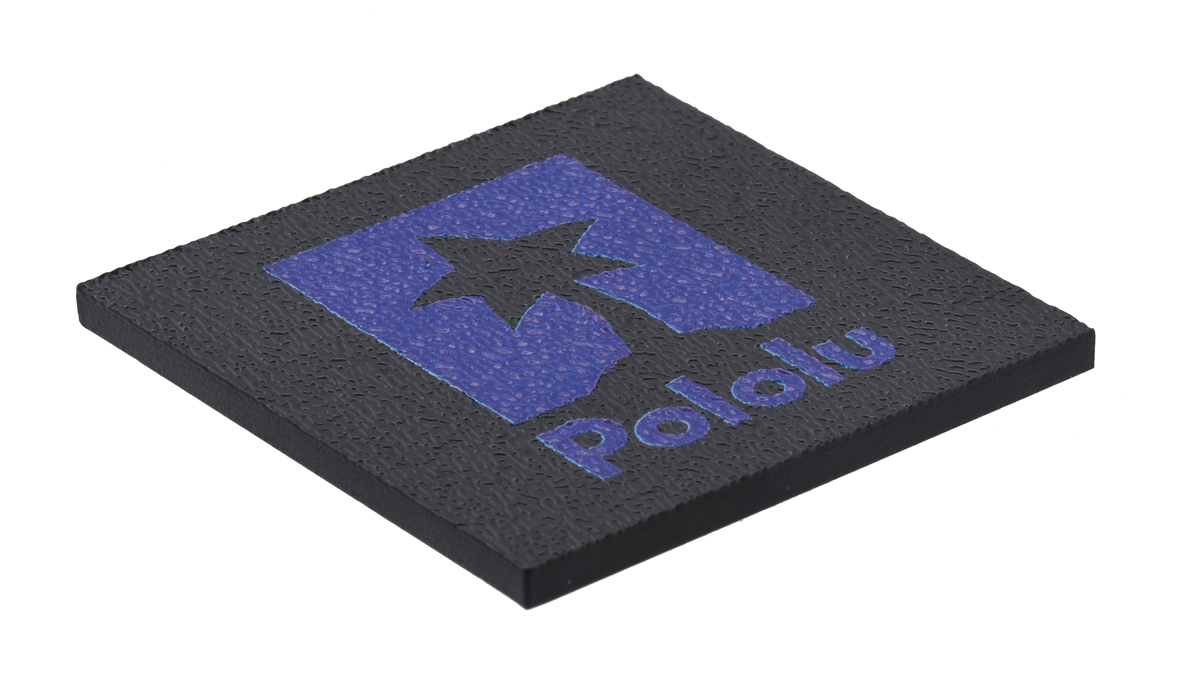
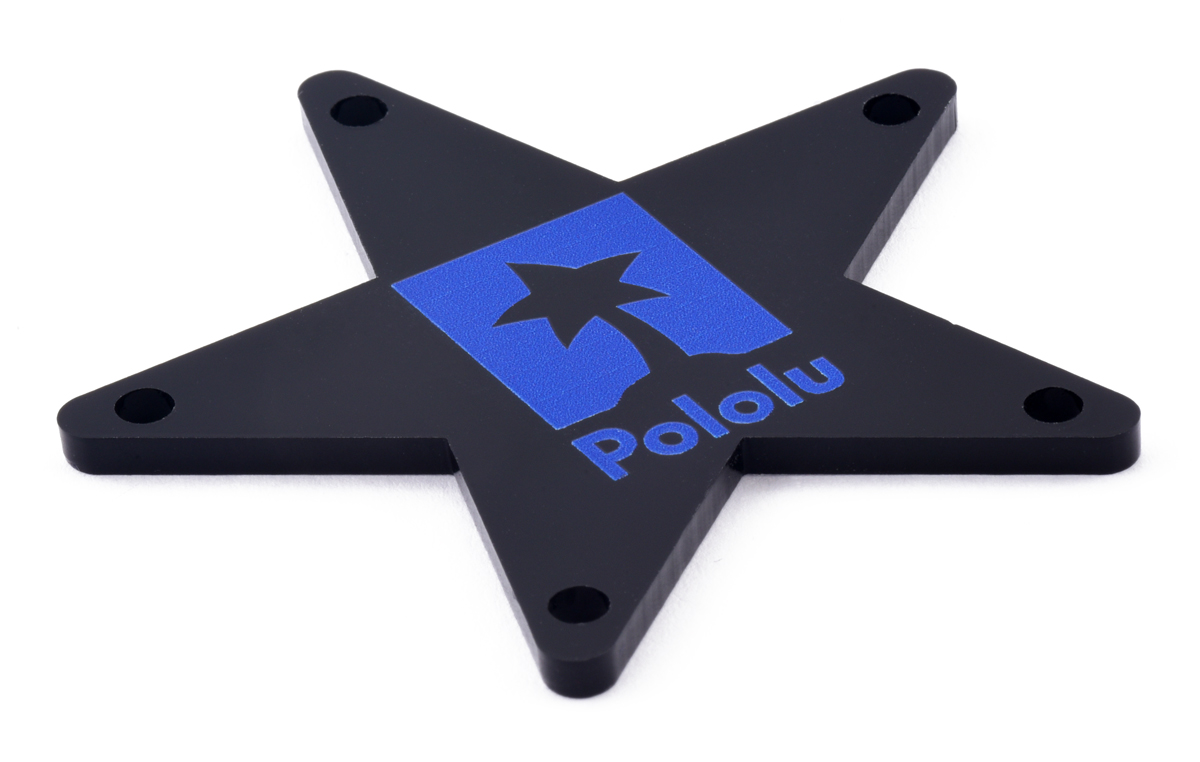
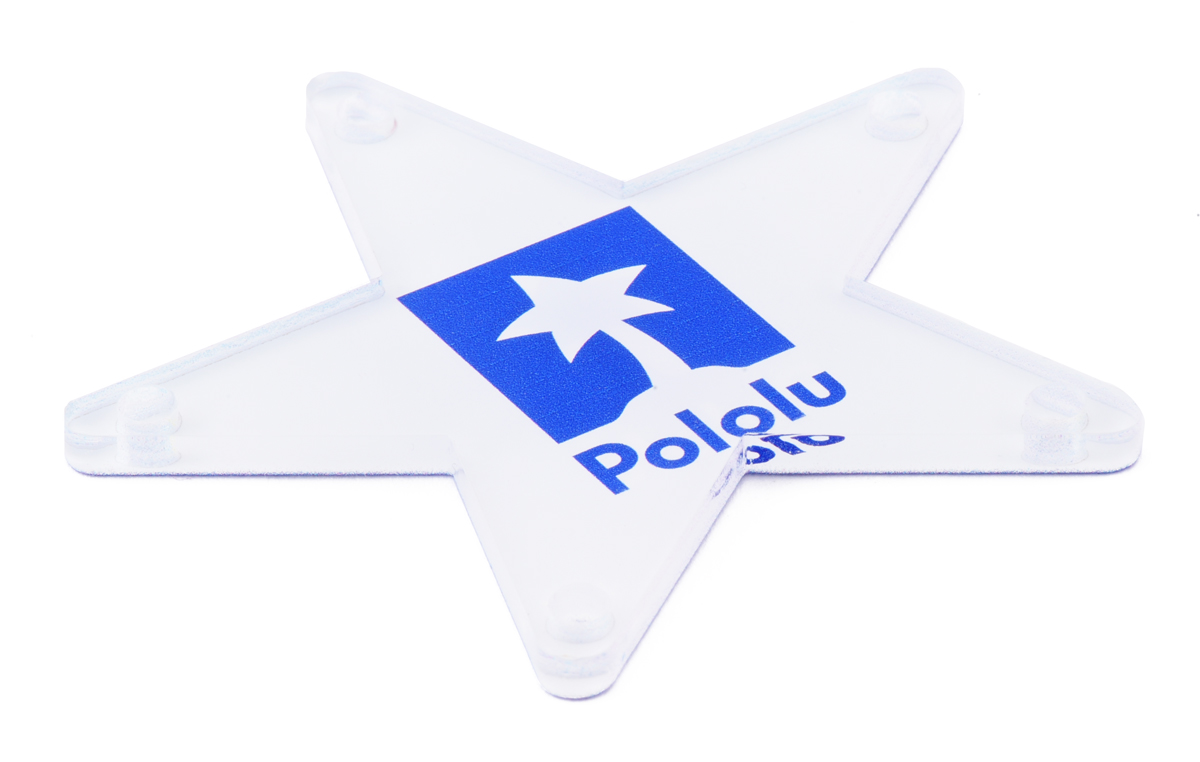
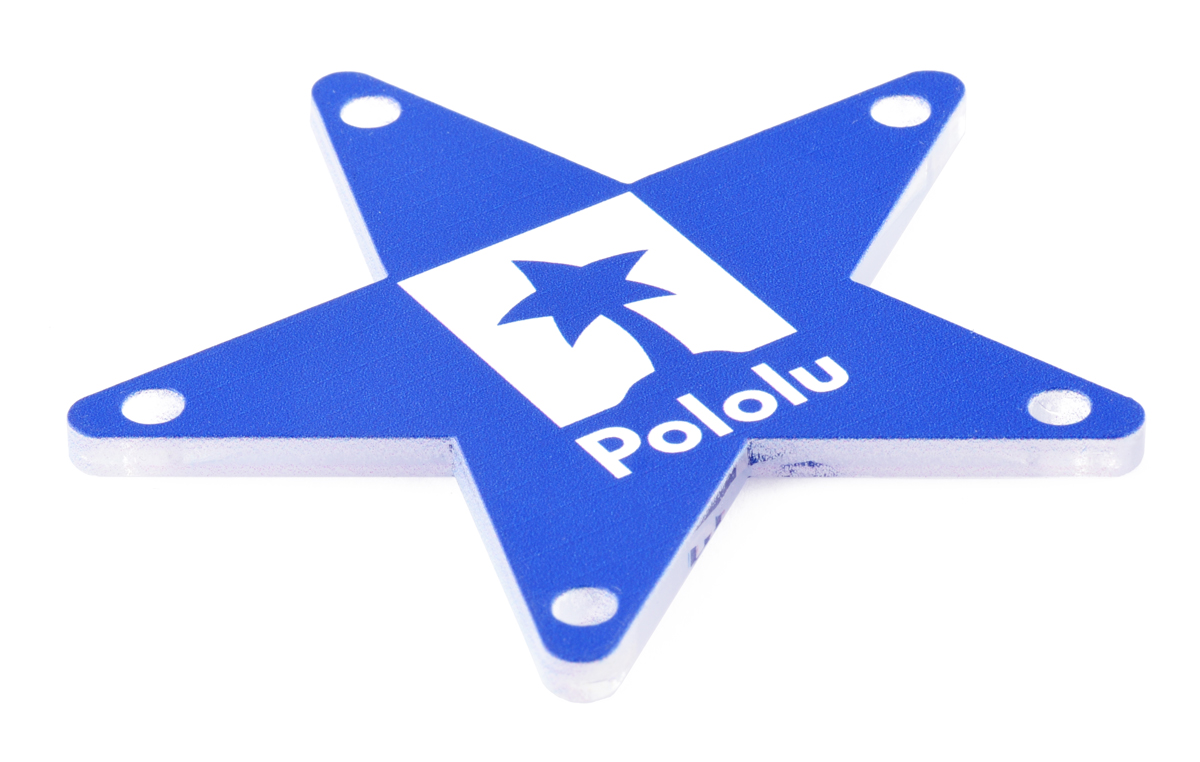
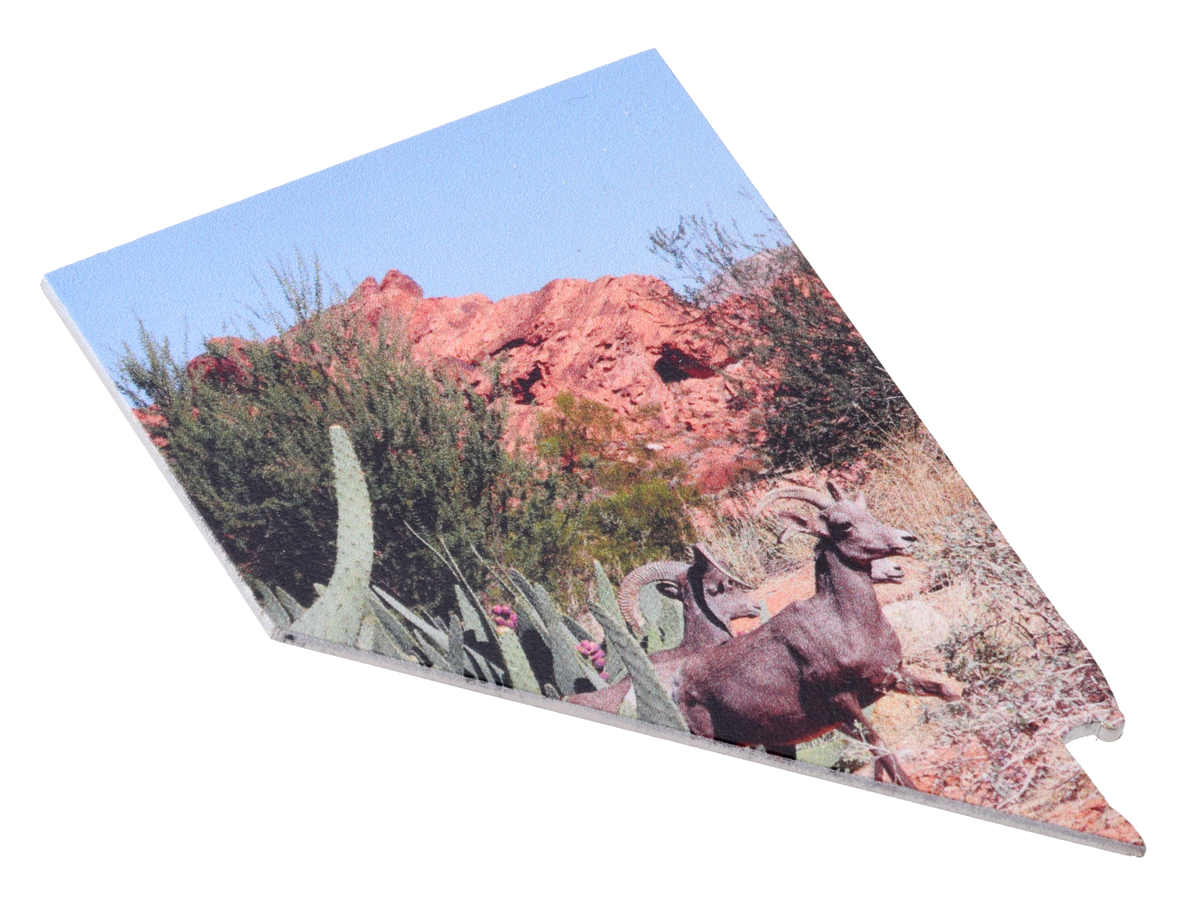
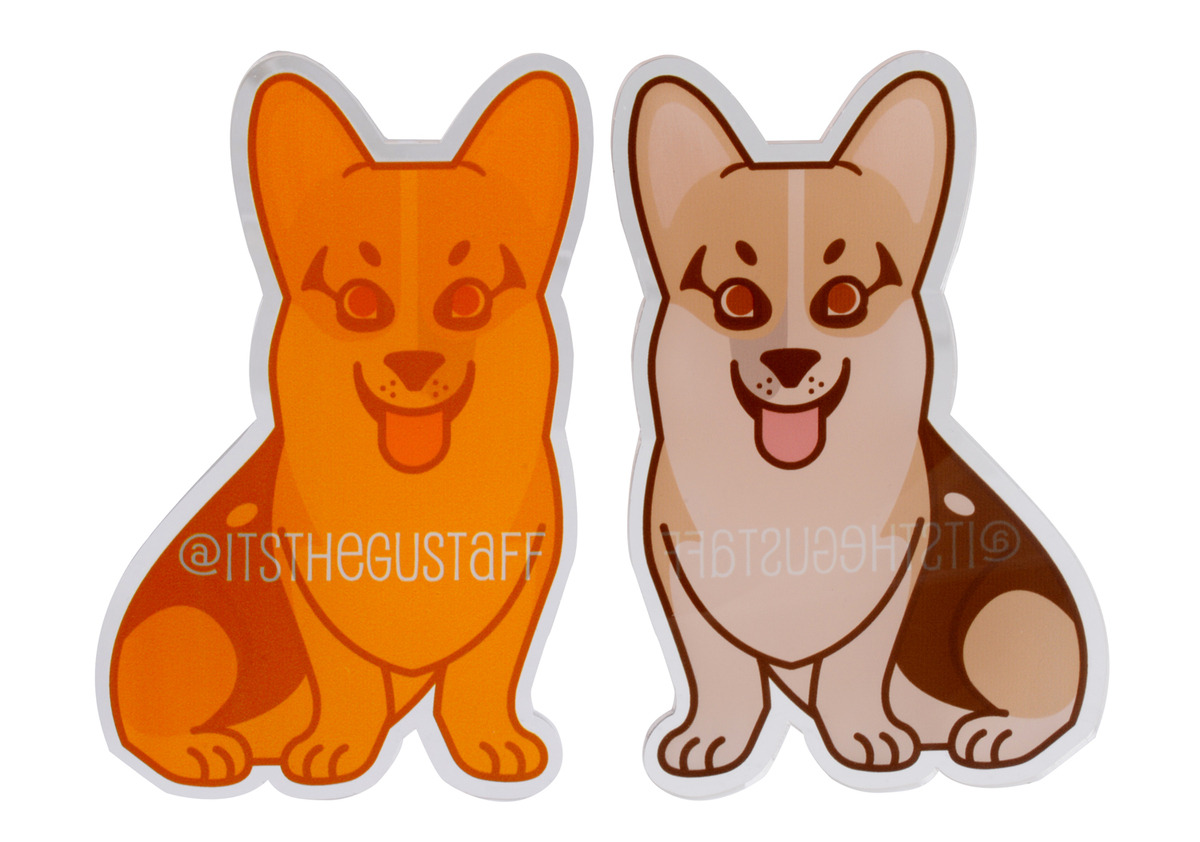
Laser-cut and UV-printed acrylic. |
|---|
Cutting capabilities:
- We can cut, score, and engrave almost anything you can draw, including:
- Sharp angles
- Smooth curves
- Holes as small as the laser beam width (~0.01″ or ~0.25 mm)
- Complex shapes
- We can handle layouts up to 47.5″ × 47.5″ (121 cm × 121 cm) on materials up to 48″ × 48″ (122 cm × 122 cm).
Material capabilities:
- Our CO2 and fiber laser cutters can cut, score, and engrave various materials including:
- On request, we can apply masking or adhesive backings to parts before cutting.
- We carry many of the most popular laser-cutting materials.
- See our quote request form for a complete list of the materials we stock, and available thicknesses and colors.
- We can special-order materials that we do not stock.
- You can supply your own material for us to cut.
UV printing capabilities:
- For many materials you can add vibrant and colorful labels, logos, photos, and artwork to your parts using UV-printing.
- We can print directly onto a part or part layout up to 24″ × 16.5″ (61 cm × 42 cm).
- We can print in 600 DPI or 1200 DPI resolution.
File processing capabilities:
- We use a variety of vector or CAD file types, including CDR, AI, EPS, DXF, DWG, PDF, and more.
- UV printing works with both vector objects and bitmap images, including common picture files (JPG, PNG, TIF, etc).
- We can create vector drawings for you based on a sketch or detailed description.
Order handling capabilities:
- We handle all scales of orders, from a single piece to thousands of parts, with competitive pricing and flexible turnaround times.
- We offer expedited turnaround times up to same-day service for typical orders.
- We can ship worldwide, or you can pickup your order from our Las Vegas facility when it is ready.
|
|
||||
|
|
2. Pricing
Pricing for custom laser cutting orders depends on the amount of machine time, labor, and the complexity of your parts.
Some factors that affect the price of laser-cut parts include the following:
- Minimum order: We charge $25 minimum for the first material and $15 minimum for additional materials.
- Laser-cutting and engraving cost: We quote designs based on the material type, material thickness, and the complexity of your design: the more cutting, scoring, and engraving required, the more expensive your design will be, and thicker materials cost more than thinner ones. We base cutting and scoring costs on the linear cutting/scoring distances, and we base engraving cost on the perimeter of the engravings.
- Cutting 3 mm acrylic starts at $0.15 per linear inch.
- Other 3 mm plastics (ABS, Delrin, styrene, PETG) start at $0.25 per linear inch.
- Scoring starts at $0.10 per linear inch.
- Engraving starts at $1 per square inch.
- Material cost: We stock various materials, which we sell by the square foot. We can also special-order materials or cut customer-supplied materials. Here are starting prices for the materials we cut most often:
- 1/8″ MDF starts at $2 per square foot.
- 3 mm birch plywood starts at $3 per square foot.
- 3 mm ABS starts at $4 per square foot.
- 3 mm acrylic starts at $5 per square foot.
- 6 mm acrylic starts at $10 per square foot.
- UV-printing set-up fee: We charge $50 per unique UV-printing layout.
- We reduce the set-up fee for repeat orders.
- UV-printing cost: We quote UV-printed designs based on layout size, number of ink layers, and printing resolution.
- Typical, 600 DPI resolution four-layer prints (primer, white, color, clear) start around $15 per square foot (plus set-up fees).
- High-resolution four-layer prints (600 DPI primer, 1200 DPI white, 1200 DPI color, 600 DPI clear) start around $25 per square foot (plus set-up fees).
- Shipping cost: Our quotes do not include shipping. Shipping is added during the checkout process, and we offer various FedEx, UPS, and USPS options. We can also ship on your FedEx or UPS account.
- Expediting cost (optional): In addition to the base quote, we typically offer expediting options for each quote, with faster service costing 20-50% more per expedited day.
- Volume pricing: Our rates decrease as the job size increases, and we can offer competitive pricing for large orders (especially if you need many copies of the same design, or if the designs are simple and do not require special handling).
- File creation: If you are unable to provide a vector or CAD file, we might be able to create the file for you. Our file creation service costs $60 per hour, with a $15 minimum.
If your design files are all set up, you can submit a quote request:
Otherwise, read on for more information about our laser cutting and UV printing services, including how to set up your files.
3. Limitations and issues to consider
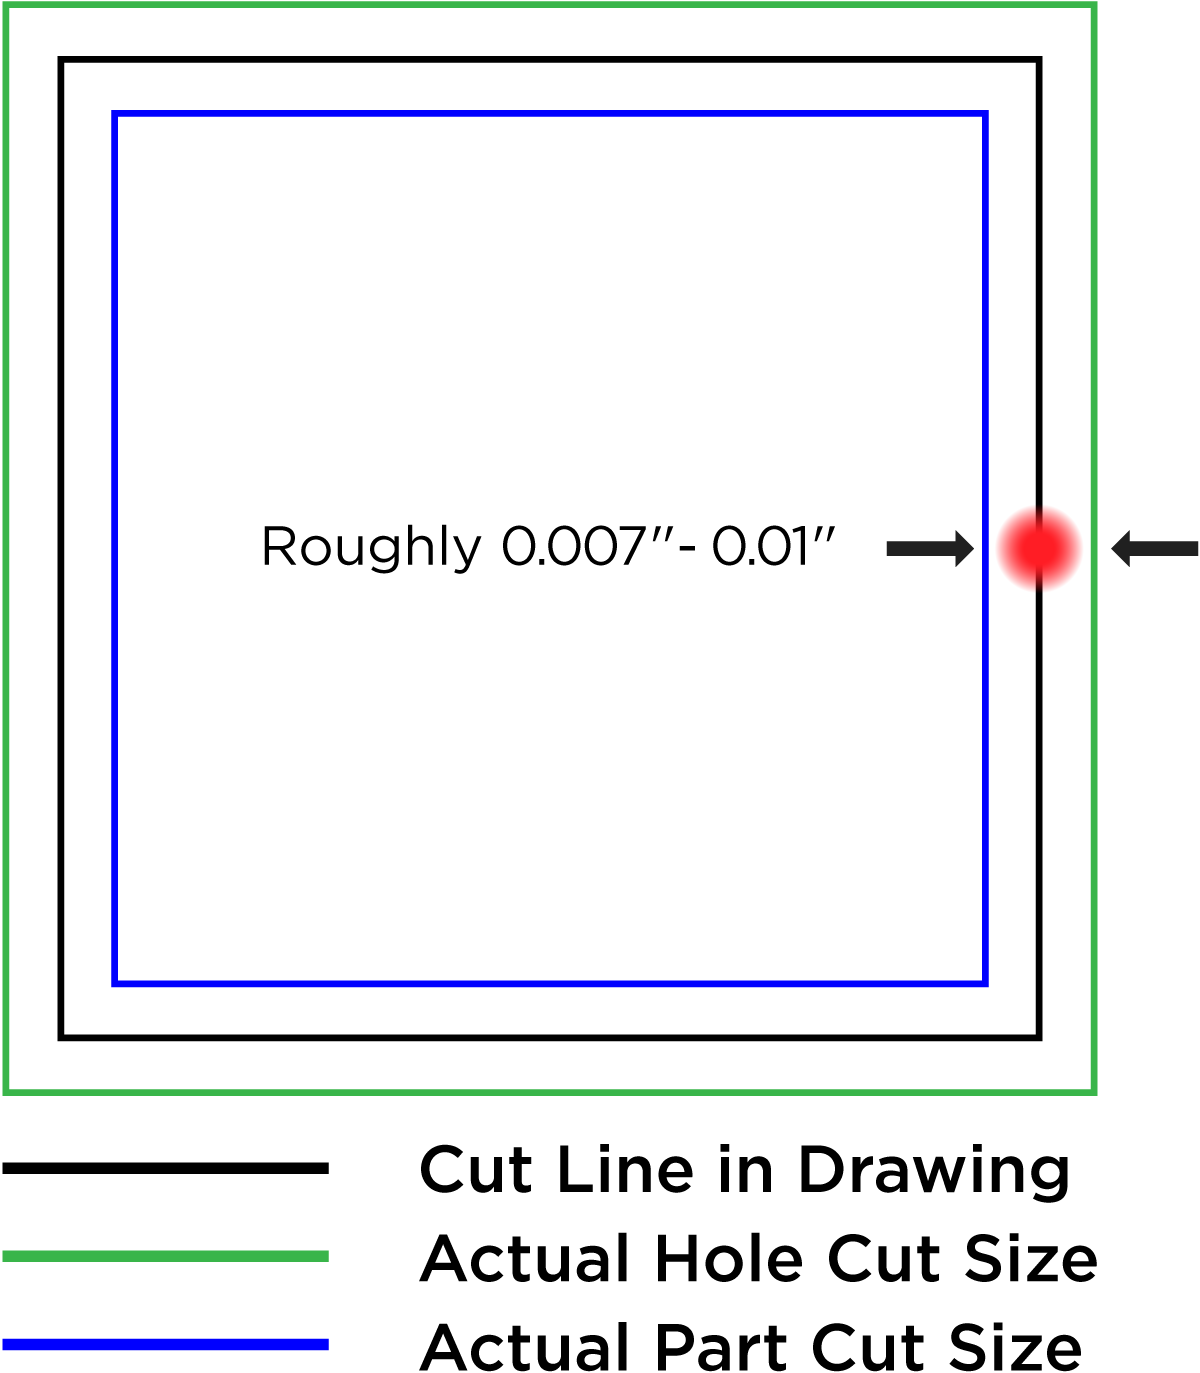 |
The kerf of our laser is roughly 0.007" – 0.01" which causes parts to be slightly smaller and have larger holes than how they are drawn. |
|---|
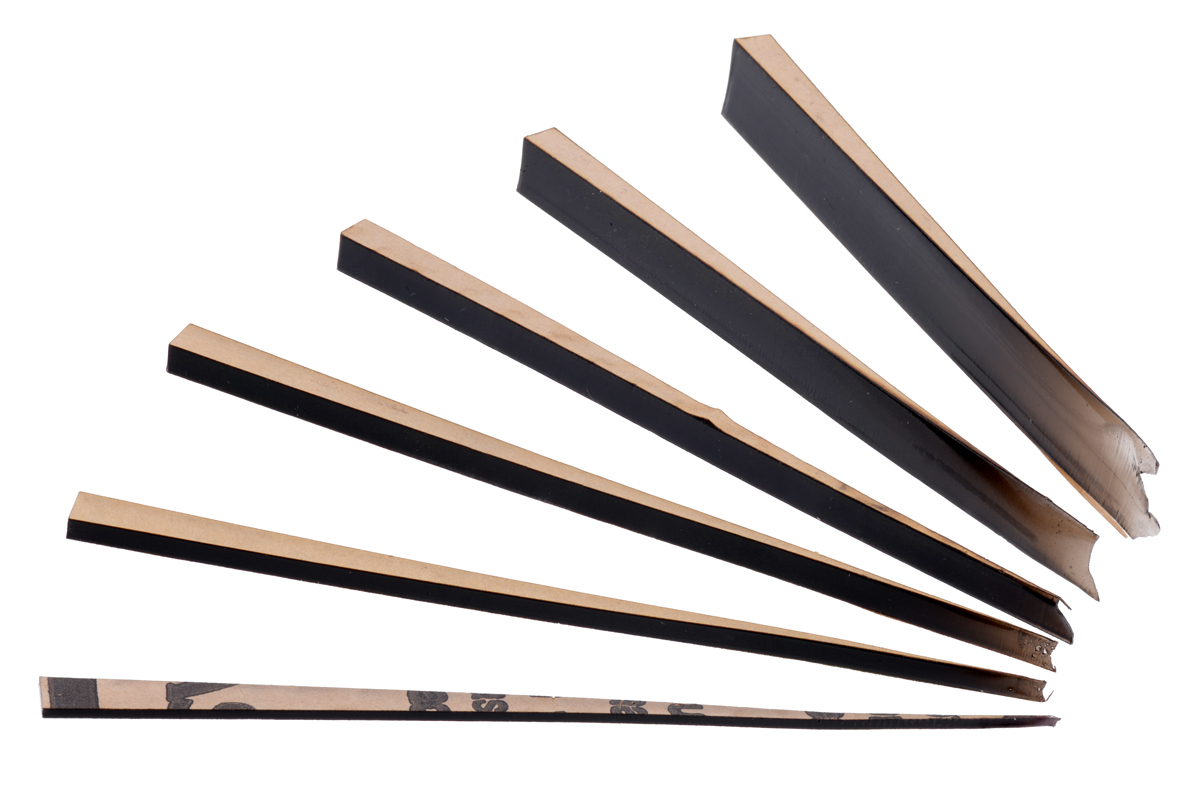 |
An example of melting along sharp angles for various thicknesses of acrylic (1.5 mm to 12 mm). |
|---|
There are some limitations to the laser-cutting and UV printing processes that are important to keep in mind:
Laser cutting geometry limitations
- We can only cut two-dimensionally – no 3D designs, or beveled edges.
- We can adjust machine settings to control the approximate engraving depths, but we cannot promise precise depths and advise against excessive engravings to avoid parts from warping.
- All laser-cut dimensions will vary slightly due to the laser’s kerf (beam width). While we typically expect a kerf width of ~0.007″ – 0.010″ (~0.18 mm – 0.25 mm), we do not guarantee any particular tolerance as there are many factors that affect the exact kerf size (material type, material thickness, material flatness, size and shape of your part and overall layout, and more).
- The laser’s beam is cone-shaped which causes the parts to have a slight (~1° – 2°) taper. The kerf width is smaller on the front than it is on the back of the material.
- The laser’s beam is not perfectly circular, which means squares will not be perfectly square, and circles are not perfectly circular (for parts that need to be perfectly circular, we suggest cutting smaller holes and cleaning them up with a drill).
- We highly recommend having no areas that are narrower than the thickness of the material you are using. Having cut lines too close together can sometimes cause the material between the cuts to break, melt, warp, or become brittle due to the heat from the laser. This includes parts with sharp angles that narrow into a sharp tip.
- Most sheet material thicknesses can vary slightly, and different materials have different thickness tolerances. We cannot promise anything beyond what the material manufacturers do, nor do we offer material pre-screening.
Material and handling limitations
- Laser cutting causes noticeable discoloration or charing along the edges of some materials such as wood, paper, rubbers, and fabrics.
- Some materials (e.g. acrylic) come with a protective film or paper masking layer applied to the surface while other materials do not (e.g., ABS, Delrin, styrene, MDF, plywood). We typically cut and ship the materials as they are when we receive them, but we can add masking upon request. (We charge more to mask materials.)
- Parts cut from materials with masking will ship with the masking still on. (We have a video that shows an easy way to unmask acrylic.)
- Parts cut from materials without masking may have burn markings from the cutting process.
- Other than UV printing, we do not offer any post-cutting services such as deburring, tumbling, polishing, bending, welding, anodizing, or coating. We ship parts as cut.
- Blemishes and light scratches may affect the surfaces of materials like metals and some plastics we receive unmasked.
- Laser cutting metals may cause slight discoloration, dross formation, and burring. Typically, burring is minimal for metals under 1/8″ thick, but is more severe for thicker materials.
- The material sits on a metal grid during cutting. When the laser cuts through the material, it hits the grid and bounces back and hits the bottom of the material, causing a small dent or mark. The backs of the parts will usually have small dents along the cut edges of the part wherever the laser, grid, and material meet.
- For more material-specific information, please see Section 5.
UV printing limitations
- While we can print onto many common laser cutting materials, we cannot print onto all of the materials we can laser cut.
- To check what materials we can and cannot print onto, please see Section 5.
- Our inks work best on rigid materials, and the prints do not hold up well to being bent or stretched.
- Ink adhesion strength depends on the material, whether primer is used, and the size/geometry of the artwork.
- We typically expect the alignment between printed artwork and laser cut geometry to be around 0.010″ (0.25 mm), but we do not guarantee any particular tolerance.
- For designs where it is important for artwork to go all the way to the part edge, we recommend including at least a 0.020″ (0.5 mm) bleed past the cut lines, but please note that this might result in some ink getting along the side edges of the part.
- We decide whether to print before or after laser cutting on a case-by-case basis. If you have specific needs or concerns, please mention them when you submit your quote request.
4. File set up instructions
We prepare your previews and laser-cut parts with CorelDRAW, which can handle a variety of vector and two-dimensional CAD drawings:
| File types we can use | File types we cannot use |
|---|---|
| ✓ CDR (CorelDRAW) | ✘ SLDDRW (SolidWorks) |
| ✓ AI (Adobe Illustrator) | ✘ SLDPRT (SolidWorks) |
| ✓ SVG (Inkscape) | ✘ SLDASM (SolidWorks) |
| ✓ EPS (Adobe Illustrator) | ✘ PSD (Adobe Photoshop) |
| ✓ DXF (must be 2D) | ✘ STEP |
| ✓ DWG (must be 2D) | ✘ STL |
| ✓ PDF (cut objects must be vector-based) | ✘ STP |
| Bitmap images (JPG, PNG, TIF, etc.) can be used for engraving and printing only (not for cutting) | ✘ Any other 3D format file |
Laser cutting file set up instructions
Following the instructions below to create your files will speed up the quote request and cutting process. If you are unable to set up your file, send us what you can (even if it is just a hand sketch and some notes), and we can try to provide a ballpark estimate, and let you know if we could create the file for you.
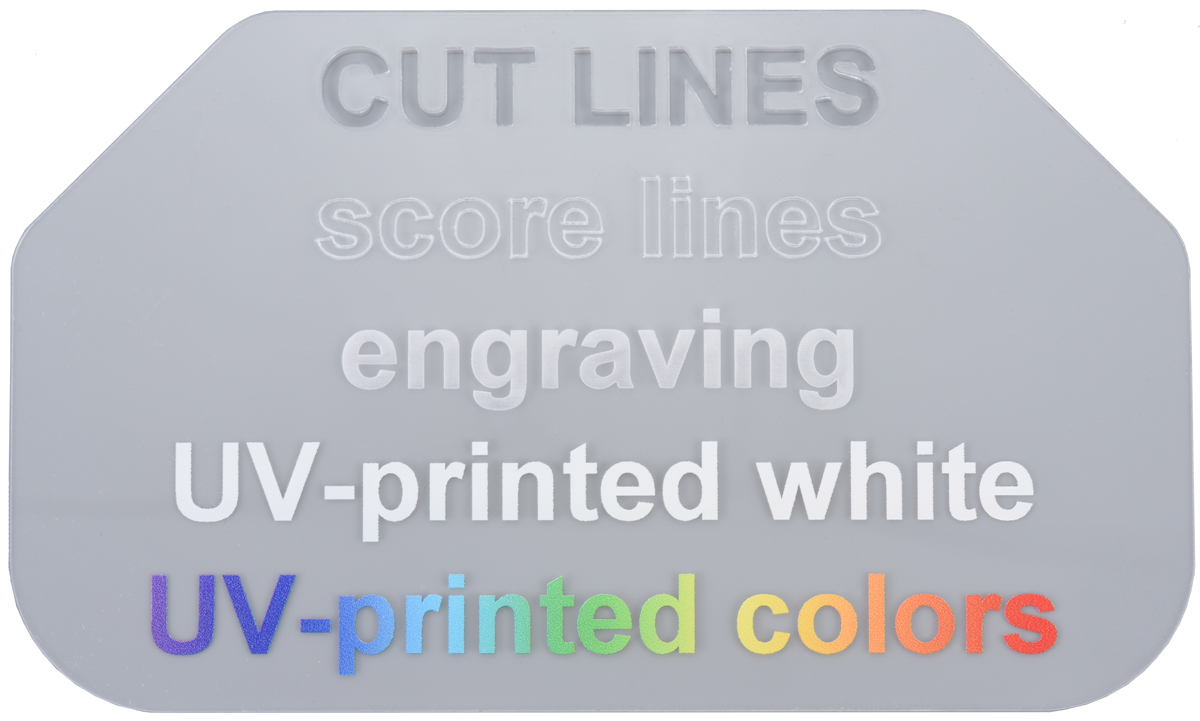
- Set up your file with different layers or colors for cut lines, score lines, engravings, UV-printed designs, and notes.
- Consider downloading one of our template files below to get started. They include preset layers for your cut lines as well as separate layers for all of our printing modes (color, white, primer, and clear).
- Add cutting designs and notes to your file, and use colors to make it easy to differentiate between design features. We prefer:
- Blue lines thinner than 0.003″ for cutting
- Red lines thinner than 0.003″ for scoring
- In some programs, you can define cutting/scoring lines by setting the stroke width to “0” or “hairline,” but do not set it to “none.”
- Black color-filled objects or lines thicker than 0.003″ for engravings
- Green for notes and reference objects that you do not want us to cut (e.g., part or material size references, special instructions, etc.)
Note: All engravings are surface-etched unless you specifically request deeper engraving.
- Add UV-printed artwork to each of the print layers using vector or bitmap objects.
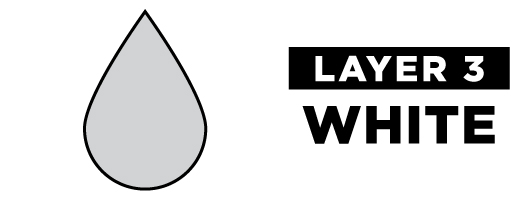
- Your file should have a separate layer for each layer of ink you want to print.
- Arrange the printing layers in the order that you want us to print them in (bottom first, top last).
- See Section 6 for information about how to stack layers and UV-printing design advice.
Note: White, primer, and clear layers should be defined in non-white colors as our printer will ignore white objects and white areas.
Note: If your UV-print design uses bitmaps, we recommend configuring them with 1200 DPI resolution. See Section 6.1 for a more detailed explanation.
- Include a size reference with a label, such as a 1″ square, to your notes layer so it will be easy for us to verify the size of your layout and quote it accordingly.
- Combine parts that use the same material into a single file, and avoid sending multiple files whenever possible.
- Parts that should be cut from different materials should have separate files.
- Save the file in one of the file types we can use (see the table above) using a filename that is meaningful for you.
- Avoid common mistakes and errors by checking the following before you submit your file:
| ✓ | Verify all your designs and notes are correct, and that none of the designs you want cut from that material are missing. • If you are submitting multiple files for different materials, we suggest including the material as part of your file name, or having a prominent note. |
| ✓ | Check that your designs avoid features narrower than the material thickness. |
| ✓ | Make sure the artboard/canvas/page size actually fits all of your parts. |
| ✓ | Convert all text to non-text objects to ensure that your design is preserved. • Programs use different terms for this operation, such as “explode text,” “convert to curves/paths/objects/outline,” etc. |
| ✓ | Verify that your file includes a size reference. |
| ✓ | Confirm that your white, primer, and clear UV printing layers do not use white objects. |
| ✓ | Open the exact file you plan to submit, and make sure everything appears correctly. • This is especially important if you are exporting from your program into a different file type. For example, if you are exporting a SolidWorks file as a DXF, open and look at the DXF. |
Once you are done, you can submit all of your files in a quote request:
Downloadable template files
You can download one of our templates below, which already have the different layers set up.
 |
 |
 |
| CorelDRAW (340k cdr) | Adobe Illustrator (7MB ai) | Inkscape (457k svg) |
|---|
|
|
||||
|
|
Additional tips and tricks
Part design
- Round off corners for stronger parts that are less likely to crack upon impact.
- Even adding a 1/16″ radius to a 90° angle can make a big difference!
- Adjust for the kerf width (the thickness of the beam).
- The kerf width which is typically ~0.007″ – 0.010″, but varies based on many factors (see our Section 3 for more information).
- You can manually draw parts to be 0.007″ – 0.010″ wider (for exterior cuts) or smaller (for interior cuts).
- Some programs have automated line-offset or contour tools that will do this for you.
UV printing
- See Section 6 for information about our capabilities, limitations, and design advice for UV printing.
Efficient layouts
- Use layouts that work well with the material size (while reserving a 1/4″ margin) whenever possible.
- Standard plastic layout sizes:
- 11.5″ x 11.5″
- 11.5″ x 23.5″
- 23.5″ x 23.5″
- 23.5″ x 35.5″
- 23.5″ x 47.5″
- Standard steel and aluminum layout sizes:
- 23.5″ x 23.5″
- 23.5″ x 47.5″
- Standard plywood layout sizes:
- 11.5″ x 23.5″
- 23.5″ x 29.5″
- 29.5″ x 47.5″
- Standard plastic layout sizes:
Note: We can handle larger layouts – up to 47.5″ x 47.5″ – but we do not usually stock sheets this large and prefer working with smaller, more manageable, layouts whenever possible.
- Share lines to reduce cutting time for non-metal layouts by nesting parts right next to each other.
- Remember to delete one of the duplicate lines, otherwise this will not be effective. Even though you might not be able to see them in the file, the laser cutters will recognize and cut lines that are stacked on top of each other, which can worsen the cut quality.
- We can accept line-shared layouts for most plastics, woods, foams, and rubbers,
- We cannot use line-shared layouts for metals.
Programs for drawing laser-cut parts
- CorelDRAW is what we use and love. It is available as a one-time purchase or a yearly subscription, and as of the writing of this guide, they also offer a free 15-day trial.
- Adobe Illustrator is the most popular vector graphics editor available, making it easy to find online guides and tutorials. Monthly and yearly subscriptions are available, as well as a free trial.
- Inkscape is a free, open-source, vector graphics editor. While it works great for designing laser-cut parts, Inkscape’s default file format (SVG) often has scaling issues when opened with other programs, so please save your files as a PDF or EPS instead of an SVG when submitting your file for a quote.
- LibreCAD is a free, open-source, CAD software capable of creating two-dimensional CAD files for laser-cutting.
5. Materials
We can laser cut plastics, woods, metals, rubbers, foams, and papers. We can handle some materials up to 1" thick, but the maximum thickness varies depending on the material. We stock some materials including acrylic, birch plywood, MDF, mild and stainless steel, aluminum, ABS, Delrin, and more. For a complete list of the materials we stock, and available thicknesses and colors, see our quote request form. You are also welcome to supply your own material for us to cut.
Materials we can laser cut
Here is a list of the materials that we can cut. If you do not see your material listed, we would be happy to try cutting it as long as it does not contain vinyl. To test a new material, please submit a quote request and provide details about your material in the special instructions section of the quote request form.
| Type | Material | Max Thickness | UV-printable | Notes |
|---|---|---|---|---|
| Plastics | ABS | 1/4″ | ✓ | Smells very bad when cut, so you might have to wash or air out the parts out upon receiving them to get rid of the smell. It is machine-friendly and will not break or crack easily if dropped or hit. It has a hair-cell textured front surface, which hides fingerprints and scuffs well. The backside of the material is smooth and glossy, and since ABS does not come with masking, this surface is prone to scratches and markings. |
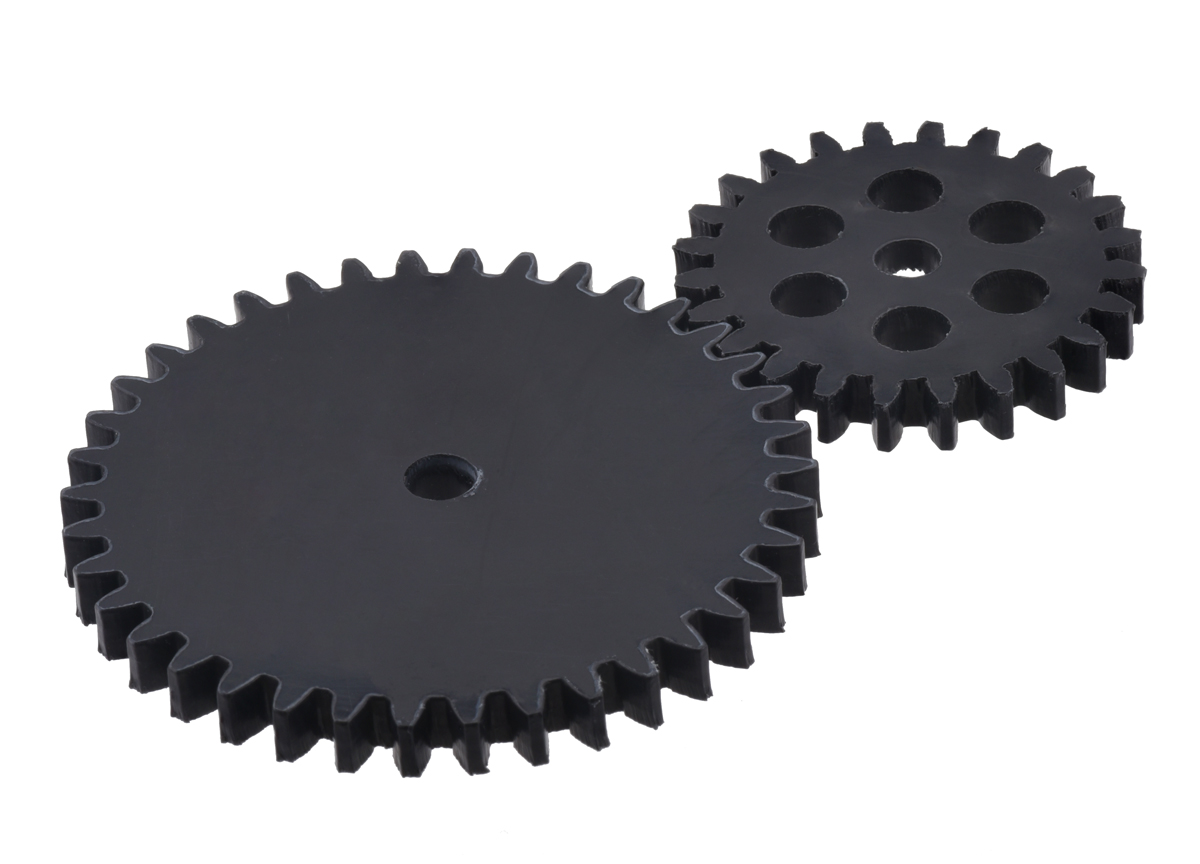
| Acetal/Delrin | 1/4″ | ✘ | Has smooth, glossy surfaces that often have scratches on them. Delrin is a very tough, slippery material that resists warping and deforming well and is commonly used to make gears. Its slick surface makes it difficult to adhere to without sanding, so we cannot UV-print onto it. It is the most expensive plastic that we carry. | |
| Acrylic | 1″ | ✓ | Also known as Plexiglas, Lucite, PMMA. Our favorite material to work with – cuts cleanly with a laser-polished edge. See the More information about acrylicsection for more details. |
|
| HDPE | 1/16″ | ✘ | Edges melt badly and produce a lot of dust that sticks to the parts when cut. | |
| Kapton | 0.050″ | ✘ | Chars badly when cut, cutting adhesive-backed sheets increases the charring, and also causes the parts to be sticky. | |
| Mylar | 0.010″ | ✘ | Also known as Polyester film. | |
| Nylon | 1/16″ | ✘ | Edges melt, smell, and discolor badly when cut. | |
| PETG | 1/8″ | ✓ | Smells very bad when cut, so you might have to wash or air out the parts out upon receiving them to get rid of the smell. PETG is not brittle, so parts do not crack or break easily. PETG comes with a film masking on both sides to protect the surface during the cutting process, but the edges still tend to melt and turn yellow from the laser cutting. | |
| Polyethylene | 1/8″ | ✘ | Melts badly when cut. | |
| Polypropylene | 1/8″ | ✘ | Melts somewhat when cut | |
| Styrene | 1/8″ | ✓ | Smells very bad when cut, so you might have to wash or air out the parts out upon receiving them to get rid of the smell. Edges melt somewhat. | |
| Teflon | 1/8″ | ✘ | Melts somewhat when cut. | |
| Metals | Aluminum | 1/4″ | ✓ | Blemishes and light scratches may affect the surfaces of metal parts. Laser cutting metals may cause slight discoloration, dross formation, and burring. Typically, burring is minimal for metals under 1/8″ thick, but is more severe for thicker pieces. We do not offer any post-cutting services such as deburring, tumbling, polishing, bending, welding, anodizing, or coating (other than UV printing). We ship parts as cut. |
| Brass | 1/8″ | ✓ | ||
| Bronze | 1/8″ | ✓ | ||
| Mild Steel | 1/4″ | ✓ | ||
| Spring Steel | 1/4″ | ✓ | ||
| Stainless Steel | 1/4″ | ✓ | ||
| Woods | Birch Ply | 1″ | ✓ | A popular, eco-friendly plywood that is great for laser cutting. It is typically cut without masking, but can be masked to minimize burn markings for an additional fee. |
| MDF | 1″ | ✓ | Low-cost material to laser cut. Does not come with protective masking, so surfaces will have some discolorations and burn markings from cutting. | |
| Rubbers | NBR (Buna-N) | 3/32″ | ✘ | Laser cutting rubbers typically generates a lot of char/soot. We ship parts as cut without dusting or cleaning them. |
| FKM/Viton | 1/8″ | ✘ | ||
| Neoprene | 1/16″ | ✘ | ||
| Polyethylene | 1/8″ | ✘ | ||
| Silicone | 1/8″ | ✘ | ||
| Foams | Depron | 1″ | ✓ | Laser cutting foams typically generates some light char/soot around part edges. We ship parts as cut without dusting or cleaning them. The edges typically have a concave profile after cutting. How deep the concave shape extends depends on several factors, but a good way to prevent problems is to avoid having areas that are narrower than the thickness of the material. |
| EPDM | 1″ | ✘ | ||
| Neoprene | 1″ | ✘ | ||
| Nylon | 1″ | ✘ | ||
| Polyethylene | 1″ | ✘ | ||
| Polyurethane | 1″ | ✘ | ||
| Silicone | 1/8″ | ✘ | ||
| Others | Cardboard | 5/32″ | ✓ | Has a slight smell to it when laser cut. |
| Cardstock / Paper | ✓ | Can be laser cut, but it is usually more cost-effective to plot/die cut it instead. Edges might show light burn marks, depending on the material color (dark colors hide the markings better). | ||
| Fabrics | ✘ | We have cut various types of fabrics including acrylic, canvas, cordura, cotton, nylon, polyester, and wool, and have not had any trouble. Edges become cauterized (which helps prevent the fabric from fraying), but might have slight discoloration depending on the color. | ||
| Leather | 1/8″ | ✘ | All leather (both natural and synthetic) smells very bad when laser cut, so you might have to air the parts out once you receive them. Synthetic leather MUST be vinyl-free. Edges will have noticeable char/soot on them. |
Materials we cannot laser cut
We do not or cannot cut the following materials:
| Material | Notes |
|---|---|
| ✘ Carbon Fiber | |
| ✘ Copper | For copper parts, or other metals that are not included in the list of we metals we can cut, please consider our friends at OSH Cut. |
| ✘ Glass | |
| ✘ PCB | We cannot cut printed circuit board materials such as FR-4, G-10 (garolite), and others. |
| ✘ Polycarbonate | Difficult to laser cut, and burns very badly. Consider PETG or impact-modified acrylic instead. |
| ✘ PVC | Also commonly known as Cintra – contains vinyl, which releases toxic fumes. |
| ✘ Vinyl | We do not cut any materials that contain vinyl since it releases toxic fumes. |
How to supply your own material for laser cutting
If you plan to supply material the material for your order, please mention this in the special instructions section in our quote request form and be sure to include the sheet size. When sending material:
- Please wait until after you have received your quote before you ship it (in case we cannot cut that material, or your design, etc.).
- Make sure to include your name and quote number with the shipment.
- Make sure the material is flat, as warped or bowed materials can cause problems during cutting. Some materials, like rubbers and fabrics, can be shipped rolled since they will still lay flat right away, while others can take a very long time to flatten out.
- Do not ship material that is longer than 48″ unless it can be cut down using scissors or you have made special arrangements with us for larger pieces.
- You can have suppliers ship directly to us to avoid having to pay an extra shipping charge.
- You are responsible for supplying any extra material needed to recut parts that do not come out well (we cover this when using our stock material).
- Please let us know what you would like us to do with the leftover material. We can hold it for another order in the near future, discard it, or send it to you along with your order (an additional shipping charge might be required).
Suppliers for laser-cutting materials
Here is a list of suppliers we and our customers work with frequently:
- McMaster-Carr — Highly-recommended for expedited laser-cutting orders – they ship fast!
- Delvie’s Plastics
- Johnson Plastics Plus — Large selection of two-tone “engravable” acrylics.
- TAP Plastics
- Online Metals
- Inventables
- ePlastics
- Professional Plastics
- eStreet Plastics
- United States Plastics
Laser material details
Plastics
ABS (acrylonitrile butadiene styrene)
| Max thickness | 1/4″ (6.4 mm) |
|---|---|
| UV-printable | ✓ |
| Primer recommended for UV printing |
✓ |
| Stocked | ✓ |
| RoHS 3 | ✘ |
| Stocked thicknesses | 1.5 mm (0.06″) 3.0 mm (0.12″) 4.5 mm (0.18″) 6.0 mm (0.24″) |
| Stocked layout sizes | 12″×12″ (30×30 cm) 12″×24″ (30×61 cm) 24″×24″ (61×61 cm) 24″×48″ (61×122 cm) 32″×48″ (81×122 cm) |
| Stocked colors | black |
| Masking | added on request |
| Surface texture | haircell and smooth (see notes) |
| Surface finish | glossy (see notes) |
| Opacity | opaque |
Notes:
- ABS has good elasticity and toughness, so it can bend a lot before cracking or breaking, and it will not crack or break easily if dropped or impacted.
- It is easily machined with hand tools.
- Our stocked ABS has a haircell textured front surface, which hides fingerprints and scuffs well. The backside of the material is smooth and glossy, but since it does not come with masking, this surface is prone to scratches and markings. We might be able to special order ABS that with smooth surfaces on both sides on request.
- We can UV print on both the smooth and haircell surfaces, but UV printing does not cover up the haircell texture. We expect most prints will look better on the smooth side and will print there by default unless you specify otherwise.
- ABS smells very bad when laser cut, so you might have to wash or air out the parts out upon receiving them to get rid of the smell.
 |
 |
Acetal/Delrin®
| Max thickness | 1/4″ (6.4 mm) |
|---|---|
| UV-printable | ✘ |
| Stocked | ✓ |
| RoHS 3 | ✓ |
| Stocked thicknesses | 3/64″ (1.2 mm) 1/16″ (1.6 mm) 1/8″ (3.2 mm) 3/16″ (4.8 mm) 1/4″ (6.4 mm) |
| Stocked layout sizes | 12″×12″ (30×30 cm) 12″×24″ (30×61 cm) 24″×24″ (61×61 cm) 24″×48″ (61×122 cm) |
| Stocked colors | black and white |
| Masking | added on request |
| Surface texture | smooth |
| Surface finish | glossy |
| Opacity | opaque (black) translucent (white) |
Notes:
- Acetal, is also know as Polyoxymethylene (POM) or by the brand name Delrin®.
- Acetal is a very rigid, tough, and slippery material that resists new warping and deformation well, but we often receive and cut parts from large sheets with slight warping which can be difficult to flatten.
- It has smooth, glossy surfaces that often have scratches since it does not come with masking.
- The slick surfaces are difficult to adhere to without sanding.
- Acetal and is commonly used to make gears.
- Acetal is the most expensive plastic that we stock.
 |
Acrylic
| Max thickness | 1″ (25.4 mm) |
|---|---|
| UV-printable | ✓ |
| Primer recommended for UV printing |
✓ |
| Stocked | ✓ |
| RoHS 3 | Clear sheets only (see notes) |
| Stocked thicknesses | 0.75 mm (0.03″) 1.5 mm (0.06″) 3.0 mm (0.12″) 4.5 mm (0.18″) 5.6 mm (0.22″) 6.0 mm (0.24″) 9.0 mm (0.35″) 12.0 mm (0.47″) |
| Stocked layout sizes | 12″×12″ (30×30 cm) 12″×24″ (30×61 cm) 24″×24″ (61×61 cm) 24″×48″ (61×122 cm) see notes for more info |
| Stocked colors | see the More informationsection |
| Masking | film or paper |
| Surface texture | smooth |
| Surface finish | glossy matte mirror faux brushed metal |
| Opacity | transparent opaque translucent mirror |
Notes:
- Acrylic, also known as Plexiglas®, Lucite, and PMMA (polymethyl methacrylate), is our favorite material to work with.
- RoHS compliance documentation for colored acrylic sheets are generally unavailable due to constantly changing pigment materials.
- For more in-depth information on acrylic, please see the
More information about acrylic
section. - We usually stock larger sheets of common colors (black, white, and clear). Large sheets of other acrylic colors can sometimes be special ordered, but may have expensive freight costs.
- Two-tone acrylics are typically only available up to 24″×48″ (61×122 cm).
 |
HDPE (high density polyethylene)
| Max thickness | 1/16″ (1.6 mm) |
|---|---|
| UV-printable | ✘ |
| Stocked | ✘ |
Notes:
- HDPE edges melt badly and produce a lot of dust that sticks to the parts when cut.
Kapton
| Max thickness | 0.050″ (1.3 mm) |
|---|---|
| UV-printable | ✘ |
| Stocked | ✘ |
Notes:
- Kapton is also known as polyimide film.
- Kapton chars badly when cut. Cutting adhesive-backed sheets increases the charring, and also causes the parts to be sticky.
Mylar
| Max thickness | 0.010″ (0.25 mm) |
|---|---|
| UV-printable | ✘ |
| Stocked | ✓ |
| RoHS 3 | ✓ |
| Stocked thicknesses | 0.003″ (0.08 mm) 0.004″ (0.10 mm) 0.005″ (0.13 mm) 0.010″ (0.25 mm) |
| Stocked layout sizes | see notes |
| Stocked colors | clear |
| Surface texture | smooth |
| Surface finish | glossy |
| Opacity | transparent |
Notes:
- Mylar is also known as polyester film.
- This is the same material used as transparency sheets with overhead projectors.
- We cut stocked Mylar from 40″ (102 cm) wide rolls, so the largest layout we can cut from stocked material 39.5″ × 47.5″ (100 × 121 cm).
- Also available with adhesive backing through suppliers like McMaster-Carr.
Nylon
| Max thickness | 1/16″ (1.6 mm) |
|---|---|
| UV-printable | untested |
| Primer recommended for UV printing |
untested |
| Stocked | ✘ |
Notes:
- Nylon edges melt, smell, and discolor badly when cut.
PETG (polyethylene terephthalate glycol)
| Max thickness | 1/8″ (3.2 mm) |
|---|---|
| UV-printable | ✓ |
| Primer recommended for UV printing |
✓ |
| Stocked | ✓ |
| RoHS 3 | ✓ |
| Stocked thicknesses | 1.5 mm (0.06″) 3.0 mm (0.12″) |
| Stocked layout sizes | 24″×48″ (61×122 cm) |
| Stocked colors | clear |
| Masking | film |
| Surface texture | smooth |
| Surface finish | glossy |
| Opacity | transparent |
Notes:
- PETG has good elasticity, so it can bend a lot before cracking or breaking.
- PETG smells very bad when cut, so you might have to wash or air out the parts out upon receiving them to get rid of the smell.
- The edges tend to melt and turn yellow from laser cutting even though sheets come with a film masking on both sides.
PE (polyethylene)
| Max thickness | 1/8″ (3.2 mm) |
|---|---|
| UV-printable | ✘ |
| Stocked | ✘ |
Notes:
- PE melts badly when cut.
PP (polypropylene)
| Max thickness | 1/8″ (3.2 mm) |
|---|---|
| UV-printable | ✘ |
| Stocked | ✘ |
Notes:
- PP melts somewhat when cut.
Styrene
| Max thickness | 1/8″ (3.2 mm) |
|---|---|
| UV-printable | ✓ |
| Primer recommended for UV printing |
✓ |
| Stocked | ✓ |
| RoHS 3 | ✘ |
| Stocked thicknesses | 0.030″ (0.76 mm) 1.5 mm (0.06″) 3.0 mm (0.12″) |
| Stocked layout sizes | 12″×12″ (30×30 cm) 12″×24″ (30×61 cm) 24″×24″ (61×61 cm) 24″×48″ (61×122 cm) |
| Stocked colors | white |
| Masking | added on request |
| Surface texture | smooth |
| Surface finish | matte |
| Opacity | opaque |
Notes:
- Styrene and has good elasticity, so it can bend a lot before cracking or breaking.
- It is easily machined with hand tools.
- Styrene smells very bad when cut, so you might have to wash or air out the parts out upon receiving them to get rid of the smell.
- Its edges melt somewhat when cut.
- Styrene is not as glossy as acrylic.
Teflon
| Max thickness | 1/8″ (3.2 mm) |
|---|---|
| UV-printable | ✘ |
| Stocked | ✘ |
Notes:
- Teflon melts somewhat when cut.
Metals
General notes about metals:
- We can typically cut metal alloys other than just the ones we stock.
- Other than UV printing, we do not offer any post-cutting services such as deburring, tumbling, polishing, bending, welding, anodizing, or coating. We ship parts as cut.
- Blemishes and light scratches may affect the surfaces of metal parts.
- Laser cutting metals may cause slight discoloration, dross formation, and burring. Typically, burring is minimal for metals under 1/8″ thick, but is more severe for thicker pieces.
Aluminum
| Max thickness | 1/4″ (6.4 mm) |
|---|---|
| UV-printable | ✓ |
| Primer recommended for UV printing |
✓ |
| Stocked | ✓ |
| Stocked alloys/types | 5052, 6061 |
| RoHS 3 | ✓ |
| Stocked thicknesses | 0.032″ (0.81 mm) 0.040″ (1.0 mm) 0.050″ (1.3 mm) 0.063″ (1.6 mm) 1/8″ (3.2 mm) |
| Stocked layout sizes | 12″×12″ (30×30 cm) 12″×24″ (30×61 cm) 24″×24″ (61×61 cm) 24″×48″ (61×122 cm) |
| Stocked colors | natural |
| Masking | not available |
| Surface texture | smooth |
| Surface finish | unpolished/mill |
| Opacity | opaque |
| Magnetic | ✘ |
Notes:
- The 5052 Aluminum we stock is easily weldable and bendable.
- See our general notes about metals.
 |
Brass
| Max thickness | 1/8″ (3.2 mm) |
|---|---|
| UV-printable | ✓ |
| Primer recommended for UV printing |
✓ |
| Stocked | ✘ |
| Masking | not available |
| Magnetic | ✘ |
Bronze
| Max thickness | 1/8″ (3.2 mm) |
|---|---|
| UV-printable | ✓ |
| Primer recommended for UV printing |
✓ |
| Stocked | ✘ |
| Masking | not available |
| Magnetic | ✘ |
Notes:
- See our general notes about metals.
Mild steel
| Max thickness | 1/4″ (6.4 mm) |
|---|---|
| UV-printable | ✓ |
| Primer recommended for UV printing |
✓ |
| Stocked | ✓ |
| Stocked alloys/types | 1018 |
| RoHS 3 | ✓ |
| Stocked thicknesses | 0.030″ (0.76 mm) 0.060″ (1.5 mm) |
| Stocked layout sizes | 12″×12″ (30×30 cm) 12″×24″ (30×61 cm) 24″×24″ (61×61 cm) 24″×48″ (61×122 cm) |
| Stocked colors | natural |
| Masking | not available |
| Surface texture | smooth |
| Surface finish | unpolished/mill |
| Opacity | opaque |
| Magnetic | ✓ |
Notes:
- The 1018 steel we stock is also commonly called mild steel, low-carbon steel, or cold-rolled steel.
- 1018 steel is easily weldable, formable, and machinable.
- Some rust might affect the surface of mild steel parts, and they are vulnerable to further rust or corrosion.
- See our general notes about metals.
 |
Through-cutting, vector etching, and raster engraving on mild steel. |
|---|
Spring steel
| Max thickness | 1/4″ (6.4 mm) |
|---|---|
| UV-printable | ✓ |
| Primer recommended for UV printing |
✓ |
| Stocked | ✘ |
| Masking | not available |
| Magnetic | depends on alloy/type |
Notes:
- See our general notes about metals.
 |
Through-cutting, vector etching, and raster engraving on spring steel. |
|---|
Stainless steel
| Max thickness | 1/4″ (6.4 mm) |
|---|---|
| UV-printable | ✓ |
| Primer recommended for UV printing |
✓ |
| Stocked | ✓ |
| Stocked alloys/types | 304 |
| RoHS 3 | ✓ |
| Stocked thicknesses | 0.024″ (0.61 mm) 0.030″ (0.76 mm) 0.036″ (0.91 mm) 0.048″ (1.2 mm) 0.060″ (1.5 mm) |
| Stocked layout sizes | 12″×12″ (30×30 cm) 12″×24″ (30×61 cm) 24″×24″ (61×61 cm) 24″×48″ (61×122 cm) |
| Stocked colors | natural |
| Masking | not available |
| Surface texture | smooth |
| Surface finish | #2B unpolished/mill #3 brushed #4 brushed |
| Opacity | opaque |
| Magnetic | ✘ (see notes) |
Notes:
- The 304 stainless steel we stock is strong and weldable.
- Stainless steel parts are resistant to corrosion and rust.
- 304 stainless steel is not magnetic, but there are other types of stainless steel that are.
- See our general notes about metals.
 |
 |
Through-cutting, vector etching, and raster engraving on stainless steel. |
|---|
Woods
General notes about woods:
- We strongly recommend adding masking to minimize burn markings and discoloration from laser cutting.
- Primer is usually unnecessary for UV printing on wood since it is porous, though you can still add it to maximize adhesion strength.
Birch plywood
| Max thickness | 1″ (25.4 mm) |
|---|---|
| UV printable | ✓ |
| Primer recommended for UV printing |
✘ |
| Stocked | ✓ |
| RoHS 3 | ✓ |
| Stocked thicknesses | 1/16″ (1.6 mm) 1/8″ (3.2 mm) 1/4″ (6.4 mm) 3/8″ (9.5 mm) 1/2″ (12.7 mm) |
| Stocked layout sizes | 30″×24″ (76×61 cm) 30″×48″ (76×122 cm) |
| Stocked colors | natural |
| Masking | added on request |
| Surface texture/finish | natural |
| Opacity | opaque |
Notes:
- Birch plywood is a popular, eco-friendly plywood that is great for laser cutting.
- Stocked 1/8″ and thicker sheets are BB/BB grade.
- Small patches, light mineral streaks, and tight pin knots might affect both surfaces of the wood.
- The thickness of stocked sheets varies significantly.
- See our general notes about woods.
 |
MDF (medium-density fiberboard)
| Max thickness | 1″ (25.4 mm) |
|---|---|
| UV printable | ✓ |
| Primer recommended for UV printing |
✘ |
| Stocked | ✓ |
| RoHS 3 | ✓ |
| Stocked thicknesses | 1/8″ (3.2 mm) 1/4″ (6.4 mm) 1/2″ (12.7 mm) |
| Stocked layout sizes | 24″×48″ (61×122 cm) |
| Stocked colors | natural |
| Masking | not available |
| Surface texture | smooth |
| Surface finish | natural |
| Opacity | opaque |
Notes:
- See our general notes about woods.
Other materials
Cardboard
| Max thickness | 5/32″ (3.97 mm) |
|---|---|
| UV printable | ✓ |
| Primer recommended for UV printing |
✘ |
| Stocked | ✓ |
| RoHS 3 | ✓ |
| Stocked thicknesses | 5/32″ (3.97 mm) |
| Stocked layout sizes | 40″x48″ (16×19 cm) |
| Stocked colors | natural (brown) |
| Masking | added on request |
Notes:
- Cardboard has a slight smell when laser cut.
- Primer is usually unnecessary for UV printing on cardboard since it is porous, though you can still add it to maximize adhesion strength.
- Corrugated cardboard sheets have a fluted center layer that makes bending/folding parts easier when the fold line is parallel to the flute direction. If that is important for your parts, please specify the flute direction in your file.
- For the cardboard we stock, the flutes are parallel with the 40″ edges.
Cardstock/paper
| Max thickness | |
|---|---|
| UV printable | ✓ |
| Primer recommended for UV printing |
✘ |
| Stocked | ✘ |
Notes:
- We can laser cut cardstock and paper, but it is usually more cost-effective to plot/die cut it instead.
- Laser cutting cardstock/paper might leave light burn marks. Darker colors are better at hiding burn marks.
Fabrics
| Max thickness | |
|---|---|
| UV printable | ✘ |
| Stocked | ✘ |
Notes:
- We have successfully laser cut various types of fabrics including acrylic, canvas, cordura, cotton, nylon, polyester, and wool.
- Edges of laser cut fabrics become cauterized (which helps prevent the fabric from fraying), but might have slight discoloration depending on the color.
- Fabric can be sent on a roll to avoid wrinkling.
Leather
| Max thickness | 1/8″ (3.2 mm) |
|---|---|
| UV printable | ✘ |
| Stocked | ✘ |
Notes:
- Synthetic leathers must be vinyl-free.
- All leather (both natural and synthetic) smells very bad when laser cut, so you might have to air the parts out once you receive them.
- Edges of laser cut leather will have noticeable char/soot on them. We ship parts as cut without dusting or cleaning them.
5.1. More information about acrylic
|
Acrylic – also known by a variety of other names, including plexiglass, Plexi, perspex, lucite, and PMMA – is the most popular laser-cutting material that we carry as it is inexpensive and has an attractive finish with laser-polished edges that is ready for immediate display.
Acrylic is available in a variety of thicknesses (which we can cut up to 1″), and a variety of transparent, translucent, and opaque colors, including fluorescent, mirrored, and two-tone options too. We have a large selection of acrylic colors and thickness available; for a complete list of our stocked materials, please see our quote request page. If you need something else, we might be able to special-order it for you from our suppliers, or you can ship it to us instead.
While acrylic is lighter and stronger than glass, it is also somewhat brittle and is susceptible to cracking if it is dropped or hit – especially at sharp corners in your design – or if drilled using the wrong bit or poor technique. We do not recommend acrylic for applications that require rough handling. However, we also have several impact-modified acrylic options that are more durable, but please note these acrylics usually have sticker edges after laser cutting than standard acrylic.
You can glue acrylic together using special acrylic glues such as Weld-On. Please contact your local hardware store and ask for glues used for acrylic.
How to care for and clean acrylic parts
Acrylic comes with a protective, paper or film, masking attached to the surface, which we leave on when we cut and ship your parts to avoid scratching the surface. Once you receive the parts, you will need to peel the masking. Here is a video that shows an easy way to unmask acrylic, which is especially helpful if you have a lot of parts!
After you have unmasked the acrylic, it can naturally build up a static charge, which can attract dirt and dust.
To clean acrylic, we always recommend that you use a very soft microfiber cloth, and avoid using paper towels, as their rough surfaces can often cause more scratches on the acrylic surface. Usually, a simple mixture of warm water and mild dish soap will do the trick, and you should avoid using harsh household cleaning products like Windex. For a more thorough cleaning, we recommend Novus #1 plastic cleaner, which is available in multiple kit sizes, or separately, from a variety of retailers, including Amazon.
WARNING: Never use isopropyl (rubbing) alcohol to clean acrylic as it will cause the acrylic to crack!
Cast and extruded acrylic
Acrylic starts as a liquid resin, which is either cast into a glass mold, or continuously extruded through a machine to make flat sheets. Both methods have advantages and disadvantages, and the following table highlights some of the most important differences:
| Cast Acrylic | Extruded Acrylic | ||
|---|---|---|---|
| ✓ | Turns frosty white when engraved, which provides high-contrast engravings | Engraving is difficult to see from most angles | |
| Thickness varies more | ✓ | Tighter thickness tolerances | |
| ✓ | Higher molecular weight; less susceptible to cracking, e.g. when machined | Lower molecular weight; more susceptible to cracking, e.g. when machined | |
| Higher melting point results in less polished finish | ✓ | Lower melting point provides a more polished finish | |
| ✓ | Wider variety of colors available | Fewer color options | |
Common uses for laser-cut acrylic
Acrylic is commonly used as an alternative to glass for a variety of different applications, such as:
|
|
|
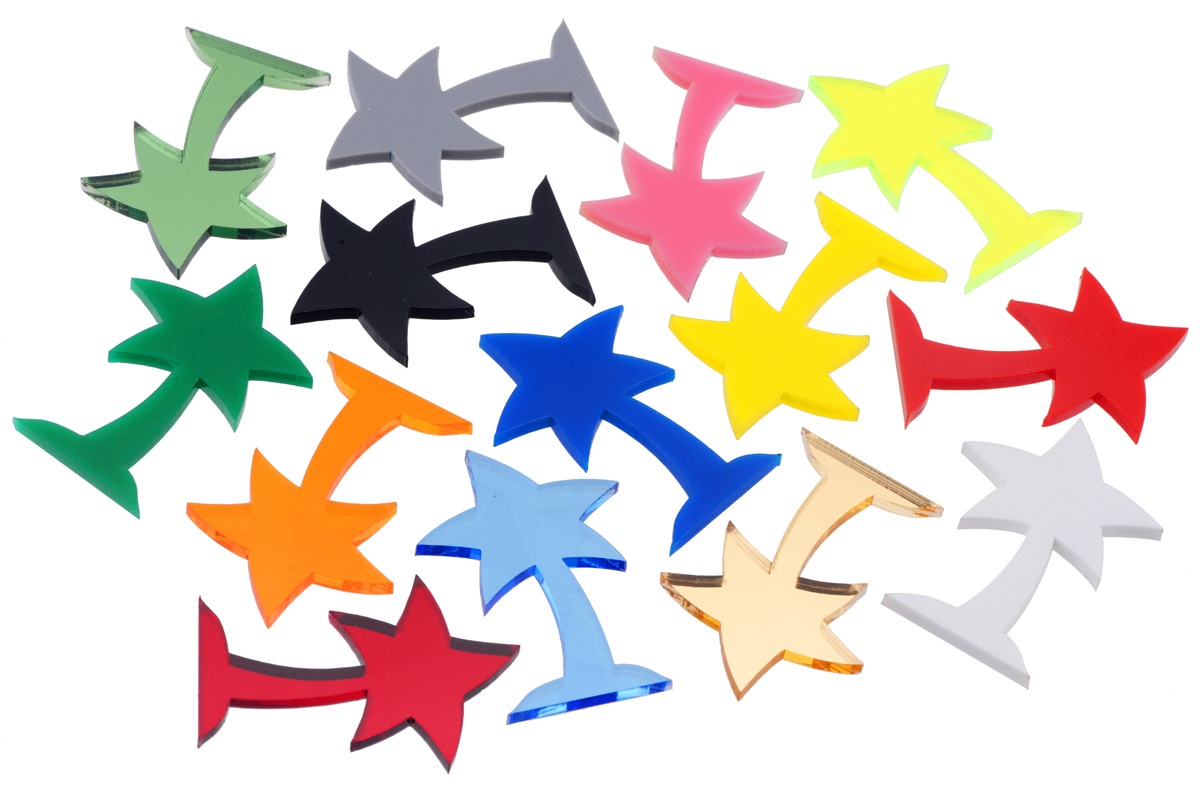
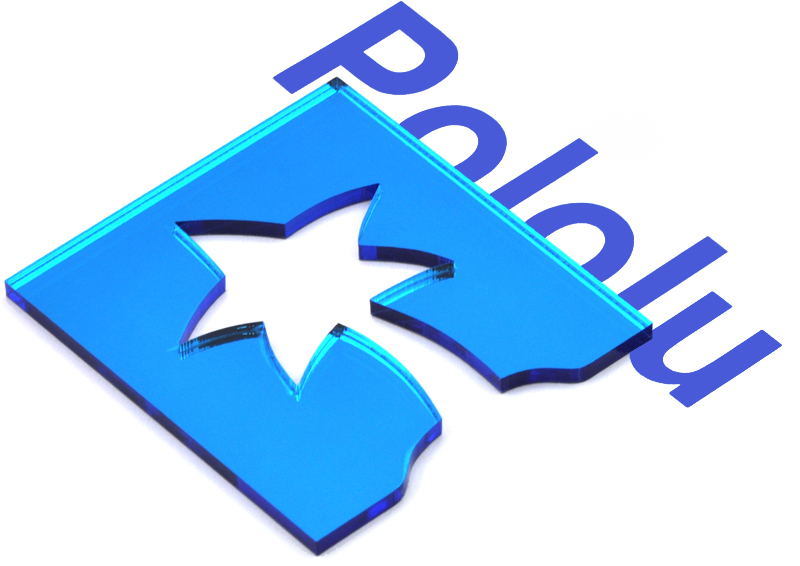
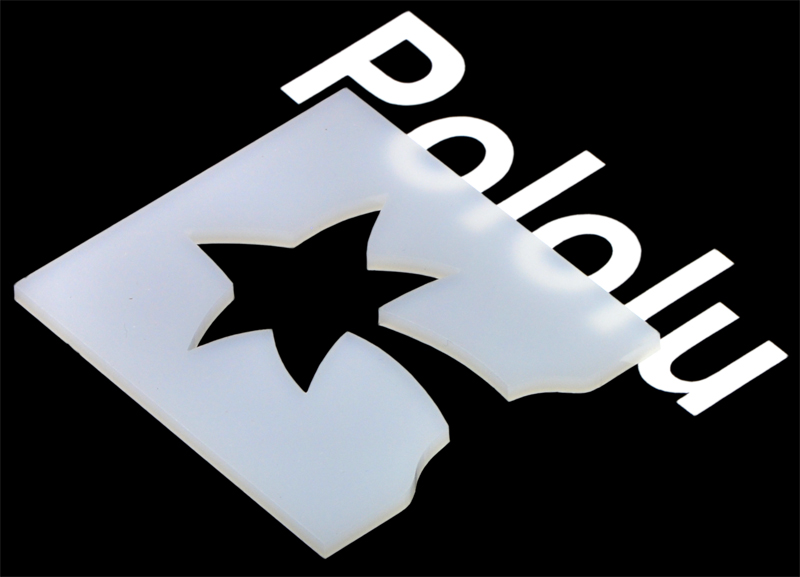
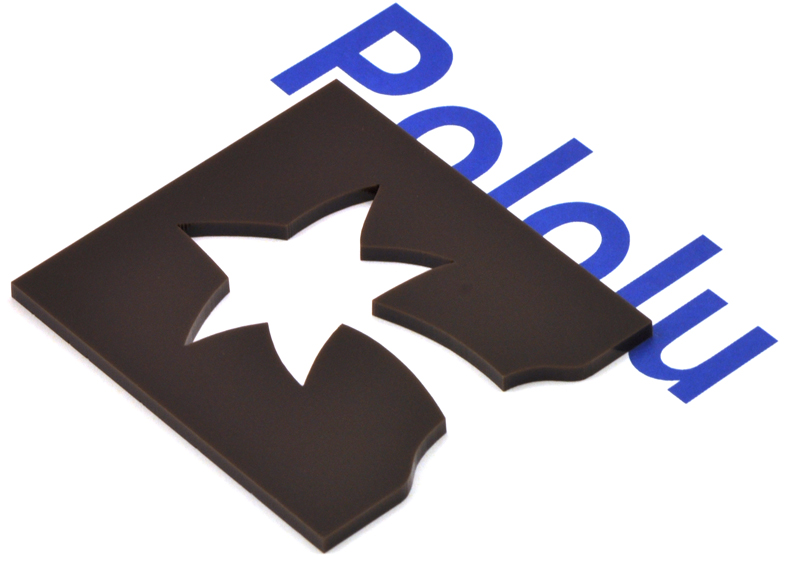
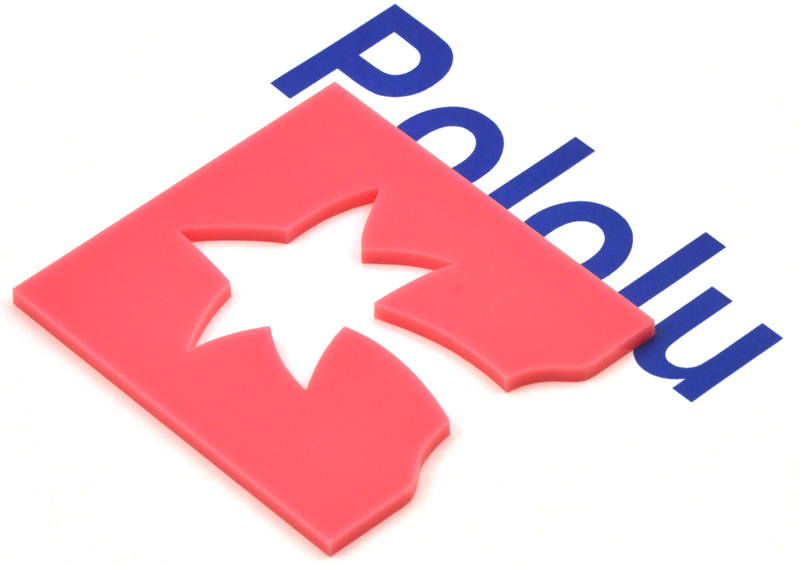
Pictures of some acrylic colors we stock
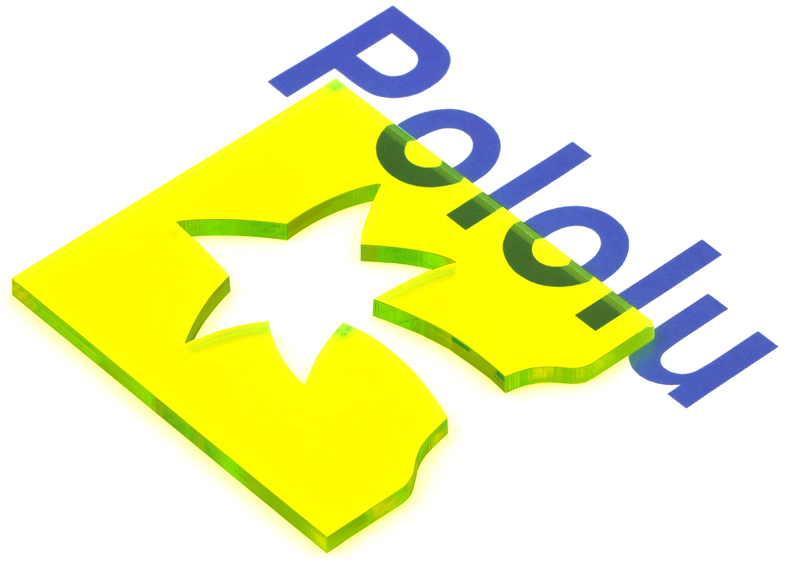
Below are pictures of most of the 3mm acrylic colors we stock. Your monitor will probably not show the colors exactly, but the pictures should give you some idea of what the colors are like. We do stock other colors and materials: see the quote request form for a complete list.
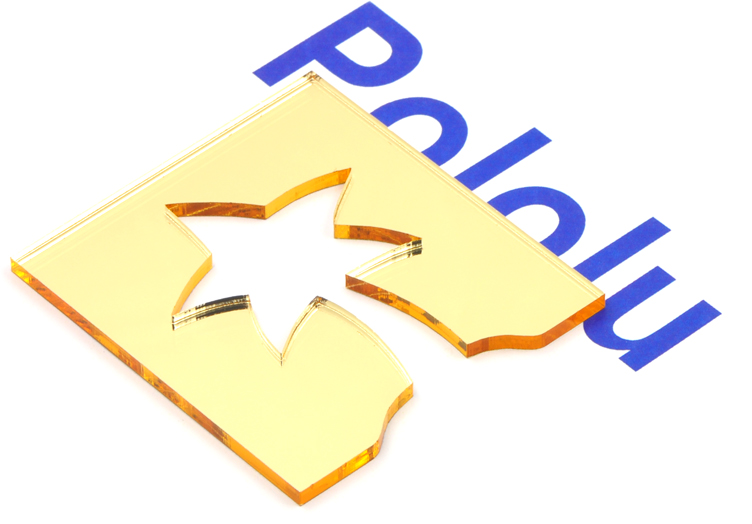 |
Gold mirrored acrylic. |
|---|
 |
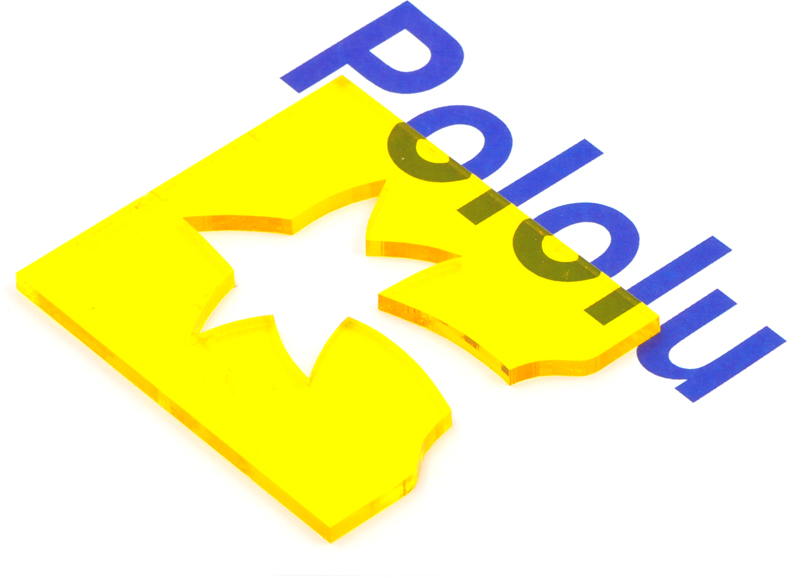
Yellow mirrored acrylic. |
|---|
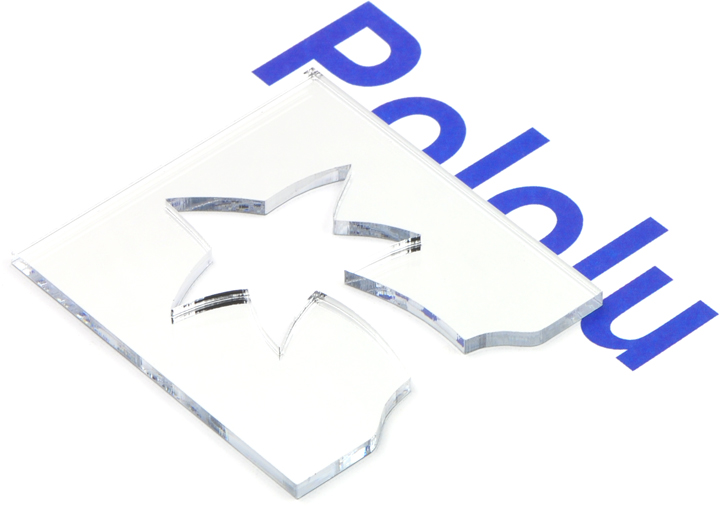 |
Clear “silver” mirrored acrylic. |
|---|
 |
Opaque black acrylic #2025. |
|---|
 |
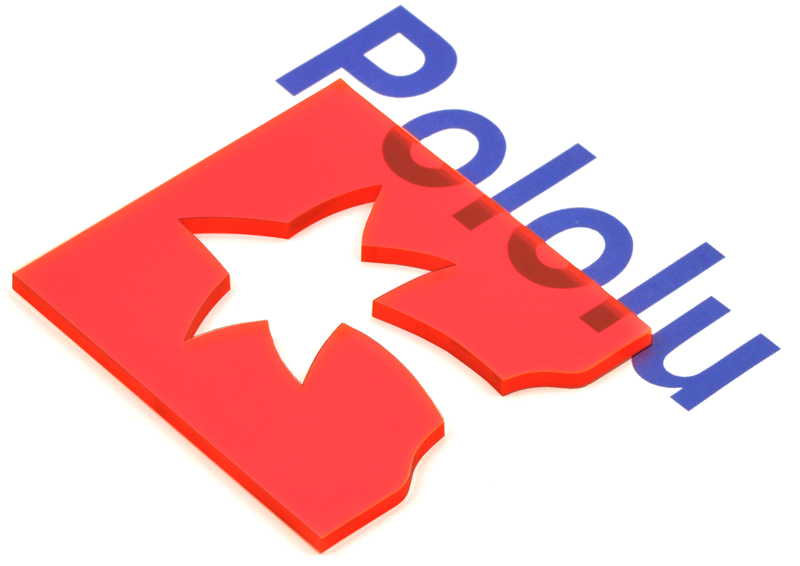
Translucent red acrylic (#2283 or similar). |
|---|
 |
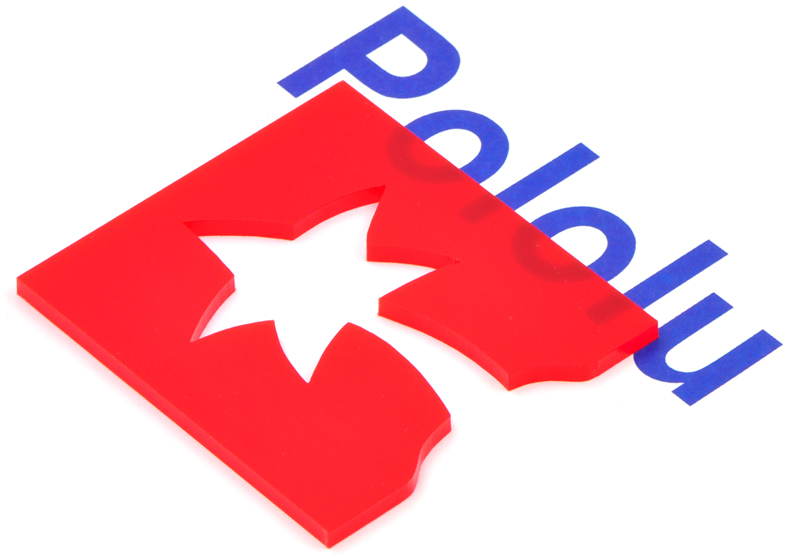
Transparent fluorescent red acrylic #2085. |
|---|
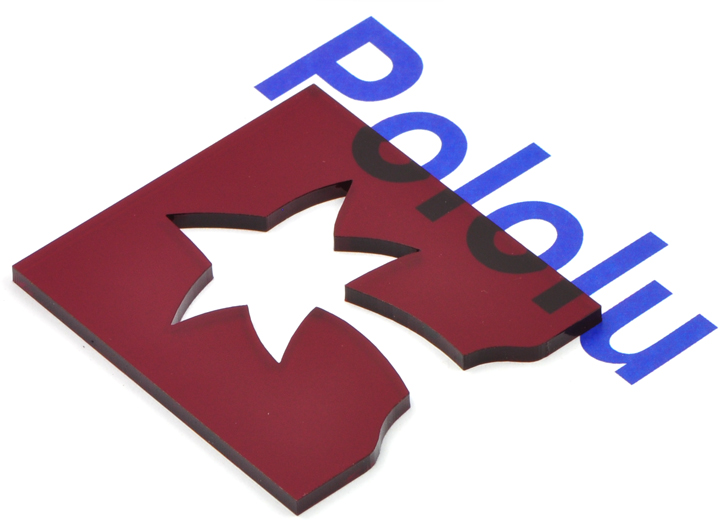 |
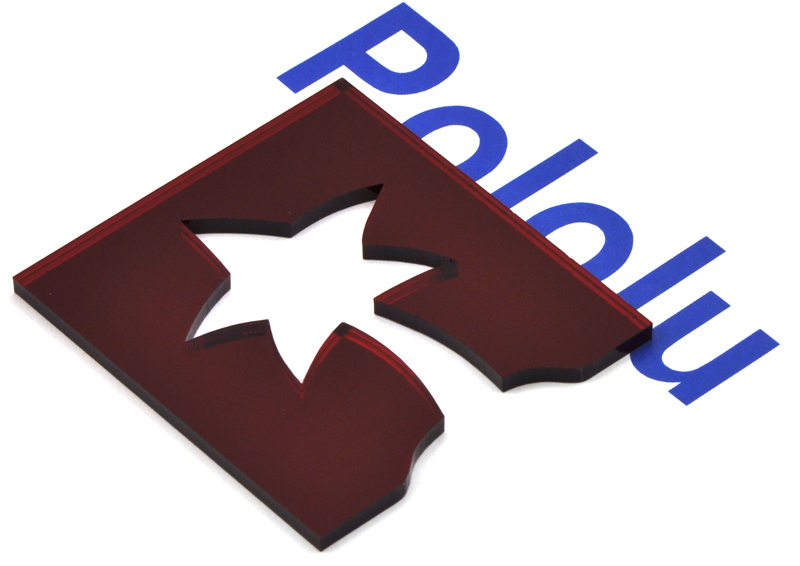
Transparent red acrylic #2423. |
|---|
 |
Red mirrored acrylic. |
|---|
 |
Transparent yellow acrylic (#2208 or similar). |
|---|
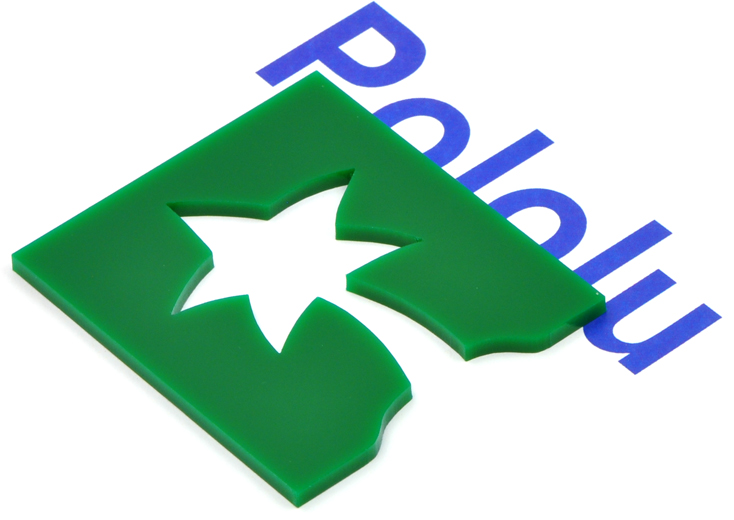 |
Translucent green acrylic (#2108 or similar). |
|---|
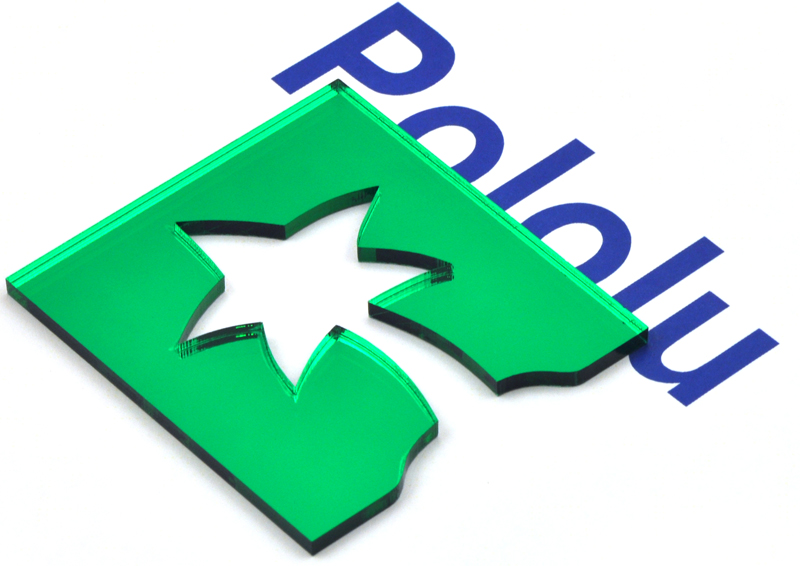 |
Green mirrored acrylic. |
|---|
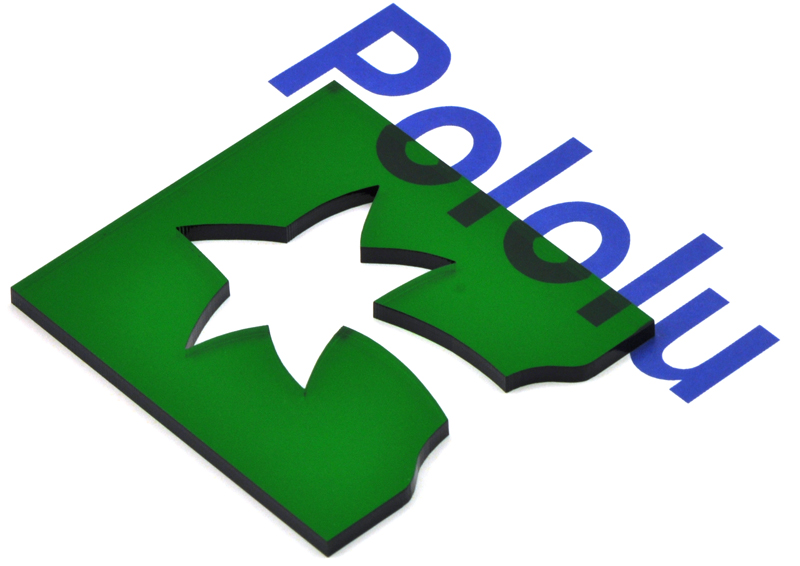 |
Transparent green acrylic #2092. |
|---|
 |
Transparent fluorescent green acrylic #2154. |
|---|
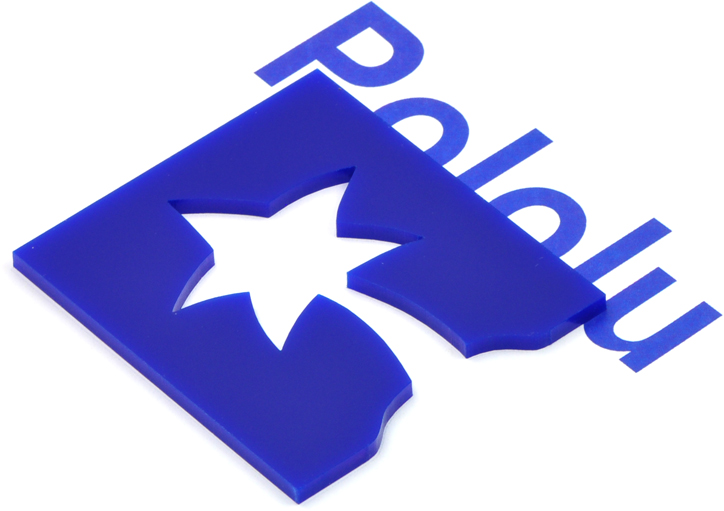 |
Translucent dark-blue acrylic (#2114 or similar). |
|---|
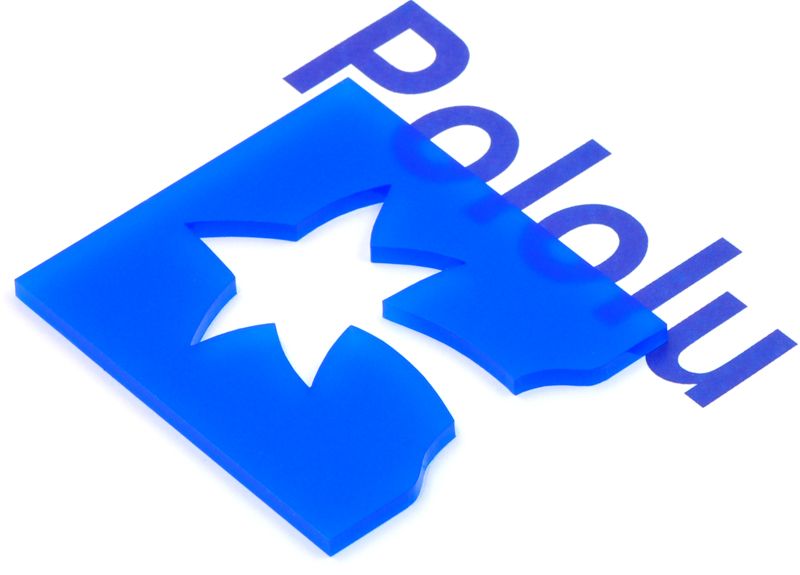
 |
Transparent blue acrylic #2424. |
|---|
 |
Translucent blue acrylic #2051. |
|---|
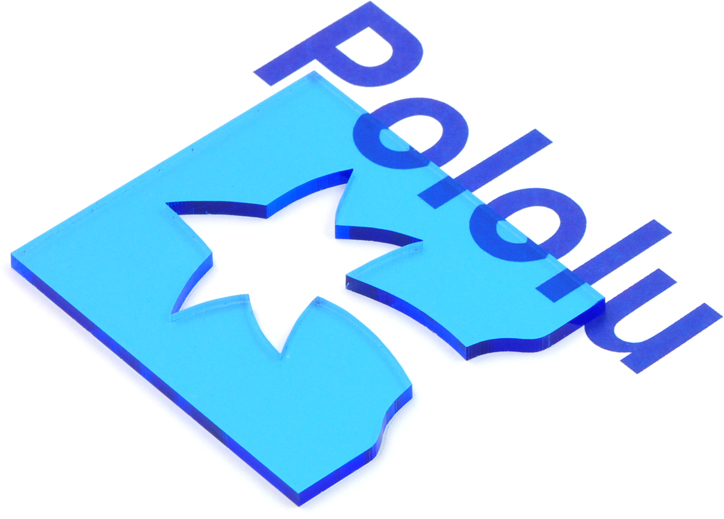 |
Transparent light-blue acrylic #2069. |
|---|
 |
Sapphire blue mirrored acrylic. |
|---|
 |
Translucent turquoise acrylic #2308. |
|---|
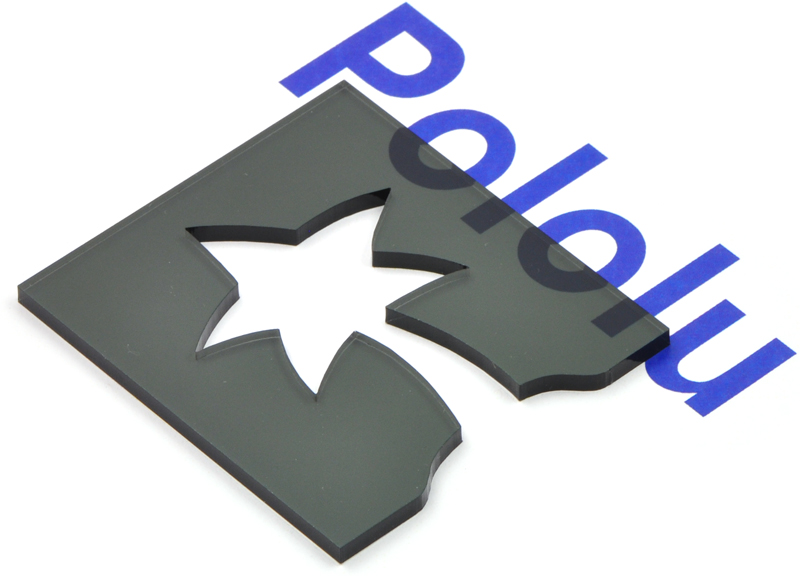 |
Transparent gray acrylic (#2064, #2074, or similar). |
|---|
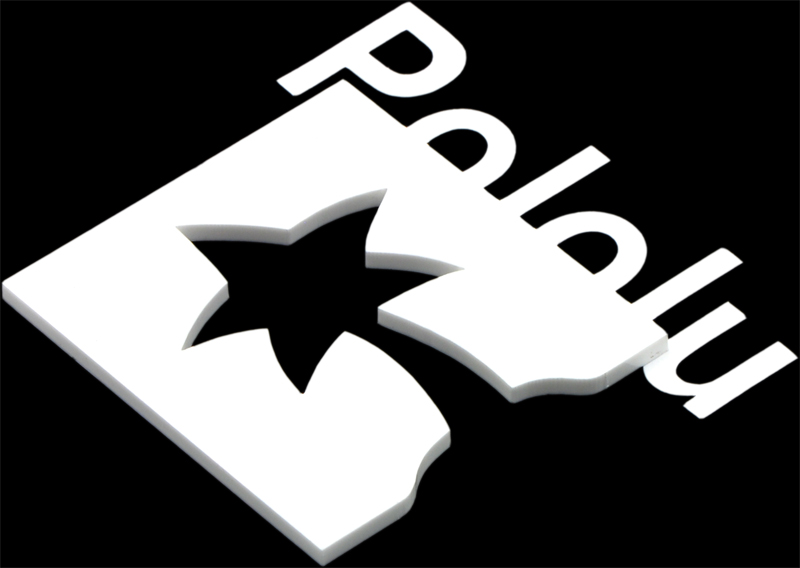 |
Opaque white acrylic #3015. |
|---|
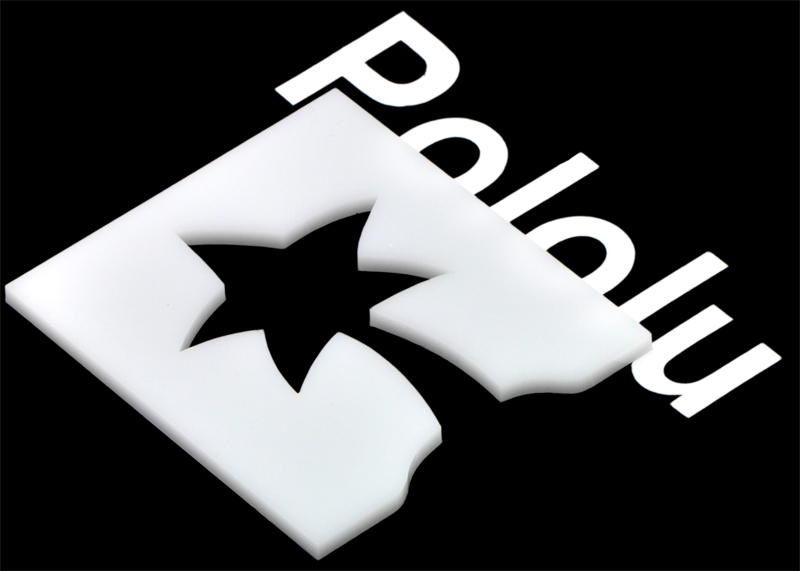 |
Translucent white or “sign white” acrylic #7328. |
|---|
 |
Very translucent white acrylic #2447. |
|---|
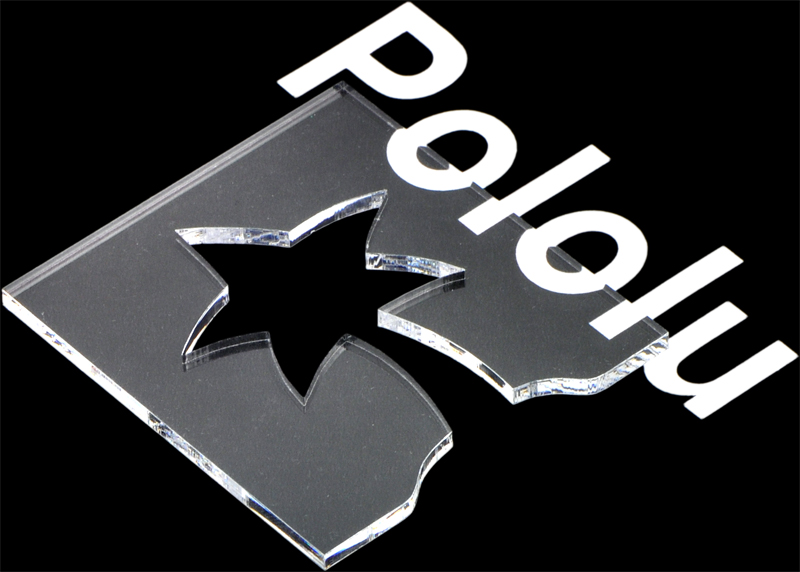 |
Transparent clear acrylic. |
|---|
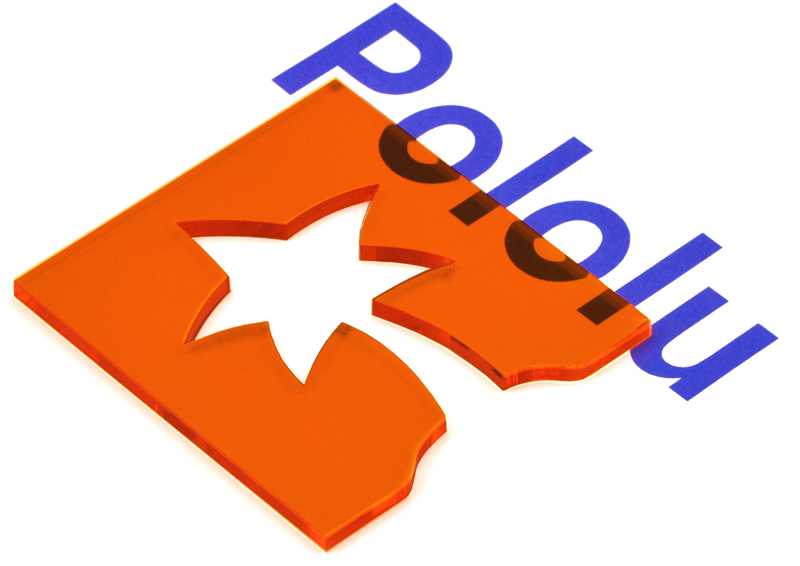 |
Transparent amber acrylic #2422. |
|---|
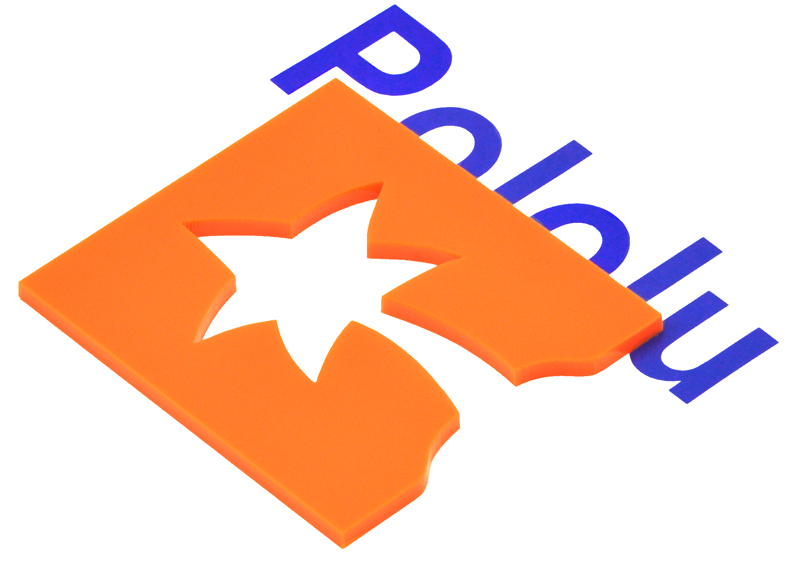 |
Translucent orange acrylic #2119. |
|---|
 |
Transparent fluorescent orange acrylic #2086. |
|---|
 |
Translucent brown acrylic #2418. |
|---|
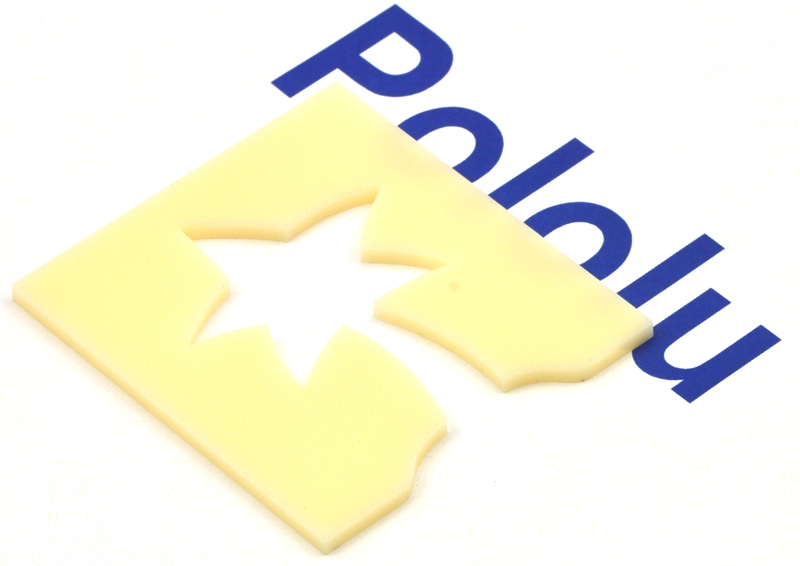 |
Translucent ivory acrylic #2146. |
|---|
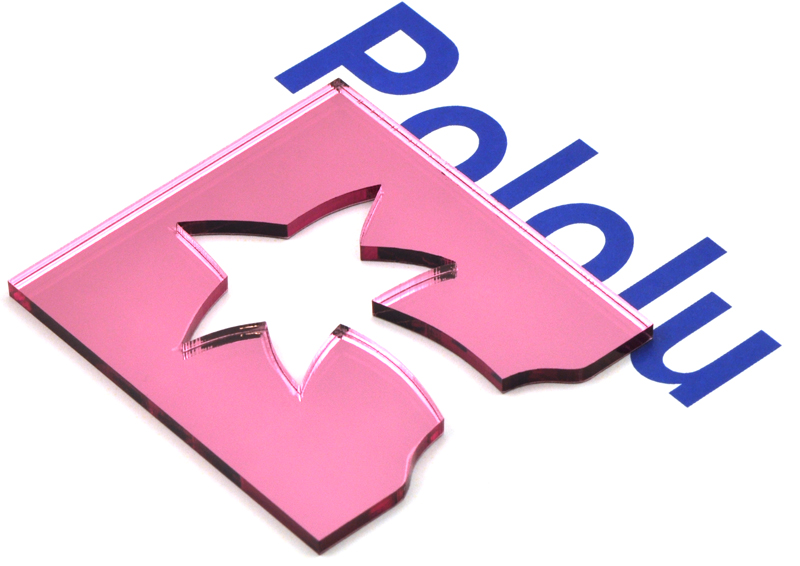 |
Pink mirrored acrylic. |
|---|
 |
Translucent pink acrylic #3199. |
|---|
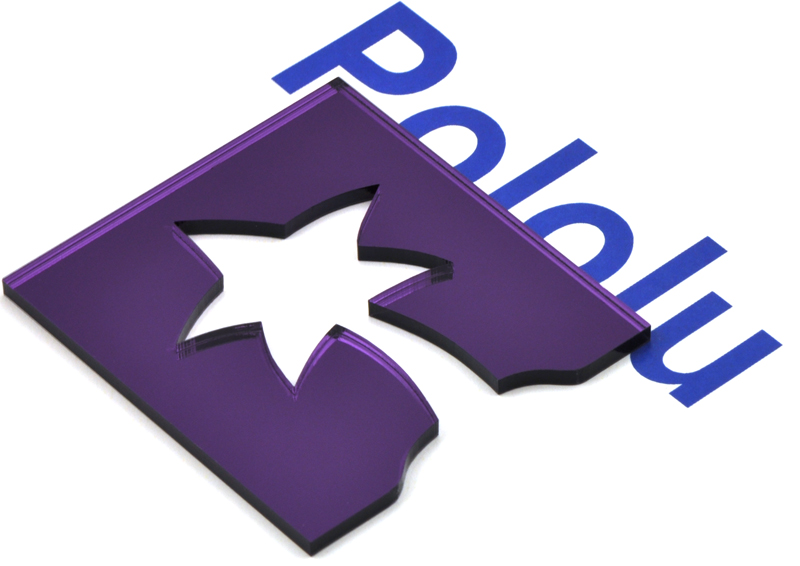 |
Purple mirrored acrylic. |
|---|
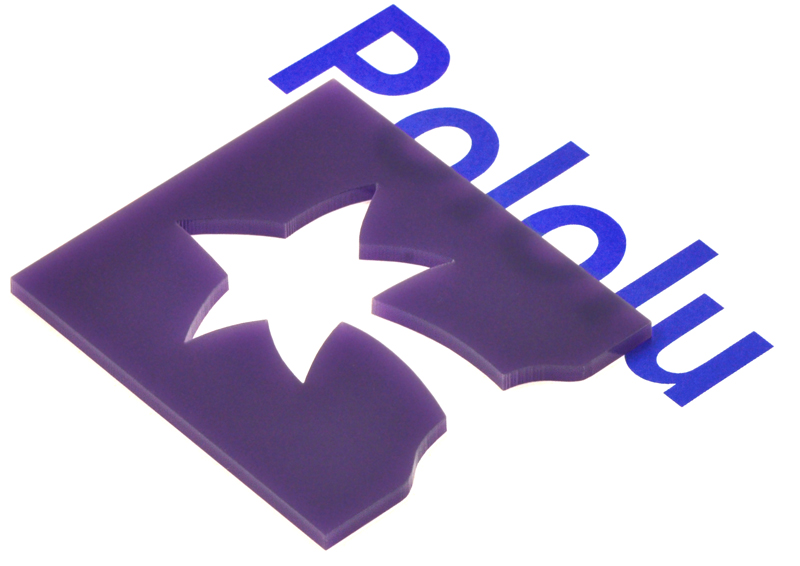 |
Translucent violet acrylic #2287. |
|---|
6. UV printing
|
Laser-cut and UV-printed acrylic. |
|---|
Our UV Printing service – also commonly referred to as Flatbed Printing – is a great way to add vibrant and colorful labels, logos, photos, and artwork to your laser-cut parts. We use UV-cured ink that dries instantly, allowing us to offer fast turnarounds and affordable prices.
We can:
- Print directly onto a part or part layout up to 24″ × 16.5″ (61 cm × 42 cm).
- Print onto many of the materials we can laser cut.
- Print in 600 DPI or 1200 DPI resolution.
- Stack multiple layers of UV-cured ink to meet all of your project’s needs.
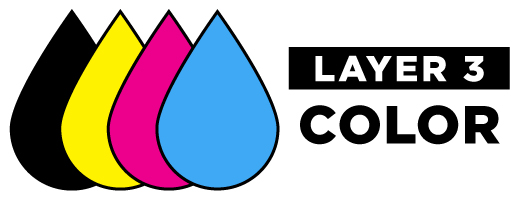
- Full-color CMYK ink (cyan, magenta, yellow, black)
- White ink creates a solid, opaque background for printing vibrant colors on non-white materials
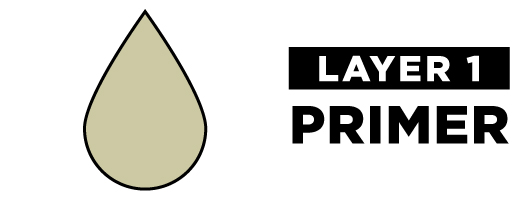
- Primer ink improves ink adhesion strength making prints robust across a wide range of materials, even for low surface area prints
- Clear ink on top adds a layer of protection
- Print using vector objects, bitmap images, or both.
- Add a photo (JPG, PNG, TIF, etc) to your laser cut design for you.
Pricing
We quote custom laser cutting and UV printing simultaneously, so the prices in your quote are for both. Here are some of the factors that affect UV-printing prices:
- UV-printing set-up fee: We charge $50 per unique UV-printing layout.
- We reduce the setup fee for repeat orders.
- UV-printing cost: We quote UV-printed designs based on layout size, number of ink layers, and printing resolution.
- Typical, 600 DPI resolution four-layer prints (primer, white, color, clear) start around $15 per square foot (plus setup fees).
- High-resolution four-layer prints (600 DPI primer, 1200 DPI white, 1200 DPI color, 600 DPI clear) start around $25 per square foot (plus setup fees).
- File creation: If you have common picture files (JPG, PNG, TIF, etc), but are unable to incorporate them in your laser cutting vector or CAD files, we might be able to create a file for you. Our file creation service costs $60 per hour, with a $15 minimum.
As with typical laser cutting orders, we discount rates for volume orders and offer expedited options. See Section 2 for more general information about prices for custom laser cutting.
Limitations to consider
- While we can print onto many common laser cutting materials, we cannot print onto all of the materials we can laser cut.
- To check what materials we can and cannot print onto, please see Section 5.
- Our inks work best on rigid materials, and the prints do not hold up well to being bent or stretched.
- Ink adhesion strength depends on the material, whether primer is used, and the size/geometry of the artwork.
- We typically expect the alignment between printed artwork and laser cut geometry to be around 0.010″ (0.25 mm), but we do not guarantee any particular tolerance.
- For designs where it is important for artwork to go all the way to the part edge we recommend including at least a 0.020″ (0.5 mm) bleed past the cut lines, but please note that this might result in some ink getting along the side edges of the part.
- We decide whether to print before or after laser cutting on a case-by-case basis. If you have specific needs or concerns, please mention them when you submit your quote request.
6.1. How to design UV prints
This section should cover everything you might want to consider in your UV-printing designs. However, if you cannot set up your file, send us what you can (even if it is just attaching a picture file, like a JPG, PNG or TIF, and some notes to your quote request), and we might be able to create the file for you.
- Downloadable template files
- Important file setup notes
- Ink basics
- Printing resolution
- Bitmaps (common picture files)
- First-surface prints
- Second-surface prints
- Double-sided prints
- Additional ink tips capabilities
- Raising areas of the print
- Examples of UV-printed parts
Downloadable template files
You can download one of our templates below, which already have the different layers set up. All you will need to do is add your artwork to the appropriate layer, and save it!
|
|
|
| CorelDRAW (340k cdr) | Adobe Illustrator (7MB ai) | Inkscape (457k svg) |
|---|
|
|
||||
|
|
Important file setup notes
 |
Example of laser-cutting and UV-printing objects organized on multiple layers in file. |
|---|
You can find general file set up instruction in Section 4; however, here are a couple of the important notes that are relevant for UV print designs:
- Define UV-printed artwork on separate layers from your cutting geometry and notes.
- Define a separate layer for each layer of ink you want to print.
Note: White, primer, and clear layers should be defined in non-white colors as our printer will ignore white objects and white areas.
- Arrange the printing layers in the order that you want us to print them in (bottom first, top last).
- You can define UV-printed artwork using vector or bitmap objects.
Note: If your UV-print design uses bitmaps, we recommend configuring them with 1200 DPI resolution. See the Bitmaps (common picture files)
section for a more detailed explanation.
Ink basics
- To get the most accurate results, we recommend designing your UV-printed artwork with CMYK defined colors instead of RGB colors.
- Using white ink under color ink will make colors opaque and vibrant.
- Color ink printed without white ink behind it will typically be more transparent and muted depending on the material.
Comparison of prints on different materials without and with a white ink layer.
| Material | CMYK | W + CMYK | |
|---|---|---|---|
| Clear acrylic |
|
||
| Black acrylic |
|
||
| Birch plywood |
|
||
| Aluminum |
|
||
- Primer, when used, should always be the first (bottom) layer as its purpose is to improve adhesion strength between the print and the material.
- We recommend adding a primer layer that will go under all of the artwork for prints on smooth, non-porous materials (e.g. plastics, metals), especially for designs that have features less than 0.2″ (5 mm) wide, such as small text.
- Primer is usually unnecessary for prints on porous materials (e.g. wood).
- Our material profiles in Section 5 indicate whether we recommend primer for each material.
- Clear ink, when used, should always be the last (top) layer as its purpose is to protect the print from abrasion.
- We always recommend adding a clear layer that covers all of the artwork for protection, and we especially recommend it in applications where other objects might contact the print.
Printing resolution
- By default, we UV print orders with 600 DPI (dots per inch) resolution since we expect that quality will be excellent for most applications.
- On request, we can also print any of our inks in 1200 DPI resolution.
- Printing color and white layers in 1200 DPI resolution typically produces stronger, more vibrant colors and sharper edges.
- Printing color and white layers in 1200 DPI also reduces the likelihood of minor imperfections (banding, fuzzy edges, etc.).
- Printing with higher resolution uses more ink and takes significantly longer, so we charge more for it.
- Our recommendation:
- If your part is going in an art gallery, or if you want to be sure it is the very best quality possible, requesting 1200 DPI resolution is probably worth it.
- 600 DPI will probably be great for everything else.
Bitmaps (common picture files)
- The resolution of a printed bitmap depends on the size of the bitmap in your file and the physical area you want it to cover, and it is limited by the machine’s printing resolution mode.
``text(Bitmap print resolution )(text(DPI)) = (text(Bitmap size )(text(pixels))) / (text(Print dimensions )(text(inches))) ``
- We recommend configuring bitmaps so they can print with 1200 DPI resolution, otherwise the print quality might be limited by your image quality.
- If you know that you want to print to your parts in 600 DPI mode (which is our default), configuring your bitmaps with correspondingly lower resolution is also okay, but we recommend designing for 1200 DPI printing since that keeps both options available.
- Many programs provide a bitmap’s printing resolution if you look at the bitmap’s properties.
- Keeping the target resolution in mind and using accordingly high resolution bitmaps throughout your design process is the best way to ensure good results.
- If you cannot avoid using lower resolution bitmaps, one easy way you could change the resolution in many programs is by using a resampling tool, though make sure to check how that operation changes your artwork.
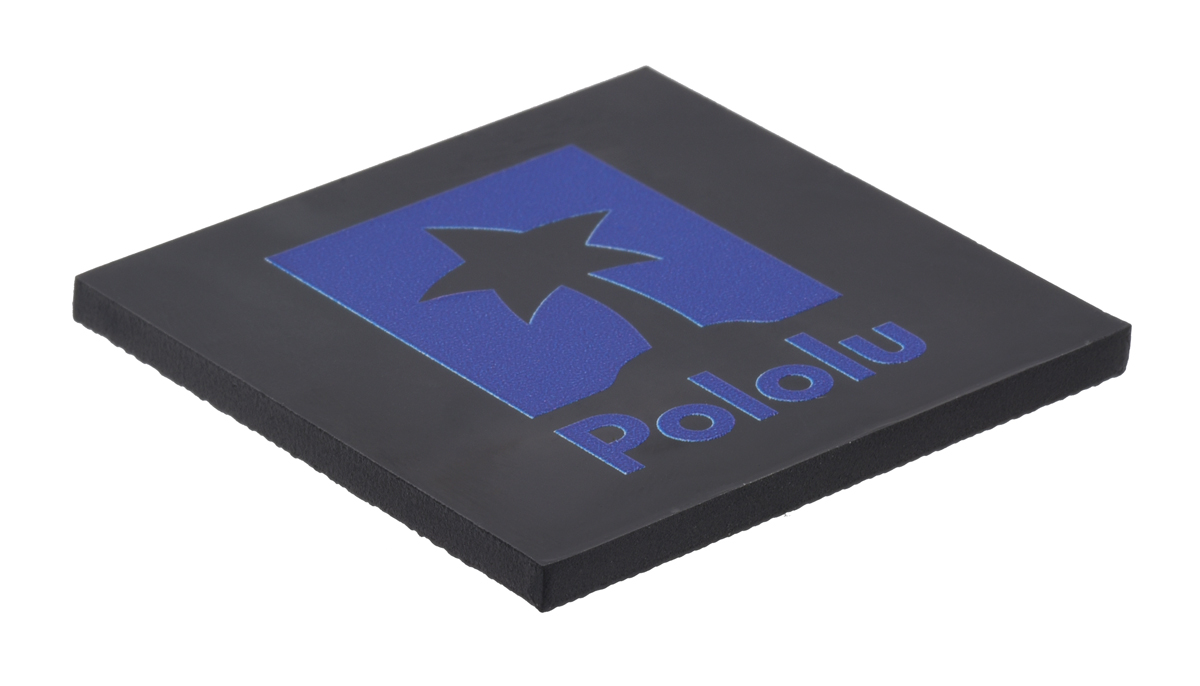
First-surface prints
- Typical single-sided prints viewed from side of the material they are printed on are called first-surface prints.
- First-surface prints will usually have four layers: primer, white, color, then clear.
Design for a first-surface print.
 |
 |
|
|---|---|---|
 |
 |
|
 |
 |
|
 |
 |
|
 |
A first-surface UV-print on laser-cut black acrylic. |
|---|
Second-surface prints
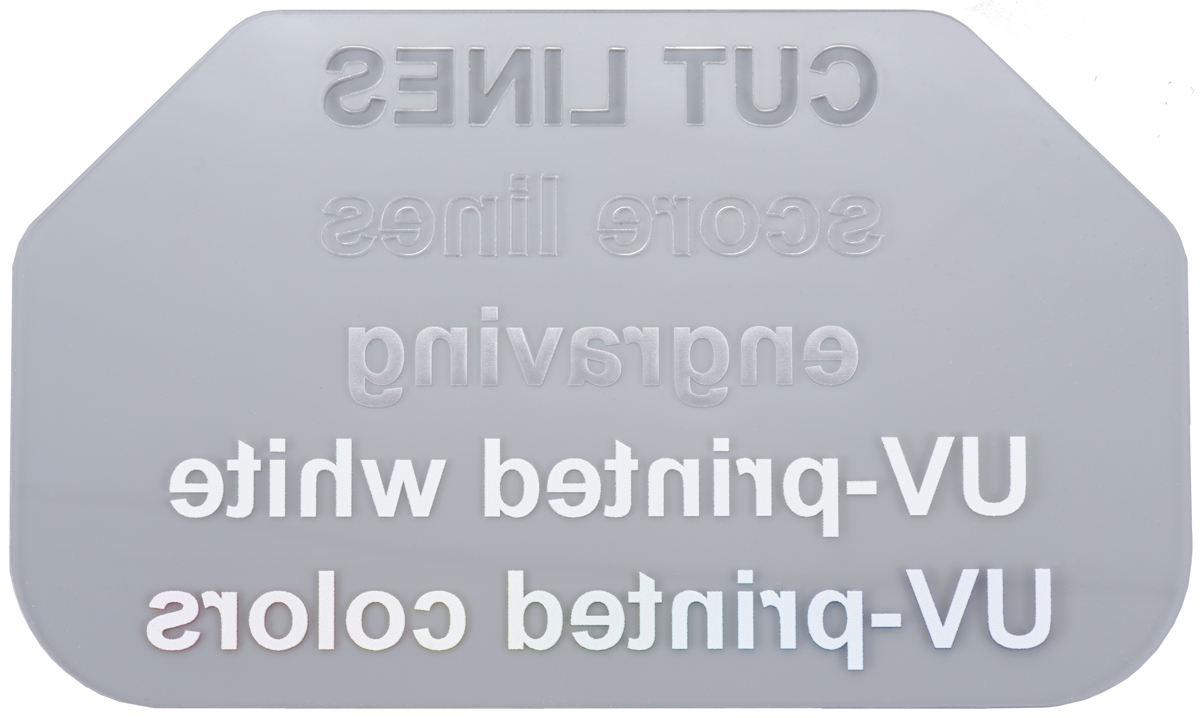
- For transparent materials (e.g. clear acrylic) you can design prints that are visible through the material called second-surface prints.
- Second-surface prints will usually have four layers: primer, color, white, then clear.
- Artwork for a second-surface print should be horizontally mirrored!
- Primer is clear, so it is still okay to use between the material and color layers on second-surface prints. It will not change the aesthetics of the print.
Design for a second-surface print.
| |
 |
|
|---|---|---|
 |
 |
|
 |
 |
|
| |
 |
|
 |
A second-surface UV-print on laser-cut clear acrylic. |
|---|
Double-sided prints
- Making artwork visible from both sides of an opaque part requires two setups to do a first-surface print on each side.
- Please note: we do not guarantee any particular alignment tolerance for setups like this.
- With transparent materials, you can make artwork visible from both sides of the part by sandwiching a layer of white ink between two color layers.
- Essentially, you are making a first-surface print and a second-surface print on the same part.
- These prints will usually have five layers: primer, color, white, color, then clear.
- The artwork for the second-surface print (i.e. the first color layer) should be mirrored!
Design for a first-surface and second-surface print.
 |
|
|
|---|---|---|
 |
 |
|
| |
|
|
| |
|
|
| |
|
|
|
|
||
| First-surface side | Second-surface side |
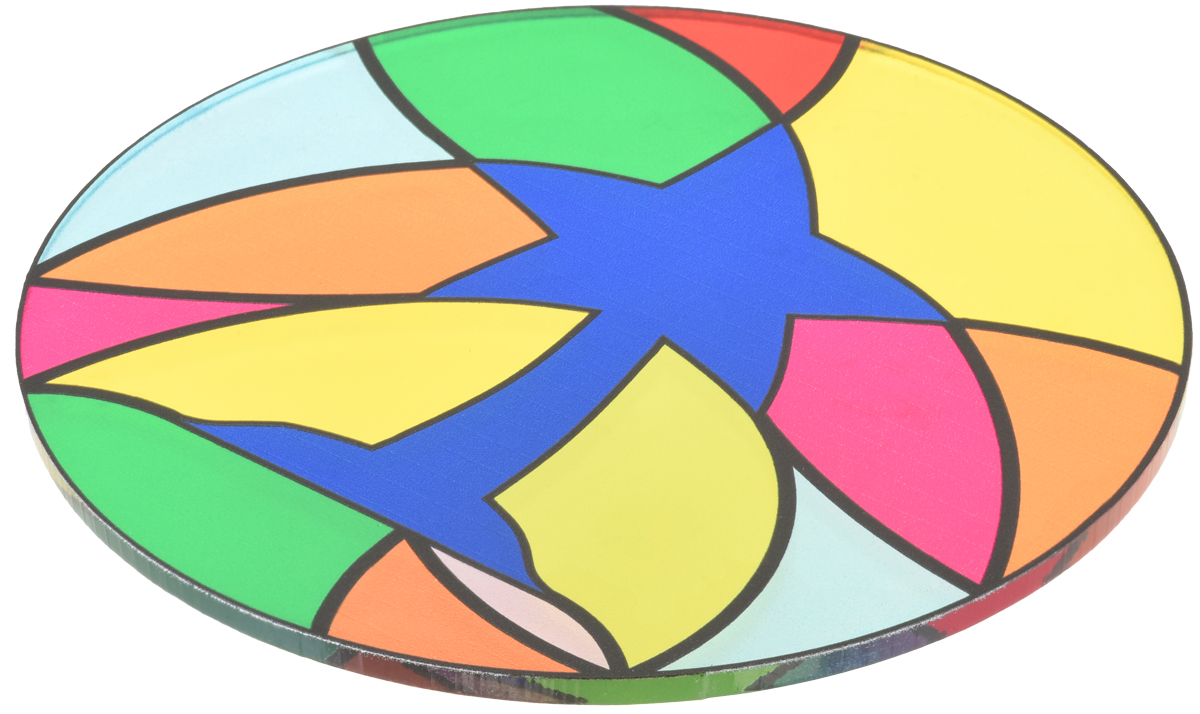
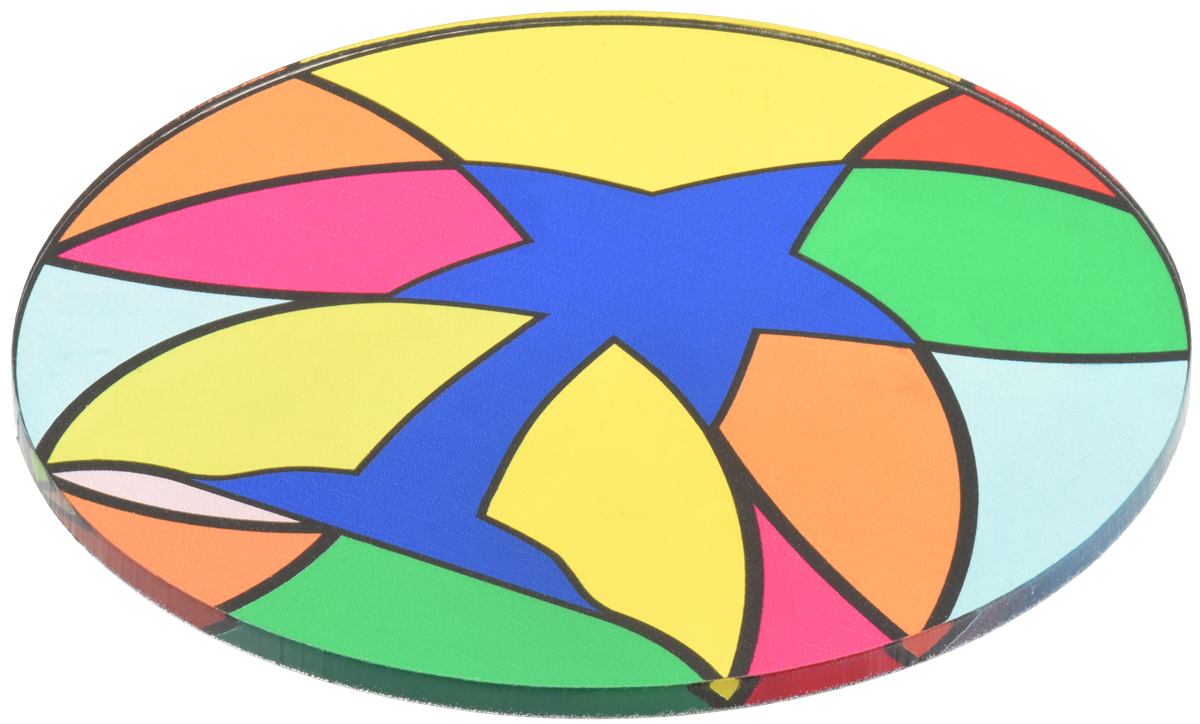
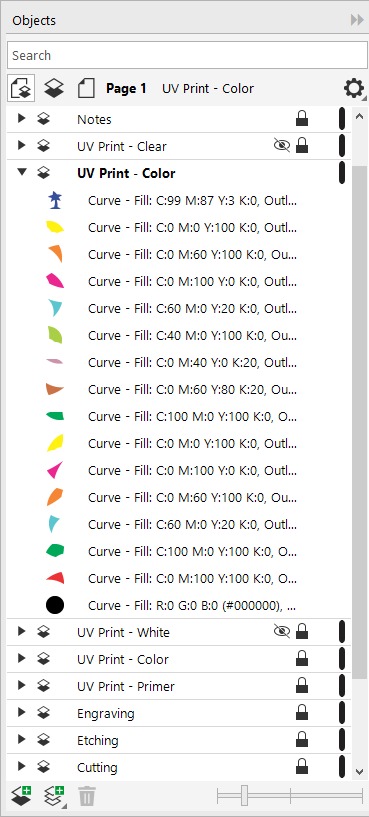
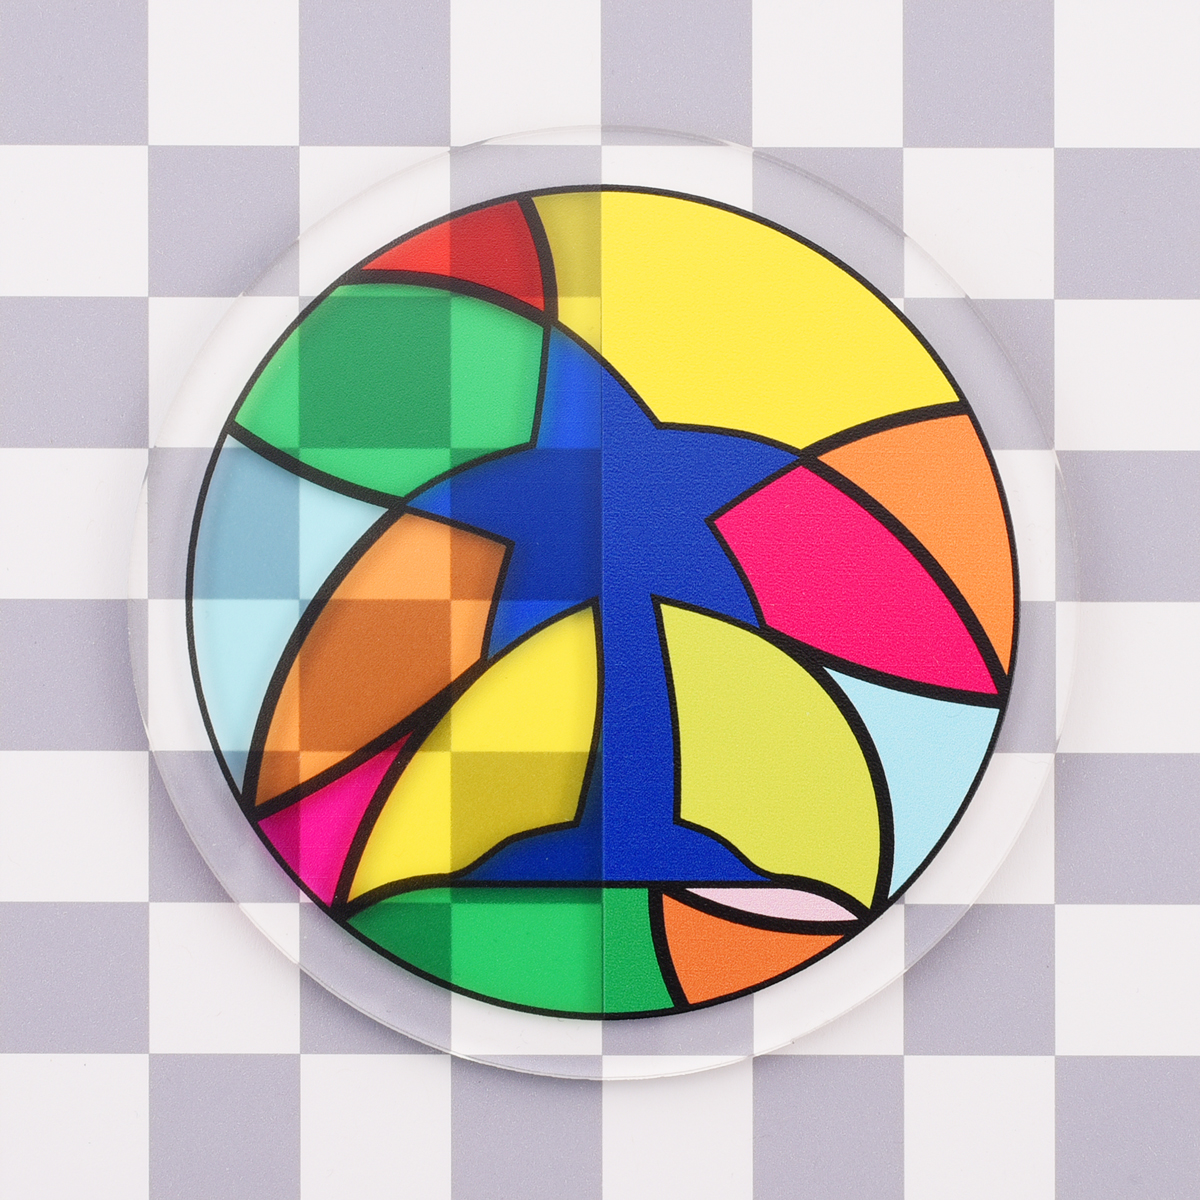
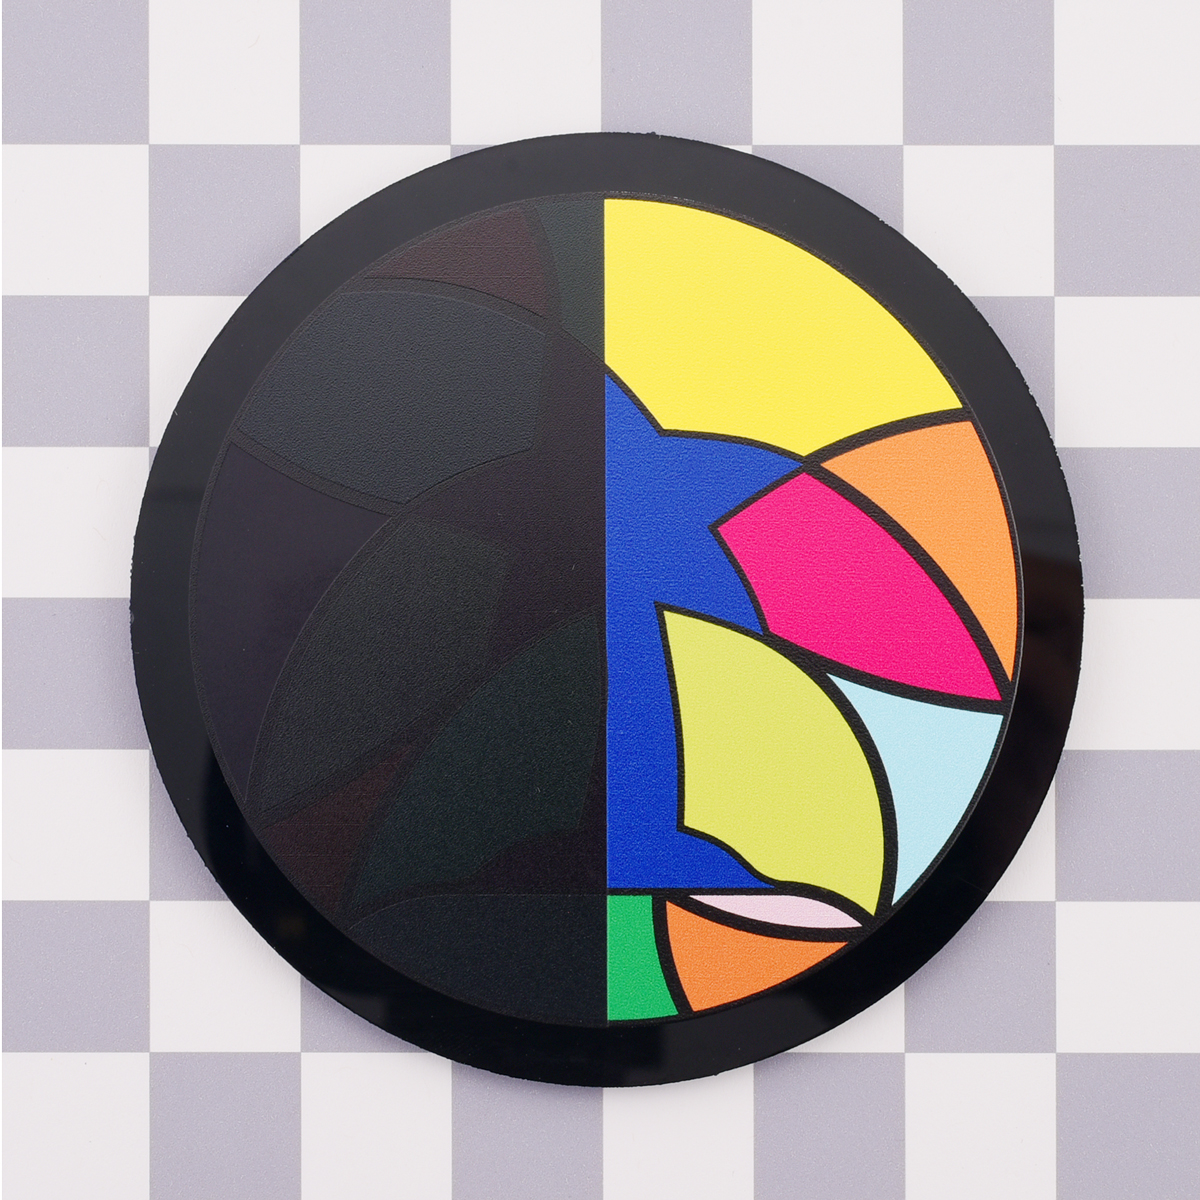
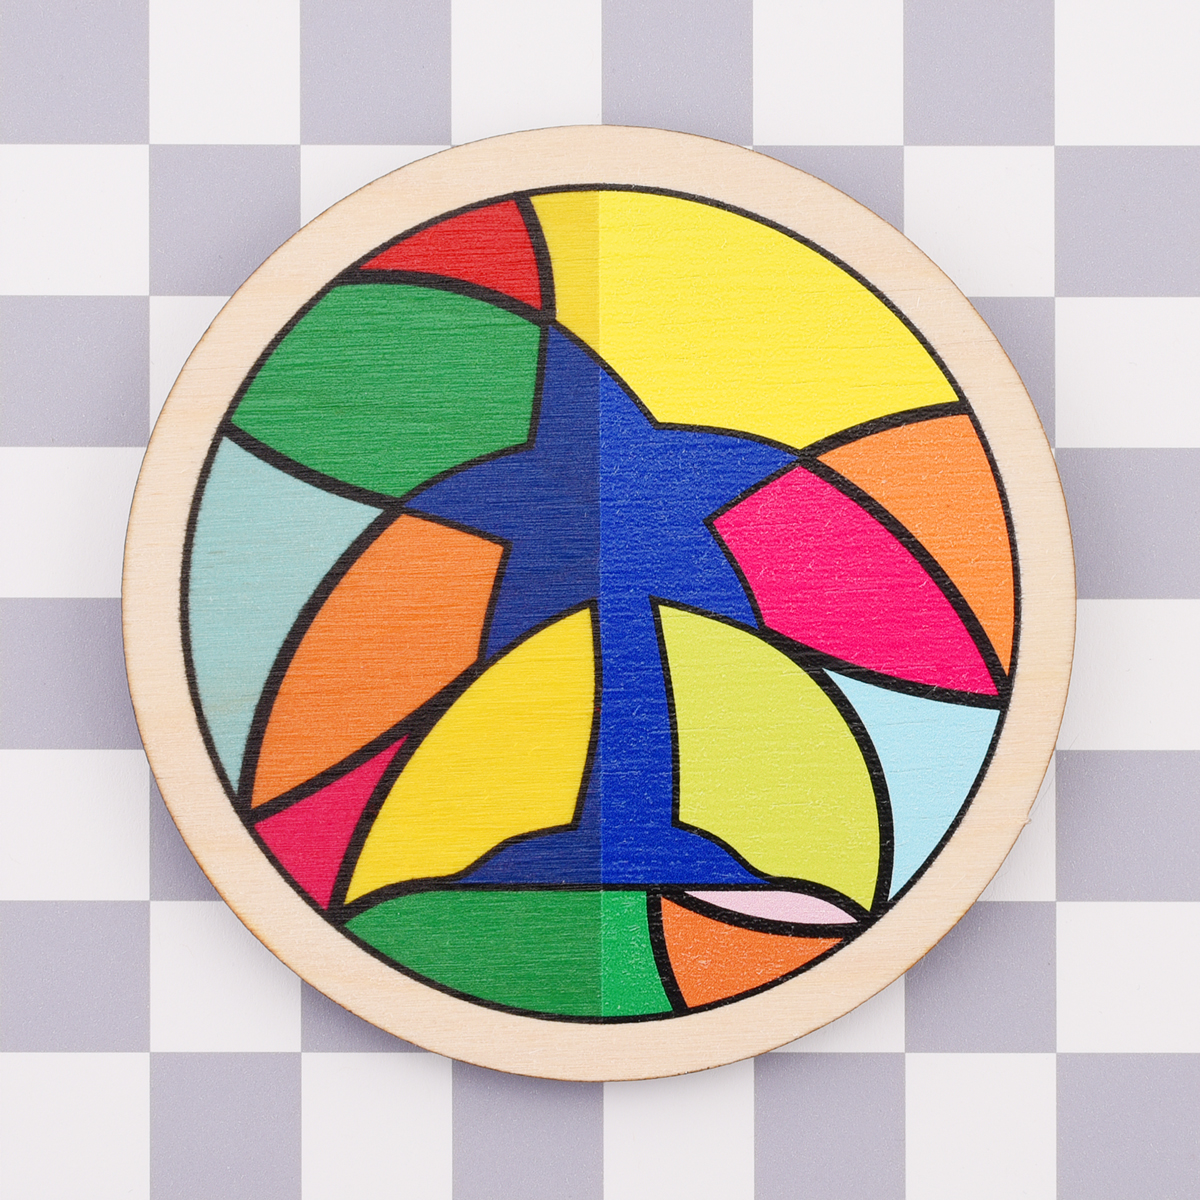
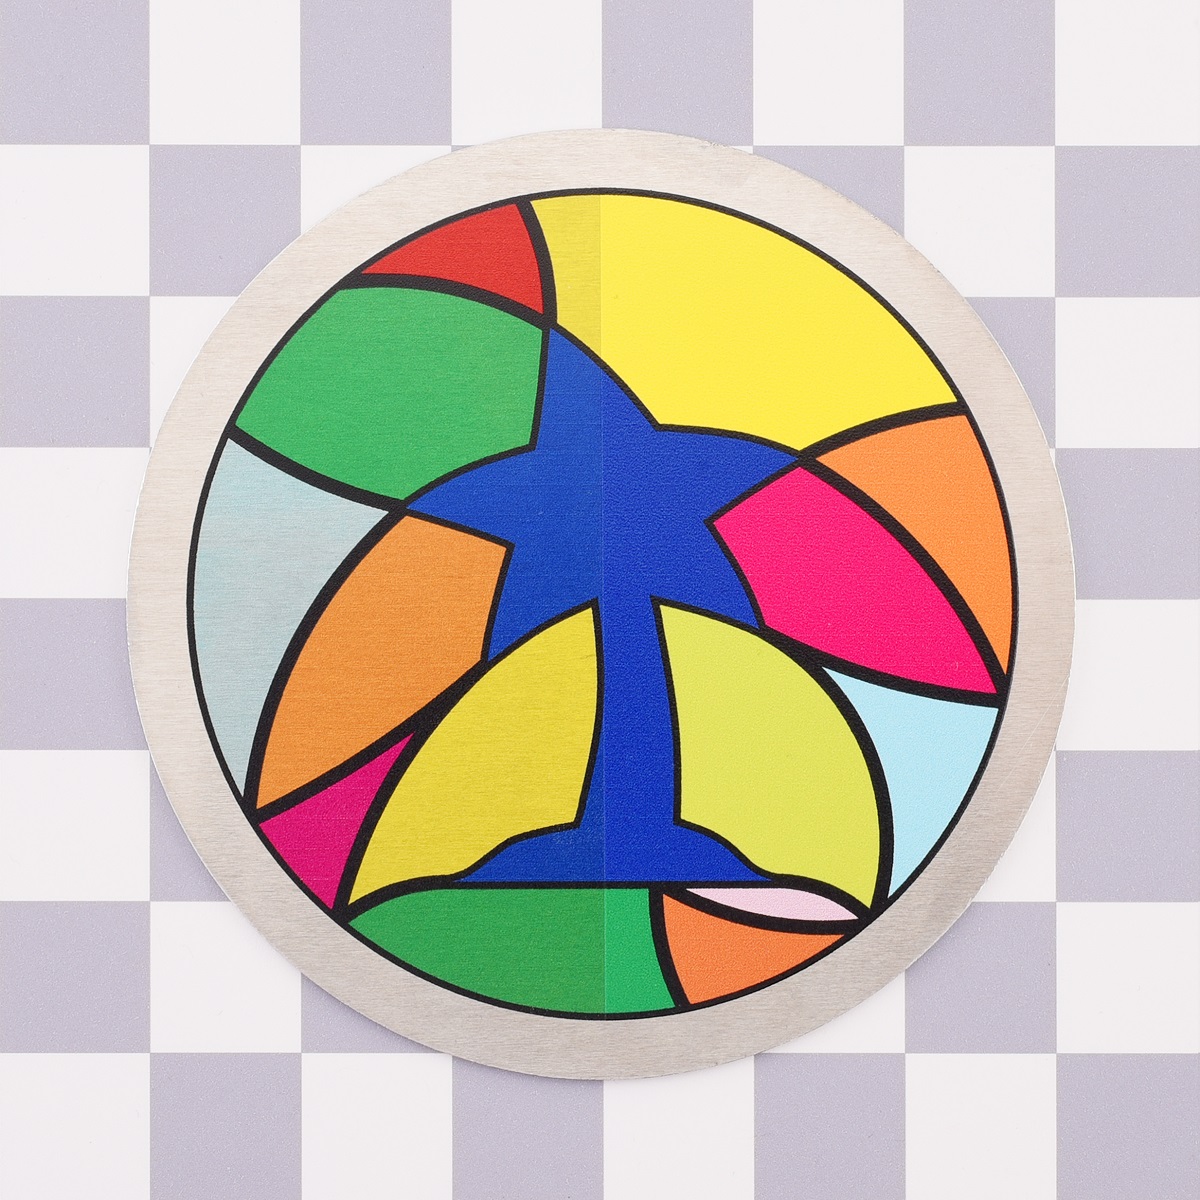
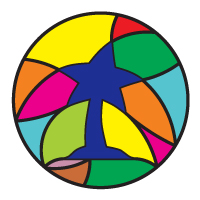
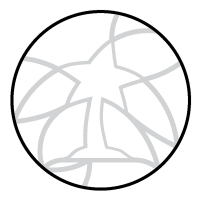
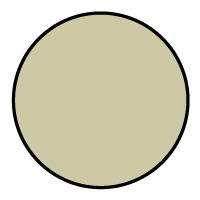
- With transparent materials, you can strategically not use white ink, or specify a lower percent density of white ink, in areas where you want the colors to be more transparent. This can make your part look like stained glass.
- The orientation of the artwork on all of the layers should match for prints like this so that the transparent areas line up correctly.
- Mirroring all of the layers makes the second-surface side the front.
- Leaving all of the layers unmirrored makes the first-surface side the front.
Designing a clear acrylic part that looks like stained glass.
| |
 |
|
|---|---|---|
| |
 |
|
| |
 |
|
| |
|
|
| |
 |
|
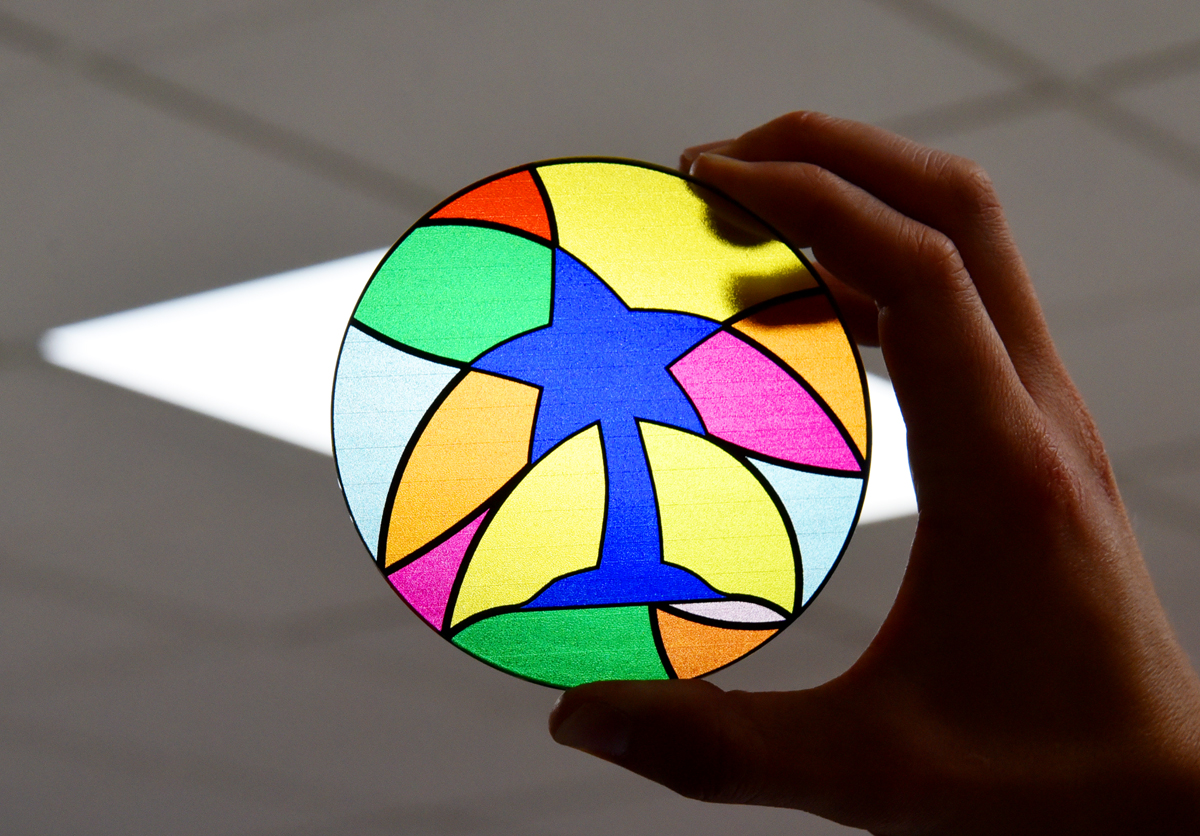 |
Laser-cut and UV-printed acrylic part with stained glass appearance. |
|---|
Additional ink tips and capabilities
CMYK color and white ink
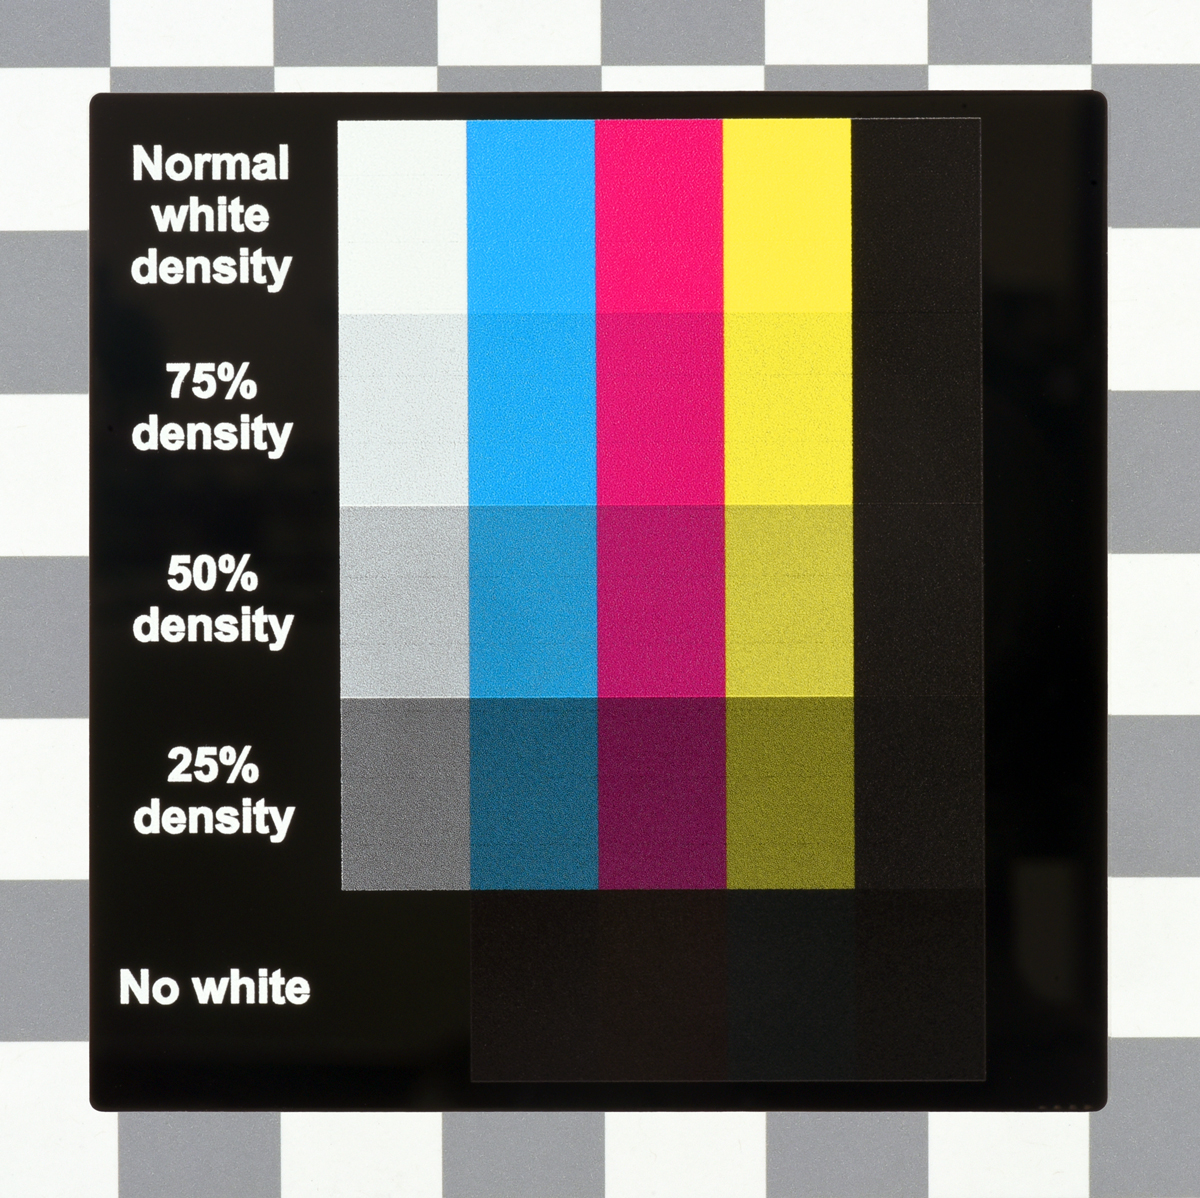
- We can vary the density that we print white ink. For example, we could print an area of white ink at 50% of normal density.
- On clear materials, you can use this to make colors appear foggy instead of completely opaque (if white were printed with normal density) or transparent (if you did not print white at all).
- Similarly, on opaque materials, you can use this to vary how muted/vibrant colors appears
- If you want to specify some areas as having different densities of white ink, please define those as different layers in your file and include descriptive notes.
|
|

Primer
- On request, we have the following options available to help ensure good ink adhesion for strenuous applications:
- We can expand/thicken the primer layer a few pixels around the white and color layers; the primer is clear, so small expansions (e.g. 1-3 pixels) are hard to notice with the naked eye on most materials.
- We can print primer in 1200 DPI resolution (we typically print primer in 600 DPI resolution).
Clear ink
- On request, we have the following options available to help protect the print in strenuous applications:
- We can expand/thicken the top clear layer a few pixels around the white and color layers; small expansions (e.g. 1-3 pixels) are hard to notice with the naked eye on most materials.
- We can print clear ink in 1200 DPI resolution (we typically print clear ink in 600 DPI resolution).
- We can print multiple protective layers of clear ink.
Raising areas of the print
- Several layers of ink can be stacked so that some areas of the print will be higher than others.
- Stacks like this are typically made by alternating layers of clear, color, and white ink.
- Each layer of ink adds around 0.0004-0.0012″ (0.01-0.03 mm) of height.
- Note: printing white and color onto a less flat surface (i.e. a surface with and without raised areas) might reduce the quality of the print. For the best results, design your artwork files so higher layers only contain artwork over the previous layer. It also helps if the layers get smaller towards the top, like levels of a pyramid.
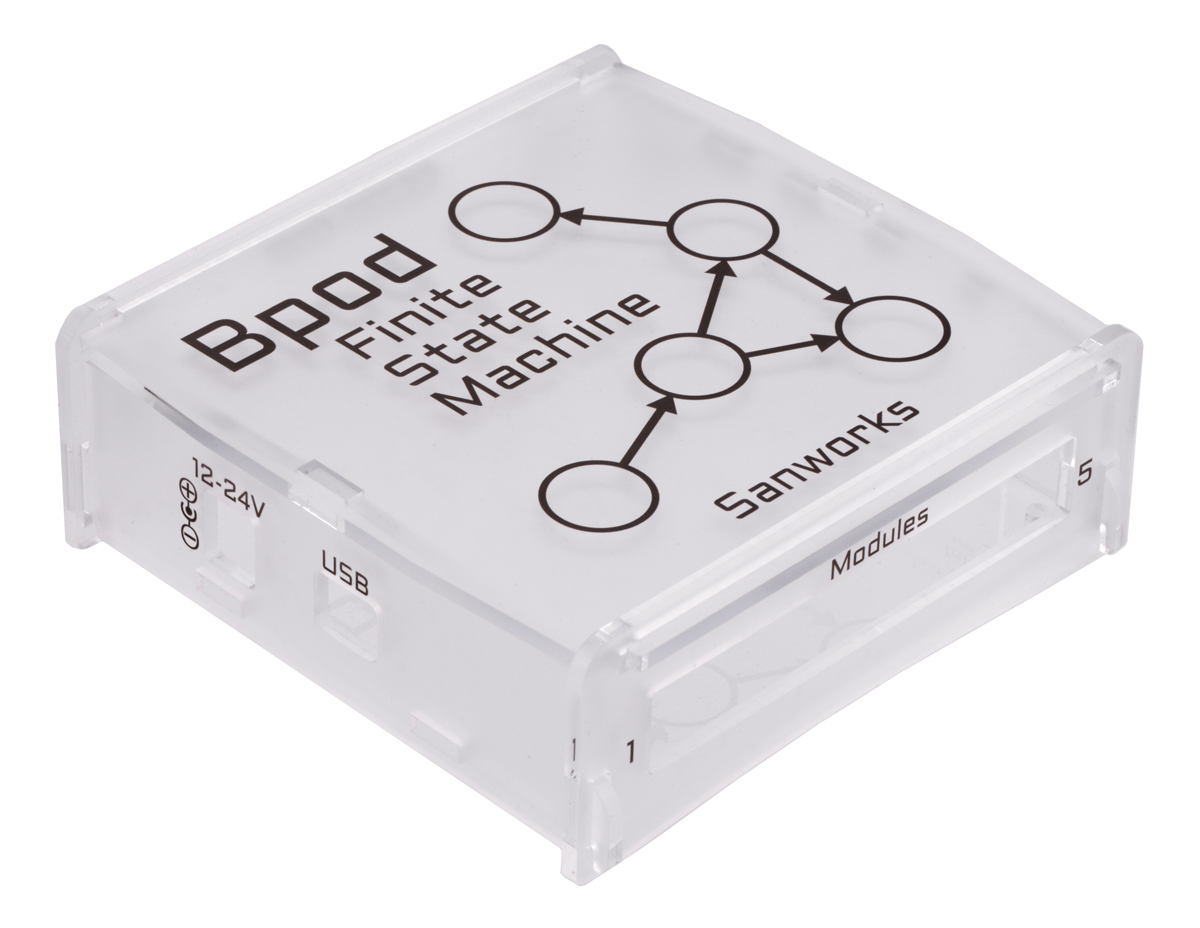
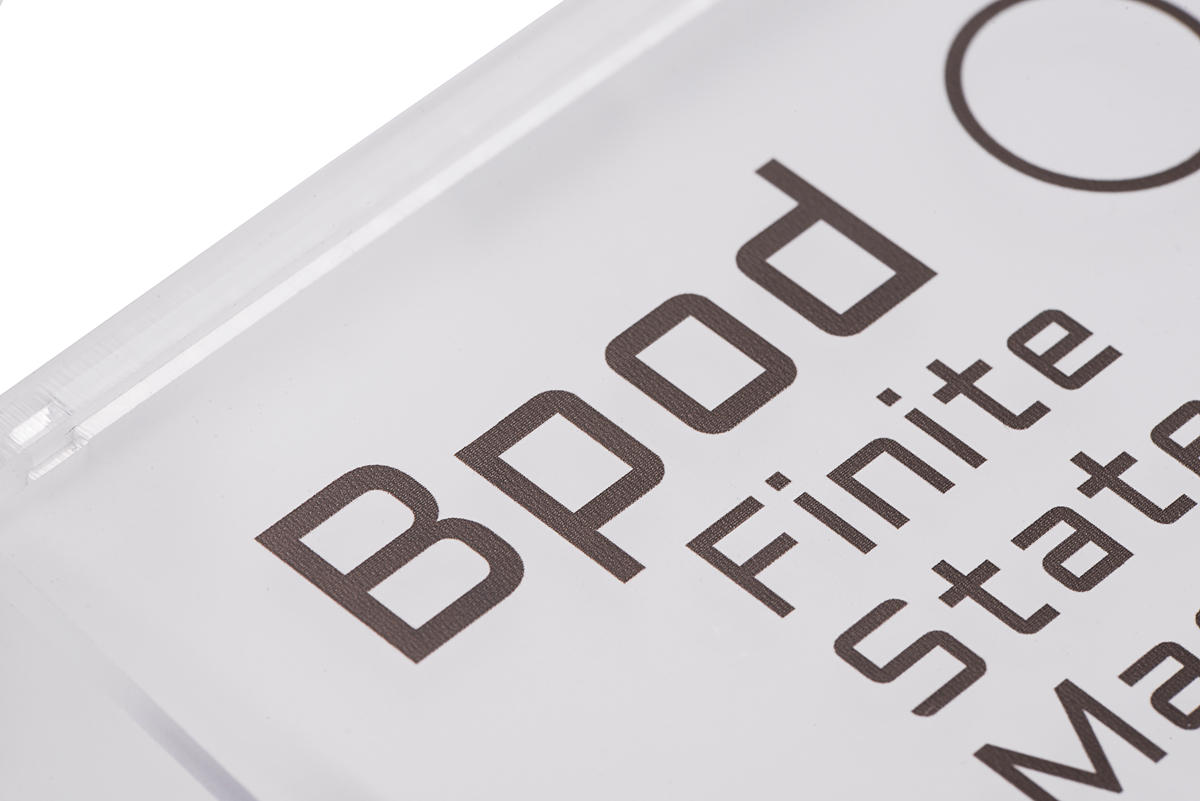
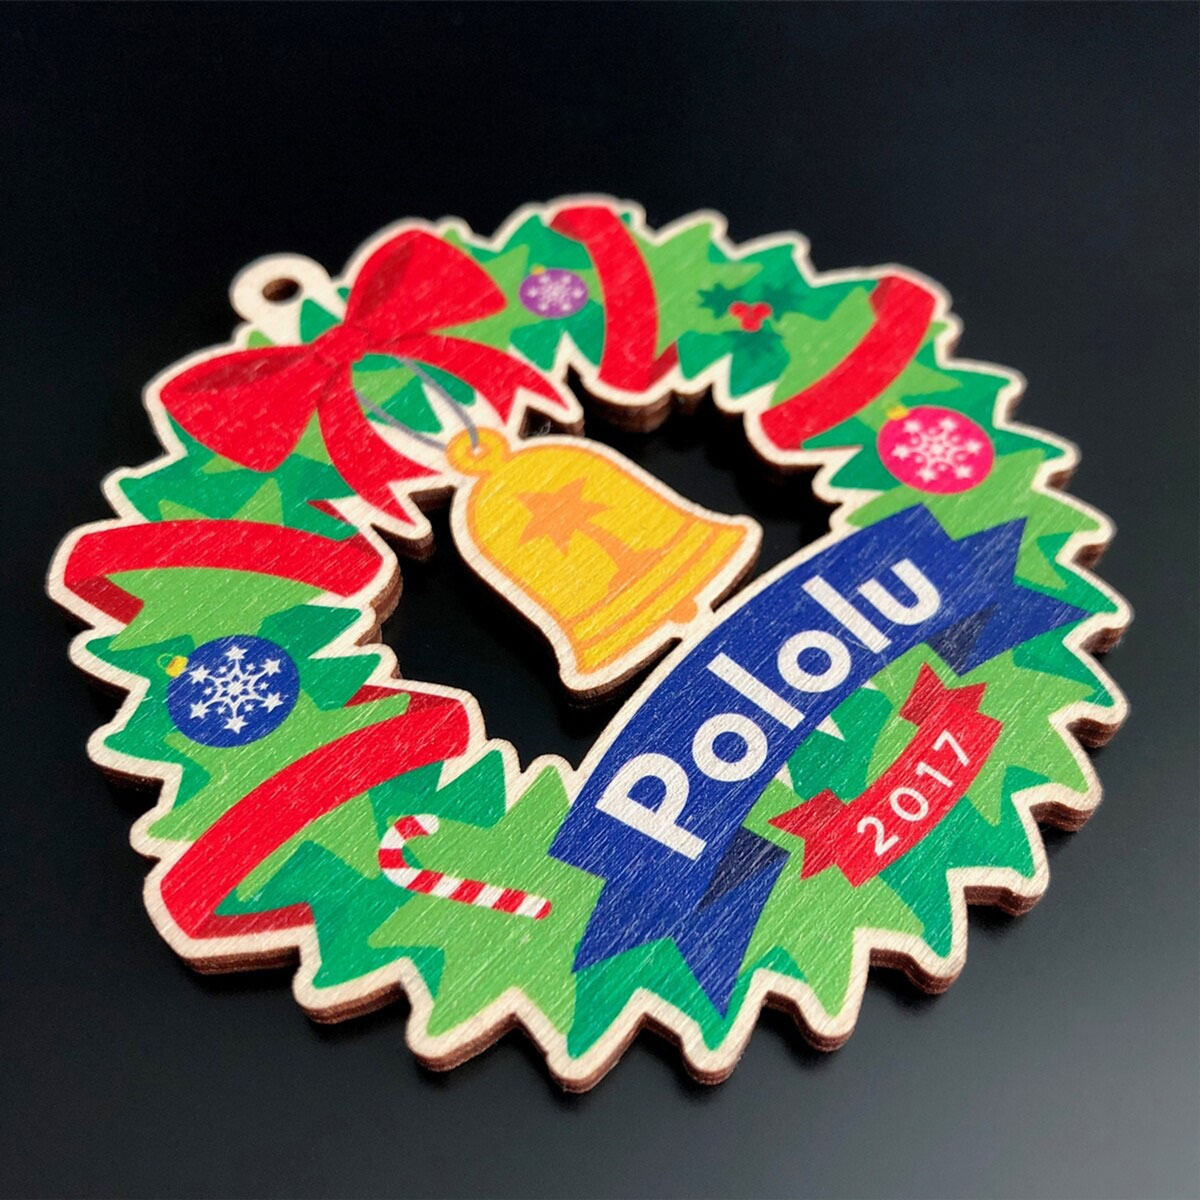
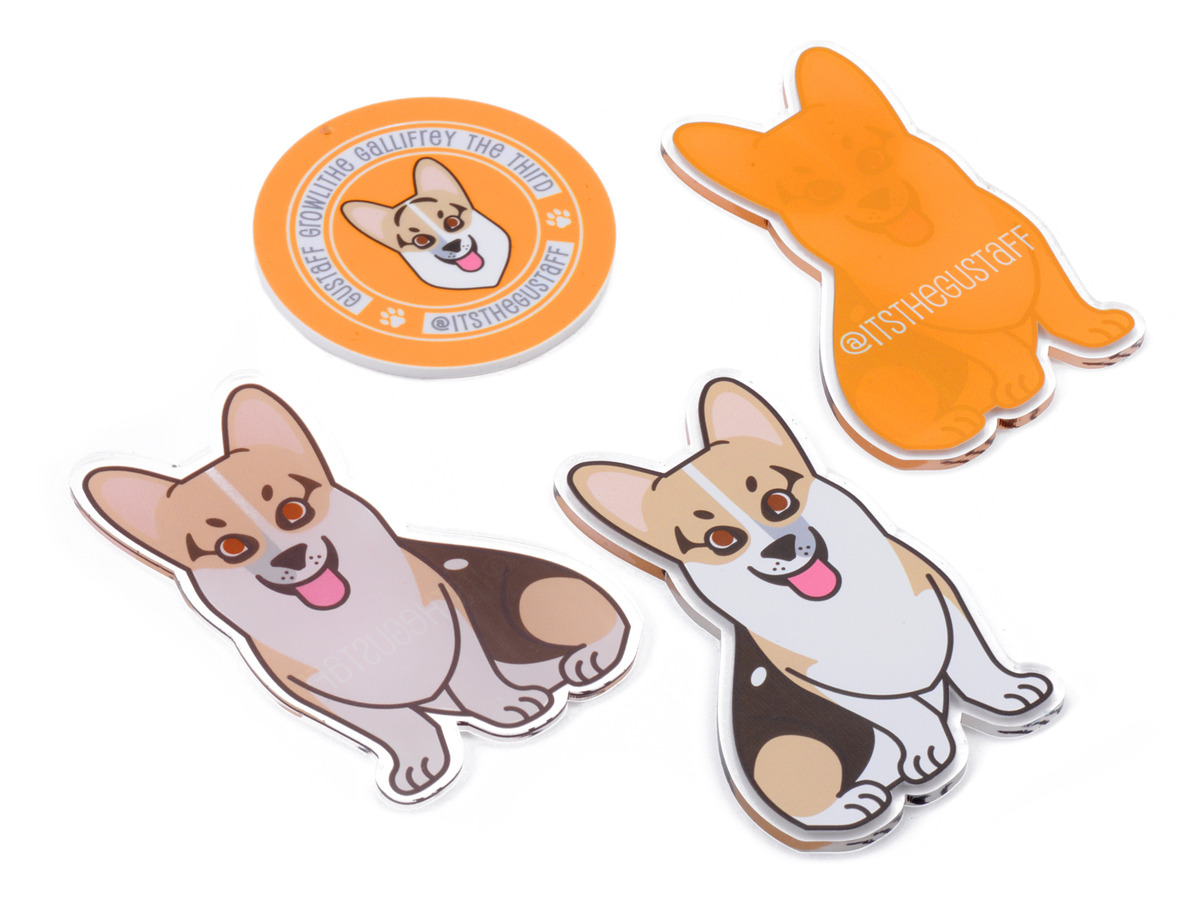
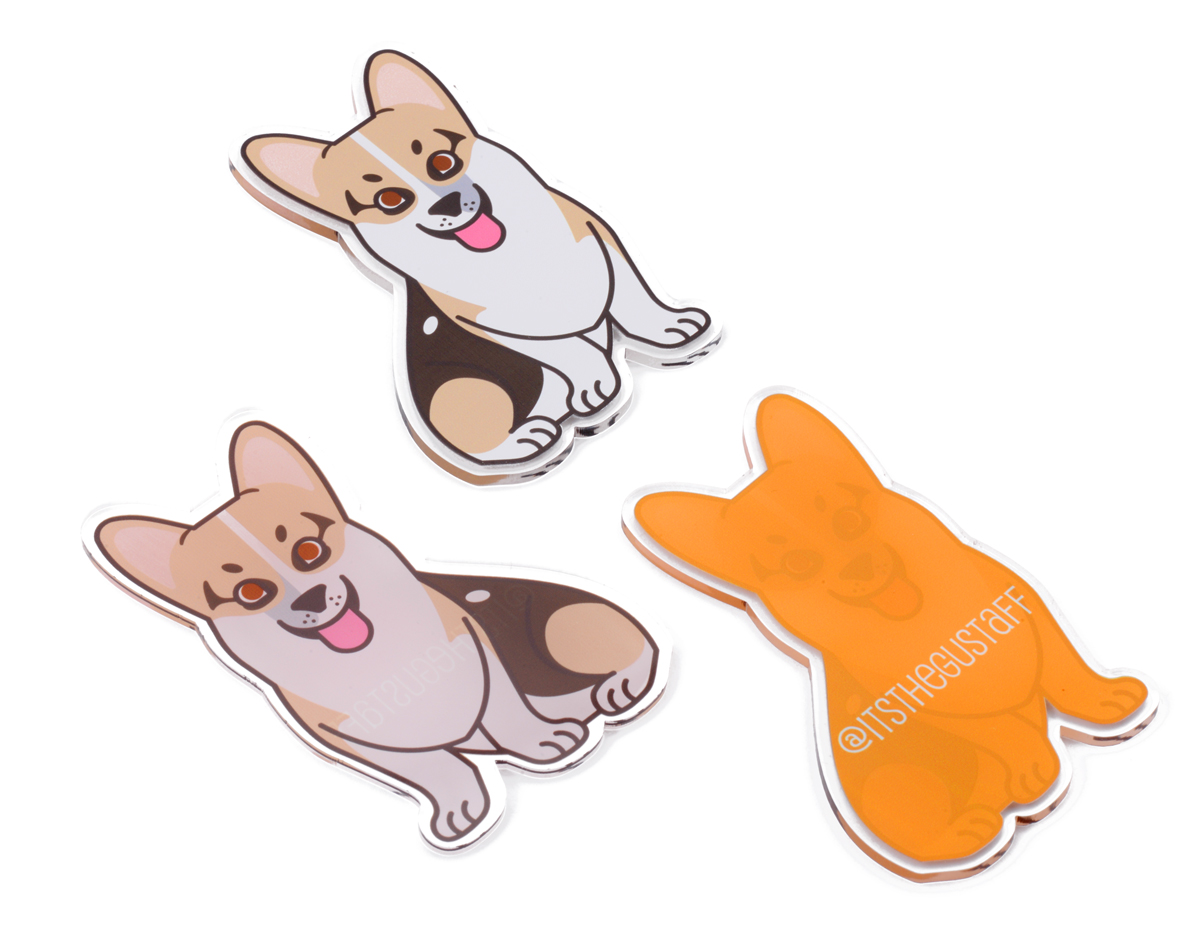
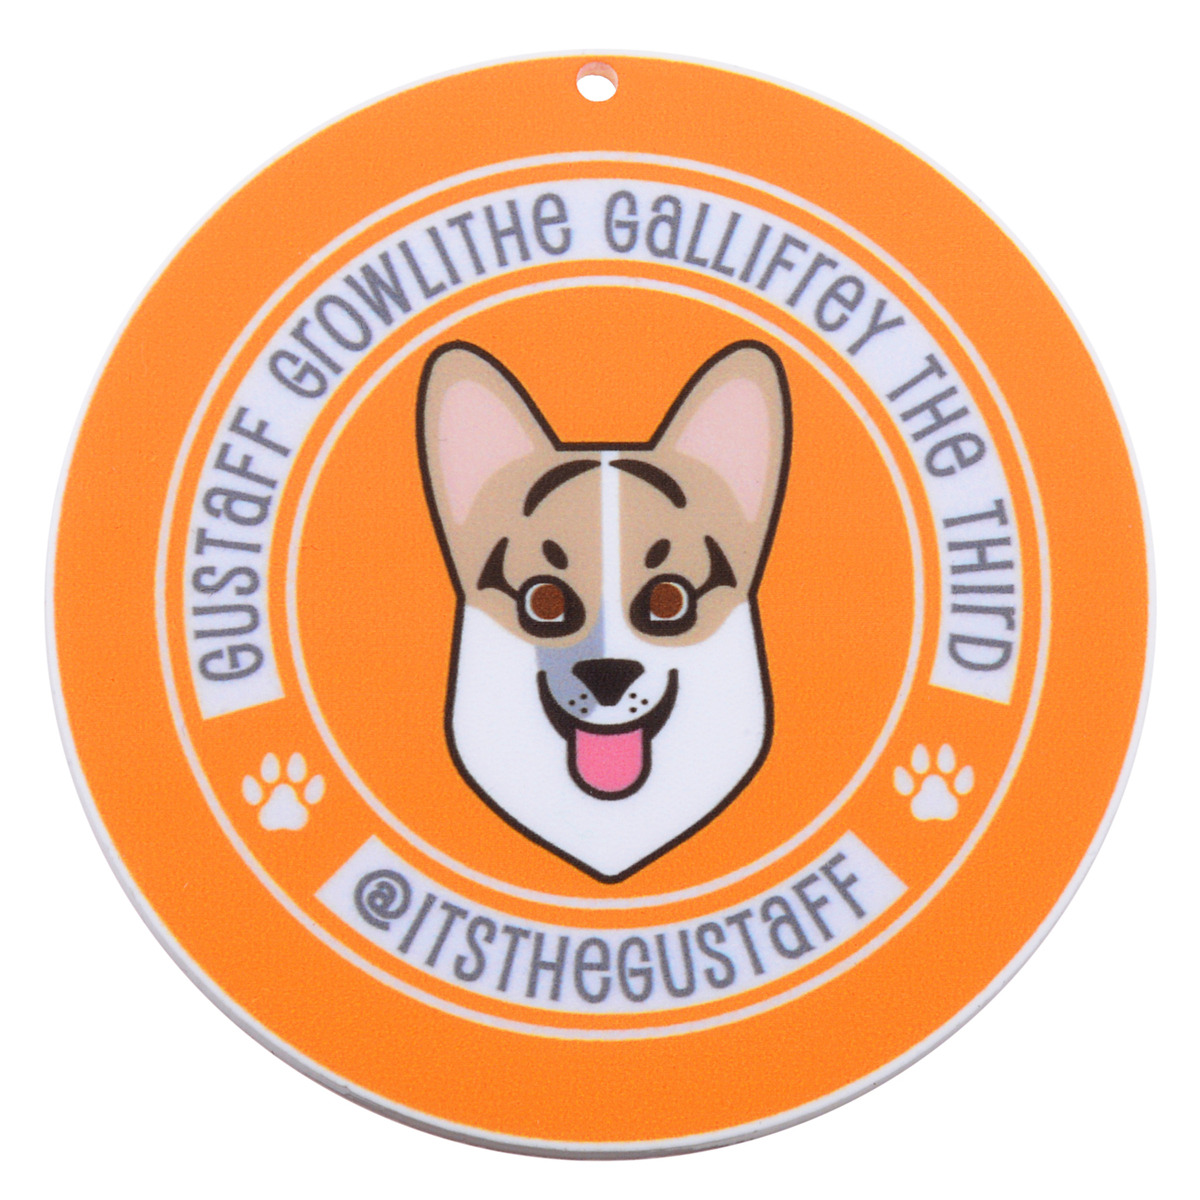
Examples of UV-printed parts
 |
 |
 |
 |
 |
 |
 |
 |
 |
 |
 |
 |
 |
Related products


Home | Forum | Blog | Support | Ordering Information | Lists | Distributors | BIG Order Form | About | Contact
© 2001–2026 Pololu Corporation
