Pololu Blog » Engage Your Brain »
Introducing the 3pi+ 2040 Robot
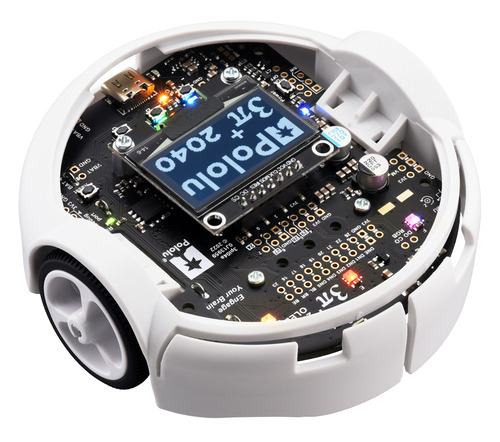
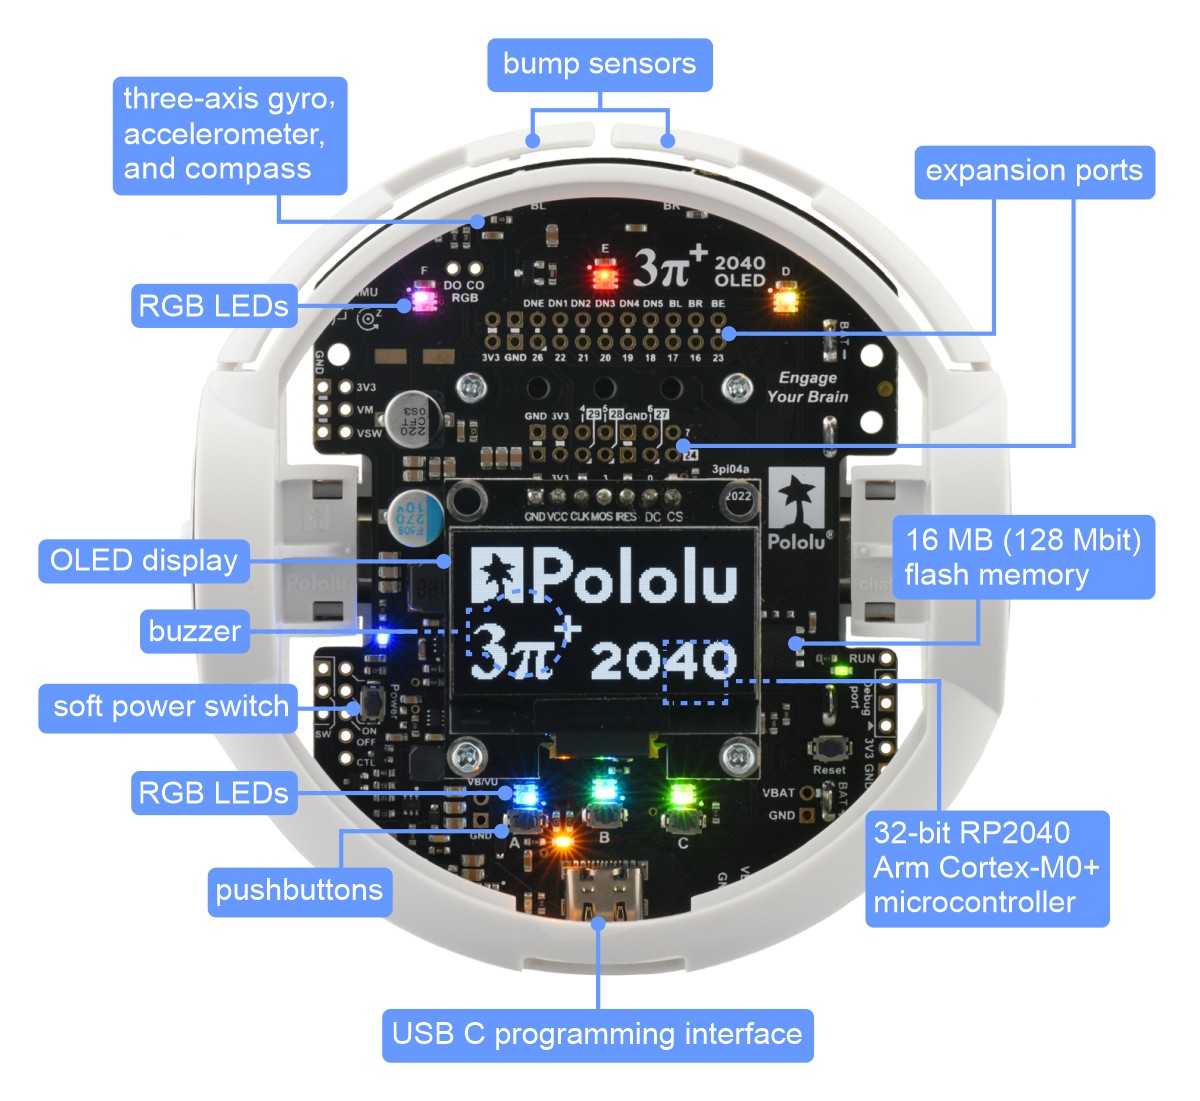
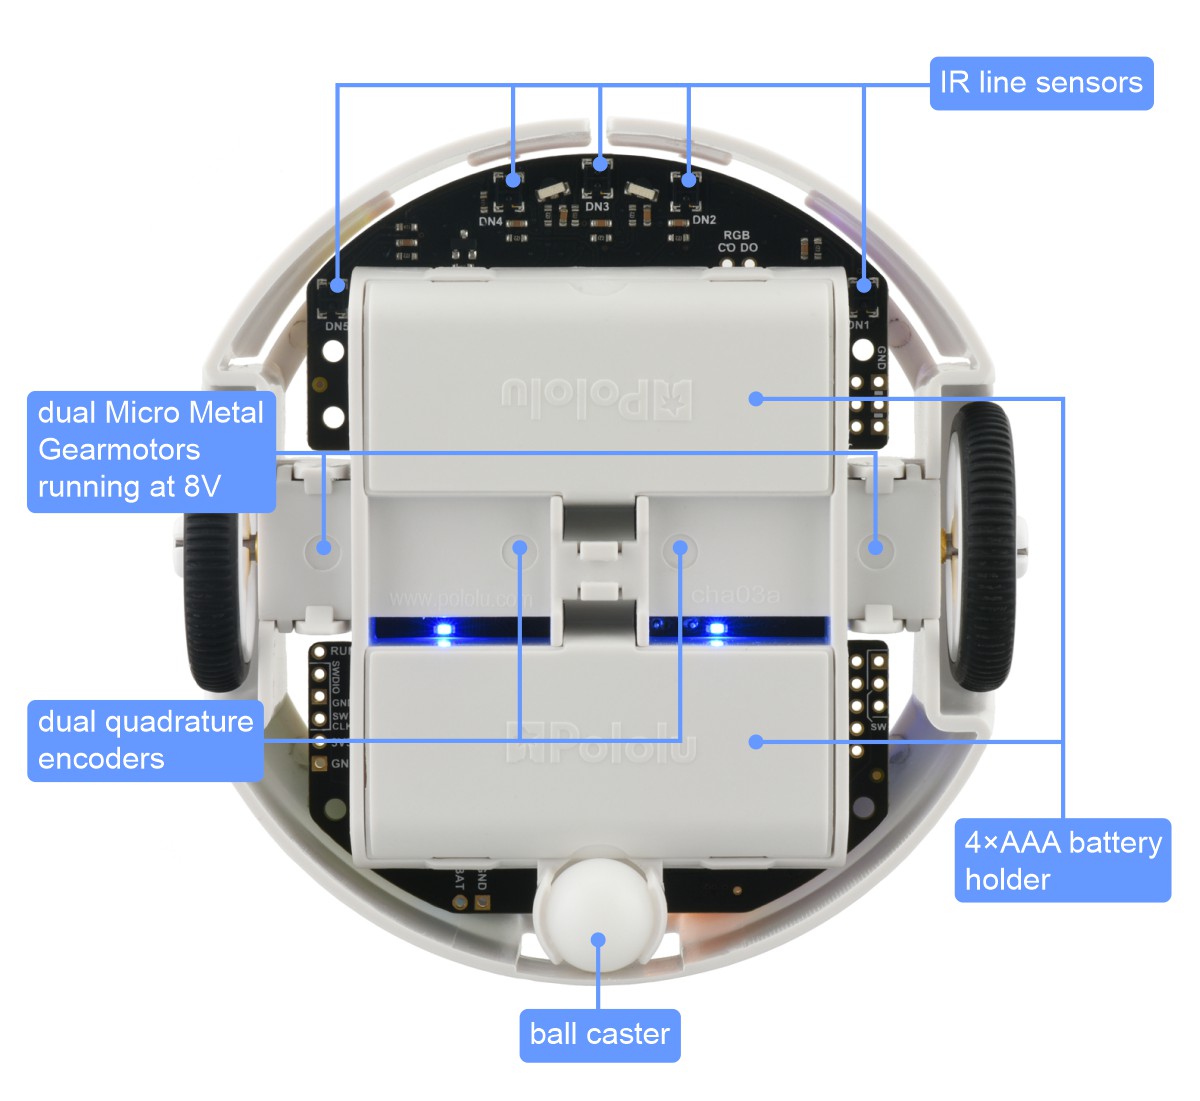
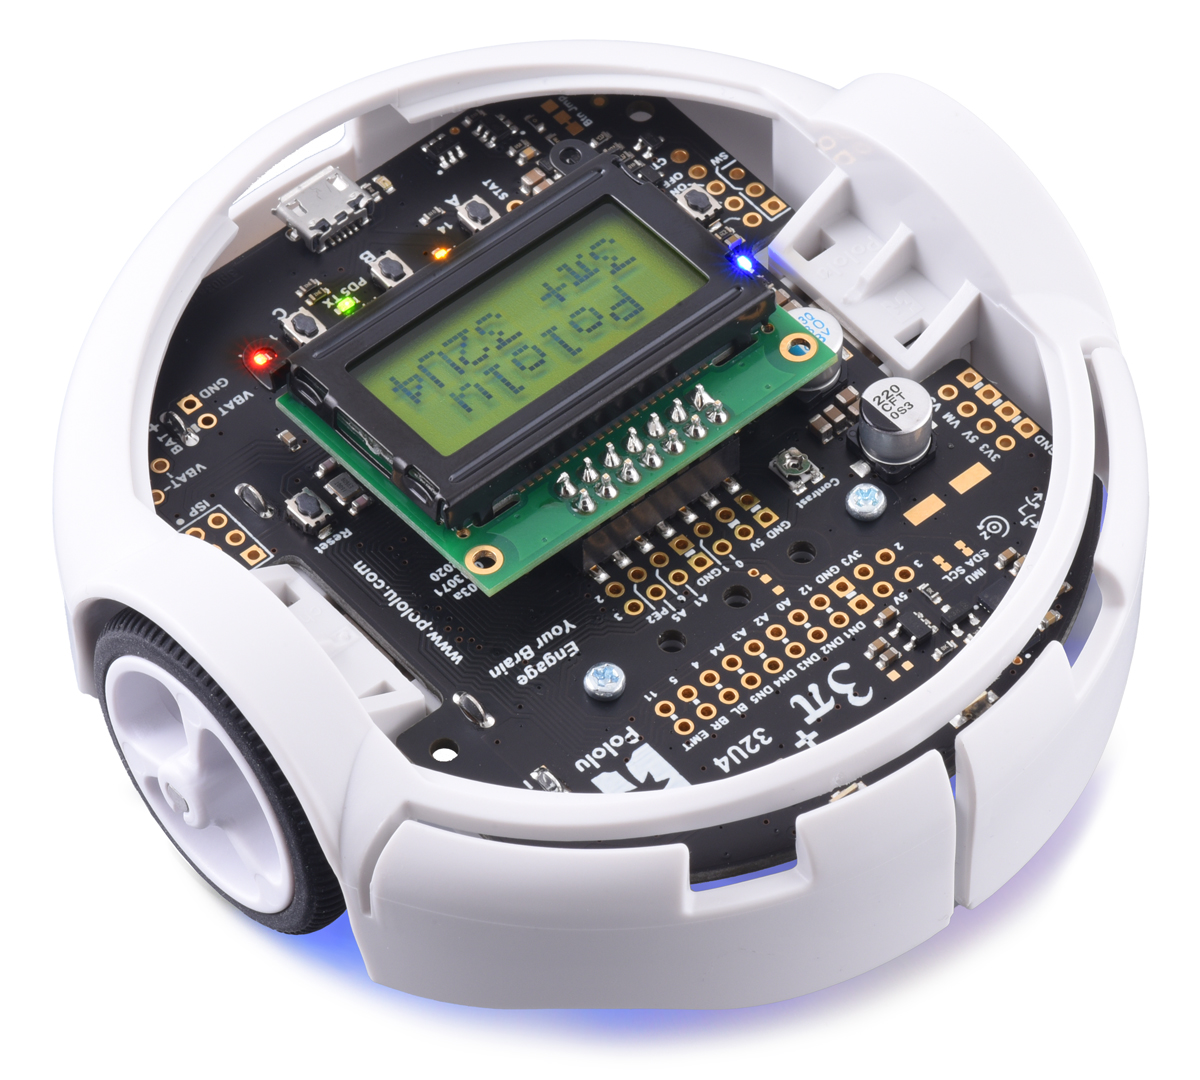
I am super excited to introduce our newest robot, the 3pi+ 2040. This robot combines the 3pi+ chassis, which we initially released in late 2020, with the power of the Raspberry Pi RP2040 microcontroller. Here is a quick overview of its features:
 |
 |
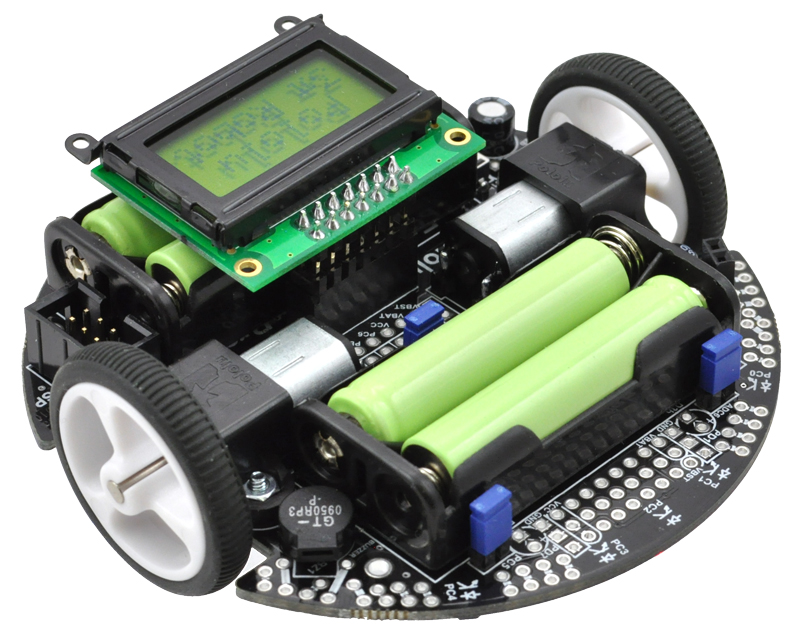
This summer will mark 15 years since we released our original 3pi robot, which was designed to be fast enough to be competitive in line following and maze solving events. The high speed offers interesting programming challenges not present in typical robot kits of that era; here is a video from back then in which Ben demonstrates his 3pi learning a maze and then going extra fast on longer straightaways:
Although we developed our first injection-molded parts (wheels, ball caster, and motor mounting brackets) for that design, it was still largely a “PCB on wheels” kind of robot. The next-generation 3pi+, with a chassis mechanically independent of any circuit board, had been in development for several years when the coronavirus pandemic hit in early 2020. We kept working on it throughout that year, culminating with the November release of the 3pi+ 32U4.
|
|
The 3pi+ delivered the most-requested feature missing from the 3pi, wheel encoders, along with many other improvements including a full IMU, bumpers, and programmability over USB (the 3pi required an external AVR programmer). With its support in the Arduino environment, the ATmega32U4 continues to offer a good entry point for working with microcontrollers, but the 8-bit architecture and 32 KB of program memory feel increasingly outdated and constraining, especially with the new sensors available on the 3pi+.
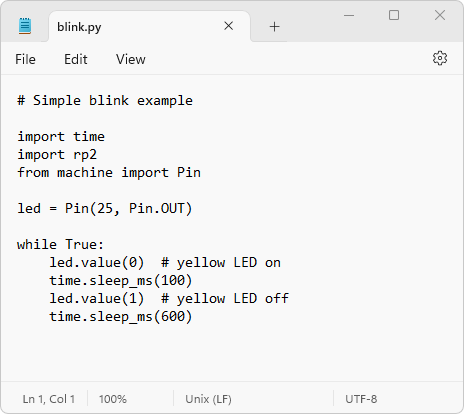
That brings us to the new 3pi+ 2040, powered by the Raspberry Pi RP2040 microcontroller (32-bit dual-core Arm Cortex-M0+) with 16 MB (128 Mbit) of flash memory. The robot ships preloaded with a MicroPython interpreter, so you can get started right away by plugging into its USB C port and editing the included example Python programs with your favorite text editor. No special programmers or programming software are required, and you can write MicroPython code from practically any desktop or mobile operating system as long as it has a text editor and the ability to copy files to a USB drive. For a basic Python IDE that lets you run code interactively, we are recommending the Mu editor. (See the User’s Guide for instructions on setting it up.)
|
|

There are many other programming environments and languages that you can use with the 3pi+. Since it shares the same RP2040 processor as the Raspberry Pi Pico, anything that works for the Pico should be usable on the 3pi+, including C, C++, and the Arduino environment. We already include some basic C examples in our example code repository, and we plan to write more examples and expand the software support for this robot. Do you have a favorite IDE that works with the Pico? Is there some language or system you’d like to run on the 3pi+?
 |
The menu of pre-installed demo programs on the 3pi+ 2040 Robot. |
|---|
Early adopter special: We are initially offering the 3pi+ 2040 Robot as a limited release intended for advanced customers who have had some experience with robotics or Raspberry Pi RP2040 programming (e.g. with a Raspberry Pi Pico). The initial release is available with 30:1 MP motors (the “Standard Edition”), either assembled for 38% off or in kit form for 50% off. Early adopter robots will generally need to be backordered as they are built to order; we expect to ship within a business day of ordering. The robot hardware is finalized so the only changes we expect for the full product release are in the initial firmware configuration and pre-installed example programs. Documentation will also continue to be developed as we release the robot to a wider customer base. Early adopters who publicly share their 3pi+ 2040 experiences will be eligible for an additional robot with an extra $25 discount.
Related products


-
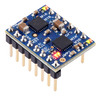
New products: Motoron M2T256 (I²C) and M2U256 (UART) dual motor controllers
- 21 December 2022The Motoron family keeps growing! We’re happy to announce the release of the Motoron M2T256 Dual I²C Motor Controller and the Motoron M2U256 Dual...
-

New product: LOCOSYS LC20031-V2 135-Channel Dual-Band GNSS Receiver Module
- 24 March 2023We’re now selling the LC20031-V2 GNSS receiver module from LOCOSYS. This module integrates a global navigation satellite system (GNSS) receiver with...
7 comments


Can you provide the plastic chassis CAD file (STL, etc)?
I need to modify the chassis to mount additional sensors.
For example, I want some anchors on the body for additional IR sensors looking forward and to the 2 sides for running in a micro-mouse maze.
Having the CAD file would allow me to easily 3D print a modified chassis.
That would also make this robot a more flexible education platform.
Thanks.
Charles

That sounds awesome! We have added 3D STEP models of the chassis it to the Resources tab of the 3pi 2040 Robot product pages. The skirt is a separate body in the 3pi-plus-chassis-kit-skirt.step file, so you should be able to isolate it, but if you run into problems please email us and we can help further.
Brandon
It is probably possible to solder headers to the expansion areas after the robot has been assembled, but some of them are very close to the plastic chassis (such as the ones accessible from inside the battery compartment). So, I would recommend removing the board to avoid melting the chassis.
The chassis was designed to allow for removing the electronics after assembly. After removing the skirt and screws, you can carefully lift the PCB, motors, and battery contacts off of the chassis as one assembled unit. The motors will only be connected to the chassis by the soldered jumper wires, so I recommend being extra careful with them.
Brandon
Thank you for sharing your experience and feedback! I am glad to hear you were able to get it fully assembled and running!
To clarify about the motor clips, they are not used in the default configuration of the 3pi+ robot; you can use them to hold the motors in place if you want to run the robot without the bumper skirt.
Brandon

The RP2040 has no built-in program memory, so programs are stored in an external 16MB flash chip. Like with any microcontroller, when you are writing to flash, you could easily make mistakes that would cause corruption. I recommend always storing a copy of your programs and data on a separate computer when developing firmware. If you want to restore the Micropython interpreter and example programs that it ships with, you can easily do that by following the firmware update procedure in the 3pi+ 2040 user's guide .
Brandon
Post a comment


Home | Forum | Blog | Support | Ordering Information | Lists | Distributors | BIG Order Form | About | Contact
© 2001–2026 Pololu Corporation
