Pololu Blog »
Kevin's mini-sumo robot: Roku
My robot, Roku, was the champion of LVBots’ August mini-sumo competition. While I didn’t have the time or inspiration to make it look like anything more interesting (like a Star Wars droid) or make use of especially innovative tactics, I think I managed to build a robot that not only is effective but also looks fairly clean and well put together. In addition, it’s a good demonstration of how the Pololu A-Star 32U4 Robot Controller can be used as a standalone main board for a small robot.
 |
One of my primary goals for this robot was to keep its height as low as I could, but I also wanted to restrict myself to parts that I could get or make here at Pololu because I was short on time. I started by choosing a few key parts like motors, wheels, and sensors, then designed a laser-cut acrylic chassis and shell to be built around those parts, although I continued to change both the part selection and the shape of the chassis for a while until I settled on my final design. As with R2-DR, I used SketchUp to model the entire robot, allowing me to determine its layout precisely and keep it very compact.
 |
I also made it a goal to use our new A-Star 32U4 Robot Controller, which I was heavily involved in the design of, as I thought this robot would provide a good opportunity to try it in a real application. The robot controller is designed with the right connections and form factor to be used as an auxiliary control board mounted on top of a Raspberry Pi, but it can be used as a standalone controller just as effectively: much like the older Pololu Orangutan robot controllers, the A-Star 32U4 Robot Controller combines a microcontroller and dual motor drivers on a single board. Furthermore, it includes a number of other useful features, like a voltage regulator, power switch, and buzzer circuit. All of this makes it a lot easier to build a complete robot while avoiding a rat’s nest of wiring (or Rattata’s nest, in the case of Grant’s robot).
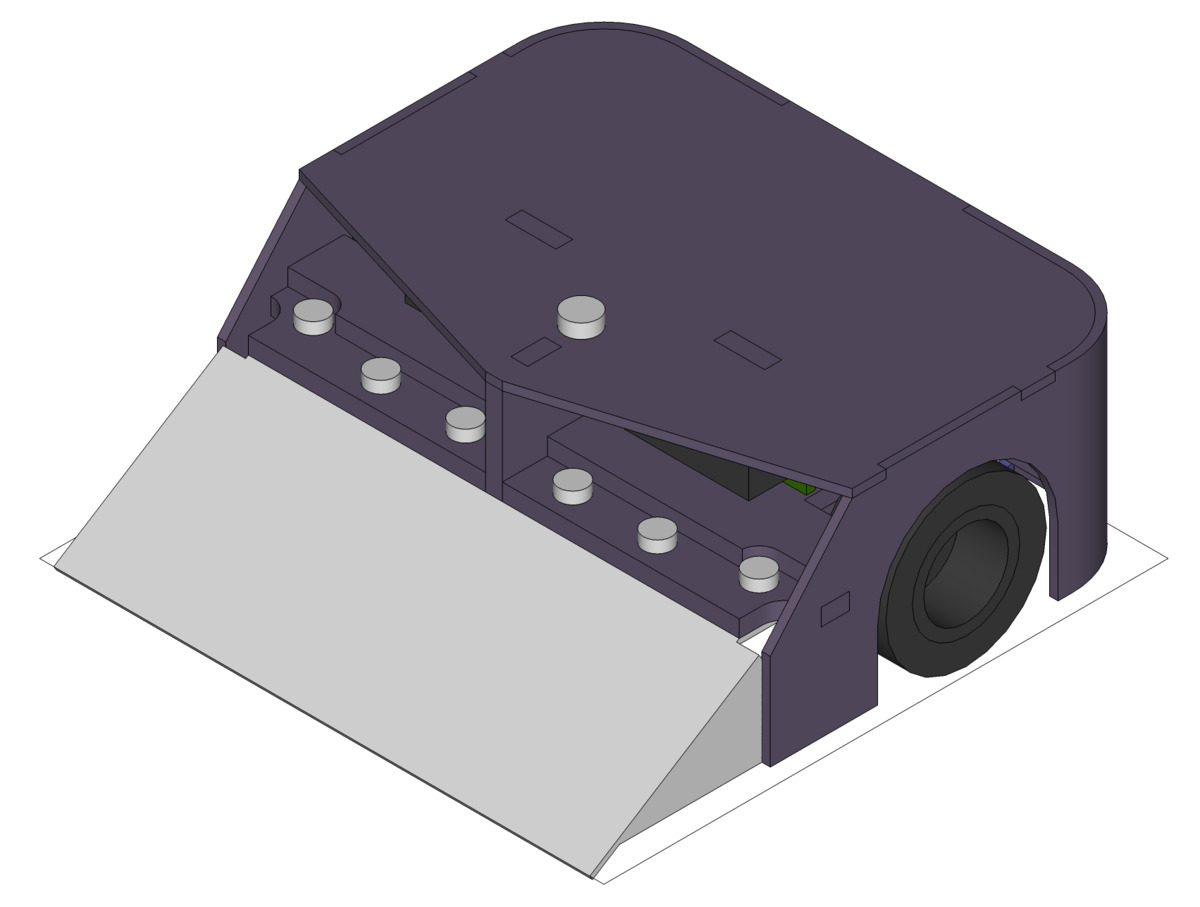
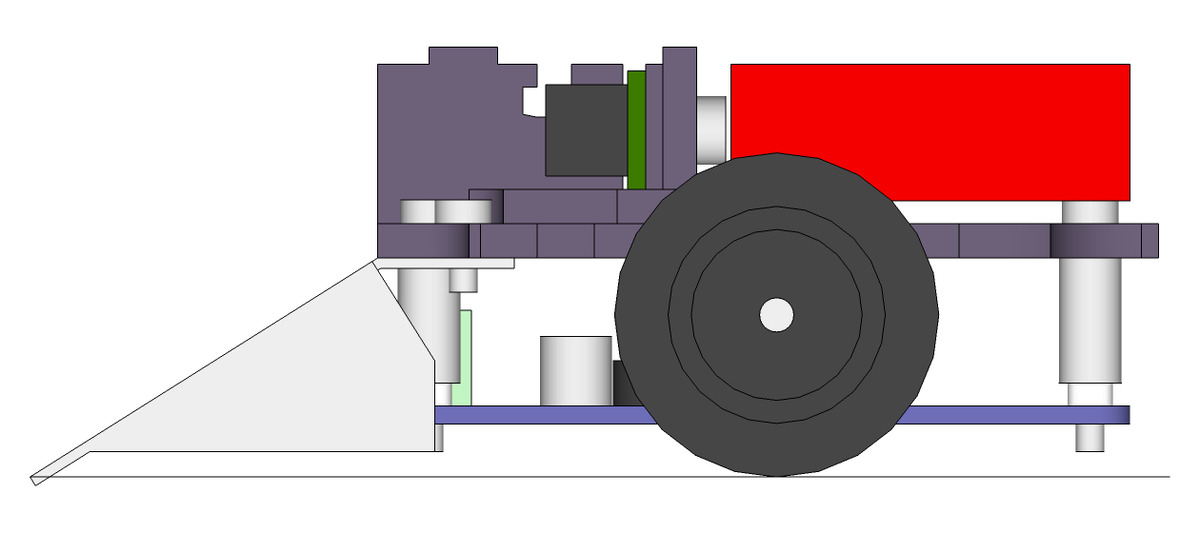
To make efficient use of space, I arranged my parts so that my motors are mounted with brackets on the bottom of a horizontal plate, while the A-Star is mounted under the motors with standoffs attached to the same plate. I also hoped that this two-layered construction, visible in the drawings below, would add rigidity to the robot. I tried to keep the motors near the center of the robot longitudinally so that most of its weight would be supported by the wheels, resulting in better traction; if the wheels were farther back, more of the robot’s weight would rest on the blade in front. At the same time, I had to position everything carefully to ensure that none of the taller components on the board would hit the motors.
|
|

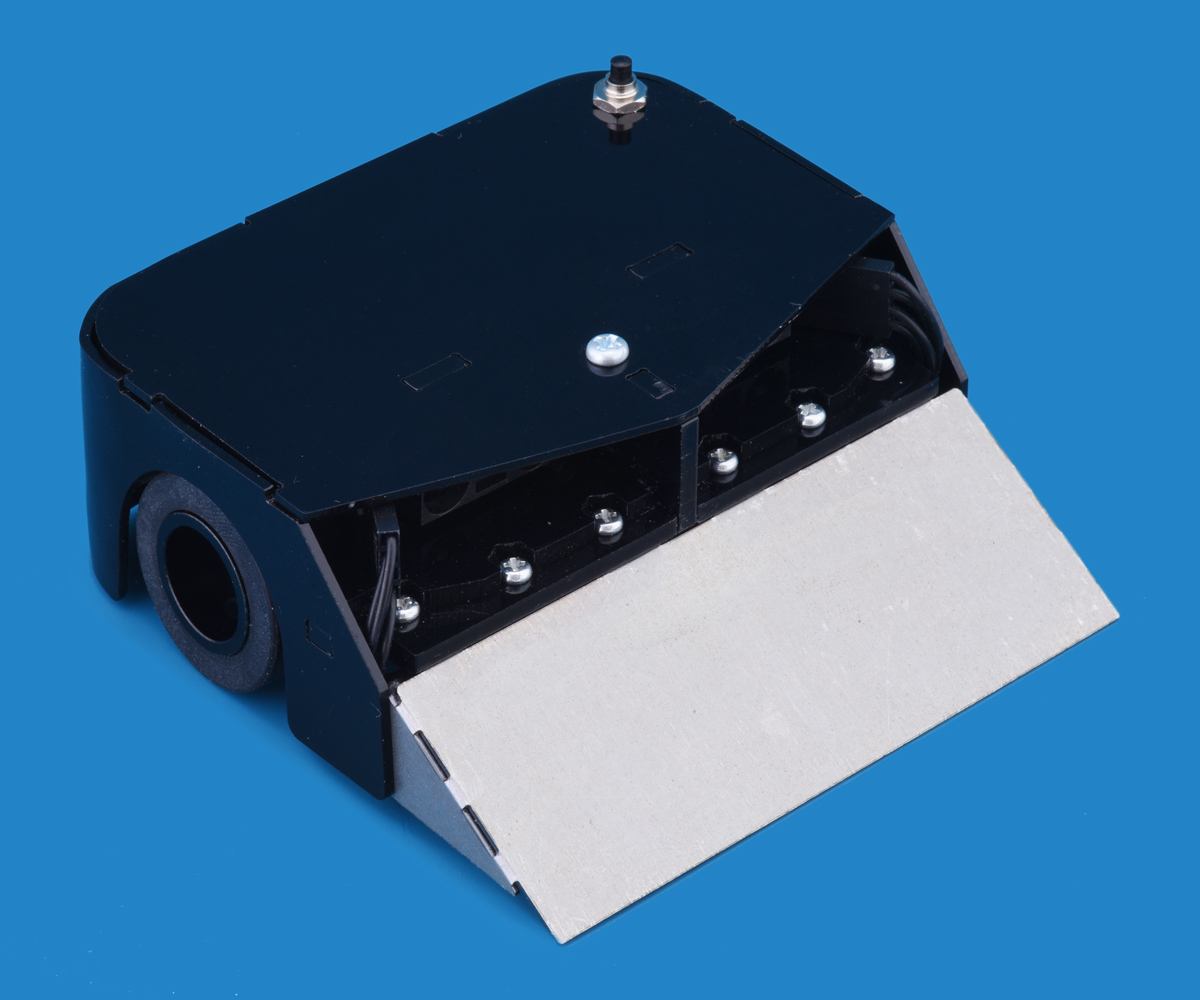
On top of the horizontal plate, I mounted my battery and two distance sensors. The idea is that the robot can use differences between the two sensors’ readings to tell which way it needs to turn to face a target. If neither distance sensor sees anything, Roku spins in place looking for a target, since it does not have edge sensors to allow it to roam around the sumo ring without falling off. The sensors are connected to the A-Star robot controller with some custom cables made from crimp connector housings and wires with pre-crimped terminals. (All in black, of course, to minimize infrared reflectivity match the color scheme.)
 |
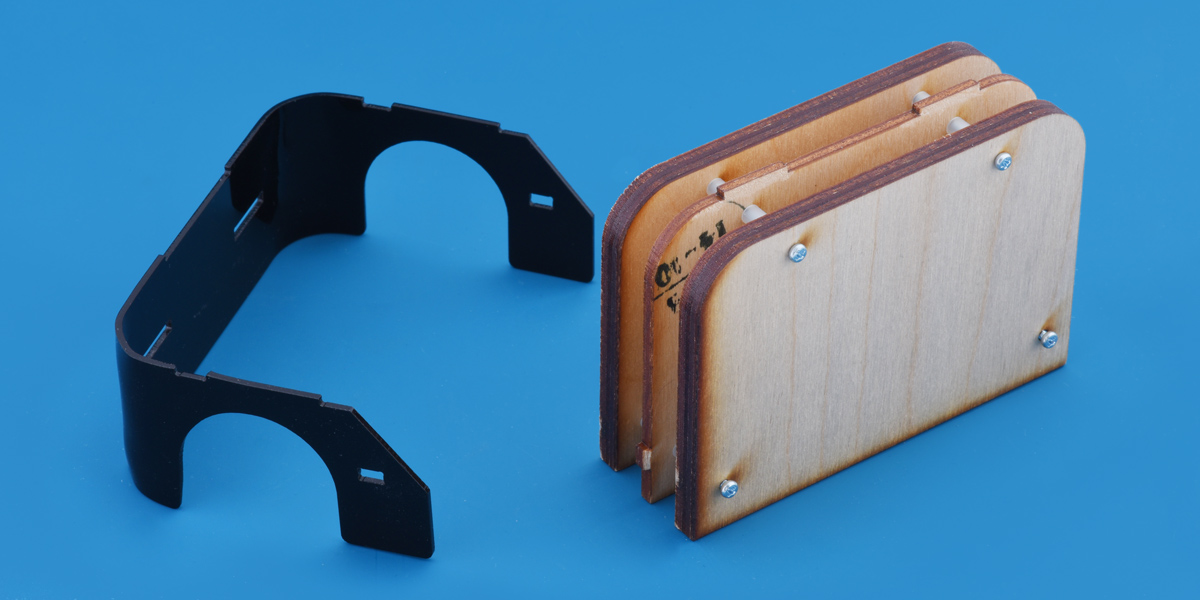
I designed a custom blade for the robot and had it laser-cut from mild steel. With the help of an inexpensive bending brake from Harbor Freight, I was able to cleanly bend the sides of the blade down at right angles. I also filed down the front edge of the blade a small amount to make it harder for an opponent to get under it. I had planned to put some kind of finish on the blade to make it darker and less reflective, like the oil blackening that Paul did to his robot, but I didn’t have time to do this.
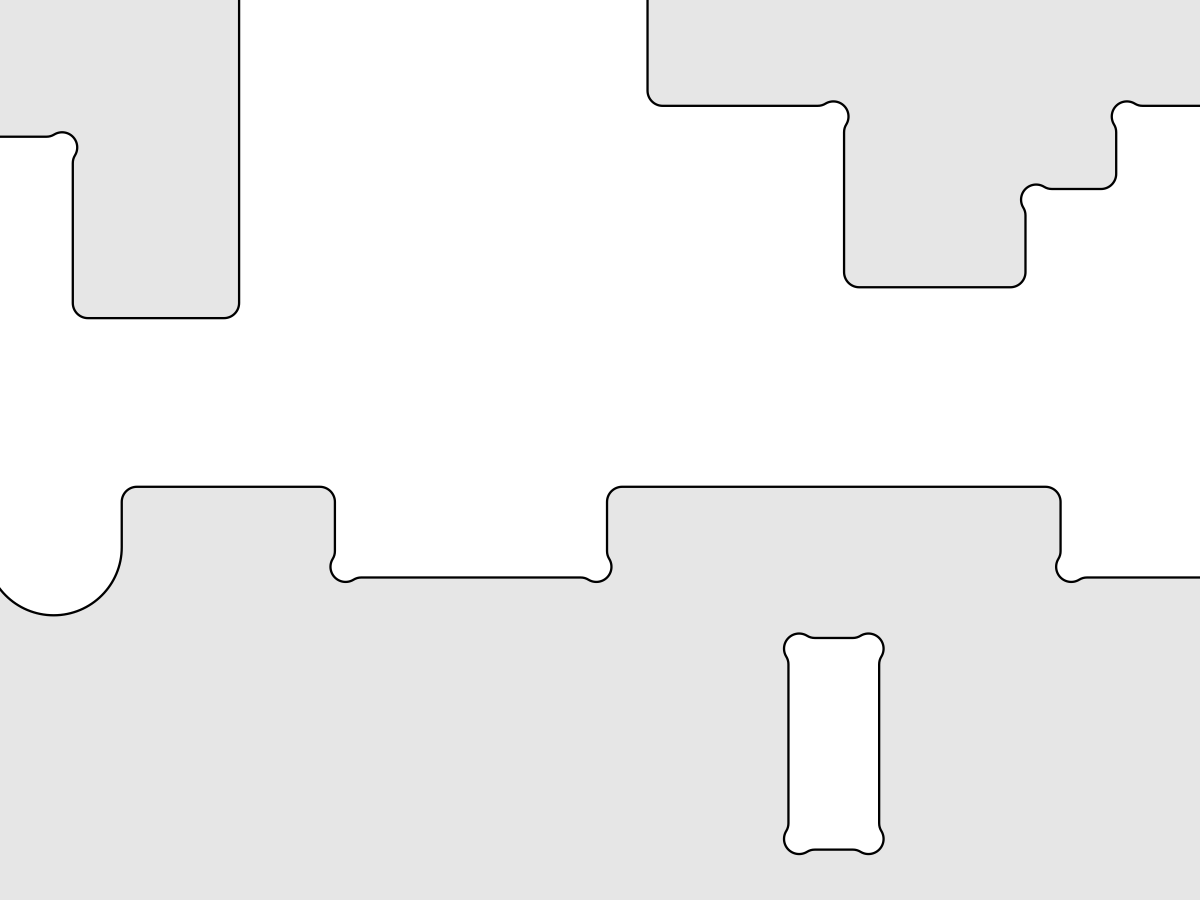
There are a few interesting details about Roku’s acrylic chassis and shell that I think are worth calling attention to. First, it’s good to keep in mind that acrylic is a relatively brittle plastic, and it can easily crack when subjected to too much stress. This seemed like an especially important concern for a sumo robot, given that it would be expected to take lots of impacts in combat. Areas with sharp inside corners are especially prone to cracking, so I took a round chunk out of each inside corner in my laser cutting pattern to increase the corner radii (like this guide recommends). I also rounded most of the outside corners to make them a little less sharp to the touch.
 |
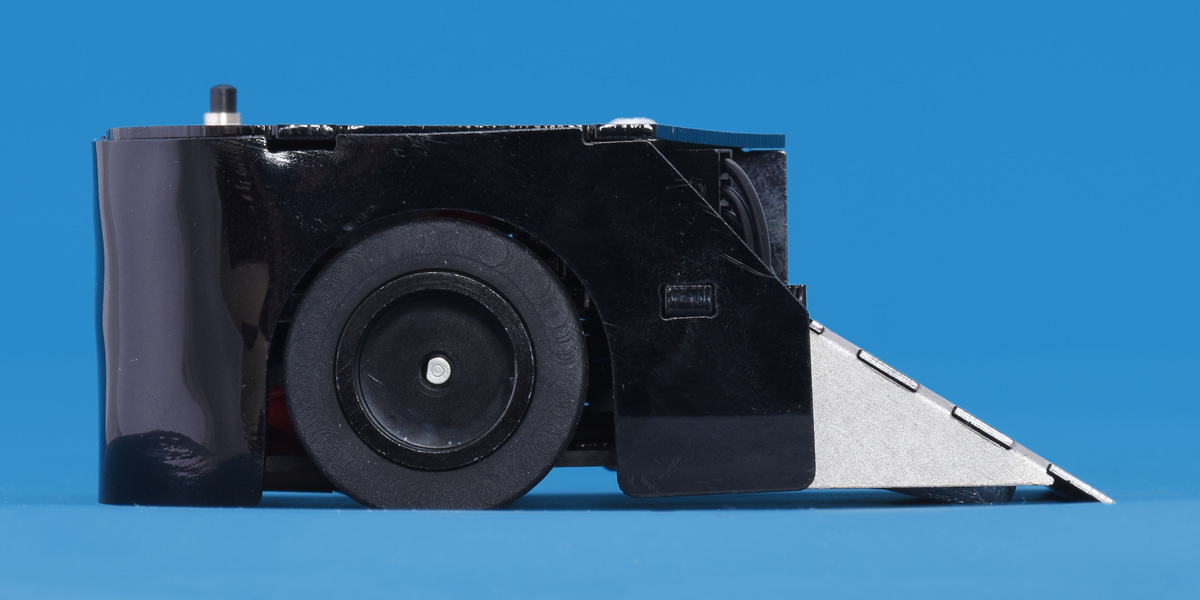
A much more noticeable aspect of the robot is that it has rounded corners in the back. The sides and back of Roku’s outer shell consist of a single U-shaped piece of acrylic that curves around the corners. To make this piece, I built a form out of plywood, screws, and spacers, then clamped the flat acrylic piece to it and warmed it with a heat gun until it became flexible enough to be bent over the form. (If you want to try this yourself, there are plenty of guides for heat-bending acrylic to be found online.)
 |
The curves aren’t perfect, especially in a close-up photo taken with studio lighting, but they still look pretty good from a distance. These rounded corners were the inspiration for Roku’s name, which I chose at the last minute: viewed from the rear, it bears some resemblance to the streaming media player of the same name.
 |
To wrap it up, here is a photo of the finished robot from the bottom, giving a clear view of the A-Star 32U4 Robot Controller as well as a few low-profile lead fishing sinkers that I added to increase the robot’s weight.
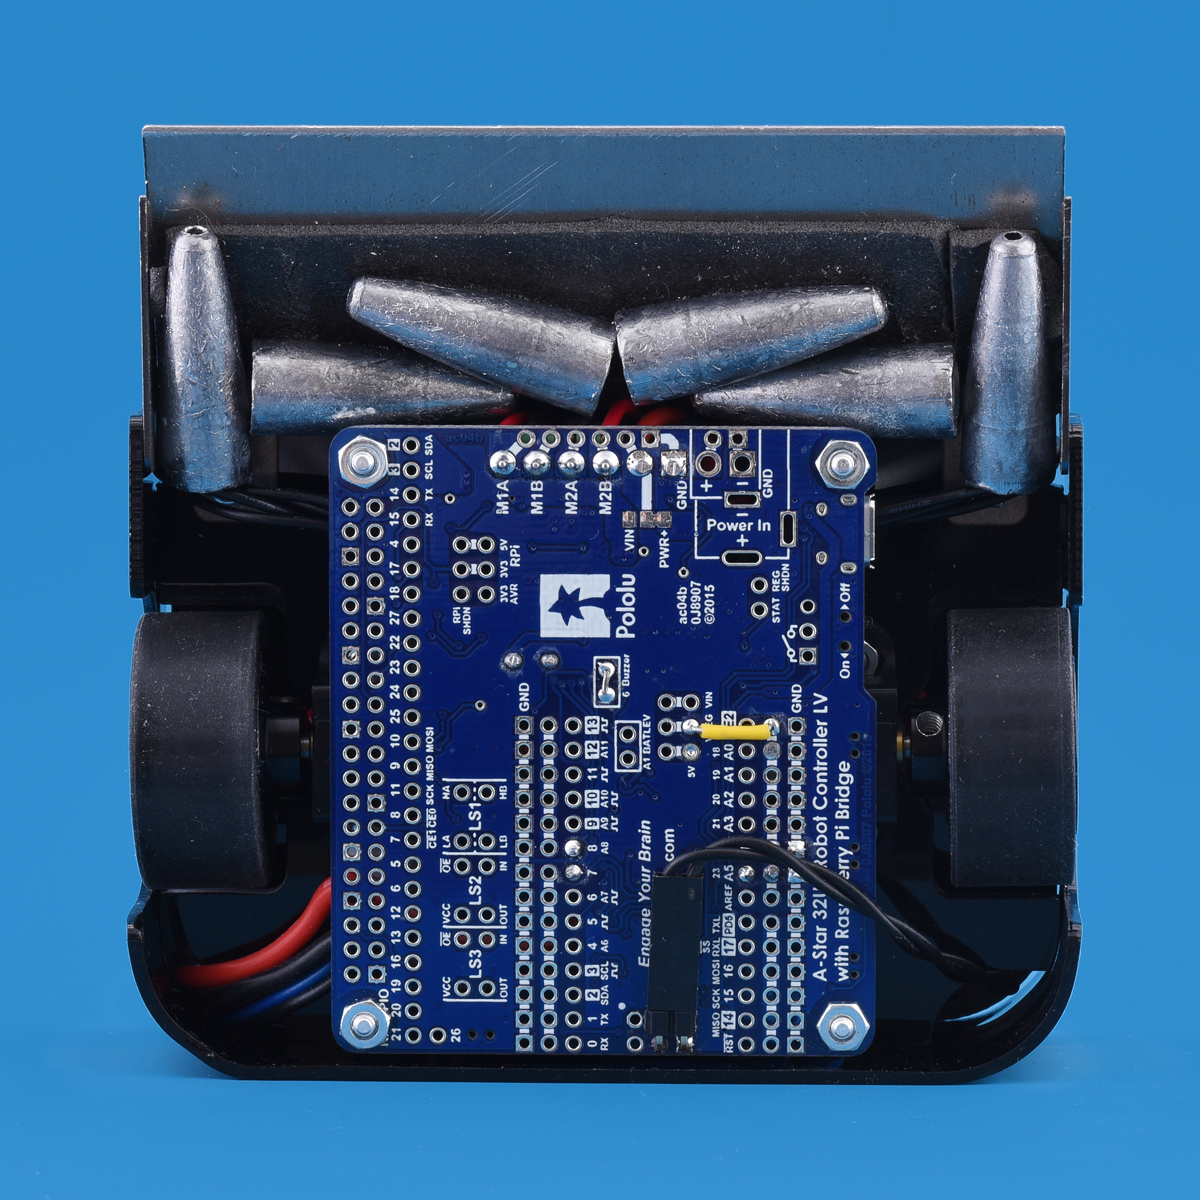 |
Even with the added mass, Roku only weighed in at about two-thirds of the 500 g mini-sumo weight limit, and the fact that it still won the competition demonstrates that there are other qualities that matter. I think there are two factors in particular that contributed a lot to my robot’s success. One was my choice of sensors: the Sharp GP2Y0A60SZ distance sensors seem capable of detecting targets more reliably and at greater distances than many other sensors, often allowing my robot to be the first to find its opponent. Additionally, Roku’s semi-sharpened blade is mounted at a shallow angle, and it bears part of the robot’s weight, which keeps it in contact with the ground. This means it can easily get underneath most opponents, even in a head-on collision, giving it the advantage in traction and pushing power.
Update: I’ve made the design and laser cutting files for my robot available in a comment below.
Related products


-

New products: Scooter/Skate Wheels
- 17 November 2015We are rolling out another set of new products here at Pololu: Scooter/Skate Wheels. They are available in 144×29 mm, 100×24 mm, 84×24 mm, and...
-
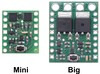
New big MOSFET-based power switches
- 19 November 2015Our mini MOSFET-based power switches now have a set of companion versions with larger MOSFETs: As I mentioned when announcing the Mini switches in...
10 comments

I read your writeup above. Do you have a list of materials you can share, as I would like to build something similar to Roku.
Cheers,
Jeff

Most of the important parts I used are listed in the "Related products" section above. Other than those, there are the chassis itself (laser cut from acrylic and steel), battery (from an RC hobby store), power button, fishing weights, and various screws, standoffs, and wires.
Kevin

I wanted to know how I can laser-cut a similar robot. It would be great if you could send me the file.
Cheers,
Dev
I made a ZIP file available here, containing the laser cutting patterns as DXFs and the Sketchup model. Please note that I made some changes to the laser files but didn't update the model to match; for example, there is a spacer piece behind the sensors (to allow clearance for the modules' through-hole pins) that is not shown in the model.
Kevin

I like your robot.
Could you please share the code of using the Sharp GP2Y0A60SZLF sensors please?
Each distance sensor outputs an analog voltage, so my code just takes an analog reading and compares the voltage to a few specific thresholds to decide whether the sensor is detecting something near, something far, or nothing. (I do not convert the voltage into a distance measurement.)
Kevin
but rather than theory could you please be more specific with some code please?
Sorry for asking but I did not manage to make them work properly.
George
The comments here are not a great place to post code or help you troubleshoot your system, so please post on our forum and I or another member of our tech support staff can try to help you (including making my code available there). So that we can look for any issues in your setup, it would be useful for you to provide more information, including pictures of your connections, the code that you are trying to use, and a description of the behavior you are seeing compared to the behavior you expect.
Kevin


Please note that our company name is Pololu (not "Polulu").
When using the speed commands in our Zumo Arduino libraries, a value of 400 corresponds to 100% duty cycle (i.e. driving the motor at the full battery voltage). So, you cannot increase the speed beyond that programatically. You might consider replacing your Micro Metal Gearmotors with different ones with a lower gear ratio.
Brandon
Post a comment


Home | Forum | Blog | Support | Ordering Information | Lists | Distributors | BIG Order Form | About | Contact
© 2001–2026 Pololu Corporation
