Support » Pololu USB AVR Programmer User’s Guide » 3.b. Programming AVRs using Atmel Studio »
3.b.2. Using Advanced Features of Atmel Studio
This section provides a brief overview of the features of Atmel Studio’s Device Programming dialog that were not covered in Section 3.b. You will not typically need to use these advanced features, but it is good to know about them for the rare occasions when you will need them. Please see the Atmel Studio documentation for more detailed descriptions of these features.
ISP Clock Frequency
In the Device Programming dialog, under Interface settings, you can set the frequency of the clock used when programming the target device. The higher the ISP frequency, the faster the target AVR will be programmed, but this frequency must be less than a quarter of the target AVR’s clock frequency. Click Read to read the frequency from the programmer and click Write to write the selected frequency to the programmer. It is important to note that the actual frequency values displayed in Atmel Studio are not correct when you are using the Pololu USB AVR programmer. See Section 3.e for a list of the actual frequencies and more information about selecting the ISP frequency.
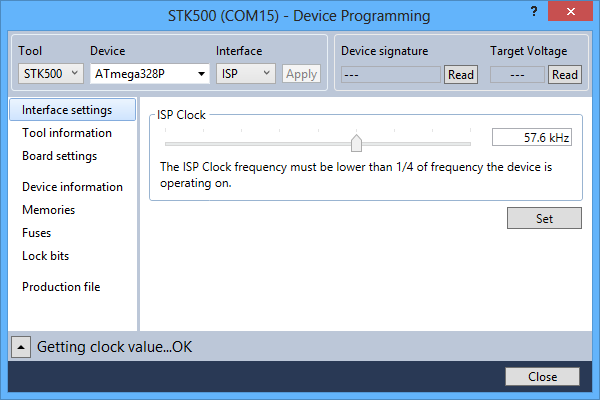 |
Atmel Studio 6’s interface for setting the ISP frequency. |
|---|
Fuses (proceed with caution!)
Selecting Fuses in the Device Programming dialog automatically causes the programmer to read the fuse settings of the target AVR. If the programmer is not connected to the target AVR when you select this tab, Atmel Studio displays an error message. Fuses allow you to configure certain persistent, fundamental aspects of your AVR such as boot flash size, brown-out detection level, and the clock off of which it should run (e.g. external crystal or internal oscillator). To learn more about the fuses and what they do, see the datasheet for your specific AVR.
Warning: You can permanently disable your AVR by setting the fuses incorrectly. Only advanced users who know precisely what they are doing should change the fuse settings!
Lock Bits
Selecting Lock bits in the Device Programming dialog automatically causes the programmer to read the lock bits of the target AVR. If the programmer is not connected to the target AVR when you select this tab, Atmel Studio displays an error message. Lock bits allow you to secure your AVR by preventing further flash writing or reading. The lock bits can be reset to a fully unlocked state by performing a chip erase (i.e. by clicking the Erase Device button in the Memories section). Lock bits are usually only important if you wish to release a product to other people without giving them access to the program it is running, or if you wish to make it more difficult to accidentally overwrite a programmed chip.


Home | Forum | Blog | Support | Ordering Information | Lists | Distributors | BIG Order Form | About | Contact
© 2001–2026 Pololu Corporation
