The Pololu AVR library (see Section 6) comes with an example serial slave program for the 3pi in libpololu-avr\examples\atmegaxx8\3pi-serial-slave, and a corresponding serial master program in libpololu-avr\examples\atmegaxx8\3pi-serial-master. This example shows how to use a ring buffer in SERIAL_CHECK mode to continuously receive and interpret a simple set of commands. The commands control various features of the 3pi, making it possible to use the 3pi as a “smart base” controlled by another processor. It is easy to add more commands yourself or adapt the library to work on a different board.
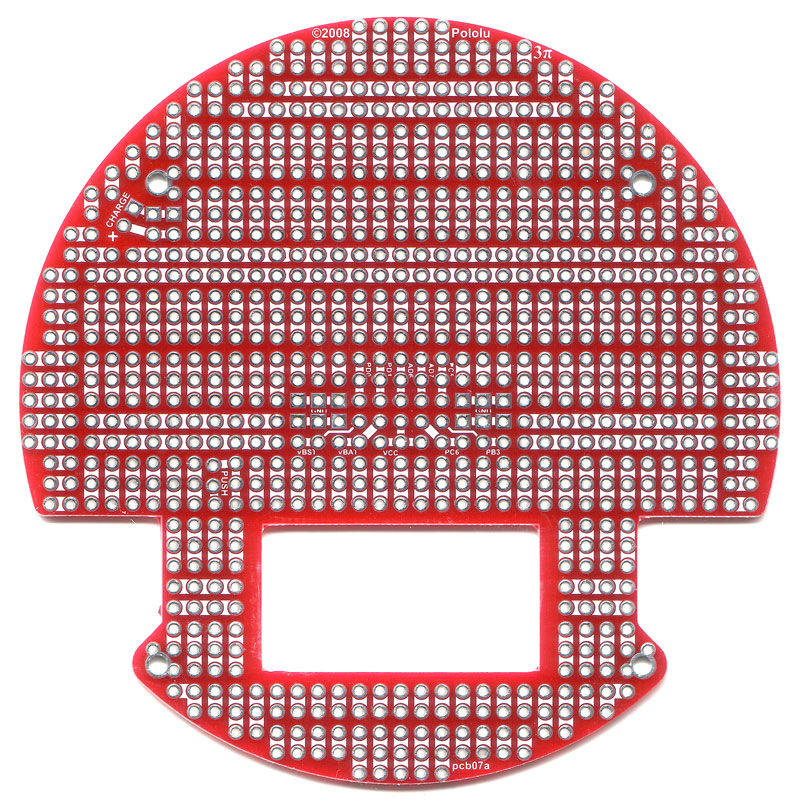
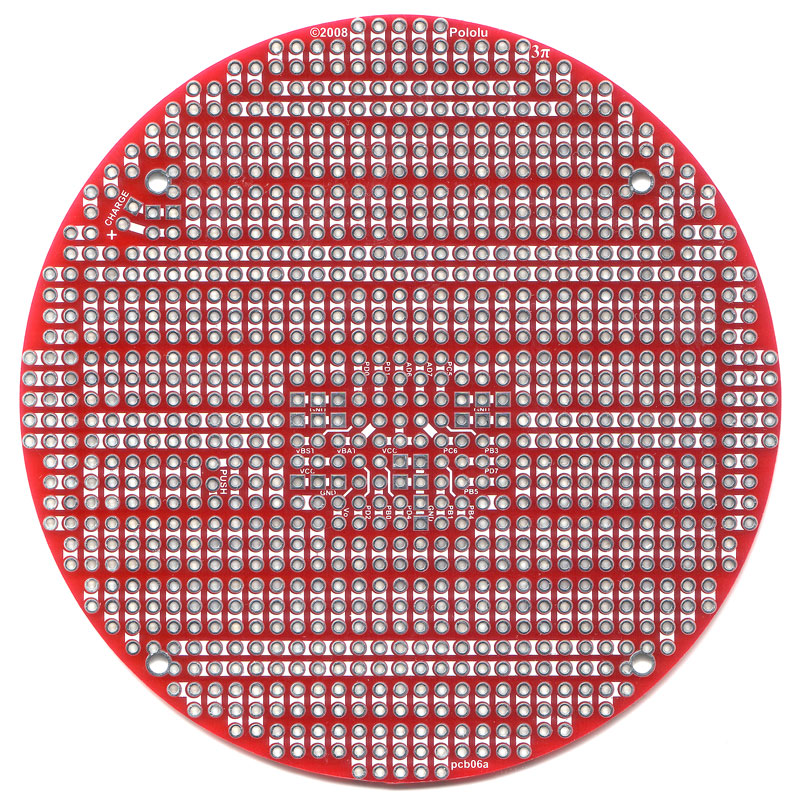
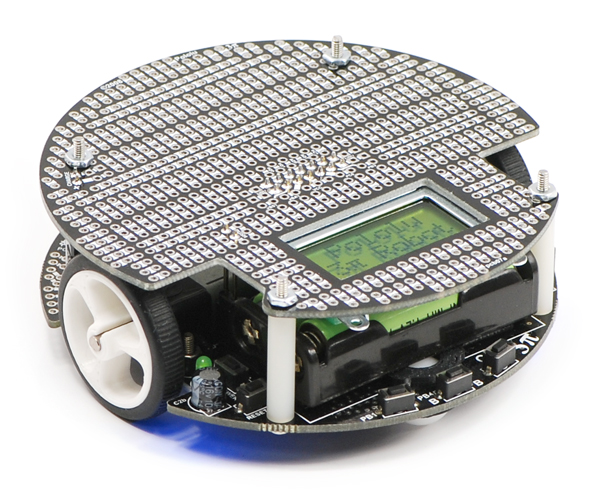
Note that we offer several basic expansion kits on which you can mount such a secondary microcontroller and additional electronics: black with cutouts that let you view the LCD underneath, black without cutouts that replaces the LCD and maximizes prototyping space, red with cutouts, and red without cutouts.
The following two pictures show the black version with cutouts mounted on a 3pi robot:
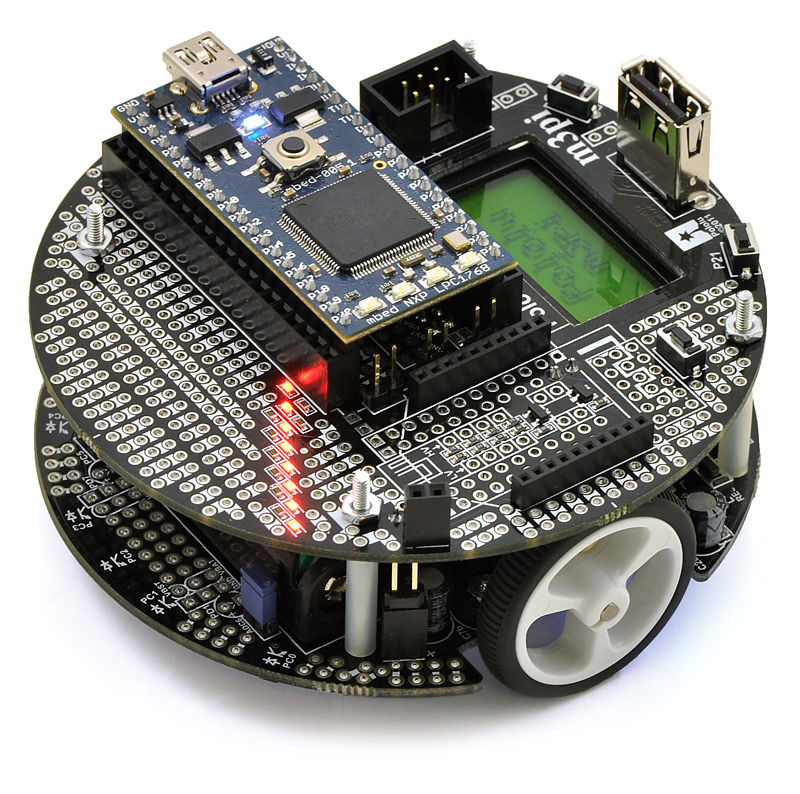
We also offer a more advanced expansion kit that lets you turn your 3pi robot into an m3pi robot. The m3pi expansion kit has sockets for additional electronics, making it simple to significantly increase the capabilities of your 3pi. One socket let’s you use a powerful mbed development board as a high-level robot controller (by issuing serial commands to the 3pi base while it is running its serial slave program), and another socket can be used for a the easy addition of a wireless serial module (XBee, Wixel, Bluetooth, etc). Please note that the m3pi robot is also available fully assembled. Please see the m3pi robot product page for more information.
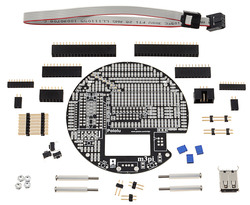 | Pololu m3pi expansion kit. |
|---|
|
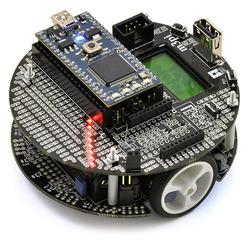 | Pololu m3pi robot controlled by an ARM mbed development board. |
|---|
|
Complete documentation of the serial functions used here can be found in Section 10 of the Pololu AVR Library Command Reference.
This slave program receives serial data on port PD0 (RX) of the 3pi and transmits responses (when necessary) on port PD1 (TX), using a 115.2 kbaud, TTL-level serial protocol. In this example, there are no parity bits, 8 data bits, and one stop bit (N81). The commands implemented here each consist of a single command byte followed by zero or more data bytes. To make it easy to differentiate the command bytes from the data bytes, the command bytes are all in the range 0x80-0xff, while the data bytes are in the range 0x00-0x7f. That is, the command bytes have their most significant bits set, while the data bytes have that bit unset.
Some commands result in the 3pi sending data back out to the controlling device. For commands where integers are sent back, the least significant byte is sent first (little endian).
If bad commands or data bytes are detected, the slave program beeps and displays an error message on the LCD. This means that if you are using the expansion kit without cutouts, you should probably remove the LCD-related commands before loading the program onto your 3pi.
The following commands are recognized by the slave program:
| Command byte |
Command |
Data bytes |
Response bytes |
Description |
| 0x81 |
signature |
0 |
6 |
Sends the slave name and code version, e.g. “3pi1.0”. This command also sets motor speeds to 0 and stops PID line following, if active, so it is useful as an initialization command. |
| 0x86 |
raw sensors |
0 |
10 |
Reads all five IR sensors and sends the raw values as a sequence of two-byte ints, in the range 0-2000 |
| 0x87 |
calibrated sensors |
0 |
10 |
Reads all five IR sensors and sends calibrated values as a sequence of two-byte ints, in the range 0-1000 |
| 0xB0 |
trimpot |
0 |
2 |
Sends the voltage output of the trimpot as a two-byte int, in the range 0-1023 |
| 0xB1 |
battery millivolts |
0 |
2 |
Sends the battery voltage of the 3pi in mV, as a two-byte int |
| 0xB3 |
play music |
2-101 |
0 |
Plays a tune specified by a string of musical commands. The first data byte specifies the length of the following string (max length 100), so that the slave program knows how many more data bytes to read. See the play() command in Section 3 of the Pololu AVR Library Command Reference for a description of the musical command format. |
| 0xB4 |
calibrate |
0 |
10 |
Performs one round of calibration on the sensors, reads all five IR sensors, and sends calibrated values as a sequence of two-byte ints, in the range 0-1000. This should be called multiple times, as the robot moves over a range from white to black. |
| 0xB5 |
reset calibration |
0 |
0 |
Resets the calibration. This should always be used when connecting to a slave, in case the master reset without a slave reset, for example in case of a power glitch. |
| 0xB6 |
line position |
0 |
2 |
Reads all five IR sensors using calibrated values and estimates the position of a black line under the robot. The value, which is sent back as a two-byte integer, is 0 when the line is under sensor PC0 or farther to the left, 1000 when the line is directly under sensor PC1, up to 4000 when it is under sensor PC4 or farther to the right. See Section 19 of of the Pololu AVR Library Command Reference for the formula used to estimate position. |
| 0xB7 |
clear LCD |
0 |
0 |
Clears the LCD screen on the 3pi. |
| 0xB8 |
print |
2-9 |
0 |
Prints 1-8 characters to the LCD. The first byte is the length of the following string of characters, as with the play command above. |
| 0xB9 |
LCD goto xy |
2 |
0 |
Moves the LCD cursor to x-y coordinates given by the next two bytes. |
| 0xBA |
autocalibrate |
0 |
1 |
Turns the robot left and right while calibrating. For use when the robot it positioned over a line. Returns the character ‘c’ when complete. |
| 0xBB |
start PID |
5 |
0 |
Sets up PID parameters and begins line following. The first data byte sets the maximum motor speed. The next four bytes, a, b, c, and d, represent the PID parameters. Specifically, the difference in the motor speeds will be set to (L-2000)×a/b + D×c/d, where L is the position of the line as described above, and D is the derivative of L. The integral term is not implemented in this program. See Section 7.c for more information on PID line following. |
| 0xBC |
stop PID |
0 |
0 |
Stops PID line following, setting motor speeds to 0. |
| 0xC1 |
M1 forward |
1 |
0 |
Sets motor M1 turning forward with a speed of 0 (off) up to 127 (full speed). |
| 0xC2 |
M1 backward |
1 |
0 |
Sets motor M1 turning backward with a speed of 0 (off) up to 127 (full reverse). |
| 0xC5 |
M2 forward |
1 |
0 |
Sets motor M2 turning forward with a speed of 0 (off) up to 127 (full speed). |
| 0xC6 |
M2 backward |
1 |
0 |
Sets motor M2 turning backward with a speed of 0 (off) up to 127 (full reverse). |
Source code
#include <pololu/3pi.h>

/*
 * 3pi-serial-slave - An example serial slave program for the Pololu
 * 3pi Robot.  See the following pages for more information:
 *
 * http://www.pololu.com/docs/0J21
 * http://www.pololu.com/docs/0J20
 * http://www.poolu.com/
 *
 */

// PID constants
unsigned int pid_enabled = 0;
unsigned char max_speed = 255;
unsigned char p_num = 0;
unsigned char p_den = 0;
unsigned char d_num = 0;
unsigned char d_den = 0;
unsigned int last_proportional = 0;
unsigned int sensors[5];

// This routine will be called repeatedly to keep the PID algorithm running
void pid_check()
{
	if(!pid_enabled)
		return;

	// Do nothing if the denominator of any constant is zero.
	if(p_den == 0 || d_den == 0)
	{
		set_motors(0,0);
		return;
	}

	// Read the line position, with serial interrupts running in the background.
	serial_set_mode(SERIAL_AUTOMATIC);
	unsigned int position = read_line(sensors, IR_EMITTERS_ON);
	serial_set_mode(SERIAL_CHECK);

	// The "proportional" term should be 0 when we are on the line.
	int proportional = ((int)position) - 2000;

	// Compute the derivative (change) of the position.
	int derivative = proportional - last_proportional;

	// Remember the last position.
	last_proportional = proportional;

	// Compute the difference between the two motor power settings,
	// m1 - m2.  If this is a positive number the robot will turn
	// to the right.  If it is a negative number, the robot will
	// turn to the left, and the magnitude of the number determines
	// the sharpness of the turn.
	int power_difference = proportional*p_num/p_den + derivative*p_num/p_den;

	// Compute the actual motor settings.  We never set either motor
	// to a negative value.
	if(power_difference > max_speed)
		power_difference = max_speed;
	if(power_difference < -max_speed)
		power_difference = -max_speed;

	if(power_difference < 0)
		set_motors(max_speed+power_difference, max_speed);
	else
		set_motors(max_speed, max_speed-power_difference);
}

// A global ring buffer for data coming in.  This is used by the
// read_next_byte() and previous_byte() functions, below.
char buffer[100];

// A pointer to where we are reading from.
unsigned char read_index = 0;

// Waits for the next byte and returns it.  Runs play_check to keep
// the music playing and serial_check to keep receiving bytes.
// Calls pid_check() to keep following the line.
char read_next_byte()
{
	while(serial_get_received_bytes() == read_index)
	{
		serial_check();
		play_check();

		// pid_check takes some time; only run it if we don't
		// have more bytes to process
		if(serial_get_received_bytes() == read_index)
			pid_check();

	}
	char ret = buffer[read_index];
	read_index ++;
	if(read_index >= 100)
		read_index = 0;
	return ret;
}

// Backs up by one byte in the ring buffer.
void previous_byte()
{
	read_index --;
	if(read_index == 255)
		read_index = 99;
}

// Returns true if and only if the byte is a command byte (>= 0x80).
char is_command(char byte)
{
	if (byte < 0)
		return 1;
	return 0;
}

// Returns true if and only if the byte is a data byte (< 0x80).
char is_data(char byte)
{
	if (byte < 0)
		return 0;
	return 1;
}

// If it's not a data byte, beeps, backs up one, and returns true.
char check_data_byte(char byte)
{
	if(is_data(byte))
		return 0;

	play("o3c");

	clear();
	print("Bad data");
	lcd_goto_xy(0,1);
	print_hex_byte(byte);

	previous_byte();
	return 1;
}

/////////////////////////////////////////////////////////////////////
// COMMAND FUNCTIONS
//
// Each function in this section corresponds to a single serial
// command.  The functions are expected to do their own argument
// handling using read_next_byte() and check_data_byte().

// Sends the version of the slave code that is running.
// This function also shuts down the motors and disables PID, so it is
// useful as an initial command.
void send_signature()
{
	serial_send_blocking("3pi1.0", 6);
	set_motors(0,0);
	pid_enabled = 0;
}

// Reads the line sensors and sends their values.  This function can
// do either calibrated or uncalibrated readings.  When doing calibrated readings,
// it only performs a new reading if we are not in PID mode.  Otherwise, it sends
// the most recent result immediately.
void send_sensor_values(char calibrated)
{
	if(calibrated)
	{
		if(!pid_enabled)
			read_line_sensors_calibrated(sensors, IR_EMITTERS_ON);
	}
	else
		read_line_sensors(sensors, IR_EMITTERS_ON);
	serial_send_blocking((char *)sensors, 10);
}

// Sends the raw (uncalibrated) sensor values.
void send_raw_sensor_values()
{
	send_sensor_values(0);
}

// Sends the calibated sensor values.
void send_calibrated_sensor_values()
{
	send_sensor_values(1);
}

// Computes the position of a black line using the read_line()
// function, and sends the value.
// Returns the last value computed if PID is running.
void send_line_position()
{
	int message[1];
	unsigned int tmp_sensors[5];
	int line_position;

	if(pid_enabled)
		line_position = last_proportional+2000;
	else line_position = read_line(tmp_sensors, IR_EMITTERS_ON);

	message[0] = line_position;

	serial_send_blocking((char *)message, 2);
}

// Sends the trimpot value, 0-1023.
void send_trimpot()
{
	int message[1];
	message[0] = read_trimpot();
	serial_send_blocking((char *)message, 2);
}

// Sends the battery voltage in millivolts
void send_battery_millivolts()
{
	int message[1];
	message[0] = read_battery_millivolts();
	serial_send_blocking((char *)message, 2);
}

// Drives m1 forward.
void m1_forward()
{
	char byte = read_next_byte();

	if(check_data_byte(byte))
		return;

	set_m1_speed(byte == 127 ? 255 : byte*2);
}

// Drives m2 forward.
void m2_forward()
{
	char byte = read_next_byte();

	if(check_data_byte(byte))
		return;

	set_m2_speed(byte == 127 ? 255 : byte*2);
}

// Drives m1 backward.
void m1_backward()
{
	char byte = read_next_byte();

	if(check_data_byte(byte))
		return;

	set_m1_speed(byte == 127 ? -255 : -byte*2);
}

// Drives m2 backward.
void m2_backward()
{
	char byte = read_next_byte();

	if(check_data_byte(byte))
		return;

	set_m2_speed(byte == 127 ? -255 : -byte*2);
}

// A buffer to store the music that will play in the background.
char music_buffer[100];

// Plays a musical sequence.
void do_play()
{
	unsigned char tune_length = read_next_byte();

	if(check_data_byte(tune_length))
		return;

	unsigned char i;
	for(i=0;i<tune_length;i++)
	{
		if(i > sizeof(music_buffer)) // avoid overflow
			return;

		music_buffer[i] = read_next_byte();

		if(check_data_byte(music_buffer[i]))
			return;
	}

	// add the end of string character 0
	music_buffer[i] = 0;

	play(music_buffer);
}

// Clears the LCD
void do_clear()
{
	clear();
}

// Displays data to the screen
void do_print()
{
	unsigned char string_length = read_next_byte();

	if(check_data_byte(string_length))
		return;

	unsigned char i;
	for(i=0;i<string_length;i++)
	{
		unsigned char character;
		character = read_next_byte();

		if(check_data_byte(character))
			return;

		// Before printing to the LCD we need to go to AUTOMATIC mode.
		// Otherwise, we might miss characters during the lengthy LCD routines.
		serial_set_mode(SERIAL_AUTOMATIC);
 		print_character(character);
		serial_set_mode(SERIAL_CHECK);
	}
}

// Goes to the x,y coordinates on the lcd specified by the two data bytes
void do_lcd_goto_xy()
{
	unsigned char x = read_next_byte();
	if(check_data_byte(x))
		return;

	unsigned char y = read_next_byte();
	if(check_data_byte(y))
		return;

	lcd_goto_xy(x,y);
}

// Runs through an automatic calibration sequence
void auto_calibrate()
{
	time_reset();
	set_motors(60, -60);
	while(get_ms() < 250)
		calibrate_line_sensors(IR_EMITTERS_ON);
	set_motors(-60, 60);
	while(get_ms() < 750)
		calibrate_line_sensors(IR_EMITTERS_ON);
	set_motors(60, -60);
	while(get_ms() < 1000)
		calibrate_line_sensors(IR_EMITTERS_ON);
	set_motors(0, 0);

	serial_send_blocking("c",1);
}

// Turns on PID according to the supplied PID constants
void set_pid()
{
	unsigned char constants[5];
	unsigned char i;
	for(i=0;i<5;i++)
	{
		constants[i] = read_next_byte();
		if(check_data_byte(constants[i]))
			return;
	}

	// make the max speed 2x of the first one, so that it can reach 255
	max_speed = (constants[0] == 127 ? 255 : constants[0]*2);

	// set the other parameters directly
	p_num = constants[1];
	p_den = constants[2];
	d_num = constants[3];
	d_den = constants[4];

	// enable pid
	pid_enabled = 1;
}

// Turns off PID
void stop_pid()
{
	set_motors(0,0);
	pid_enabled = 0;
}

/////////////////////////////////////////////////////////////////////

int main()
{
	pololu_3pi_init(2000);
	play_mode(PLAY_CHECK);

	clear();
	print("Slave");

	// start receiving data at 115.2 kbaud
	serial_set_baud_rate(115200);
	serial_set_mode(SERIAL_CHECK);
	serial_receive_ring(buffer, 100);

	while(1)
	{
		// wait for a command
		char command = read_next_byte();

		// The list of commands is below: add your own simply by
		// choosing a command byte and introducing another case
		// statement.
		switch(command)
		{
		case (char)0x00:
			// slient error - probable master resetting
			break;

		case (char)0x81:
			send_signature();
			break;
		case (char)0x86:
			send_raw_sensor_values();
			break;
		case (char)0x87:
			send_calibrated_sensor_values(1);
			break;
		case (char)0xB0:
			send_trimpot();
			break;
		case (char)0xB1:
			send_battery_millivolts();
			break;
		case (char)0xB3:
			do_play();
			break;
		case (char)0xB4:
			calibrate_line_sensors(IR_EMITTERS_ON);
			send_calibrated_sensor_values(1);
			break;
		case (char)0xB5:
			line_sensors_reset_calibration();
			break;
		case (char)0xB6:
			send_line_position();
			break;
		case (char)0xB7:
			do_clear();
			break;
		case (char)0xB8:
			do_print();
			break;
		case (char)0xB9:
			do_lcd_goto_xy();
			break;
		case (char)0xBA:
			auto_calibrate();
			break;
		case (char)0xBB:
			set_pid();
			break;
		case (char)0xBC:
			stop_pid();
			break;

		case (char)0xC1:
			m1_forward();
			break;
		case (char)0xC2:
			m1_backward();
			break;
		case (char)0xC5:
			m2_forward();
			break;
		case (char)0xC6:
			m2_backward();
			break;

		default:
			clear();
			print("Bad cmd");
			lcd_goto_xy(0,1);
			print_hex_byte(command);

			play("o7l16crc");
			continue; // bad command
		}
	}
}