Support » Pololu 3pi Robot User’s Guide » 4. Getting Started with Your 3pi Robot »
4.b. Powering Up Your 3pi
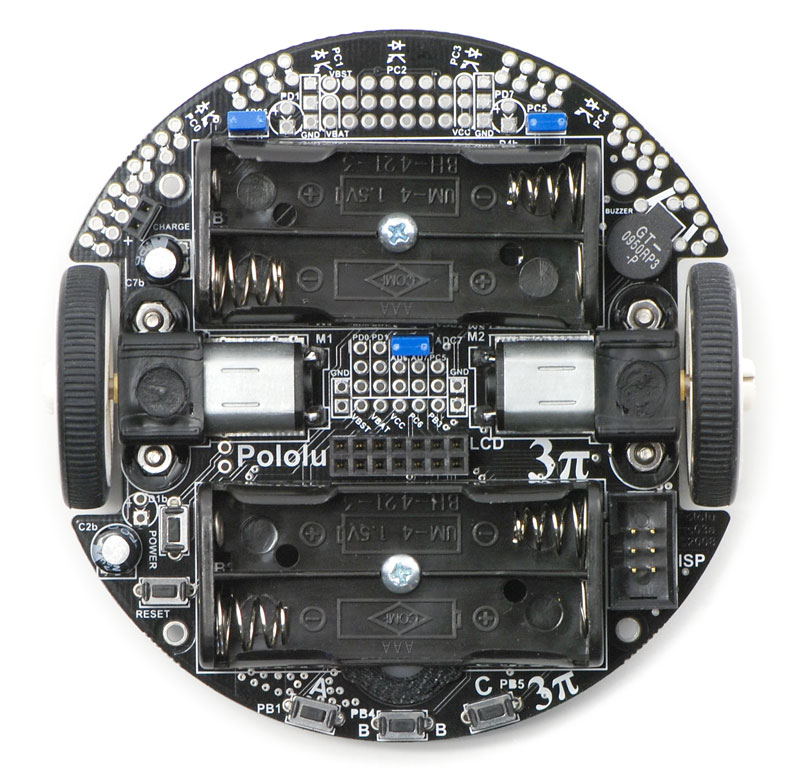 |
The first step in using your new 3pi robot is to insert four AAA batteries into the battery holders. To do this you will need to remove the LCD. Pay attention to the LCD’s orientation as you will want to plug it back in this way when you are done. With the LCD removed your 3pi should look like the picture to the right.
Once the batteries are in place, you should return the LCD to its position over the rear battery holder. Make sure each male LCD header pin goes into a corresponding female socket.
Next, push the power button (located on the left side of the rear battery pack) to turn on your 3pi. You should see the two blue power LEDs on the underside of the 3pi light, and the 3pi should begin running its preloaded demo program. You can simply push the power button again to turn the 3pi off, and you can push the reset button (located just below the power button) to reset the program the robot is running.


Home | Forum | Blog | Support | Ordering Information | Lists | Distributors | BIG Order Form | About | Contact
© 2001–2026 Pololu Corporation
