Before you connect a Wixel to a computer running Microsoft Windows, you should install the drivers:
- Download the Wixel Windows Drivers and Software (12MB zip)
- Open the ZIP archive and run setup.exe. The installer will guide you through the steps required
to install the Wixel Configuration Utility, the Wixel command-line utility (WixelCmd), and the
Wixel drivers on your computer. If the installer fails when run directly from the ZIP file, extract the contents of the ZIP file
to a temporary directory on your computer, right click setup.exe, and select “Run as Administrator”.
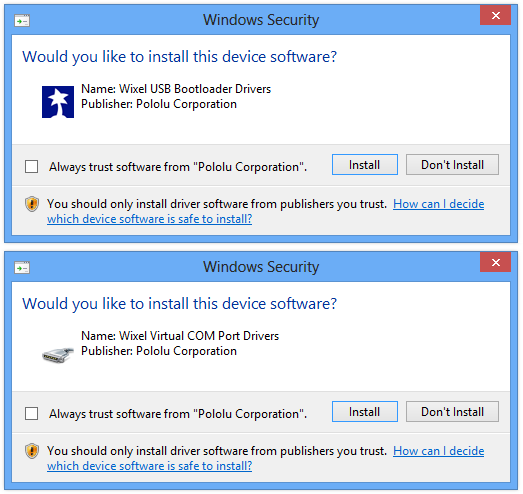
- During the installation, Windows will ask you if you want to install the drivers. Click “Install” (Windows 10, 8, 7, and Vista) or “Continue Anyway” (Windows XP).
- After the installation is finished, your start menu should have a shortcut to the Wixel Configuration Utility (in the Pololu folder). This is a Windows application that allows you to load apps onto your Wixel. There will also be a command-line utility called WixelCmd which you can run at a Command Prompt.
Windows 10, Windows 8, Windows 7, and Windows Vista users: Your computer should now automatically install the necessary drivers when you connect a Wixel. No further action from you is required.
Windows XP users: Follow steps 5–9 for each new Wixel you connect to your computer. You will also have to follow these steps again the first time you run an actual Wixel app on the Wixel.
- Connect the device to your computer’s USB port.
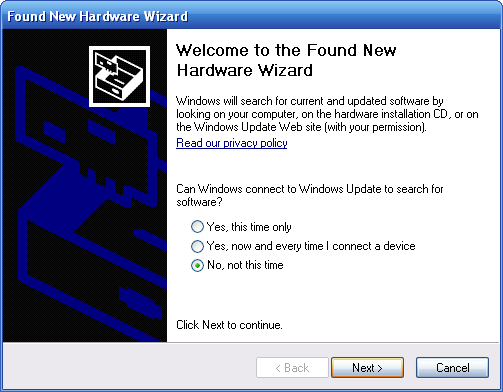
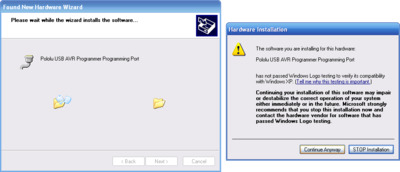
- When the “Found New Hardware Wizard” is displayed, select “No, not this time” and click “Next”.
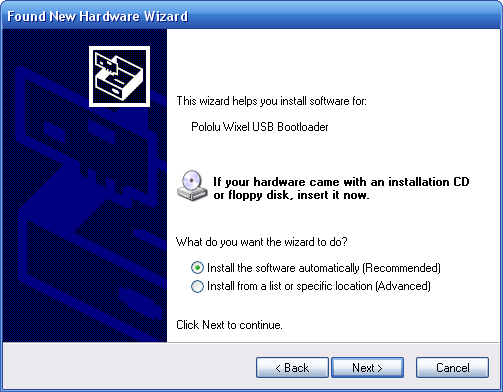
- On the second screen of the “Found New Hardware Wizard”, select “Install the software automatically” and click “Next”.
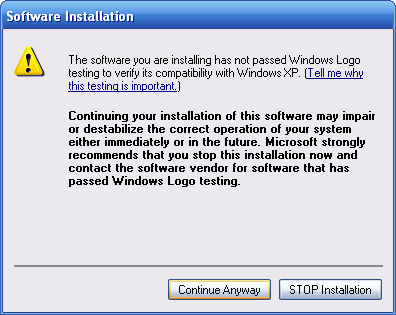
- Windows XP will warn you again that the driver has not been tested by Microsoft and recommend that you stop the installation. Click “Continue Anyway”.
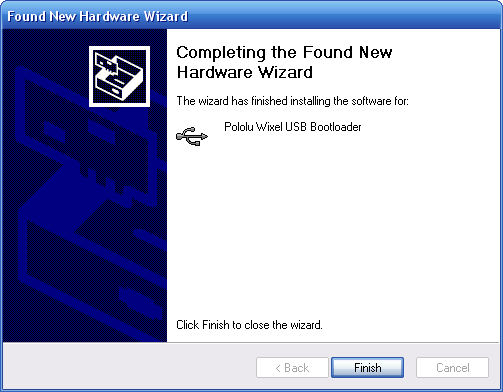
- When you have finished the “Found New Hardware Wizard”, click “Finish”.
After installing the drivers, if you go to your computer’s Device Manager and expand the “Pololu USB Devices” list, you should see an entry for the Pololu Wixel USB Bootloader.
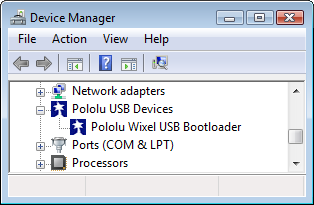 | Windows Vista or Windows 7 Device Manager showing a Wixel in bootloader mode. |
|---|
| 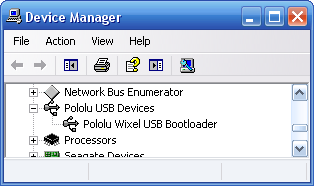 | Windows XP Device Manager showing a Wixel in bootloader mode. |
|---|
|
If you see the “Pololu Wixel USB Bootloader” entry in your device manager, it means that your Wixel is in bootloader mode. Your Wixel should go into bootloader mode when you first plug it into USB, because there is no app on the Wixel by default. Once you have loaded an app onto the Wixel using the Wixel Configuration Utility, and the app is running, then you will not see the Pololu Wixel USB Bootloader entry in your Device Manager. The entry you see in the Device Manager will depend on the application that is loaded on the Wixel. Some apps might not enable the USB interface, in which case you will see no entry for the Wixel in the Device Manager. However, typical Wixel Apps will appear in your Device Manager as a single Virtual COM port (with product ID 0x2200) in the “Ports (COM & LPT)” list as shown below:
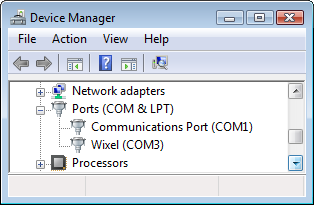 | Windows Vista or Windows 7 Device Manager showing a Wixel that is running an app with a virtual COM port. |
|---|
| 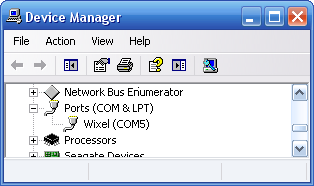 | Windows XP Device Manager showing a Wixel that is running an app with a virtual COM port. |
|---|
|
In parentheses, you will see the name of the port (for example, COM5 or COM6). Some software will not allow connection to higher COM port numbers. If you need to change the COM port number assigned to a Wixel, you can do so using the Device Manager. Bring up the properties dialog for the COM port and click the “Advanced…” button in the “Port Settings” tab. From this dialog you can change the COM port assigned to your device. Windows will remember which COM port was assigned to which Wixel using the built-in serial number of the Wixel; a given Wixel will always get assigned to the same COM port regardless of which USB port it is plugged into.
You might see that the COM port is named “USB Serial Device” in the Device Manager. This can happen if you are using Windows 10 or later and you plugged the Wixel into your computer before installing our drivers for it. In that case, if your Wixel is running an app with a virtual COM port, Windows will set up your Wixel using the default Windows serial driver (usbser.inf), and it will display “USB Serial Device” as the name for its COM port. The port will be usable, but it might be hard to distinguish it from other ports because of the generic name shown in the Device Manager. We recommend fixing the name in the Device Manager by right-clicking on the “USB Serial Device” entry, selecting “Update Driver Software…”, and then selecting “Search automatically for updated driver software”. Windows should find the Wixel drivers you already installed, which contain the correct name for the port.