

This is a merged information page for Item #2508.
View normal product page.
Pololu item #:
2508
Brand:
Pololu
Status:
Special Order Only

This shield makes it easy to build an Arduino-controlled Zumo robot. The shield mounts onto an assembled Zumo chassis, connecting directly to the chassis’s battery terminals and motors, and the Arduino plugs into the shield, face down. This shield includes dual motor drivers, a buzzer for playing simple sounds and music, a user pushbutton, and a 3-axis accelerometer, compass, and gyroscope. The shield boosts the battery voltage to power the Arduino, and it breaks out the Arduino I/O lines, reset button, and user LED for convenient access and to accommodate additional sensors for things like obstacle and edge detection.
|
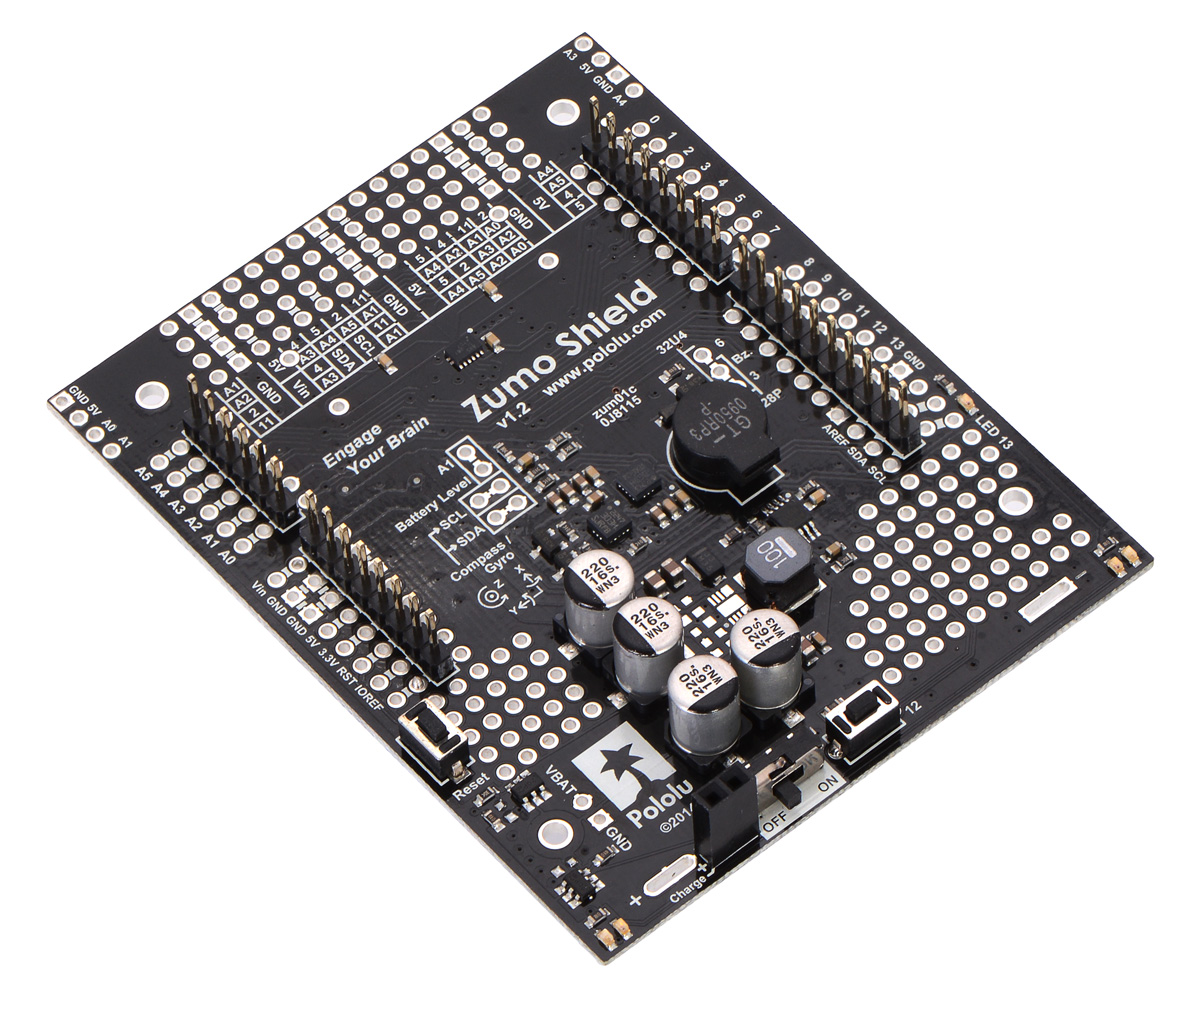
Zumo Shield for Arduino, v1.2, shown with included hardware. |
|---|
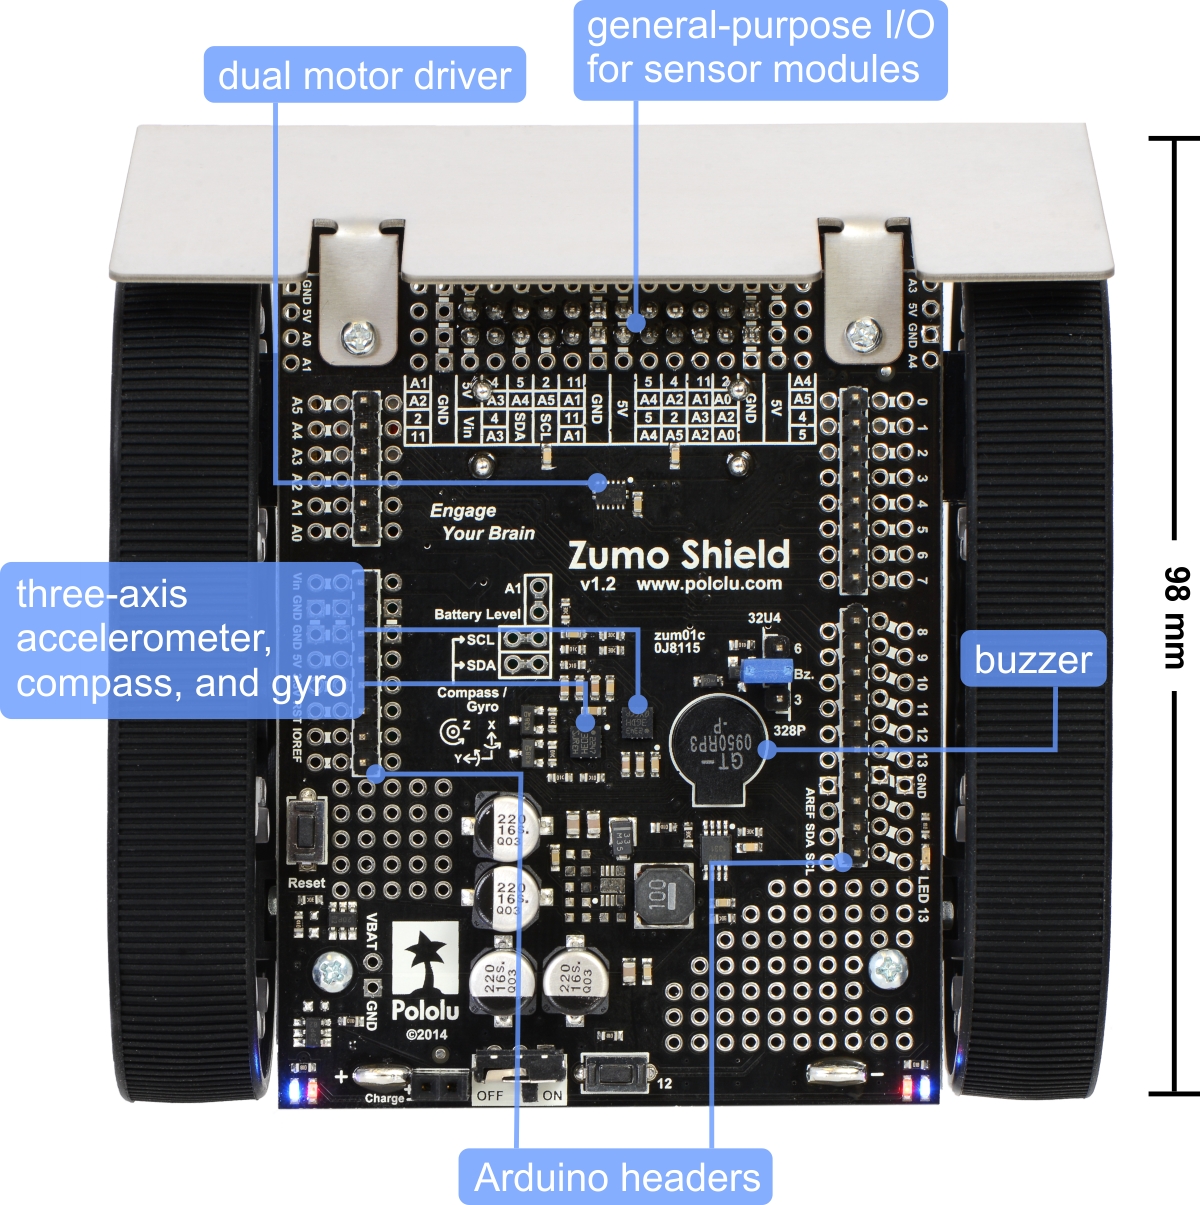 |
Main features of the Zumo Shield for Arduino, v1.2. |
|---|
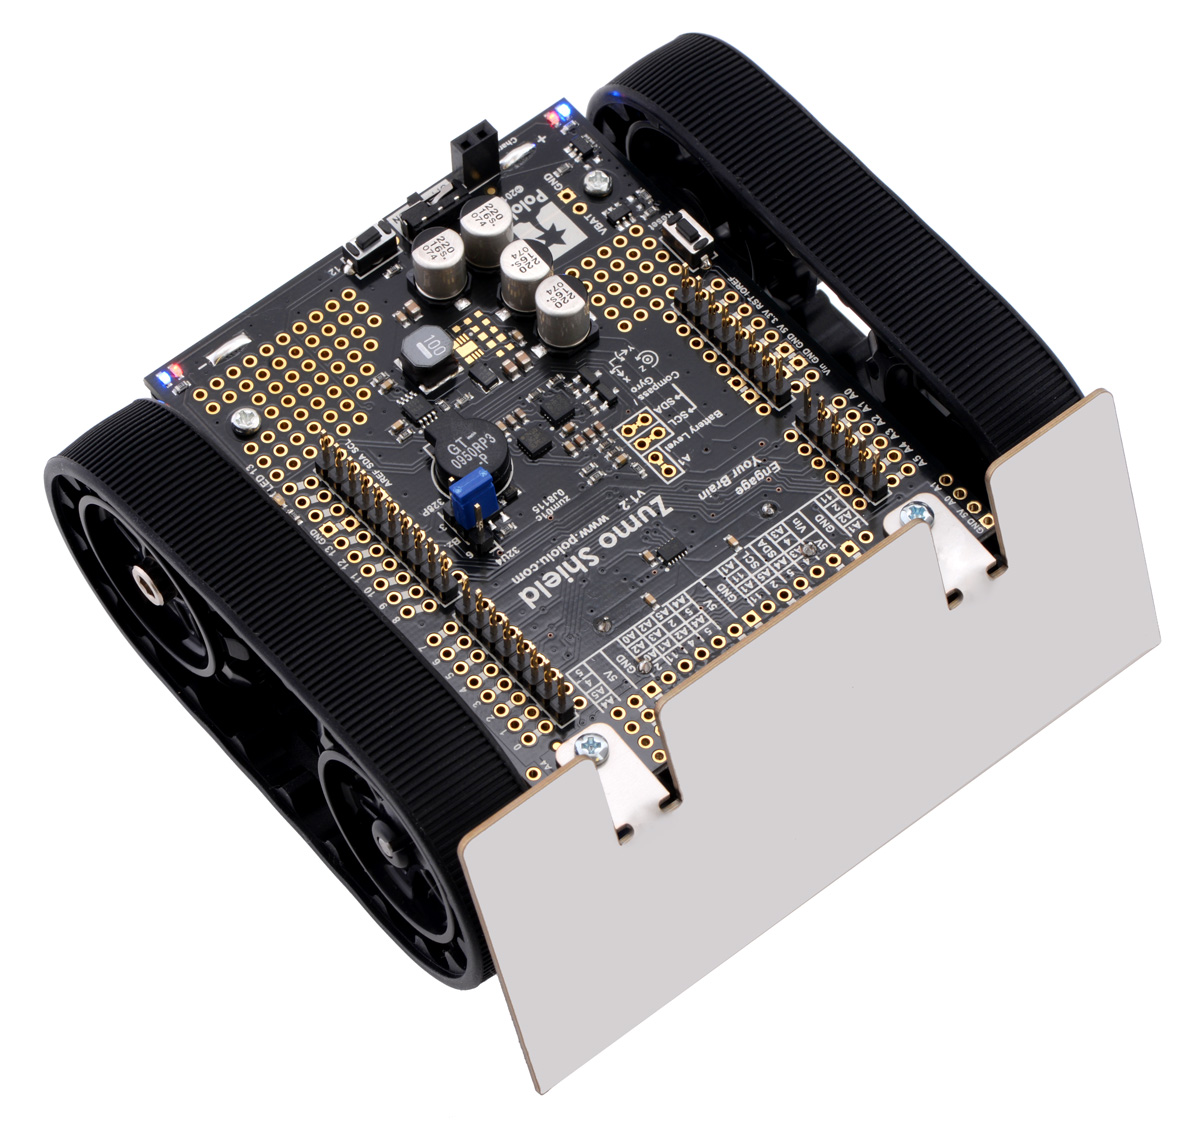 |
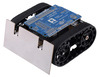
Zumo Robot for Arduino, v1.2. |
|---|
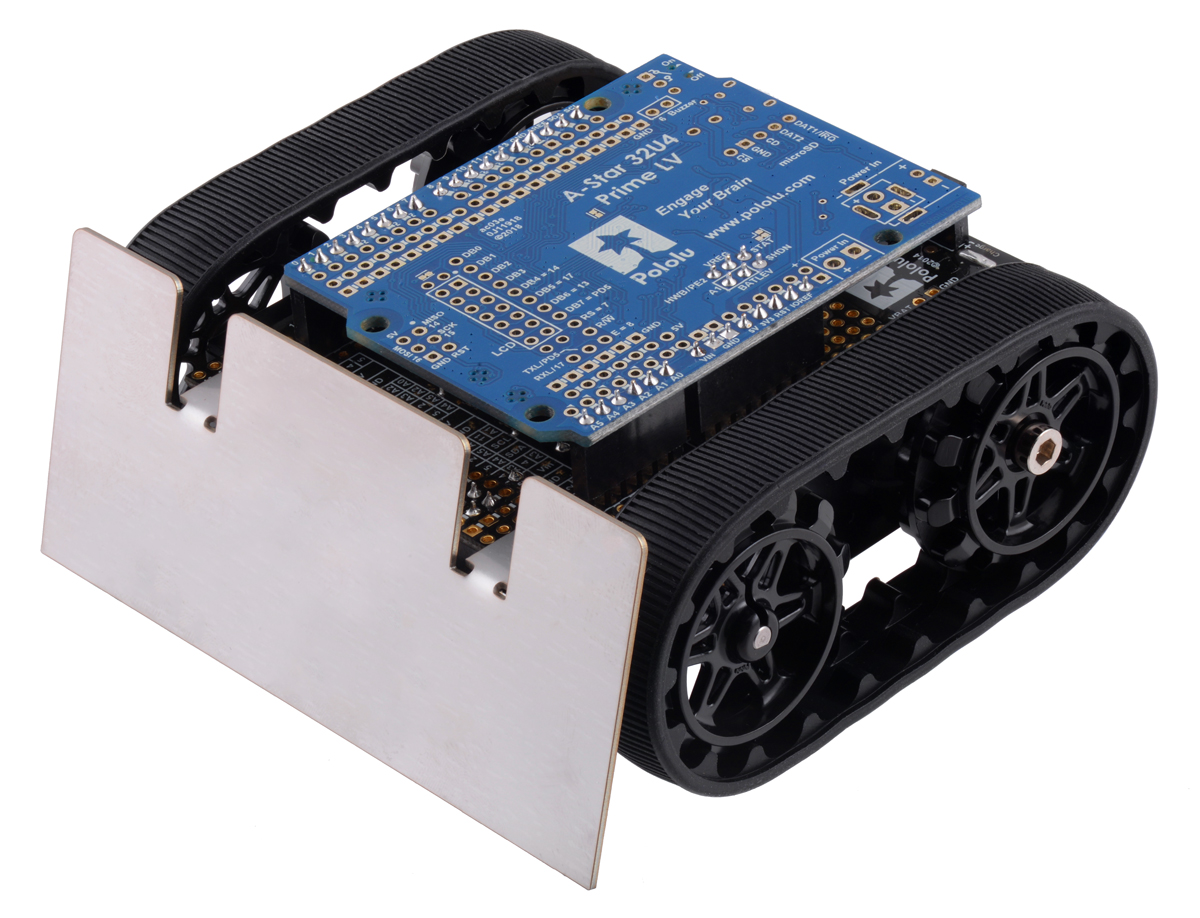 |
Assembled Zumo Robot for Arduino with an Arduino-compatible A-Star 32U4 Prime LV. |
|---|
 |
Zumo Shield for Arduino, v1.2, as it ships (assembled with surface-mount components only). |
|---|
 |
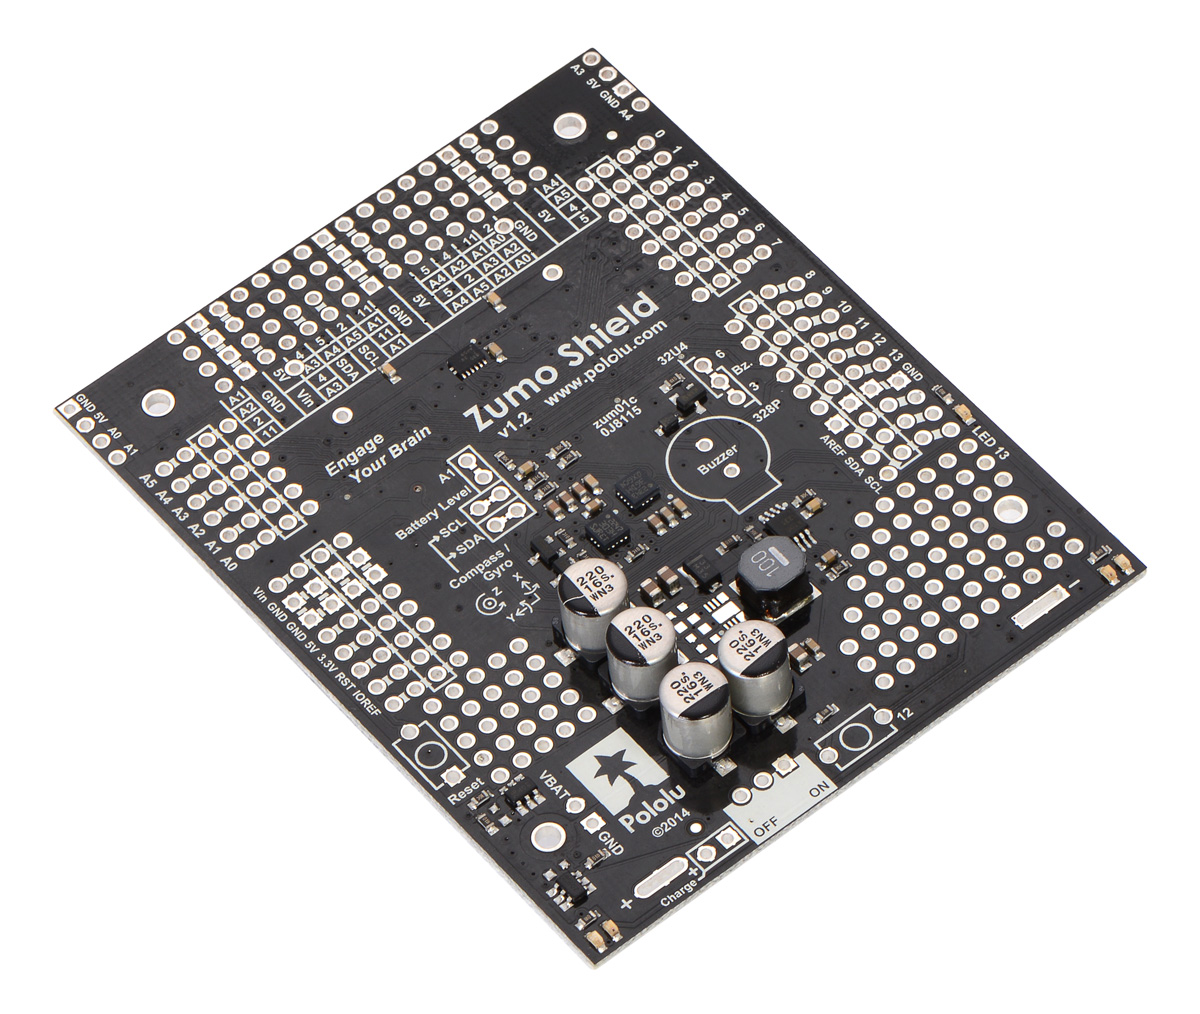
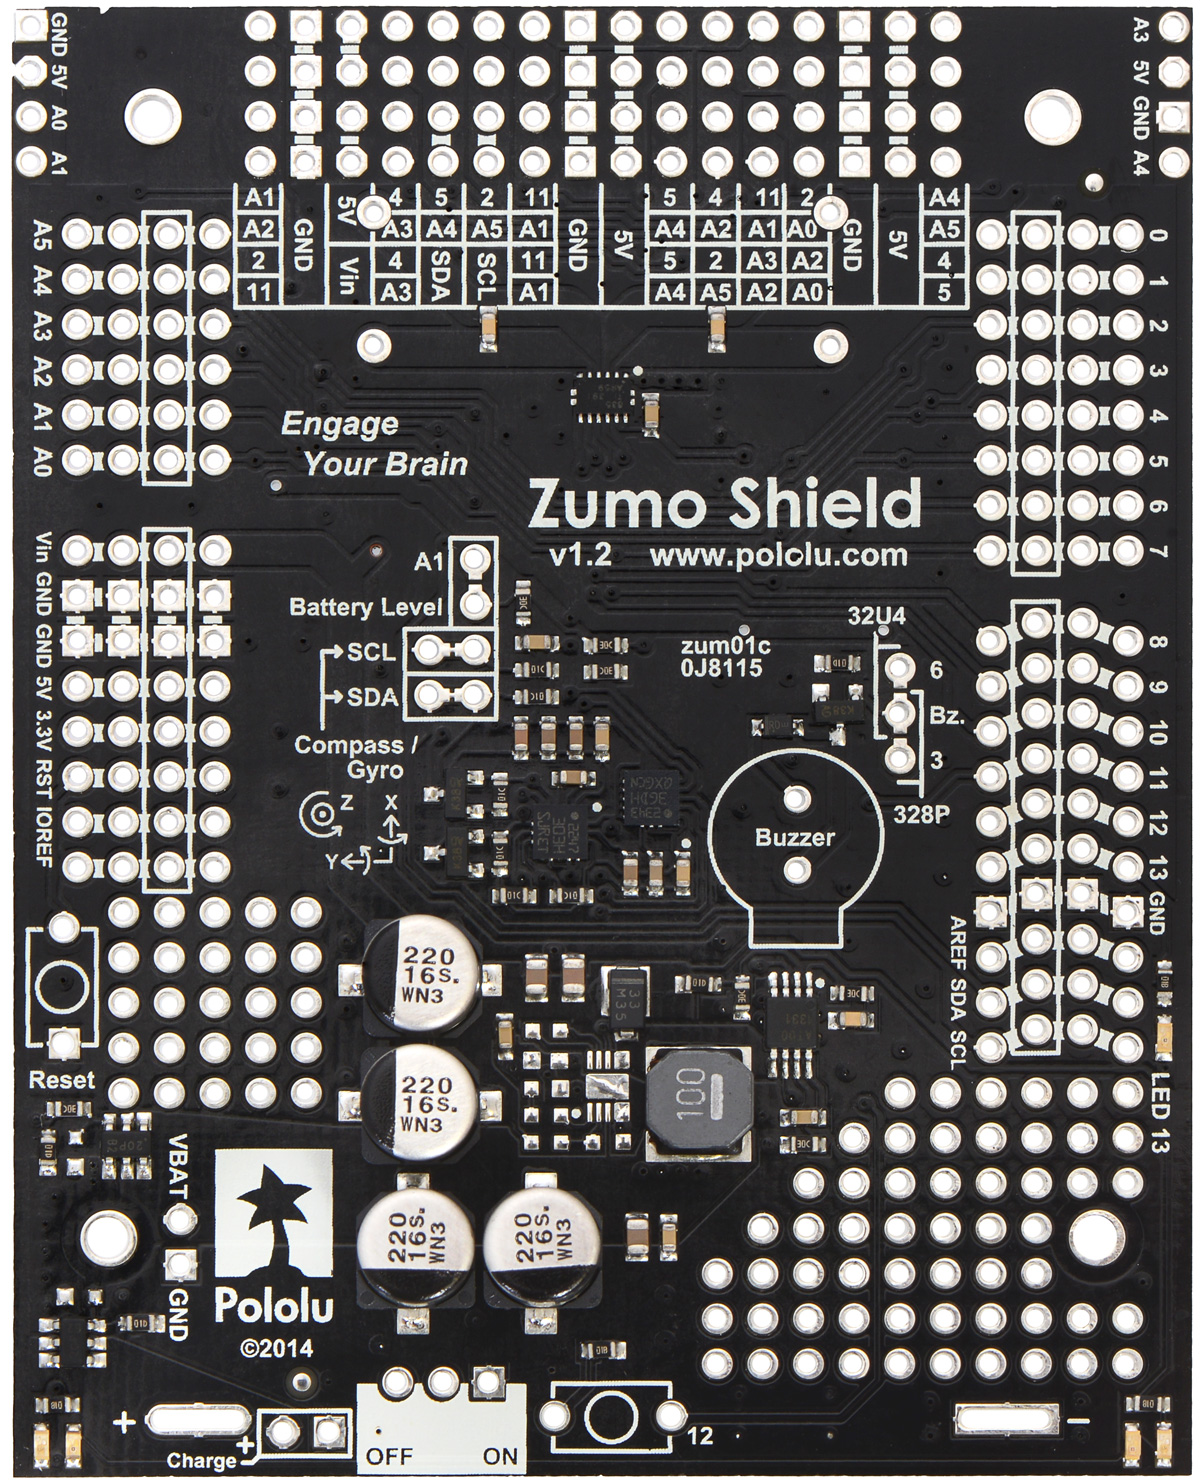
Zumo Shield for Arduino, v1.2, with included through-hole components installed. |
|---|
 |
Zumo Shield for Arduino, v1.2, as it ships (assembled with surface-mount components only). |
|---|
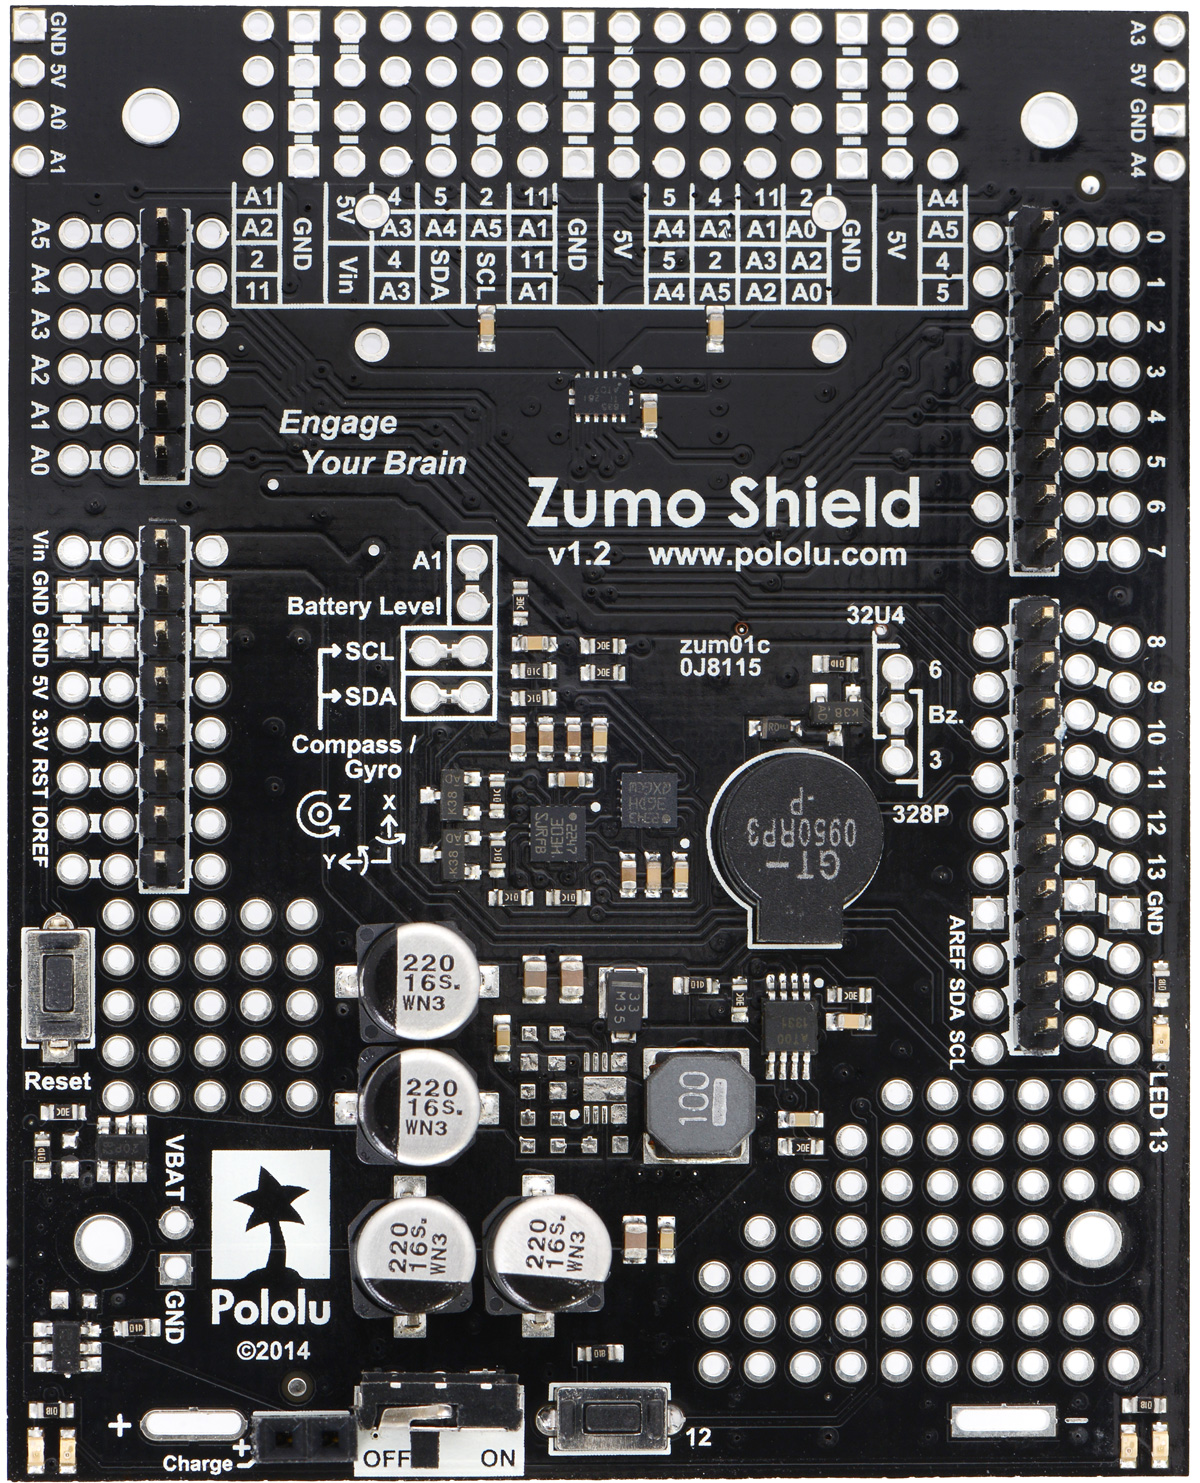 |
Zumo Shield for Arduino, v1.2, with included through-hole components installed. |
|---|
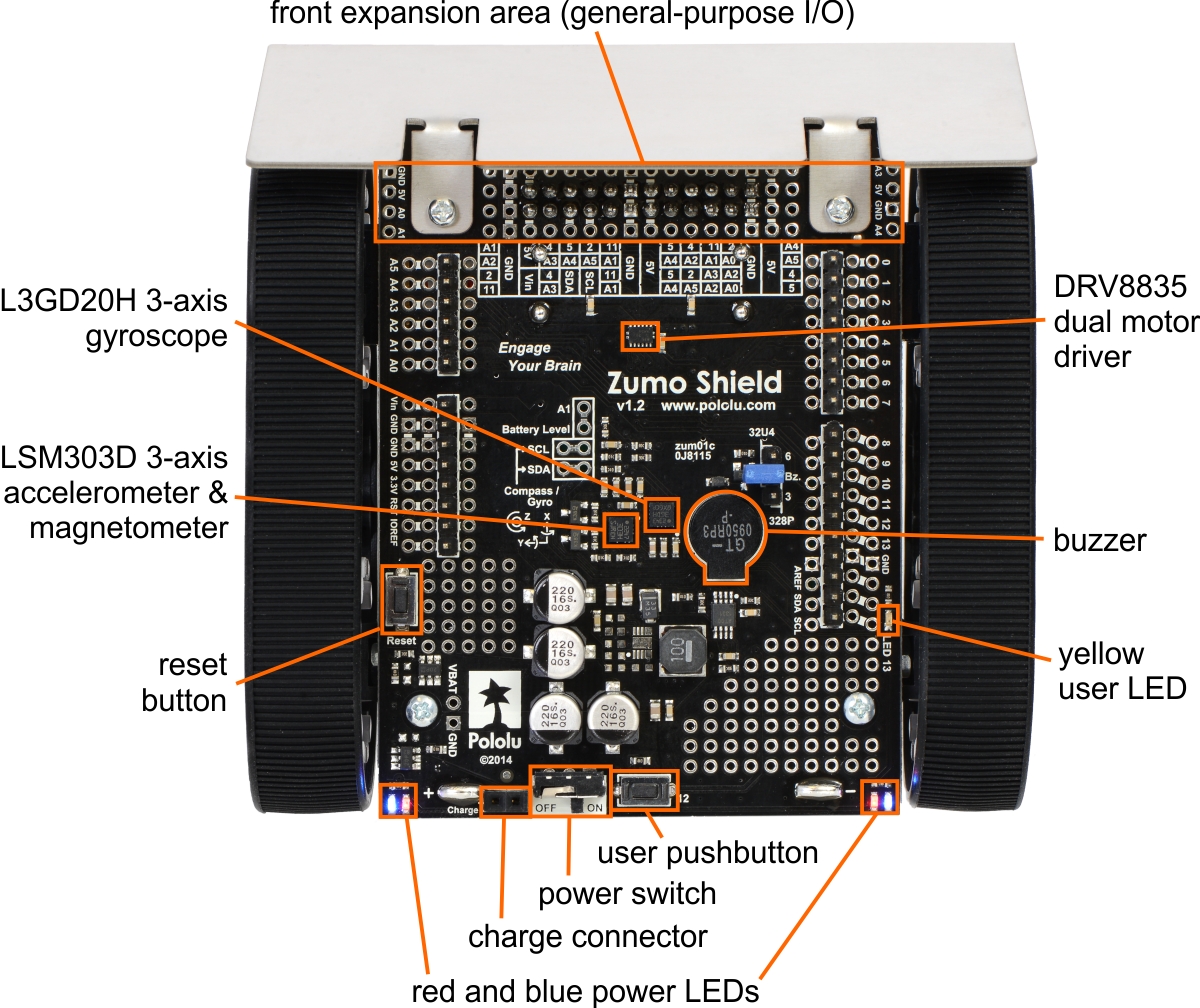 |
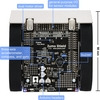
Zumo Shield for Arduino, v1.2, top view with labeled components. |
|---|
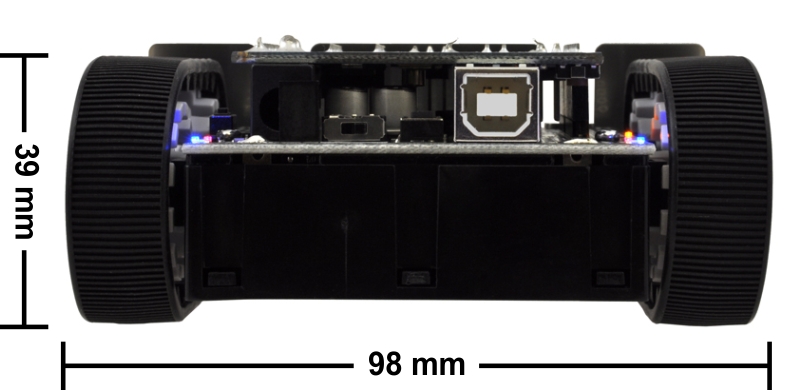 |
Zumo robot assembled with a Zumo Shield and Arduino Uno, back view. |
|---|
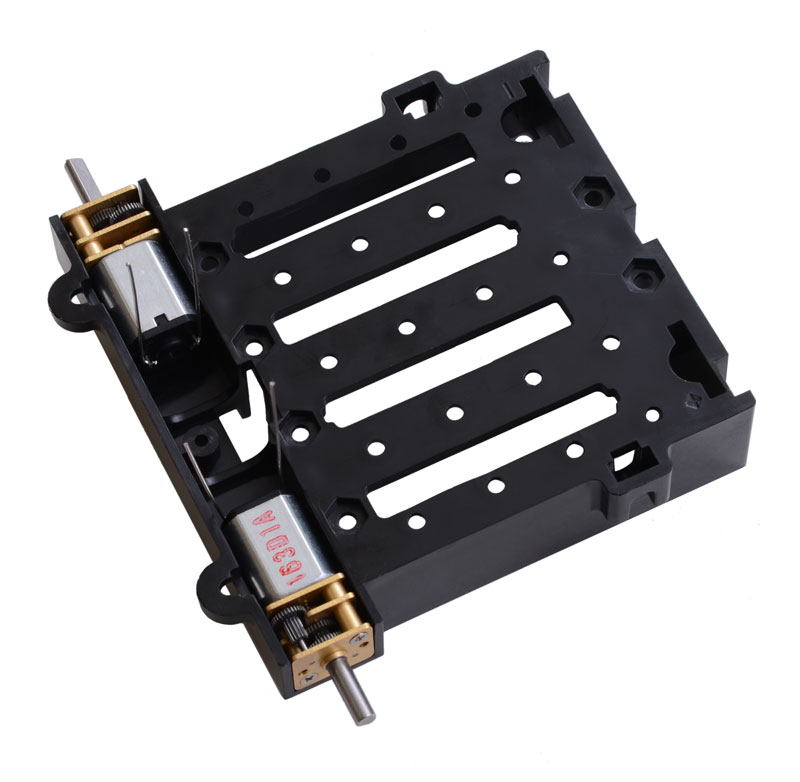 |
Zumo chassis being assembled with two Micro Metal Gearmotor. |
|---|
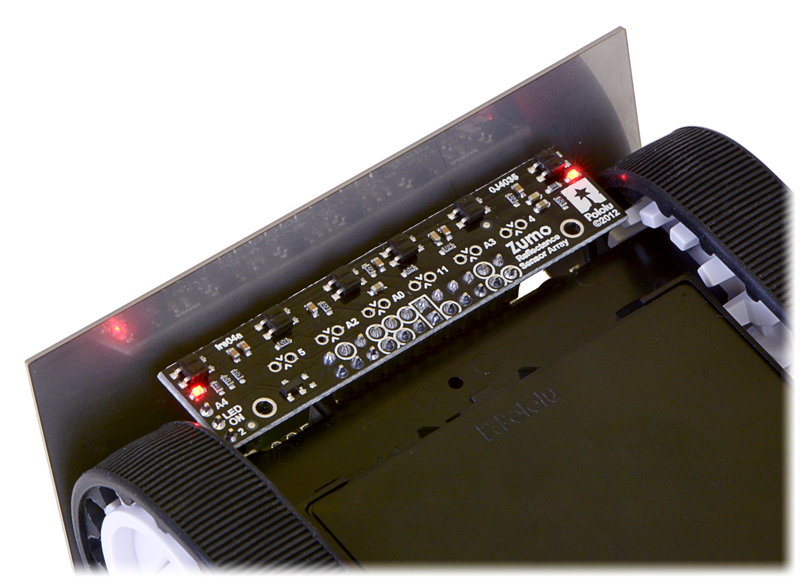 |
Zumo reflectance sensor array on a Zumo robot, bottom view. |
|---|
New version available: This product has been replaced by the Zumo Shield for Arduino, v1.3. The new version replaces the shield’s inertial sensors with an LSM6DS33 accelerometer and gyro and an LIS3MDL magnetometer, as the LSM303D accelerometer and magnetometer used on this v1.2 board is no longer in production. You can use our updated Zumo Shield Arduino library to help you write code that will work with the inertial sensors on any revision. In addition, the power switch and pushbuttons on the v1.3 shield have been changed to be surface-mount parts. For more information, see the user’s guide.
|
Zumo Shield for Arduino, v1.2, with included through-hole components installed. |
|---|
The Zumo Shield is designed specifically to be a convenient interface between a Zumo chassis and an A-Star 32U4 Prime, Arduino Uno, or Arduino Leonardo. The shield mounts directly to the chassis, connecting to its battery terminals and motors, and the A-Star Prime or Arduino plugs into the shield’s male header pins, face down. The shield provides all the electronics necessary to power the motors and includes some additional fun components for making a more interesting robot, such as a buzzer for making sounds, and a 3-axis accelerometer, compass, and gyroscope for sensing impacts and tracking orientation. The only differences between this v1.2 shield and the previous version are the addition of a 3-axis gyro and an upgrade of the accelerometer/magnetometer module.
With the Zumo Shield and an Arduino (or compatible board like the A-Star Prime), the Zumo chassis becomes a low-profile, Arduino-controlled tracked robot that is less than 10 cm on each side (small enough to qualify for Mini-Sumo competitions). It works with a variety of micro metal gearmotors to allow for a customizable combination of torque and speed, and a stainless steel sumo blade is available for applications that involve pushing around other objects. Arduino libraries and sample sketches are available for quickly getting a Zumo robot up and running.
|
|
This shield is also available as part of our Zumo Robot kit for Arduino, which bundles it with a Zumo chassis and Zumo blade, and in our Zumo Robot for Arduino, which is preassembled with 75:1 HP micro metal gearmotors and a Zumo reflectance sensor array.
|
The Zumo Shield ships with all of the components required for shield assembly, as shown in the main product picture. Note that soldering is required; please see the user’s guide for detailed assembly instructions. This shield does not include motors or the Zumo chassis itself, though it is available as part of a Zumo Robot kit for Arduino that includes everything you need to build your Zumo robot except motors, an Arduino, and batteries. If you just want a robot that is already put together, we also sell a fully assembled Zumo Robot for Arduino – just add batteries and an Arduino or A-Star Prime and it is ready to go.
|
Zumo chassis being assembled with two Micro Metal Gearmotor. |
|---|
To use this shield you will need a few additional parts:
|
Zumo reflectance sensor array on a Zumo robot, bottom view. |
|---|
The newer Zumo 32U4 is another robot based on the Zumo chassis. It is a more highly integrated robot than the Zumo robot for Arduino, with enhancements that include a built-in Arduino-compatible ATmega32U4 microcontroller (the same one used in the Arduino Leonardo and A-Star 32U4 boards), an LCD, encoders for closed-loop motor control, and proximity sensors for obstacle detection. The Zumo 32U4 main board effectively combines the functions of the Zumo Shield and the separate Arduino controller into a single, compact board that is just as easy to program as a standard Arduino or A-Star thanks to its USB interface and preloaded Arduino-compatible bootloader.
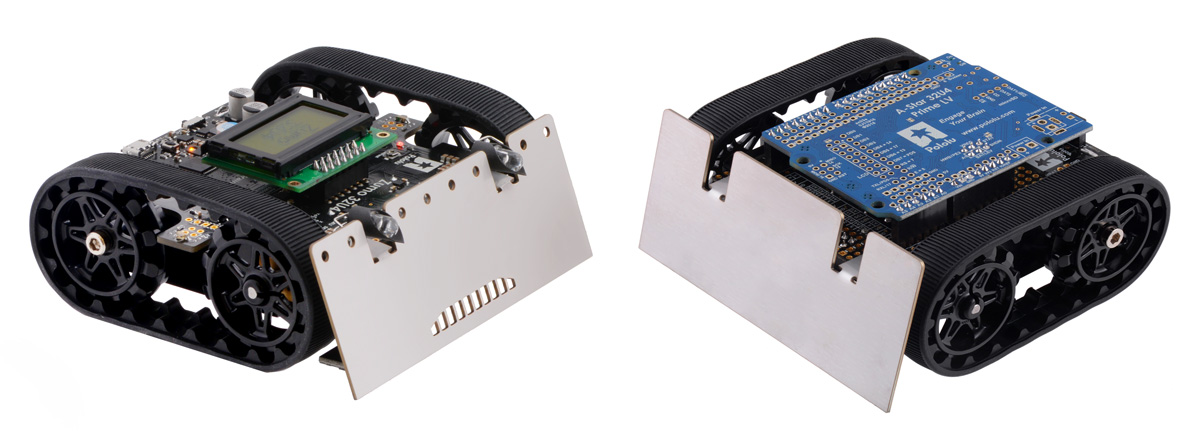 |
A Zumo 32U4 robot (left) and a Zumo robot for Arduino with an A-Star 32U4 Prime LV (right). |
|---|
Some of the pin mappings and software libraries differ between the Zumo 32U4 and Zumo robot for Arduino, so programs written for one robot generally need to be modified to work on the other.
| PCB dev codes: | zum01c |
|---|---|
| Other PCB markings: | 0J8115 |
User’s manual for the Pololu Zumo Shield for Arduino.
Datasheet for the ST LSM303D 3D accelerometer and 3D magnetometer module.
Datasheet for the ST L3GD20H three-axis digital-output gyroscope.
This DXF drawing shows the locations of all of the board’s holes.
Un guide complet pour assembler, utiliser et exploiter rapidement votre Robot Zumo (version 0.1). Note: This French translation of our Zumo Robot for Arduino user’s guide was made by our distributor MCHobby.
This library and examples for Arduino-compatible boards makes it easy to program an Arduino-controlled robot built with Pololu’s Zumo Shield or Zumo robot kit (also available fully assembled).
This library can be used to program an Arduino-controlled Zumo through MATLAB and Simulink. It provides driver blocks for all the sensors present on the Zumo Robot as well as example models showing their usage.
This tutorial on the Adafruit Learning System guides you through the process of programming a Zumo robot with Simulink.
This tutorial from Adafruit shows how to pair a Pixy CMUCam-5 vision system with the Zumo Robot for Arduino to enable it to chase objects or follow you around.
This article was written by Professor Erich Styger for his class on embedded systems programming at the Lucerne University of Applied Sciences and Arts. It describes various ways to tweak the performance of a Zumo to be more competitive in a Mini Sumo competition. Note that his Zumos use a custom PCB rather than our Zumo shield for Arduino; our shield has a lot of capacitance in parallel with the batteries that generally prevents the “battery inertia” problem Erich describes.
This is a YouTube playlist by control systems lecturer Brian Douglas that uses the L3GD20 MEMS gyroscope. It describes the fundamentals of the gyro and how to use it for closed and open loop control projects with MATLAB/Simulink and Arduino.
This robot is uses our Zumo robot kit, 75:1 micro metal gearmotors, and a Zumo reflectance sensor array. Instead of an Arduino it uses a Freescale FRDM-KL25Z as the microcontroller board, and sample code is available for line following and maze solving. By Erich, March 2013.
We have noticed that the accelerometer in the LSM303D is particularly sensitive to brown-out conditions. If power is removed and the voltage on the 3.3 V power supply line falls significantly, but is not allowed to drop completely to 0 V, the accelerometer can be put into a bad state. When power is reapplied to the LSM303D, the accelerometer then returns readings on some or all axes that are large values and do not change much or at all. (We have often seen readings like -32760 and 24539.)
To prevent this problem from occurring, the voltage on the 3.3 V line must be allowed to fall to about 0 V when power is removed from the LSM303D. Depending on other loads and the amount of capacitance on the 3.3 V line, it can take up to several seconds for this to happen, meaning that you should avoid interrupting power to the LSM303D for any shorter period, and if such a short interruption does occur, you should remove power again for a longer period to allow the accelerometer to reset properly.
If the voltage takes too long to fall, you can add a resistor between 3.3 V and ground (a “bleeder resistor”) to discharge the 3.3 V line more quickly when power is removed. We suggest trying a resistor in the 1 kΩ to 10 kΩ range. (Note that a stronger bleeder resistor will cause the voltage to fall more quickly when power is removed, but it will also waste more power when the supply is present.)
The Zumo 32U4 includes a bleeder resistor on the 3.3 V line.
We posted recently about how progress in MEMS sensors has resulted in a constant stream of improved Pololu breakout boards. This week, we brought...