Support » Sample Project: Simple Hexapod Walker »
4. Sequencing the Hexapod Gait
Gaits
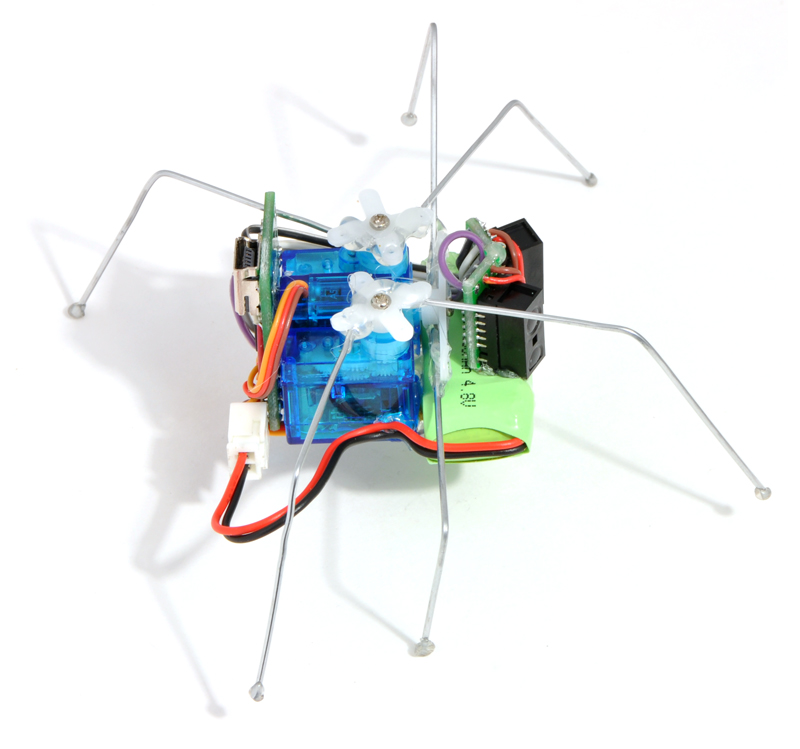
Now that you have constructed your hexapod, it is time to make it walk. A method of walking forward with legs is called a gait, and animals or robots with many degrees of freedom have a variety of gaits available – humans can walk, run, hop, or skip; horses can walk, trot, canter, or gallop, and so on. Your hexapod is so simple that it has just one possible gait for forward motion, called the tripod gait.
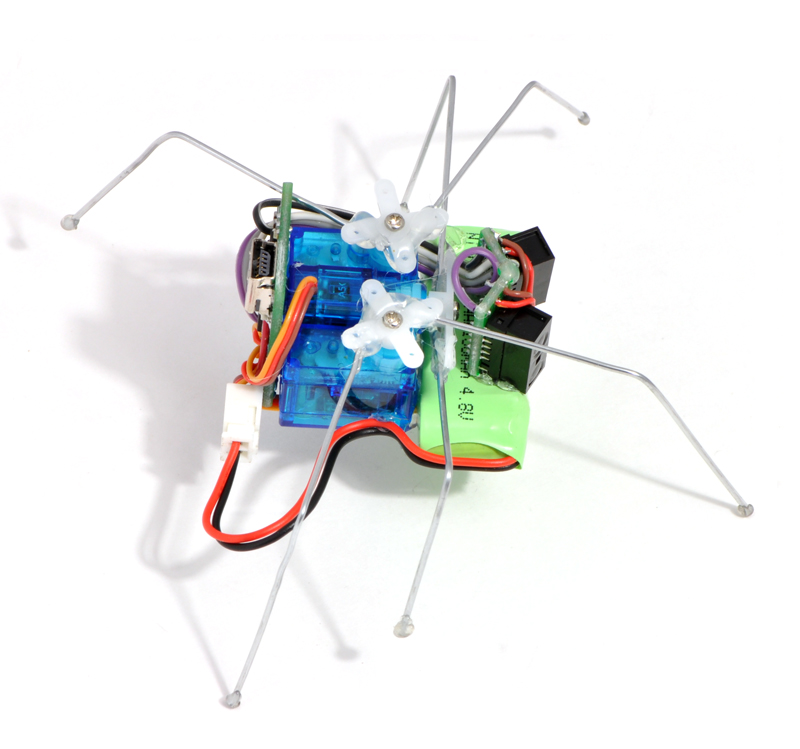
In the tripod gait, your hexapod has three feet in contact with the ground at all times: the front and back legs on one side and the middle leg on the other side. The angle of the middle servo determines which side is up and which side is down. It achieves forward motion by pushing those feet backwards against the ground while the other feet move forward through the air. Then the hexapod shifts its weight to the other three feet and moves forward in the same way. By continuously shifting its weight using the middle legs, then moving the raised feet forward, it walks forward.
Walking forward with the Maestro Control Center
You can easily assemble motion sequences using the Maestro Control Center’s sequencer feature. For documentation on the sequencer, see Section 4.c of the Micro Maestro User’s Guide.
Use the controls on the Status tab of the Maestro Control center to move your hexapod to each of these four positions, pressing the “Save Frame” button after each, to save a sequence.
| Frame 0 right front & back, left middle legs touching the ground |
|
|
||
|---|---|---|---|---|
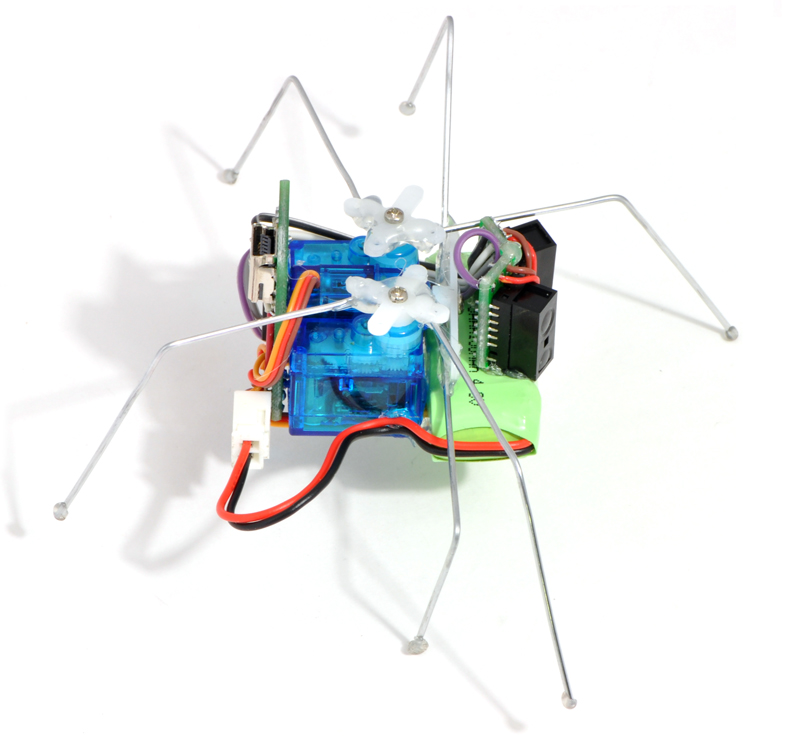
| Frame 1 down legs move back, front legs move forward |
|
|
||
| Frame 2 weight shifted to the other tripod |
|
|
||
| Frame 3 down legs move back, front legs move forward |
|
|
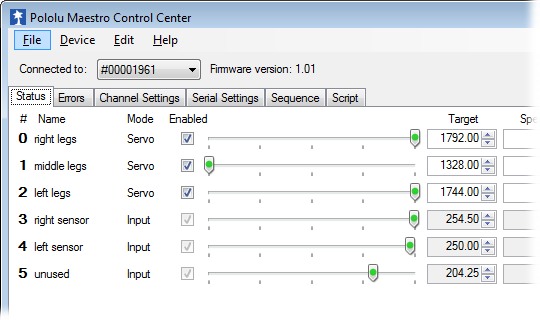


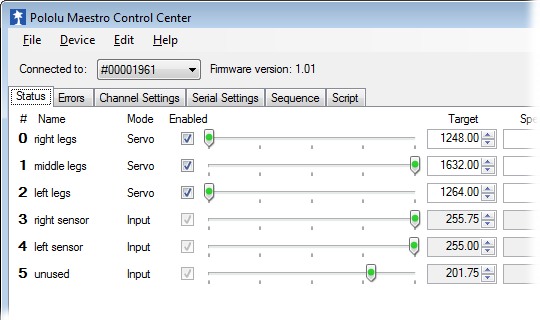

In the screenshots of the Maestro Control Center, you can see that the servos are always either at their minimum or maximum values, which you should have configured to be safe values that do not cause the servo to strain. Your numbers might be slightly different from the ones shown here. If you have assembled the servos in a different configuration or connected them to different ports, you will, of course, have different very settings for each frame.
On the Sequence tab, you should now have four frames saved. Select “Play in a loop” and play the sequence to see your hexapod walk. Rename your sequence to “forward” before continuing.
Walking forward autonomously
Click the button “Copy Sequence to Script” to convert your sequence into a script that can be saved on the Maestro. If you select the “Run script on startup” option on the Script tab and apply settings, your hexapod will automatically start to walk. You can now disconnect it from USB and allow it to walk on its own.
Reconnect USB and click “Stop Script” or disable the “Run script on startup” option to get it to stop walking.
Backwards and turning gaits
On the status tab, start again with Frame 0 but go through the sequence of motions in reverse to get backwards walking: Frame 0, Frame 3, Frame 2, then Frame 1. Save this sequence under the name “backwards”, and test that it moves your hexapod backwards.
Turning is different. To create turning sequences, you will need to move all front and back legs forward or backward together, instead of moving the two sides in opposite directions. Try it out, and save two more sequences: “right” and “left”, verifying that they turn the hexapod right and left.
You are now ready to program your hexapod to avoid obstacles.


Home | Forum | Blog | Support | Ordering Information | Lists | Distributors | BIG Order Form | About | Contact
© 2001–2026 Pololu Corporation
