Pololu Blog »
Posts tagged “community projects”
You are currently viewing a selection of posts from the Pololu Blog. You can also view all the posts.
Popular tags: community projects new products raspberry pi arduino more…
Moving sculpture Kinetic Little Rain
This hypnotic video from customer Alain Haerri shows Kinetic Little Rain, a moving sculpture that was inspired by the sculpture Kinetic Rain in the Changi Airport in Singapore. Alain’s sculpture features 100 blown glass drops that are moved by stepper motors. Each motor is driven by its own Tic T500 Stepper Motor Controller and the whole setup is controlled by an Arduino Mega 2560.

Laser cutting part of a 50:1 model of the James Webb Space Telescope
 |
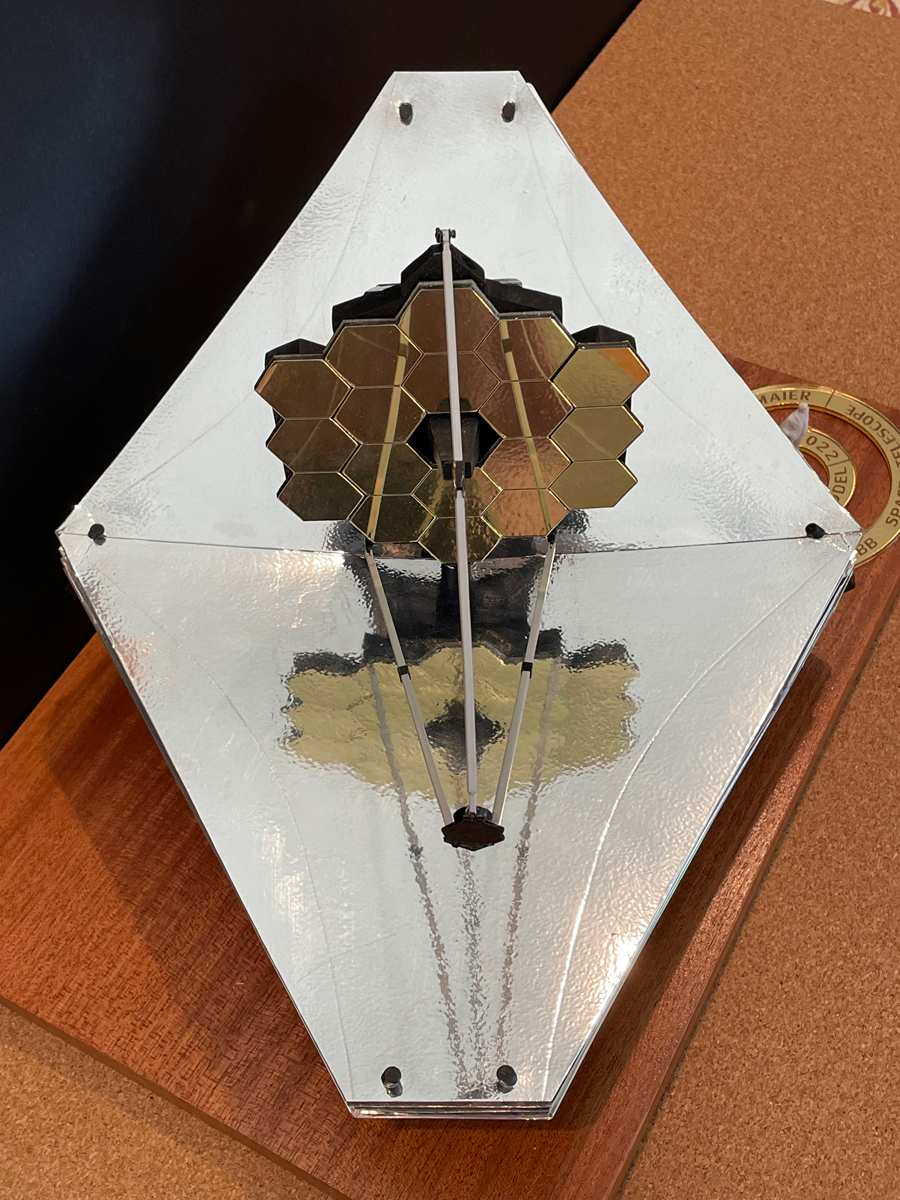
50:1 scale model of the James Web Space Telescope model with laser-cut and etched gold-mirror acrylic and gold-mirror styrene parts. |
|---|
Retired aerospace engineer Robert Maier shared with us this awesome 50:1 scale model of the James Webb Space Telescope (JWST) he made with his brother Mark and a little help from our custom laser cutting service. We cut the JWST’s main mirrors for him out of 1.5 mm gold mirrored styrene sheets from Midwest Products, and the hexagon patterns were laser etched onto the surface. He also had us laser cut various silicone bands to hold the moving pieces of the structure as the model folds/unfolds.
|
|

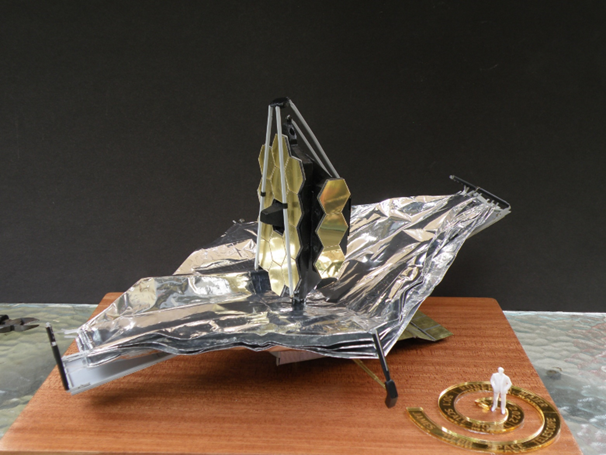
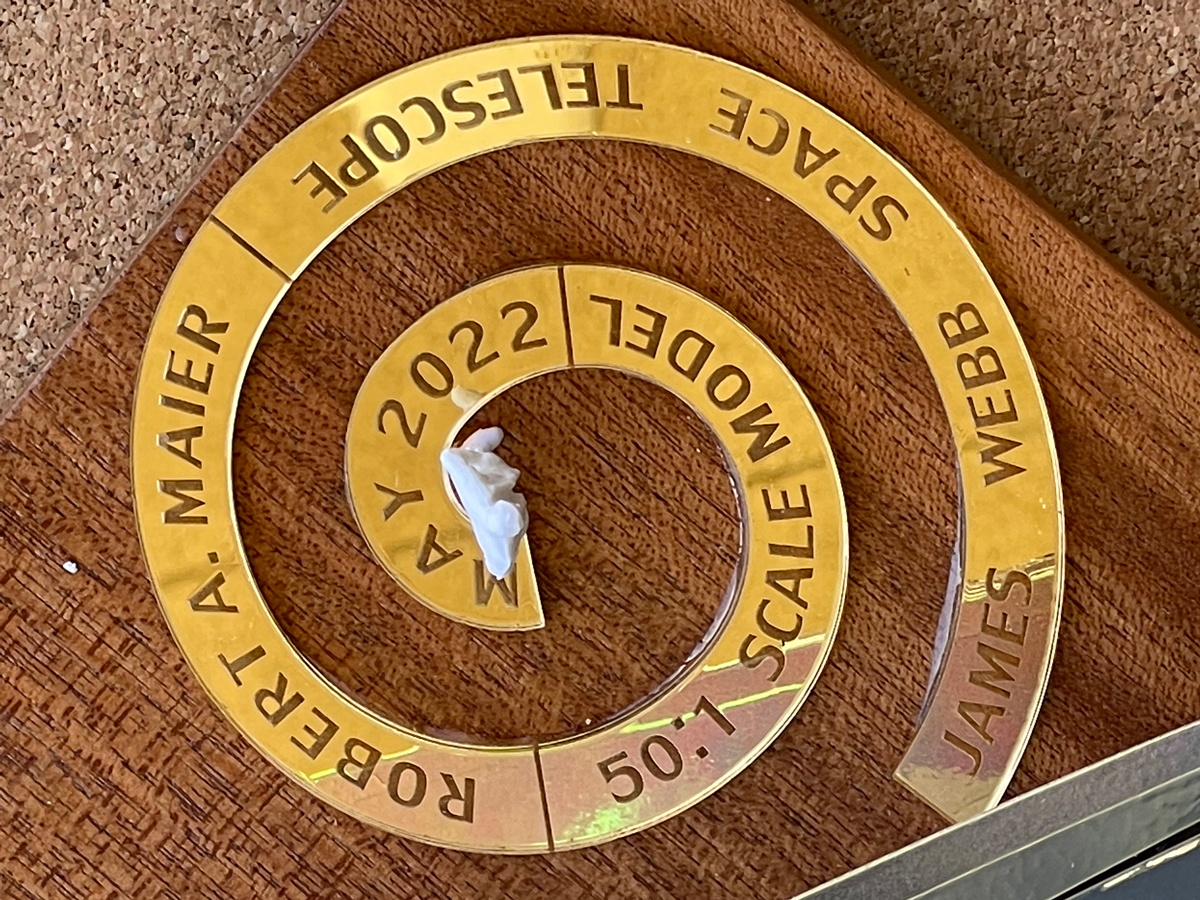
We more commonly work with 3 mm mirrored acrylic, but the model’s mirror required something thinner, and the more expensive styrene was perfect for the job. For comparison, the spiral label sitting beneath the figurine’s feet was cut from gold mirror acrylic.
|
|

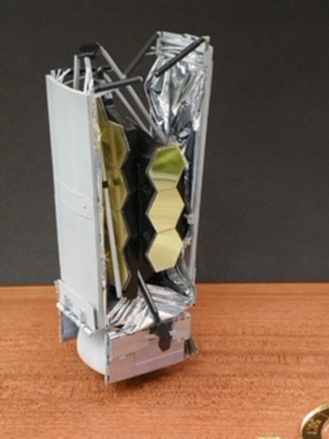
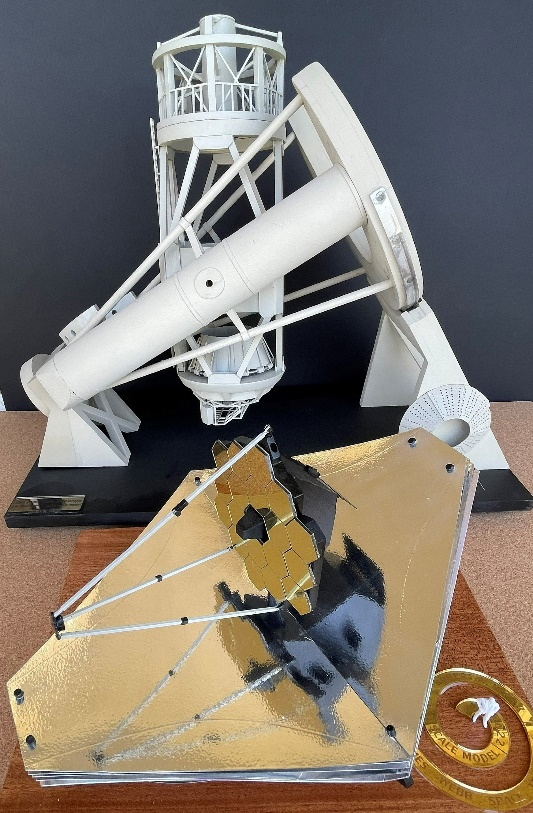
Mark uses the model in the Astronomy 101 classes he teaches at San Jacinto College in Southern California. He recently wrote an article about the model, which is published in the April 2023 issue of Sky and Telescope magazine (it’s on page six). Additional photos of the model are included below, and even if you’re not a subscriber to the magazine, you can preview the article online.
|
|
|
Do you have a fun idea in mind that can benefit from laser-cut parts? Submit a quote request or contact us to discuss how we can help.
Related products

"Serenade"; 3D Mixed-Media Artwork by Tammy Carmona
 |
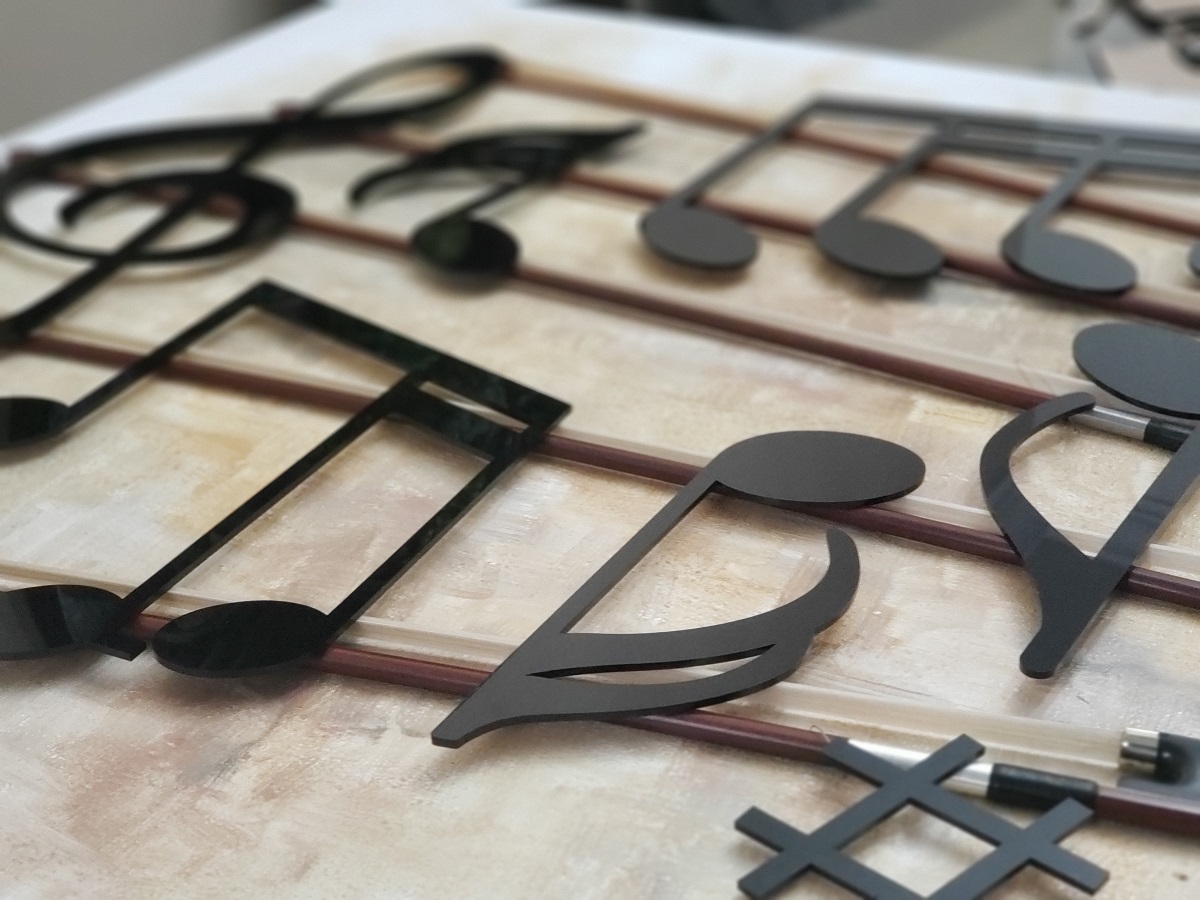
Artist Tammy Carmona recently used our laser cutting service to help create her 3D mixed-media artwork, “Serenade”, pictured above. Carmona writes about the piece:
This mixed-media composition takes classical elements of music, and combines them with art in a decadent, delicious “feast for the eyes”.
The piano-glossy notes, the authentic violin bows and an actual violin, the laser-cut butterflies, the preserved roses – each element brings a different sensation and a different meaning.
Themes of rebirth and remembrance permeate this piece. The old violin is reborn with bursts of flowers, the old bows have found a new life supporting musical notes, the flowers are real preserved roses.
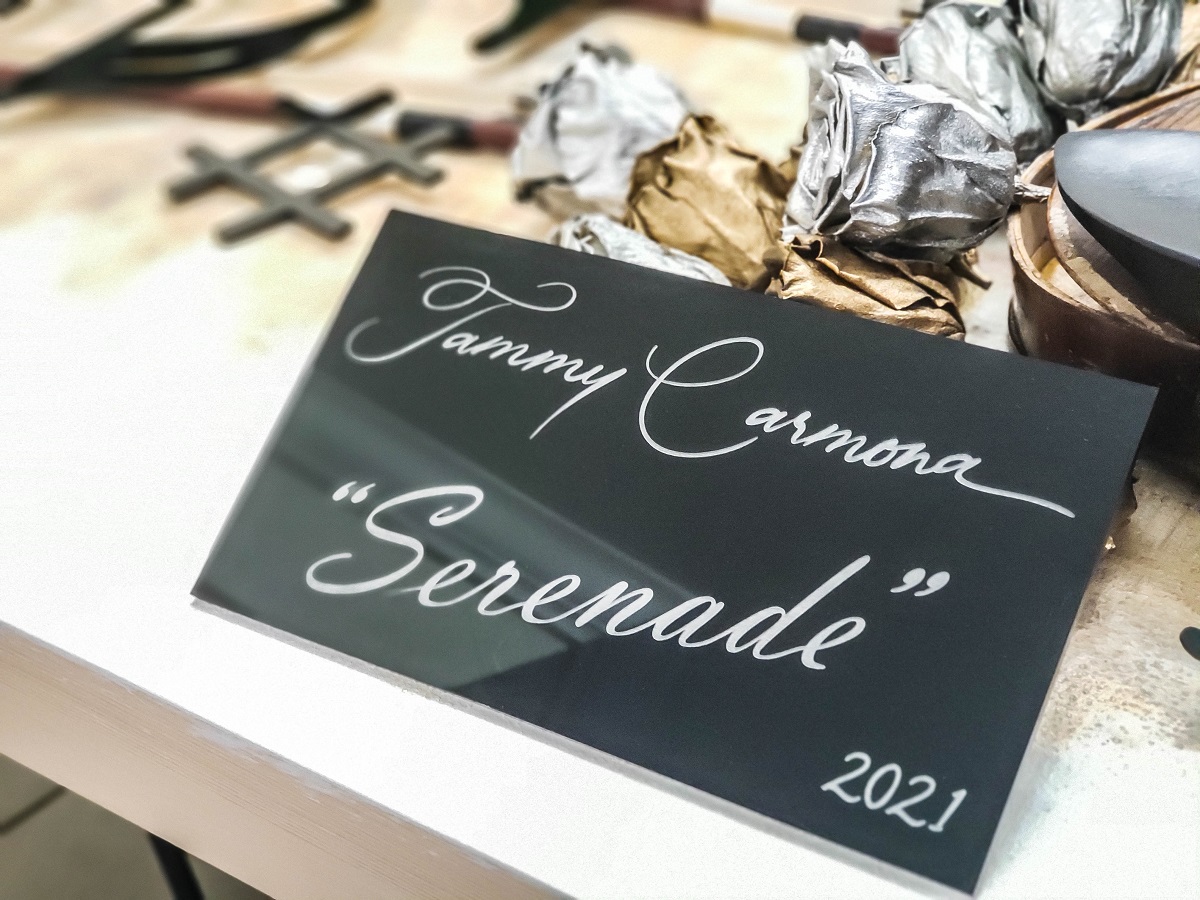
The music notes were laser cut out of black cast acrylic, which we stock regularly. The title sign for the piece, pictured below, was cut from the same material and raster engraved. A nice feature of the cast acrylic used in this piece is that it turns frosty white when engraved, which provides high contrast engravings.
For a more detailed description of Carmona’s piece and additional pictures, visit her website here. More information about our laser cutting service can be found here.
|
|
 |
Related products
Curtis's laser-cut arcade stick case
 |
Hello, I’m Curtis, an engineering intern at Pololu. I’m studying mechanical engineering at University of California, Irvine. I’ve been playing a lot of Tekken during the pandemic. In fighting games like Tekken a lot of people use arcade sticks to play. So, I wanted to build my own.
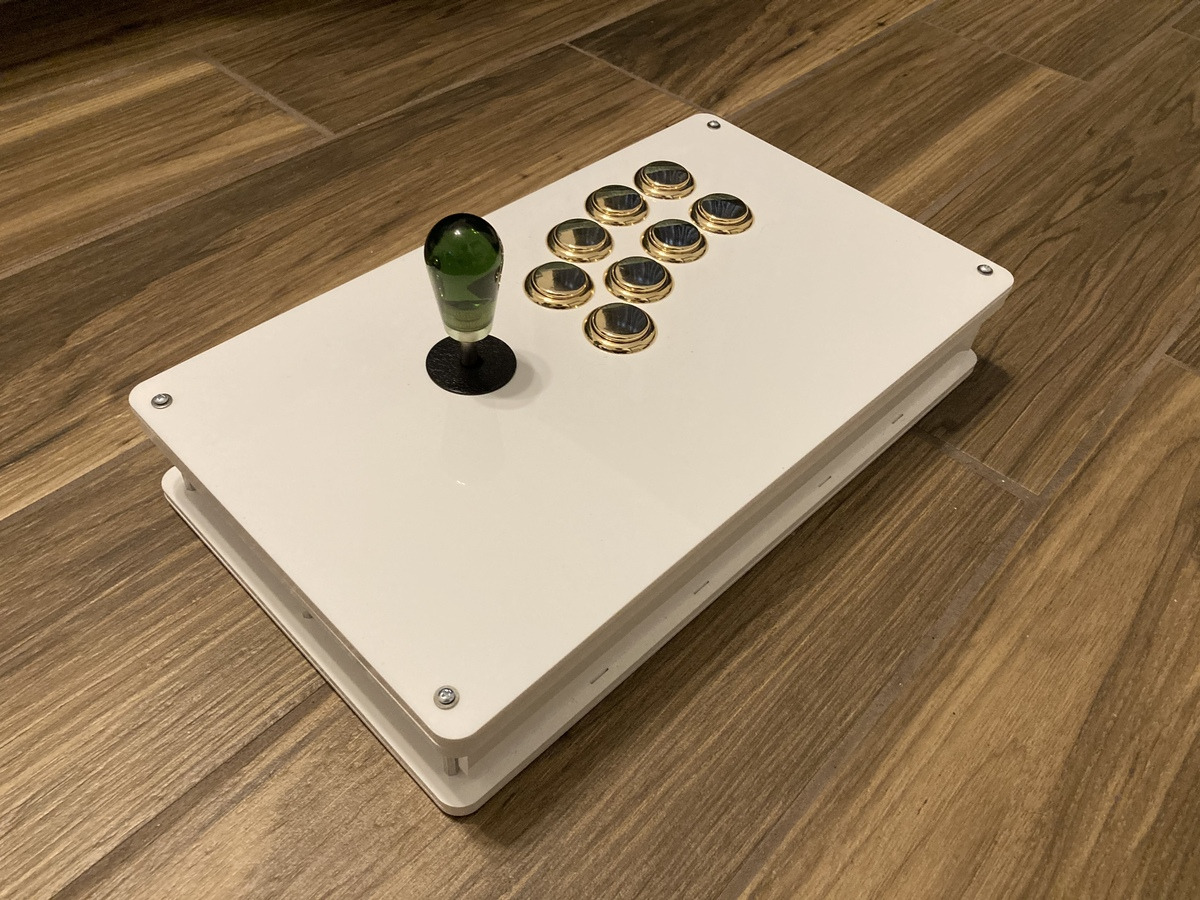
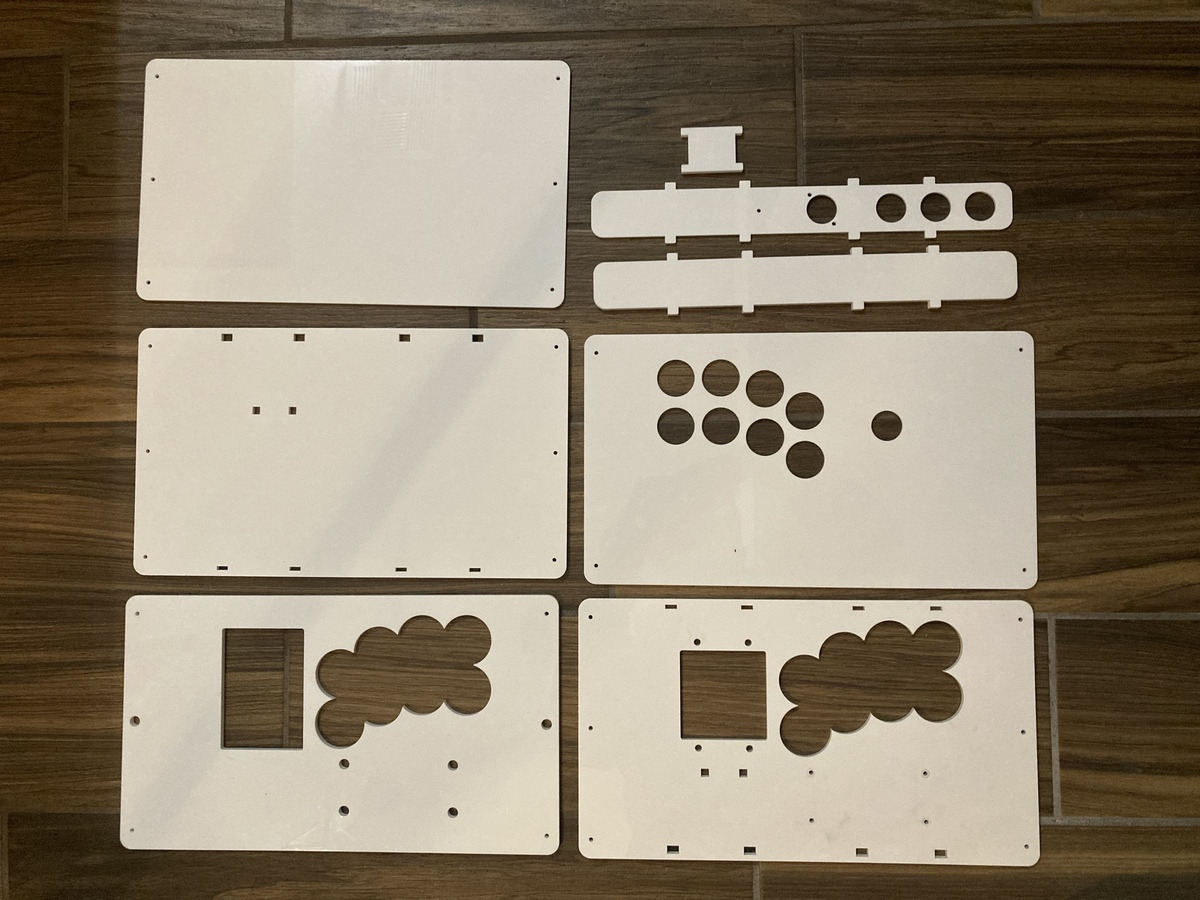
I built an arcade joystick case using acrylic parts (3mm and 6mm thickness) that I made with our Custom Laser Cutting Service as well as various M-F standoffs, F-F standoffs and screws and nuts.
I designed the case myself in Solidworks. I decided on a length and width of 8" × 14" because that makes it large enough to be comfortable, while being small enough to fit in a backpack and carry around. The positioning of the buttons and joystick is based on Hori arcade sticks, with some modification to fit my hands. The difficult part was figuring out how to mount all the components. I ended up layering the acrylic pieces to form the top and bottom plates. This let me mount components in between the layers, which hid screws and made the case look better. I was also able to cut holes to position vertical supports, like the front and back walls, to increase the case’s rigidity.
 |
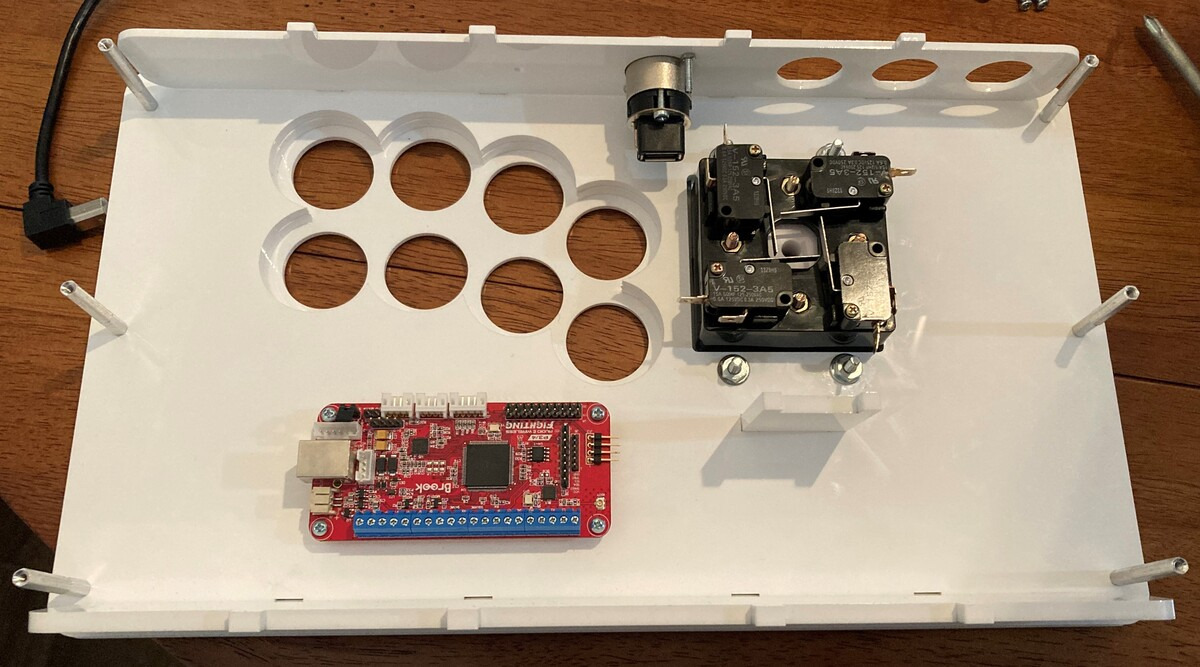
It’s designed to fit:
- 8 × 30mm and 3 × 24mm Sanwa buttons
- Neutrik USB type A to B pass-through
- Brook Wireless Fighting Board
- IST Alpha 49s Joystick.
PCBs from Brook are popular for arcade sticks. They have low latency and are compatible with PC and consoles. Button and joystick choices are based on personal preference, similar to mechanical keyboard switches. Sanwa buttons are popular as well, and pretty standard in a lot of arcade cabinets, so I picked them because I’m used to them. I chose the IST joystick because the joystick tension is stiffer, which I prefer because it makes quick movements easier.
It can be a little tricky to put together. I didn’t realize that the joystick switches had tabs that extended beyond the sides of the joystick, so it couldn’t slide into the case. To get around this, the joystick just has to be taken apart and put back together inside the case.
 |
Overall the case works really well. I was worried that the acrylic wouldn’t be stiff enough, but the case is rigid, and all the components fit.
You can download my CAD files (.DXF and .CDR) for the laser cut parts here (97k zip) to cut out the same case I designed, or as a starting point to design your own.
Related products
Video from content creator Curio Res: How to control a DC motor with encoder
Content creator Curio Res recently released a tutorial and accompanying video explaining how to control a DC motor with an encoder. The video and post cover how to set up a motor with encoder, a controller, and a motor driver and how to read encoder signals. They also address common questions we get from customers who want to add closed-loop feedback to their projects such as how to implement a PID algorithm to control the position of the motor shaft based on the encoder readings. The content is well explained, and the diagrams and motion graphics make everything easy to follow and understand.
The tutorial uses one of our 37D Metal Gearmotors and our TB67H420FTG Motor Driver Carrier. The tutorial also uses an Arduino Uno, but one of our A-Star 32U4 Primes could be used instead.
If you like Curio Res’s content, be sure to subscribe to their YouTube channel so you don’t miss their latest videos. We look forward to seeing more great tutorials from Curio Res!
Related products


3pi+ featured in community member's intro to robotics video series
Customer and forum user Brian Gormanly (known as bg305 on our forum) just released the first video in his new Arduino Lab Series: Introduction to Robotics: Building an Autonomous Mobile Robot. Brian writes, “Throughout this series we will be introducing topics on building and programming an autonomous mobile robot! You can follow along with each lab adding amazing new behaviors to your robot projects and learning the algorithms and tuning techniques that produce incredible robots!”
Brian is using our new 3pi+ 32U4 Robot in his videos and from the first video, it looks like the series will be a great introduction to robotics and the 3pi+! Subscribe to Brian’s channel Coding Coach so you can make sure to catch each video as it is released.
Related products


Starlite by Grant Grummer
Grant Grummer used our laser cutting service to create 6- and 8-point acrylic stars for his project, Starlite: A programmable star-shaped canvas for displaying light patterns.
Starlite uses a 3mm thick laser-cut piece of translucent white acrylic (#7328 white, also called “sign white”) for the front face. The LEDs mount onto a thinner (1.5mm thick) piece that has rectangular cutouts that allow the LEDs to connect to the controls, the main control board, and an UPduino daughter board.
You can read more about Starlite on Grant’s Make: Projects and GitHub pages.
If you are interested in making a similar light display, be sure to check out our selection of LED strips!
Related products


PULSE: A pendant to warn you when you touch your face
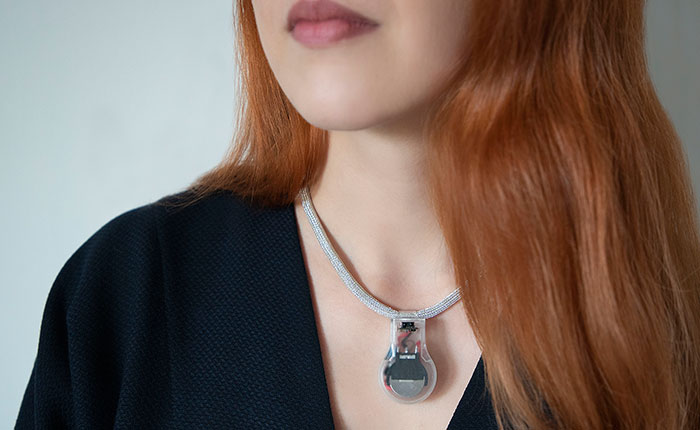 |
PULSE pendant by JPL. |
|---|
PULSE is a 3D-printed wearable device designed by JPL that vibrates when a person’s hand is nearing their face. It’s based around our 38 kHz IR Proximity Sensor, and was designed to be relatively easy to reproduce (it doesn’t require a microcontroller or programming, but you do need access to a 3D printer to make the case). The project is open-source hardware, with complete instructions, design files, and a full parts list available on GitHub.
These are the parts that can be purchased from Pololu:
- Pololu 38 kHz IR Proximity Sensor, Fixed Gain, High Brightness
- 10×2.0mm or 10×3.4mm shaftless vibration motor
- Mini Slide Switch: 3-Pin, SPDT, 0.3A
- Wire
Here’s a short demo of our intern Curtis using a PULSE pendant he made himself:
You can find more information about the PULSE pendant on the PULSE website.
Related products


Empty Vessels: a performance of robots, cellos, and artificial intelligence
Artist David Gardener contacted us recently to share his work, Empty Vessels (seen in the above video), an immersive audio visual installation that explores the connection between machines, data, and their environment. The piece features three cellos played by custom built robotic structures that perform music composed in real time. It premiered in November 2019 at the Society for Arts and Technology in Montreal, where it performed for sold out audiences for two weeks! David was kind enough to answer our questions about the piece and allow us to share his answers along with some more footage and pictures with you below:
 |
How long did you work on the piece?
The project started as an idea by myself (David Gardener) and Greg Debicki about a year ago. It remained an idea for most of the year until we were approached by the Society for Arts and Technology in Montreal (SAT) for help funding the project, where we could work on the project as artists in residence. At the end of the residency (in November) we would also premiere the show. This gave the project a very fast timeline taking just two and a half months from concept to presentation for two weeks of shows. I think it is probably the quickest timeline I have ever worked to, having to design, engineer & build the whole project.
Can you tell us which products of ours you used and how they were used in your project?
For the project I used the following components from Pololu:
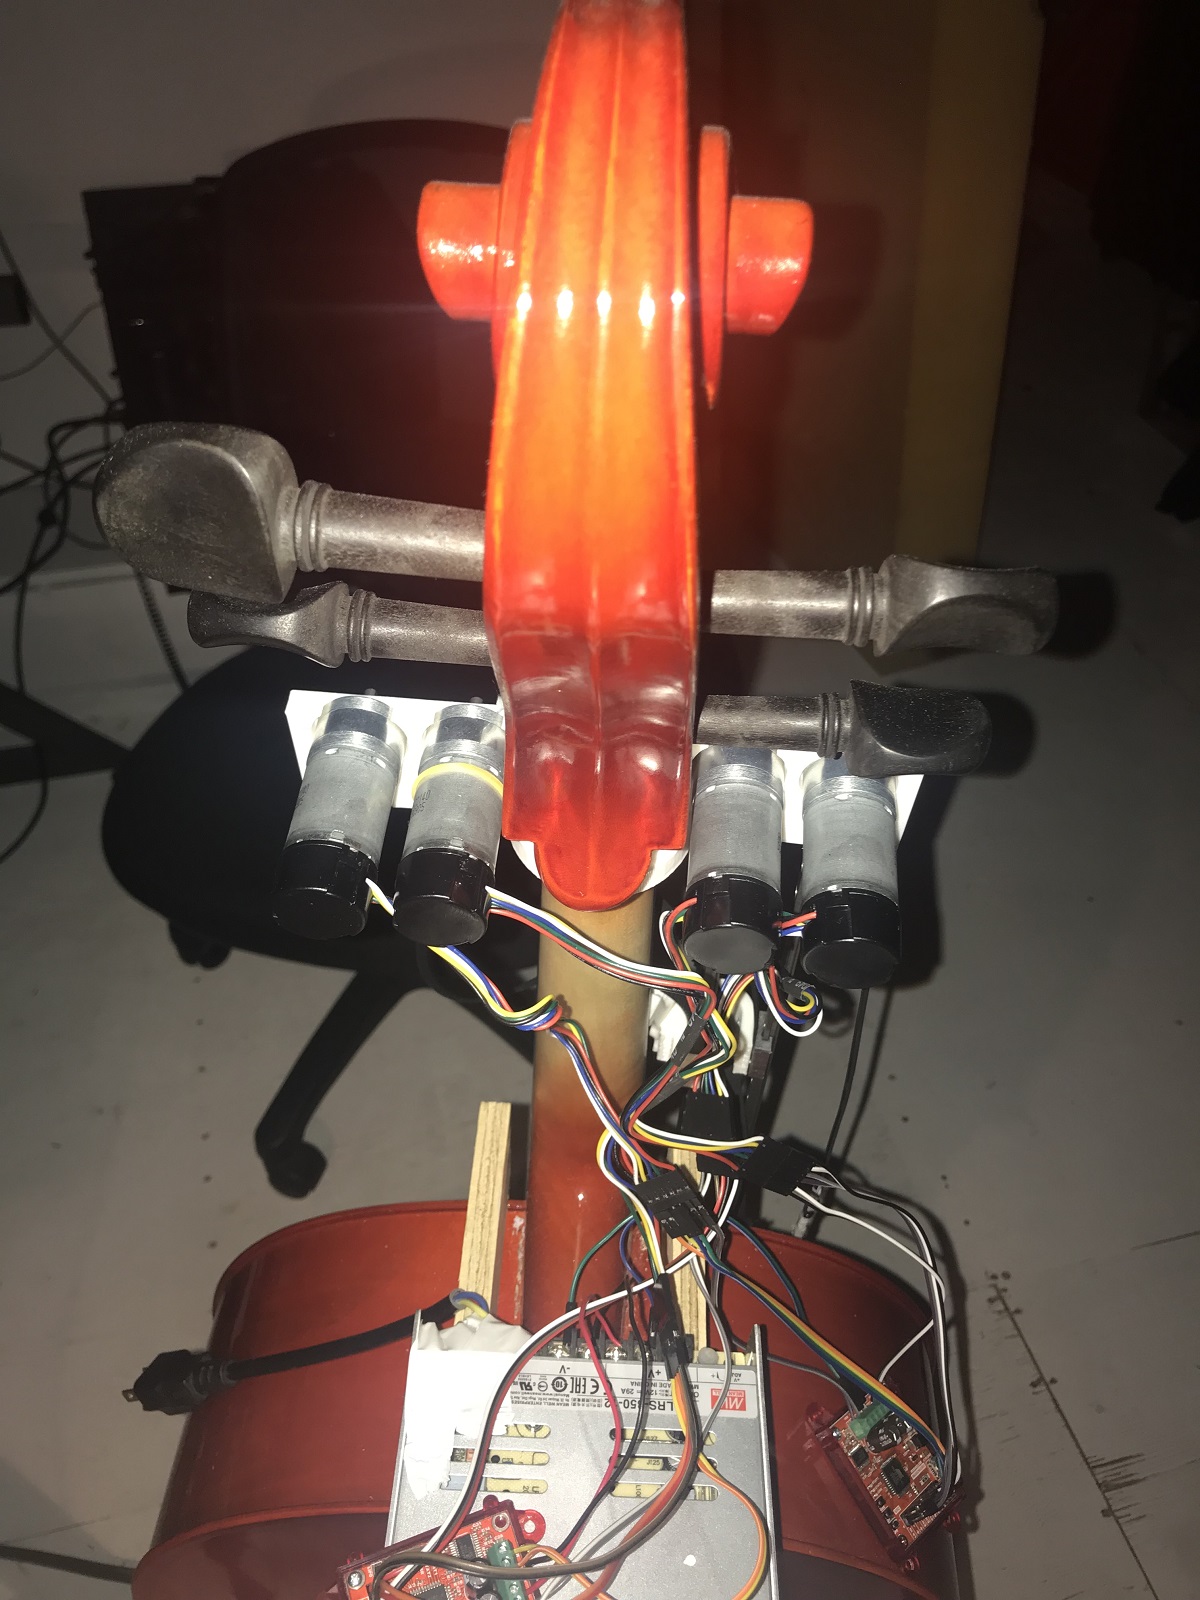
- 12 x 9.7:1 Metal Gearmotor 25Dx63L mm HP 12V with 48 CPR Encoder (one for each string on each cello)
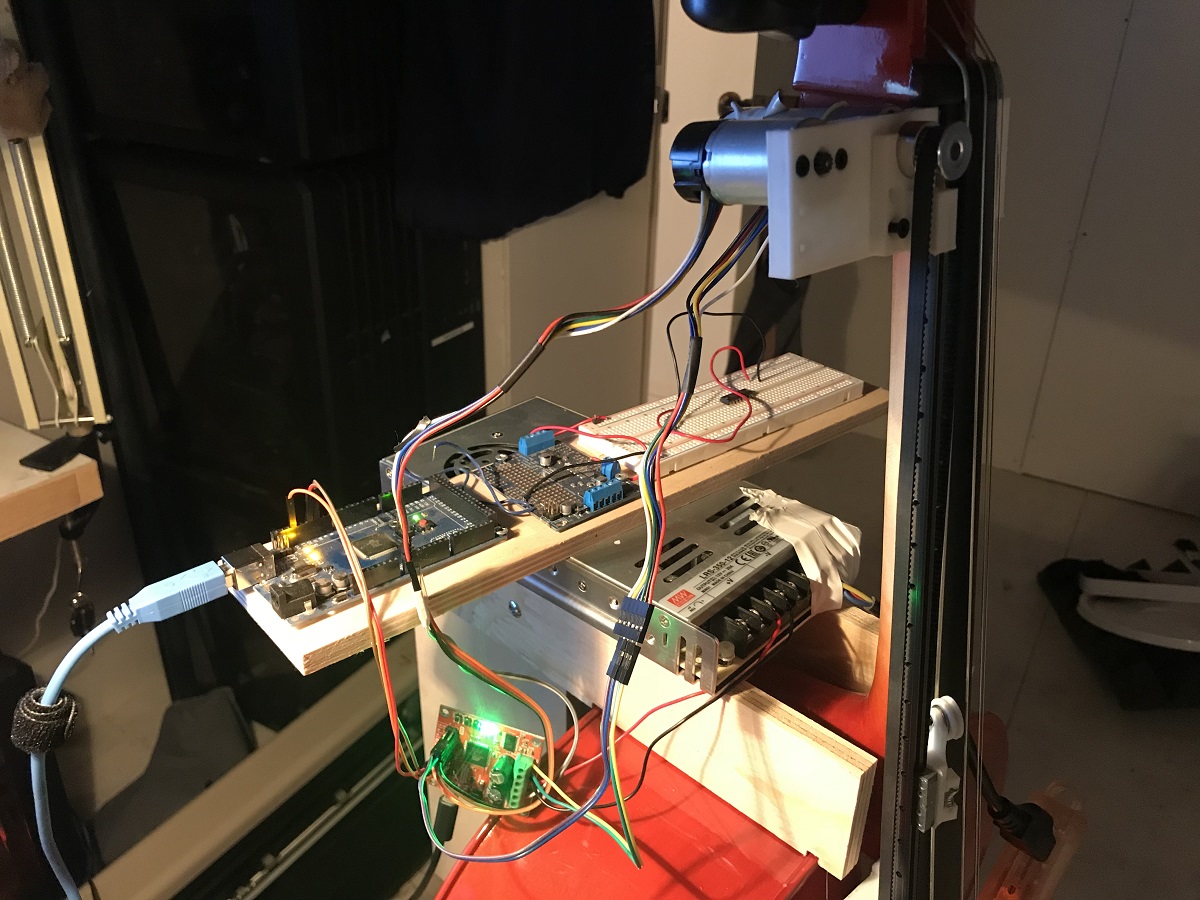
- 6 x RoboClaw 2x7A Motor Controller (two per cello to drive those motors)
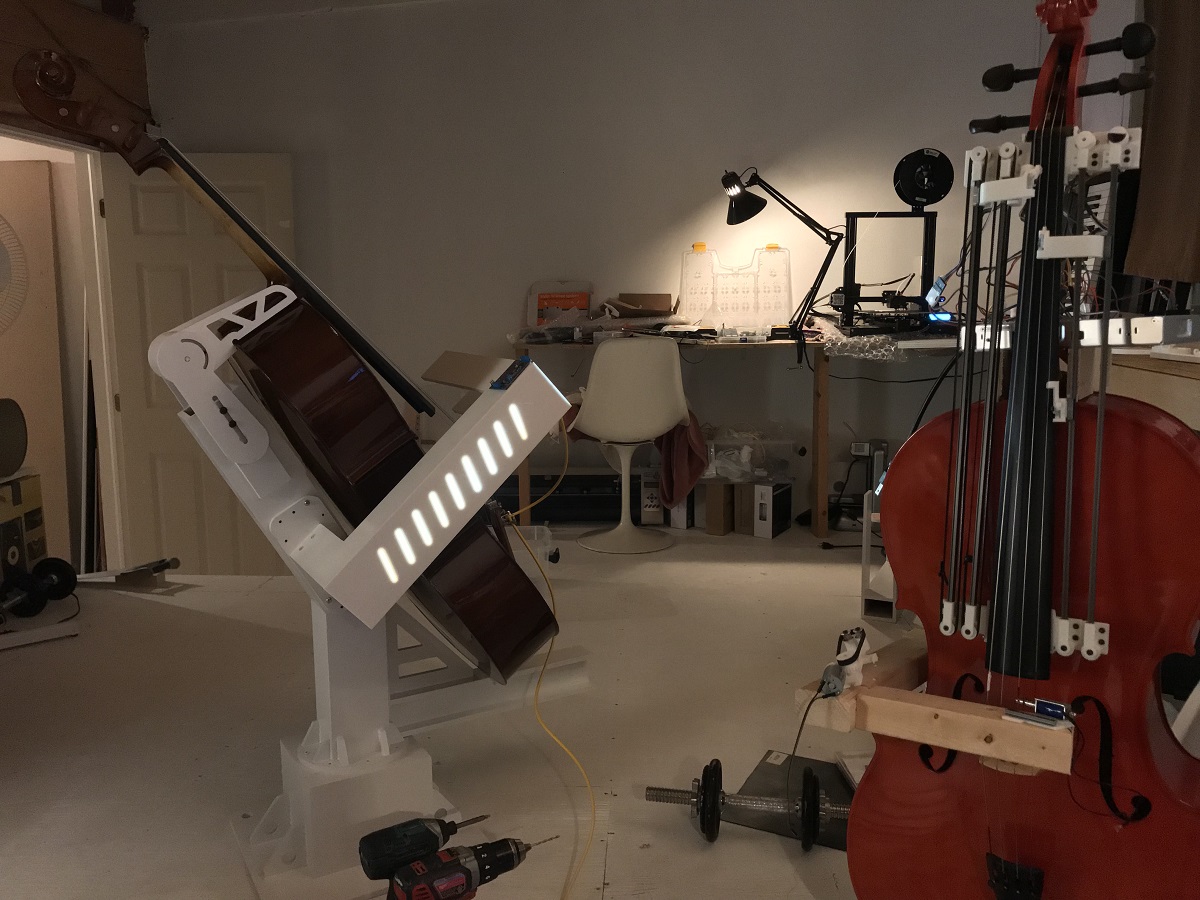
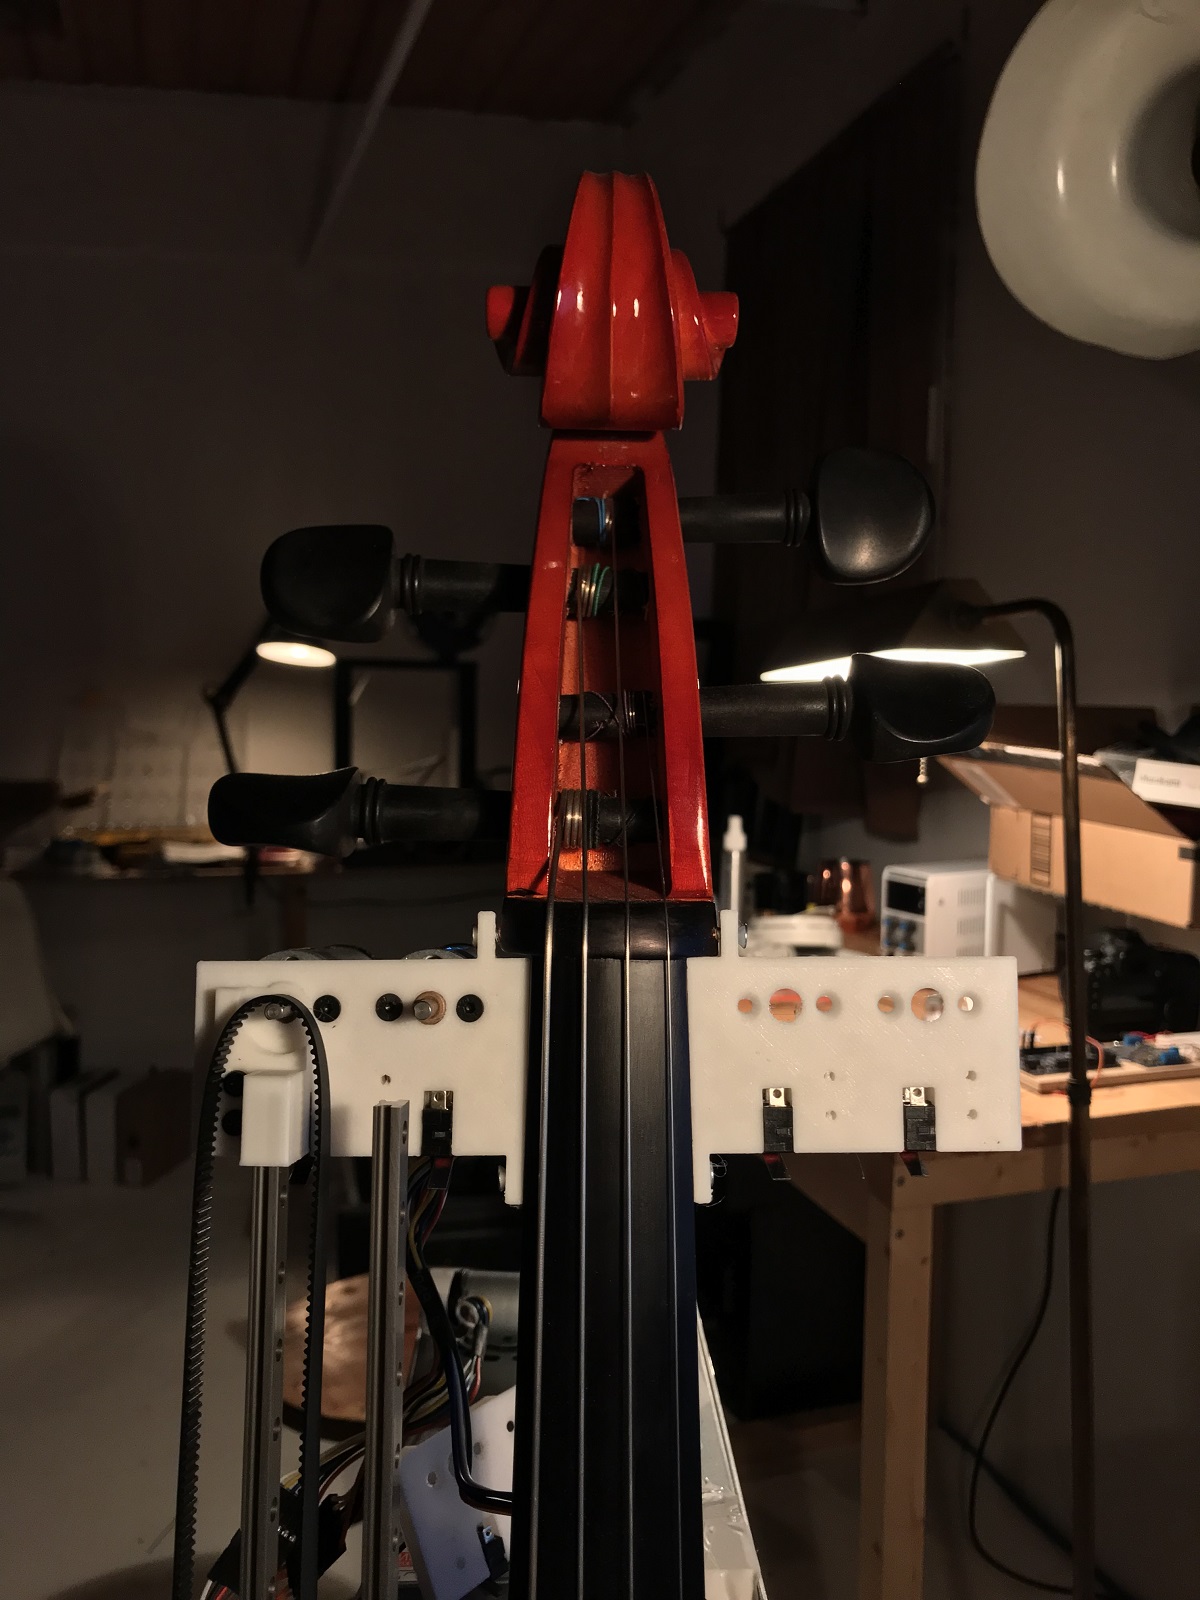
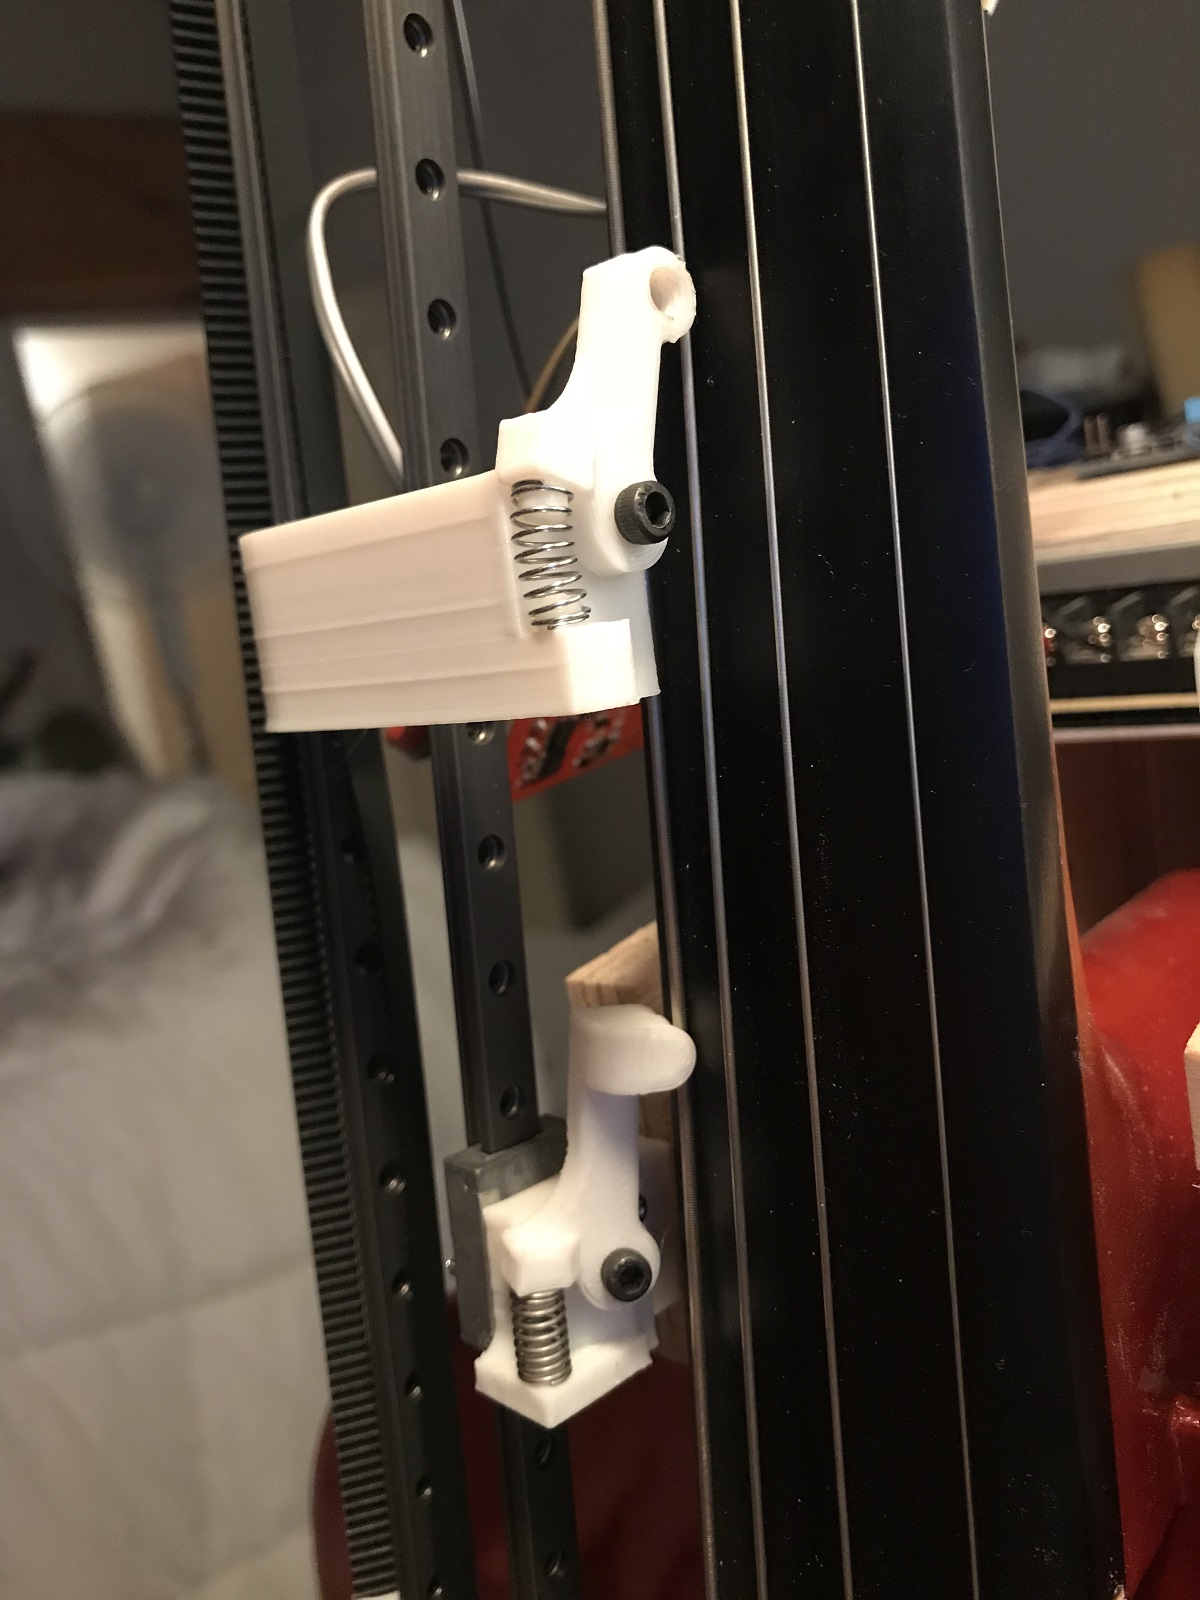
These were used to drive linear slides that moved the note sliders up and down the fingerboard. The reason for using this method was because I am a cellist myself, and the ability to slide between notes is really important in the sound of the cello. Unlike a guitar, there are no frets on a cello’s fingerboard, so the note sliders have to move to very accurate positions on the fingerboard to make sure that the notes are nicely in tune. On startup the motors would all drive the sliders to a home position using a limit switch. From there they would move to the different notes just by driving the motors to pre-defined positions. I decided to use a slider per string on each cello to maximise the amount of notes that could be played simultaneously, meaning they could play 12 note chords, or fast melody lines by splitting the melody across the 3 cellos.
|
|
|
Did you design the slider systems for the fingerboards? It looks like some of the parts might be 3D printed; are the design files available anywhere?
Yes, I designed the whole robotic system from scratch. The cello is such a beautiful instrument in both design and sound. However it is designed specifically for a human body, none of the strings are parallel or in the same plane even, they all diverge towards the bridge. I didn’t want to change the actual instrument in any way for this project. This complicated the build a lot! On top of that, no two instruments are the same, so I had to make sure that the parts could be adjusted in the different planes depending on the instrument they were attached to. Another difficulty is at the top end of the finger board the strings are very close together meaning the sliders all had to be very thin so as not to collide with each other. In the end all these considerations led me to the decision that I would 3D print all the parts. With such a short build timeline, this meant I could design and print revisions of all the parts much quicker than if I was making all the parts by hand in the workshop.
The designs for the parts are not available at the moment as they are very much working prototypes! I plan to upload them for anyone that wants to see them at a stage in the future that I am happy with them.
 |
Can you tell us what your motor control setup is? (What motor drivers are you using, how are you processing the encoders, how are you coordinating all the movement, etc.?)
So I think I answered this in question 2. But a more general overview of the working of the cellos is – The main brain of the three cellos is the software MAX MSP (running on a PC). This would send position data over serial to an Arduino which then told the RoboClaws the next position to send the motors to. The RoboClaws were running in closed loop mode so they were dealing with the encoders directly.
We noticed you have some fans pointed at the upper bank of motors on each cello. Are the motors or controllers overheating, or is that to protect the cellos from getting too warm?
That is funny. Yes, originally I was using your 4.4:1 gear ratio 12 V motors as I really wanted the note sliders to be whizzing up and down the fingerboards like a cello maestro. But after burning out some of the motors by driving them too hard, I decided to switch to the next gear ratio down (and actually even they were getting hot). But by this point I had already locked off the design and ordered all the motors as the opening night for the piece was in three weeks. So to make sure I didn’t lose any more motors, I added some forced air cooling (just a silent fan sat on a bar stool pointed at the motors of each cello)… it added a slight bit of rock ‘n’ roll to the show.
Can you give us some details about how the music is generated?
So the project is headed towards having a fully artificially intelligent score where the music is generated on the spot and then played. The project is designed to also play in a museum environment where it will sit and play for its audience forever evolving music, with the intensity of the compositions controlled by the number of people it is playing to. However, it is currently in a more generative state where it will play music based on a set of musical rules from which it generates the music. This is where my collaborator Greg came into the project, developing patches in MAX MSP that generate the compositions and then work out which string on which cello to send each note to.
Is the piece on exhibit anywhere currently, or are there any planned exhibits coming up?
The piece was shown for a week at the SAT at the end of last year, but it was almost totally sold out so an extra week was added straight after that. The cellos are now back in my studio, where they will be upgraded. They are scheduled for another two weeks of shows at the SAT from March 24th 2020. There are some other shows in Montreal where it will be shown as part of some electronic music and tech festivals (unannounced as of right now). It is then planned for a European tour late summer 2020. It is best to keep track of the dates from my Instagram, @montreal_life_support.
Do you have a website or any social media channels where people can follow your work?
Instagram is probably the best. These are the handles:
- David Gardener: @montreal_life_support
- Greg Debicki: @woulg
Other than that I will be releasing a making-of style video documenting the build in the coming weeks on the YouTube channel.
 |
Cat tax! |
|---|
Thanks so much to David for sharing your work with us and answering all our questions. For readers in the Montreal area near the end of March/beginning of April, visit the Society for Arts and Technology’s website for showtime and ticket information.
Related products


Ham radio antenna rotor control using a Tic Stepper Motor Controller
Pablo Lewin wanted a way to adjust the antenna for his Ham radio remotely, but was told his antenna controller was too old to upgrade for remote operation. That didn’t deter him though! He got creative and came up with a solution by connecting a stepper motor to his antenna controller and then using one of our Tic Stepper Motor Controllers. Now he can access the computer the Tic is connected to remotely and control the antenna’s position through the Tic’s software. Check out the video below to see his setup:
Here’s the video Pablo recommends at the beginning of his explanation to get up and running with your own Tic Stepper Motor Controller:
Related products


Home | Forum | Blog | Support | Ordering Information | Wish Lists | Distributors | BIG Order Form | About | Contact
© 2001–2024 Pololu Corporation


