Pololu Blog » User Profile: Jon » Posts by Jon »
Posts by Jon (Page 3)
You are currently viewing a selection of posts from the Pololu Blog. You can also view all the posts.
Popular tags: community projects new products raspberry pi arduino more…
Pololu relay module used in custom ESP8266-based plant watering system
Forum user LuisLabMO posted about his WiFi-controlled plant watering and monitoring system. The system uses SparkFun’s Blynk ESP8266 board to read various sensors that monitor sunlight, moisture content of the soil, and detect the level of water remaining in the watering reservoir. The Blynk signals our 5V relay module to activate the system’s water pump, which irrigates the plants through a drip system. You can read more about LuisLabMO’s watering system in his post, which also has a link to his Hackster.io project page and GitHub repository.

Tru.D 3D
 |
On Monday, Colin McGinn launched a Kickstarter in order to create a 3D short film using Tru.D 3D, which is a volumetric display system that he designed and patented. The system quickly feeds 3D volumetric objects into a specific viewing area, and each 3D piece forms a frame of an animation to tell a story that can be viewed from any angle.
Included among the Kickstarter rewards is a mini Tru.D 3D machine, which uses our micro metal gearmotors and magnetic encoders to perform a short, two-second animation. The machine is small enough to hold in your hands, and backers have the option of choosing from one of three different animations.
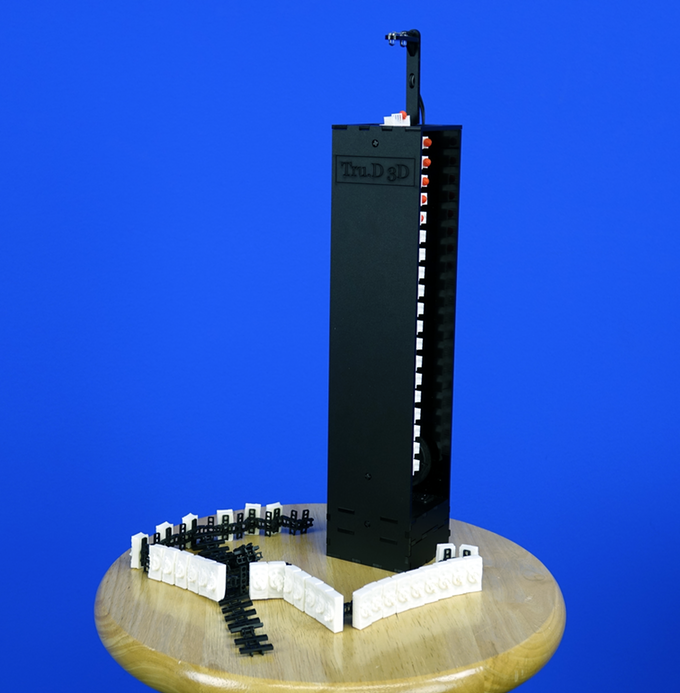 |
You can find more information on Colin’s project, including the full digital version of the short film, on his Kickstarter.

The Purdue Tuggiteers' spring 2015 senior design project
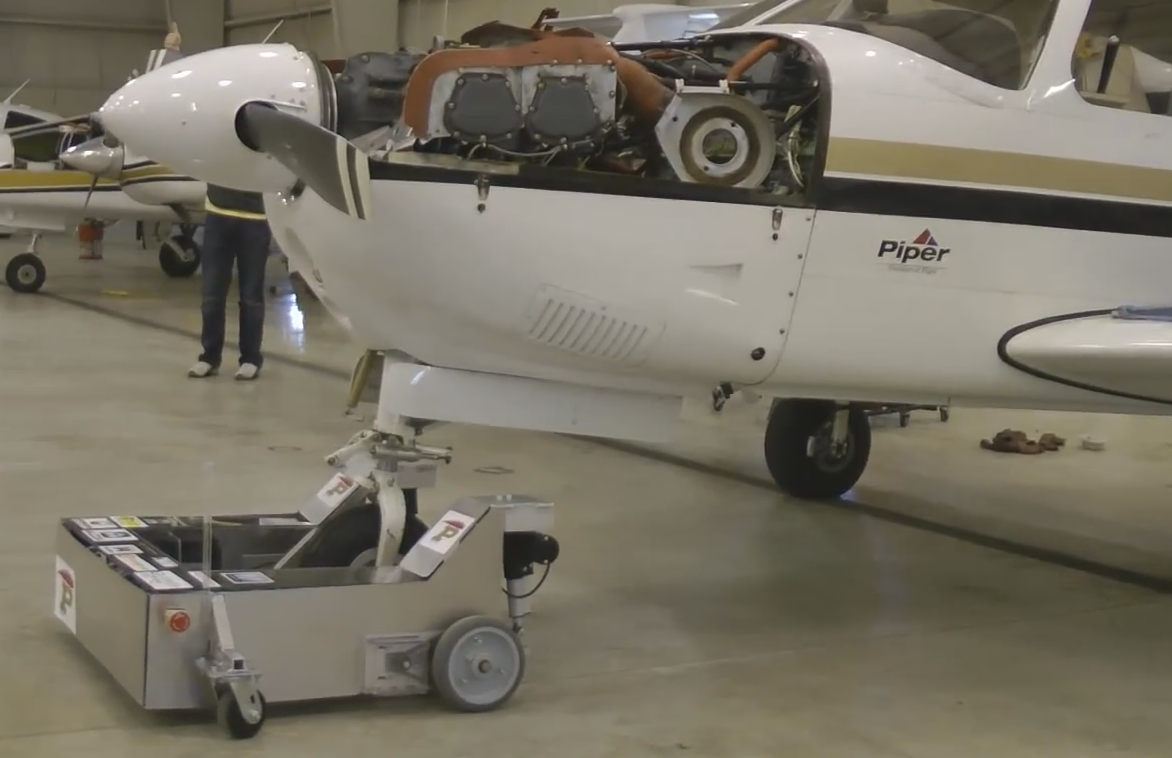 |
For their senior design project in the spring semester of this year, a team of Mechanical Engineering students (the Tuggiteers!) from Purdue made a remotely-controlled plane-towing vehicle that uses one of our step-up/step-down regulators. The team shared with us this video of their final review, which demonstrates the vehicle approaching, connecting to, and towing a single-engine aircraft:
This next video captures their vehicle’s first test. An on-board camera allows you to get a 1st-person view of the latch actuating and gripping the aircraft wheel:
We are always excited to see our parts getting used in cool projects, and we were especially excited to see this because it looks way easier than doing it the usual way:
 |
Ben, pushing a plane (before he started Crossfit). |
|---|
Related products

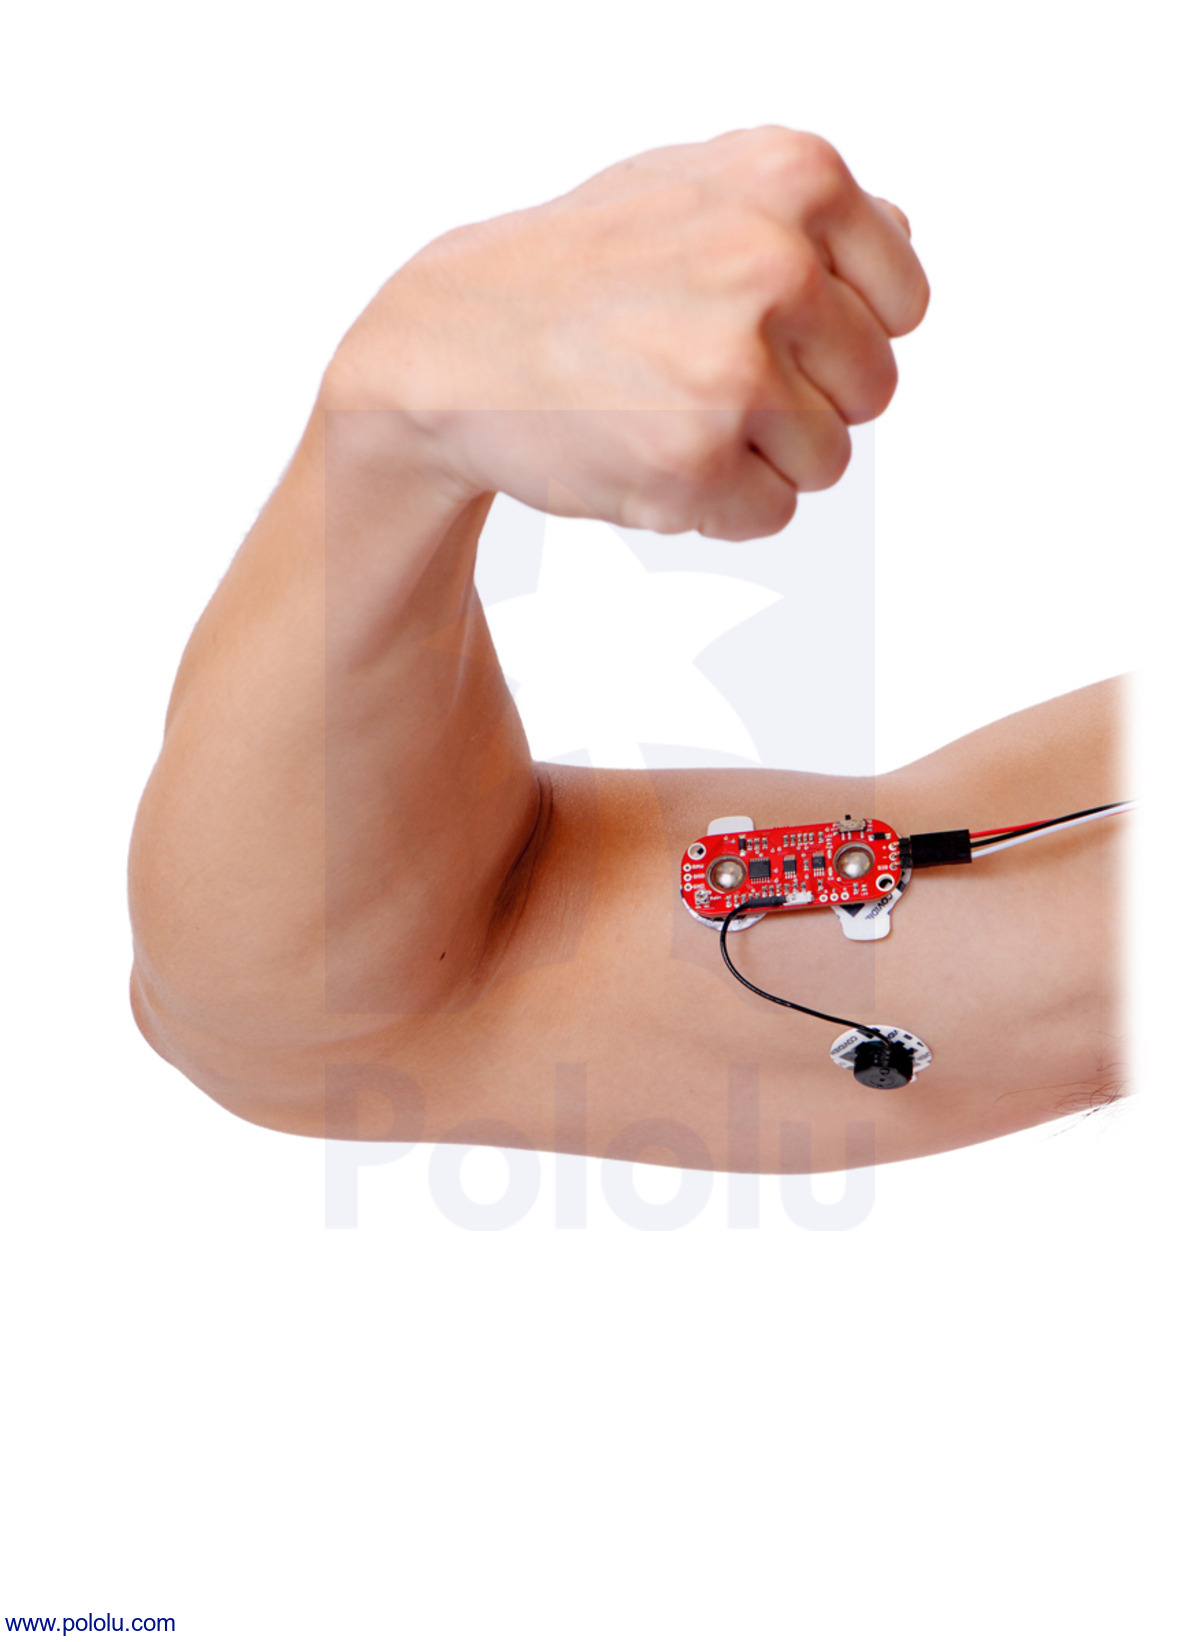
Video: MyoWare Muscle Sensor demonstration with Maestro servo controller
 |
I got your torque right here ;) |
|---|
Now that we are carrying Advancer Technologies’ MyoWare Muscle Sensor, it is time to update our demonstration video! I’ve had two whole years to add some mass to my biceps (during which time I continuously worked on those bad boys for a grand total of four weeks), and now I can proudly present to you these sick gains.
The demonstration is basically a redo of the original muscle sensor demo with the new sensor, except for a few small differences (honestly, my biceps are not that much bigger). In this setup, a 6-channel Maestro reads the muscle sensor’s analog voltage output and commands the position of a Power HD servo. The Maestro’s +5 V (out) pin supplies power to the MyoWare Muscle Sensor, and the servo and Maestro are powered by 4 rechargeable AA batteries. On a personal note, I found it really satisfying to use a single power source for this demonstration, which is not something you can do with the previous version of this muscle sensor, as it requires two supplies. (Be sure to check out the MyoWare Muscle Sensor’s product page to read about more ways the new muscle sensor improves upon the older version!)
This Maestro script is slightly more interesting than the script in the last demo, since the servo’s default direction of rotation was the opposite of the motion for a bicep curl (and we were already quite happy with the servo’s orientation with respect to my arm for the planned video footage). To get around this, and make the servo arm movement match the position of my arm during a bicep curl, I did some basic math and came up with an equation that you can see in the code below:
# Sets servo 1 to a position based on the analog input of the MyoWare Muscle Sensor.
begin
  8000            # put this value on the stack (for why, see line 5)
  0 get_position   # get the value of the muscle sensor's signal connected to channel 0
  4 times minus    # y = -4x + 8000 , which is an equation we use to deal with the servo's
                   # default direction of rotation and scale the Maestro's Target
                   # value to roughly 4000-8000 (approximately 1-2 ms)
                   # which is the range of servo pulses that corresponds
                   # to the motion we want.
  1 servo          # set servo 1 accordingly
repeat
You can, of course, use other devices to read the analog voltages from the MyoWare Muscle Sensor. If you have not already, you might try using one of our A-Stars!
If you have a project that uses the MyoWare Muscle Sensor, we would be pumped to hear about it!
Related products


New product: MyoWare muscle sensor and electrodes
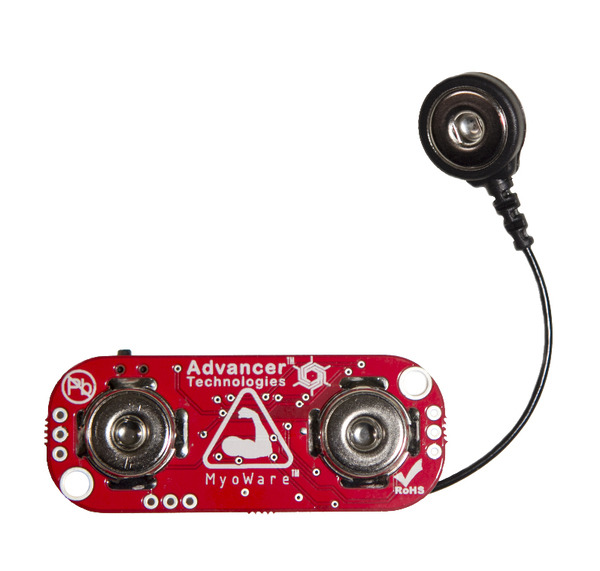 |
We are pumped to announce that we are now carrying Advancer Technologies’ MyoWare Muscle Sensor!
This sensor features a number of improvements over the older Muscle Sensor v3 including single-supply operation (no need for a negative voltage supply) and built-in snap connectors for electrodes. Other new features include a raw EMG output, reverse power protection, a power switch, LED indicators, and two mounting holes.
|
|
For a fun example that shows how you could use the muscle sensor, take a look at this blog post, which uses one of our Maestros to monitor a bicep while it is flexing, and command a servo to imitate the motion with a tiny cardstock version of He-Man’s arm. (Note that the project uses the older Muscle Sensor v3, not this new product.) You can also head on over to Advancer Technologies’ website for more project ideas.
|
|
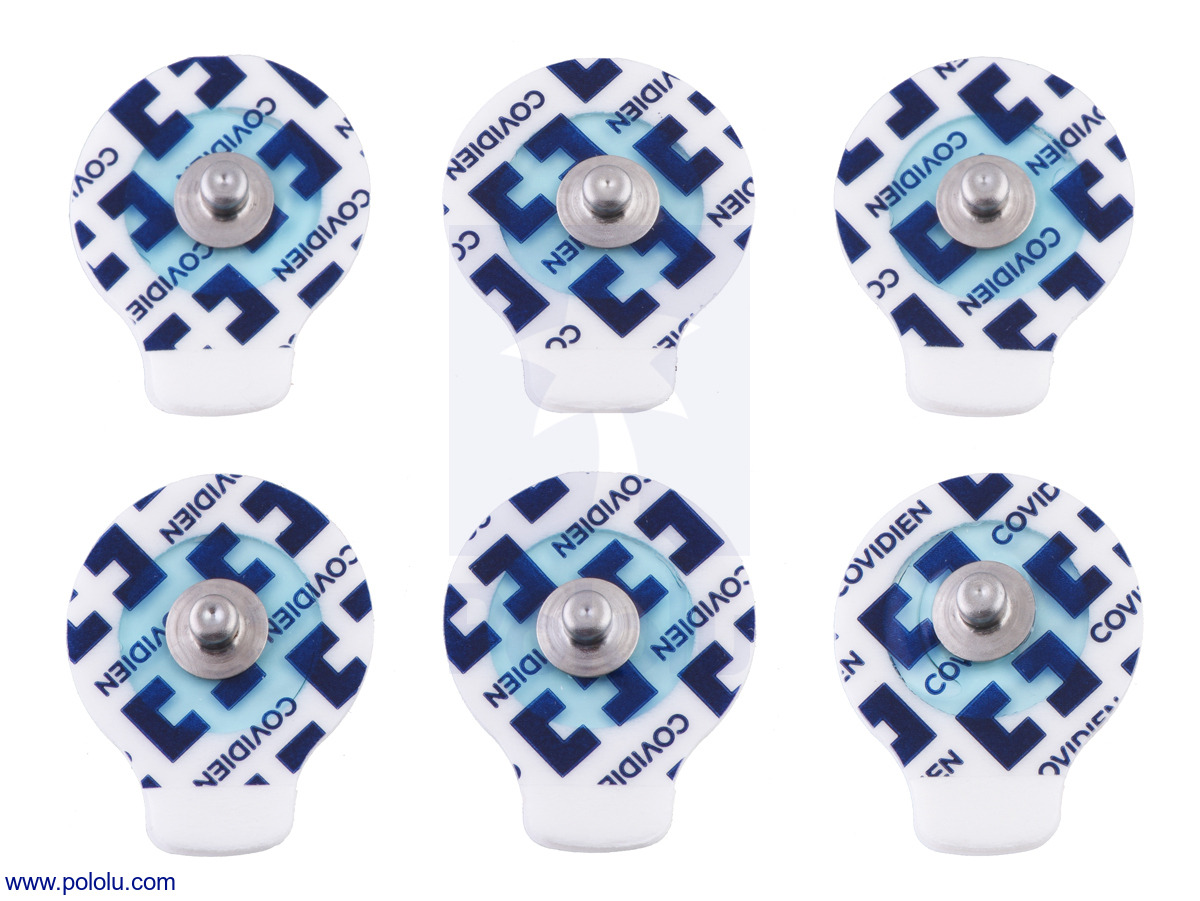

The MyoWare Muscle Sensor does not ship with electrodes; they are available separately in packs of six.
Related products

Prototyping hexapod motion with a Maestro USB servo controller
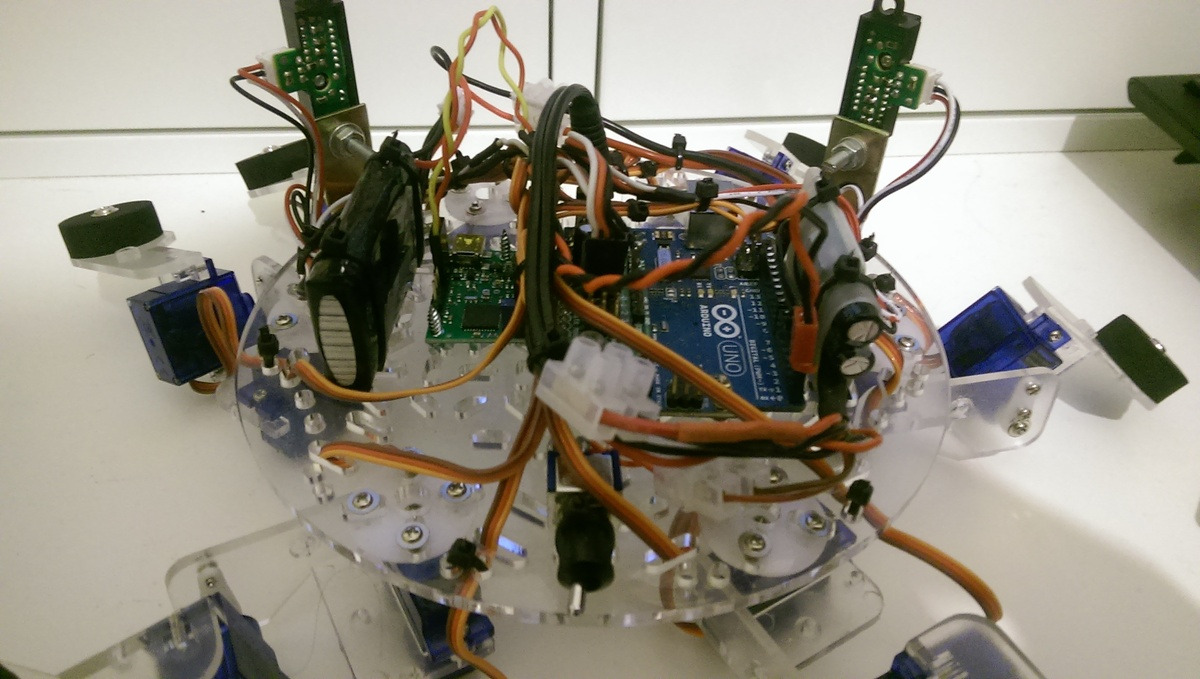 |
Chris Barlow posted this interesting write-up about how he is using the USB connection of a Mini Maestro servo controller to prototype motion control for his hexapod robot. He has been going over the build in detail on his blog, so check it out over there, and be sure to take a look at this short video below:
Zippy: an Arduino Nano-based balancing robot
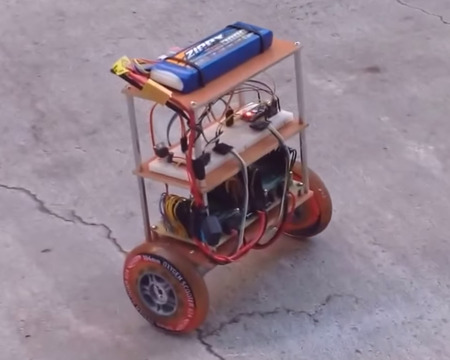 |
Zippy is an RC balancing robot created by Larry McGovern. It uses an Arduino Nano to read pulses from an RC receiver and accelerometer and gyroscope data from an MPU6050. After processing that information, the Nano commands two ST motor driver development boards, which each control a 30:1 37D mm gearmotor with encoder. The whole system is powered by a 3S LiPo (brand: Zippy, of course!). You can watch Zippy scoot around on pavement below:
In the video description, Larry mentions that he modeled Zippy after the Balanduino robot, but we would like to highlight one noticeable difference: he used his own pair of wheels, which are mated to the output shaft of his gearmotors with our 6mm scooter wheel adapters! I had a major role in designing these, so on a personal note, it is especially exciting to see someone get a good use out of them. (It also looks like our stamped aluminum L brackets are used to mount the motors.)
Related products


Jon's line following robot: Usain Volt 2.0
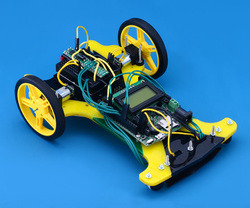
Like other developers and engineers here, I made a robot for the LVBots Line Following Contest. This post describes my robot, Usain Volt 2.0, and details some of what I was thinking when I designed it. If you want to know more about the competition rules and how it was judged, see the LVBots line following rules. Continued…
Maestro-controlled Spider Dress 2.0 at CES 2015
 |
This week at the Consumer Electronics Show, some of our engineers got to see Spider Dress 2.0, which was being exhibited by its designer, Anouk Wipprecht, at the Intel booth. The dress is designed to react to invasions of the wearer’s personal space with threatening insect-like legs controlled by servos. Two Maxbotix proximity sensors are used to detect movement, and two 12-channel Maestro servo controllers (one under each shoulder pad) control the response of the legs. The whole dress is controlled by an Intel Edison.
|
|

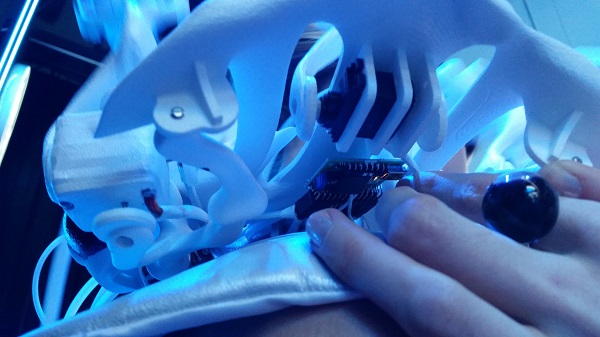
Anouk explains the dress in detail in this video, which was produced by Make, and features a brief cameo by yours truly:
You can learn more about Spider Dress 2.0 in this Make article, and about Anouk and her work by visiting her website.
Related products

Khan Academy interactive continuous rotation servo demo
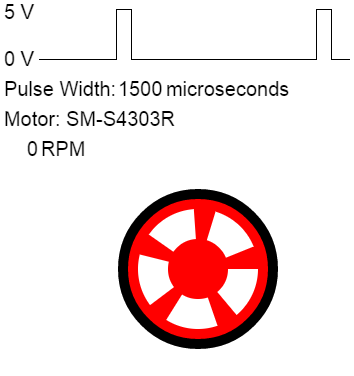 |
Khan Academy user mbbackus created a demo that allows users to visualize the effects of sending different pulse widths to the SM-S4303R and Parallax continuous rotation servos. (You can use the up and down arrow keys to change the pulse width, and more instructions can be found as comments in the code.)
For those who are interested, you can learn more about standard RC servo pulses in this series of blog posts about hobby servos.
You can see the demo on its Khan Academy page.
Related products


Home | Forum | Blog | Support | Ordering Information | Lists | Distributors | BIG Order Form | About | Contact
© 2001–2026 Pololu Corporation


