Support » Pololu AVR Programming Quick Start Guide » 3. Programming in Windows with Microchip Studio »
3.3. Compiling an Example Program
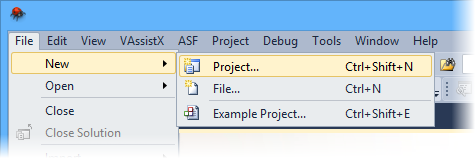
The next step is to compile an example program in Microchip Studio and load it onto your Orangutan or 3pi robot. Open Microchip Studio and create a new project by selecting New > Project… in the File menu.
 |
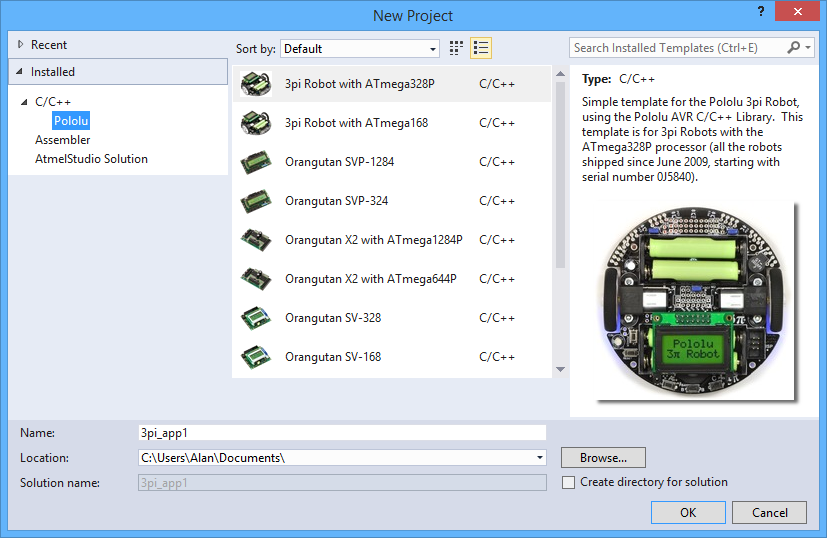
In the New Project dialog, select Installed to see the installed templates. Expand the C/C++ category and select Pololu to see a list of templates that were installed by the Pololu AVR C/C++ Library’s installer. If there is no Pololu category, make sure that you have installed the Pololu AVR C/C++ Library and try restarting Microchip Studio. Select the template that corresponds to your device. Be careful to select the right one; if you’re not sure what model of AVR microcontroller your device has then you can find out by checking your invoice, checking your Pololu order history, or by reading the writing on the AVR itself.
- All 3pi robots shipped from Pololu since June 2009, starting with serial number 0J5840, have an ATmega328P.
- All Orangutan X2s shipped from Pololu since October 25, 2010 have an ATmega1284P.
Also, we recommend unchecking the Create directory for solution checkbox to make your directory structure a little simpler.
 |
After you click OK, Microchip Studio will create a new project from the template and open it:
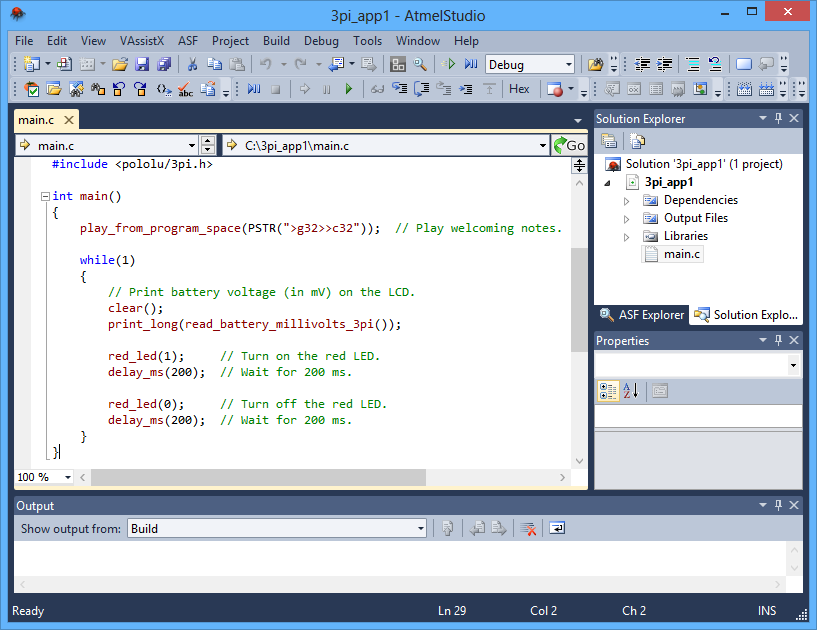 |
The project will contain some simple example code that demonstrates basic features of the board, such as blinking an LED, playing some notes on the buzzer, and displaying numbers on the LCD. The functions being called are defined in the Pololu AVR C/C++ Library. You can find more information about them in the Pololu AVR C/C++ Library User’s Guide and read their source code by looking in the directory where you installed the library.
You can build/compile the project by selecting Build > Build Solution or by pressing F7. If you get an error at this point, and you haven’t modified the example program or project configuration at all, then it is likely that the Pololu AVR C/C++ Library was not installed correctly and you should try installing it again. If the build is successful, then the build output shown in the “Output” tab at the bottom should end like this:
...
Build succeeded.
========== Build: 1 succeeded or up-to-date, 0 failed, 0 skipped ==========
If that is what your output looks like, then you have successfully compiled your project into a HEX file, which can be found in the project directory. It is now time to program that HEX file onto your AVR using the Pololu USB AVR Programmer or the built-in programmer on the Orangutan SVP or Orangutan X2.
Before programming, make sure your device is powered and that your programmer is connected to your computer via USB. If you are using the Pololu USB AVR Programmer, you will need to connect the programmer to the device using the included 6-pin ISP cable. If you are programming a device such as the Baby Orangutan B that does not have a shrouded male header that enforces the correct cable orientation, then be careful to line up the pin 1 indication arrow on the cable with the arrow on the device.
Orangutan X2 users: The AVR programming software in Microchip Studio is not compatible with the Orangutan X2 so we recommend using AVRDUDE as described in Section 3.4 instead of attempting to follow the instructions below.
To program, simply go to Microchip Studio and press the F5 key. Alternatively you can program by selecting either Continue or Start Without Debugging from the Debug menu.
If programming fails: If you get an error message after attempting to program, then click View > Available Microchip Tools to open the “Available Tools” window. Make sure that there is one and only one STK500 in the list and make sure that the COM port number matches the COM port number of your programmer’s programming port, which is displayed in the Device Manager. If you are using the Pololu USB AVR Programmer, then please see the Troubleshooting section of the programmer’s user’s guide. If you are using an Orangutan SVP, then make sure you have firmware version 1.03 or later (see the Upgrading Firmware section of the user’s guide). If you are using an Orangutan X2, see the note above.
If the programming was successful, you should be able to see the program running on your device. The red user LED on the device should be blinking. If your device has a buzzer, it should play a note whenever the device starts up. If your device has an LCD, it should display a number on the LCD, but you might have to adjust the contrast potentiometer to see it.
If you want to access advanced features of the programmer, or want an interface that gives more feedback when the programming is successful, you can use the Device Programming dialog box of Microchip Studio.
Tip: If you use multiple programmers, but never connect more than one at a time to your computer, you might want to configure them all to be on the same COM port so that programming with the F5 key in Microchip Studio will always work. You can change the COM port number assigned to a device by going to the Device Manager, double clicking on the COM port, and then clicking the “Advanced…” button in the “Port Settings” tab.
Related products


Home | Forum | Blog | Support | Ordering Information | Lists | Distributors | BIG Order Form | About | Contact
© 2001–2026 Pololu Corporation
