Pololu Blog »
Posts tagged “pololu videos”
You are currently viewing a selection of posts from the Pololu Blog. You can also view all the posts.
Popular tags: community projects new products raspberry pi arduino more…
Video: Demo Program on the Pololu 3pi+ 32U4 OLED Robot
This video steps through the demo program on our new 3pi+ 32U4 OLED Robot. The Pololu 3pi+ 32U4 OLED robot is a complete, high-performance mobile platform based on the Arduino-compatible ATmega32U4 MCU. The demo program shown in this video highlights many features of the 3pi+ including bump and line sensors, full 9-axis IMU (three-axis gyro, accelerometer, and compass), micro metal gearmotors and encoders, three user LEDs, and a 128×64 graphical OLED display.
This program ships on all 3pi+ OLED robots, both the assembled and kit versions. It is also included in the example sketches in the Pololu 3pi+ 32U4 Arduino library. More information about the 3pi+ demo program can be found in the user’s guide here.
Related products


Video: How to Assemble the 3pi+
We are excited to release our first video related to our new 3pi+ robot! This assembly video walks you through the steps found in the assembly section of the 3pi+ 32U4 User’s Guide. While our user’s guides aim to be as thorough as possible, some things are a lot easier to understand when you actually see someone doing it (like soldering the leads to the motor tabs!), so we hope you find this video a useful addition to our 3pi+ documentation.
Is there something you would like to see in a future 3pi+ video? Let us know in the comments below!
Related products


Video: How to Say Pololu!
The name Pololu is simple, but over the years, we’ve noticed some customers mispronouncing our name or hesitating to say it. And if you can’t say our name, how will you tell your friends about us? So if you are unsure about how to say Pololu, I hope this little video will help you out:
Video: Easy Acrylic Unmasking
We do a lot of laser cutting here at Pololu as part of our custom laser-cutting service, so we know first hand how tedious it can be to remove the paper masking from laser cut parts like acrylic. Check out the video below for a simple trick you can use to speed up the process.
Related products

Video: Installing Multi-Hub Wheels
This short video shows how to install one of our multi-hub wheels on a motor. These wheels are currently available as an 80×10mm black pair and an 80×10mm white pair. They are cool because they include a set of interchangeable collets that can be inserted into the wheel to firmly grab four different shaft types: 3mm D, 3mm round, 4mm D, and 4mm round. For more information about what went into designing these wheels, check out Jan’s blog post from when they were initially released.
Our introductory special for these wheels is still available. Use coupon code MULTIHUBINTRO and get 33% off on up to three sets.

Related products


Video: How to Install Terminal Blocks
On Monday, after receiving a photo of some wonky-looking terminal blocks, our tech support team mentioned to me that we get a good amount of photos from customers needing help with their products that have their terminal blocks installed incorrectly. They either aren’t stacked together properly, are inserted into the wrong holes on the boards, or they’re soldered incorrectly. I tried to make some recreations of the problems we see most often so you can see what I’m talking about:
|
|
|

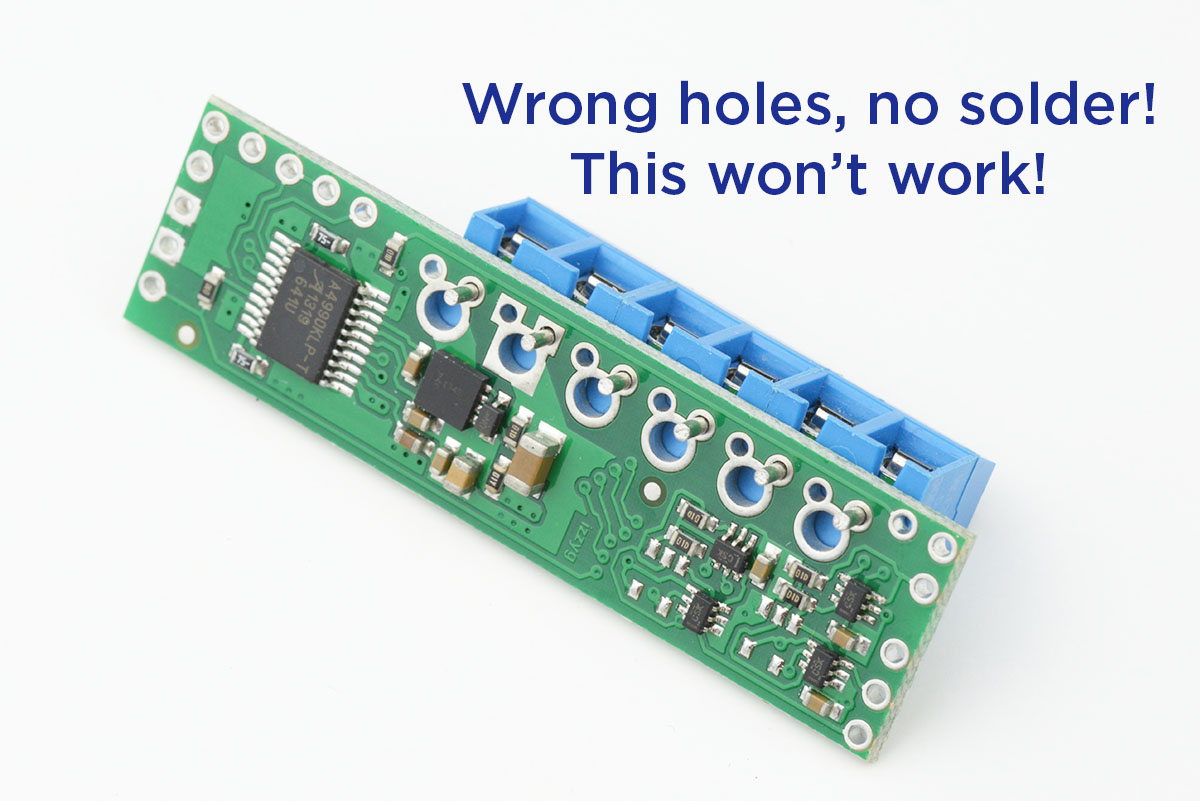
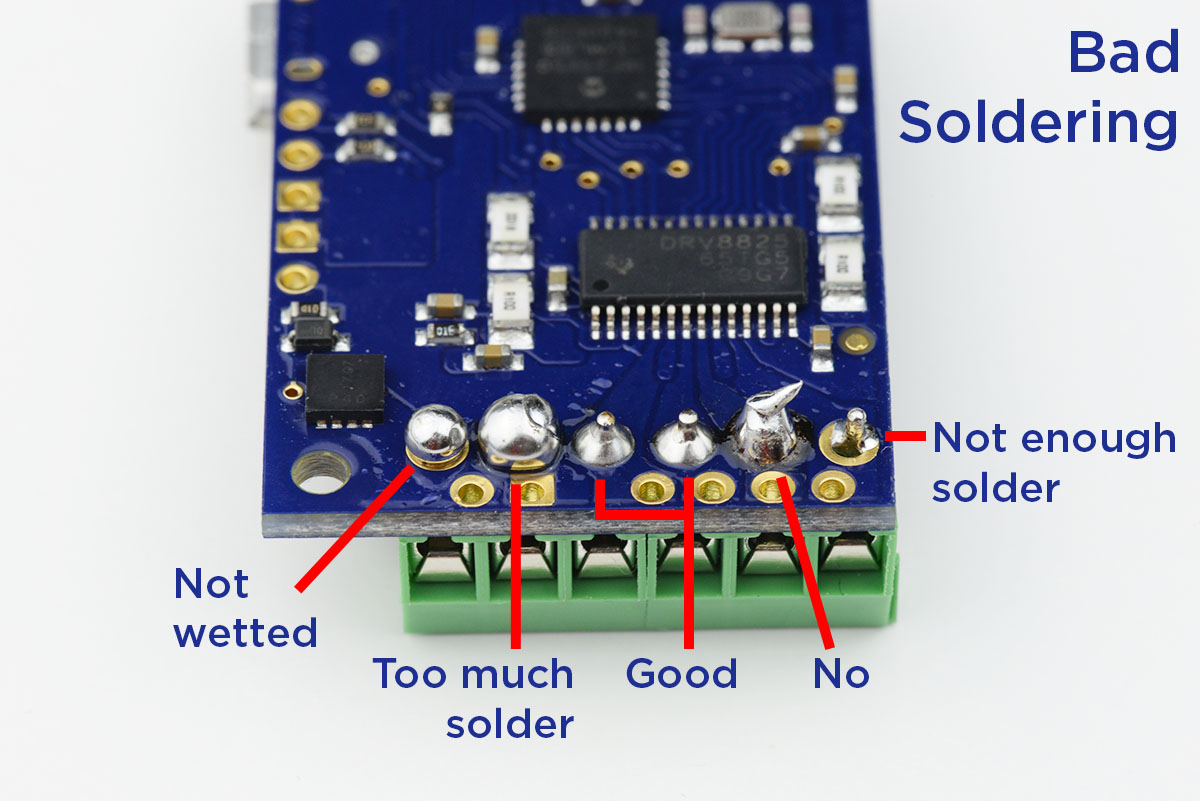
So at the request of our support team, I made this video that goes over how terminal blocks should be installed:
Related products


Video: Overview of the Jrk G2 Motor Controllers with Feedback
In our last blog post, we announced the release of our second generation of Jrk Motor Controllers with Feedback. If that announcement wasn’t enough to get you excited about the Jrks, here’s a short video to give you a taste of what the Jrks can do:
You totally want one now, right? Well lucky for you, our special introductory coupon is still valid. The first 100 customers to use coupon code JRKG2INTRO can get 40% off up to three units. (Click to add the coupon code to your cart.)

Video: Getting Started with the Tic Stepper Motor Controllers
As I showed in my last post a few weeks ago, our Tic stepper motor controllers offer six different control interfaces so you can add stepper motors to a variety of projects. Getting started with the Tics is easy. This new video tutorial steps (see what I did there?) you through getting your stepper motor running with our Tic controllers:
As I was making this video, I realized one of the coolest things about the Tic is how quickly you can work out the capabilities of your stepper motor. Even if you’re comfortable using one of our stepper motor drivers along with a microcontroller, using the Tics makes adjusting settings like current limits, step rates, speed, and acceleration as quick as a click of the button, and you can control your motor directly from the software to make sure it’s behaving how you would like. So you might want to keep an extra Tic around for that purpose, just as a stepper motor tester.
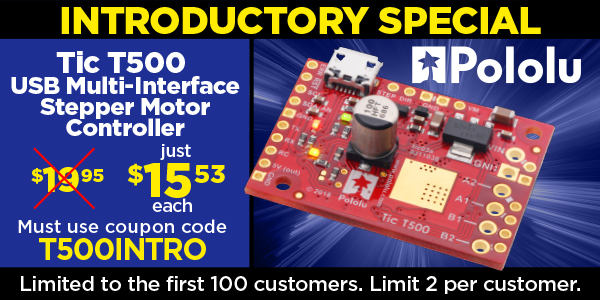
Right now you can still purchase our newest Tic at a special introductory price of just $15.53 using the coupon code T500INTRO! (Click to add the coupon code to your cart.) We also cover shipping in the US! Note that this introductory offer applies only to the units without connectors soldered in.
Related products


Video: Introducing the Tic Stepper Motor Controllers
Our Tic Stepper Motor Controllers make basic control of stepper motors easy. This quick video shows you all the control interfaces you can use with our Tics to add stepper motors to your projects:
Making this video was actually the first time I’ve had a chance to play around with the Tics, and I was pleasantly surprised at how quickly I was able to set up the Tic with each interface option. Once I had everything connected, it only took a few minutes using the control software to get things moving for each setup.
This video also gives a sneak peek of our new Tic T500 (the red Tics in the opening shot). Like our new stepper motor drivers, the T500s are based on the MPS MP6500 bipolar stepper motor driver. Keep an eye on this blog for their release in the coming weeks.
Related products
Video: Setting the Current Limit on Pololu Stepper Motor Driver Carriers
One of my many roles here at Pololu is overseeing technical support, and I have seen countless cases of customers who have problems with their stepper motor systems because they have not properly set the current limit on their stepper motor driver. To address the issue, we have made a new video that demonstrates how to set the current limit on our stepper motor driver carriers. The video also provides helpful tips and points out a few common pitfalls.
A DRV8825 carrier is used for the demonstration, but the video also applies to our A4988, DRV8824, and DRV8834 stepper motor driver carriers. In the demo, signals for the driver are provided by an Arduino-compatible A-Star 32U4 Prime SV. Here is a simplified version of the Arduino code from the video that can be used to step a motor in both directions:
/* Simple step test for Pololu stepper motor driver carriers
This code can be used with the A4988, DRV8825, DRV8824, and
DRV8834 Pololu stepper motor driver carriers.  It sends a pulse
every 500 ms to the STEP pin of a stepper motor driver that is
connected to pin 2 and changes the direction of the stepper motor
every 50 steps by toggling pin 3. */

#define STEP_PIN 2
#define DIR_PIN 3

bool dirHigh;

void setup()
{
  dirHigh = true;
  digitalWrite(DIR_PIN, HIGH);
  digitalWrite(STEP_PIN, LOW);
  pinMode(DIR_PIN, OUTPUT);
  pinMode(STEP_PIN, OUTPUT);
}

void loop()
{
  // Toggle the DIR pin to change direction.
  if(dirHigh)
  {
    dirHigh = false;
    digitalWrite(DIR_PIN, LOW);
  }
  else
  {
    dirHigh = true;
    digitalWrite(DIR_PIN, HIGH);
  }

  // Step the motor 50 times before changing direction again.
  for(int i = 0; i < 50; i++)
  {
    // Trigger the motor to take one step.
    digitalWrite(STEP_PIN, HIGH);
    delay(250);
    digitalWrite(STEP_PIN, LOW);
    delay(250);
  }
}
Related products


Home | Forum | Blog | Support | Ordering Information | Wish Lists | Distributors | BIG Order Form | About | Contact
© 2001–2024 Pololu Corporation


