Pololu Blog »
Video: How to Assemble the 3pi+ 32U4 OLED Robot
In case you missed it, the 3pi+ now comes with a graphical OLED display! Accordingly, we have released an updated version of the 3pi+ assembly video. This video walks you through the steps found in the assembly section of the 3pi+ 32U4 User’s Guide. While our user’s guides aim to be as thorough as possible, some things are a lot easier to understand when you actually see someone doing it (like soldering the leads to the motor tabs!), so we hope you find this video a useful addition to our 3pi+ documentation.
Is there something you would like to see in a future 3pi+ video? Let us know in the comments below!
-
Performance graphs for our 25D Metal Gearmotors
- 7 September 2021We have published performance graphs (5MB pdf) for our 25D Metal Gearmotors! Each chart is based on hundreds of individual measurements...
-
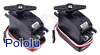
New product: Surplus SpringRC SM-S4303R Continuous Rotation Servo Pair (Two Servos)
- 28 September 2021SpringRC SM-S4303R Continuous Rotation Servo Pair. We are now offering a two-pack of Surplus SpringRC SM-S4303R Continuous Rotation Servos. These...
0 comments
Post a comment


Home | Forum | Blog | Support | Ordering Information | Lists | Distributors | BIG Order Form | About | Contact
© 2001–2026 Pololu Corporation