Pololu Blog »
Ascending/descending spider
This animated spider prop takes a traditionally static Halloween display to new heights! The setup is simple: a Maestro servo controller and a continuous rotation servo raise and lower a spider with the help of a limit switch.
 |
Implementation
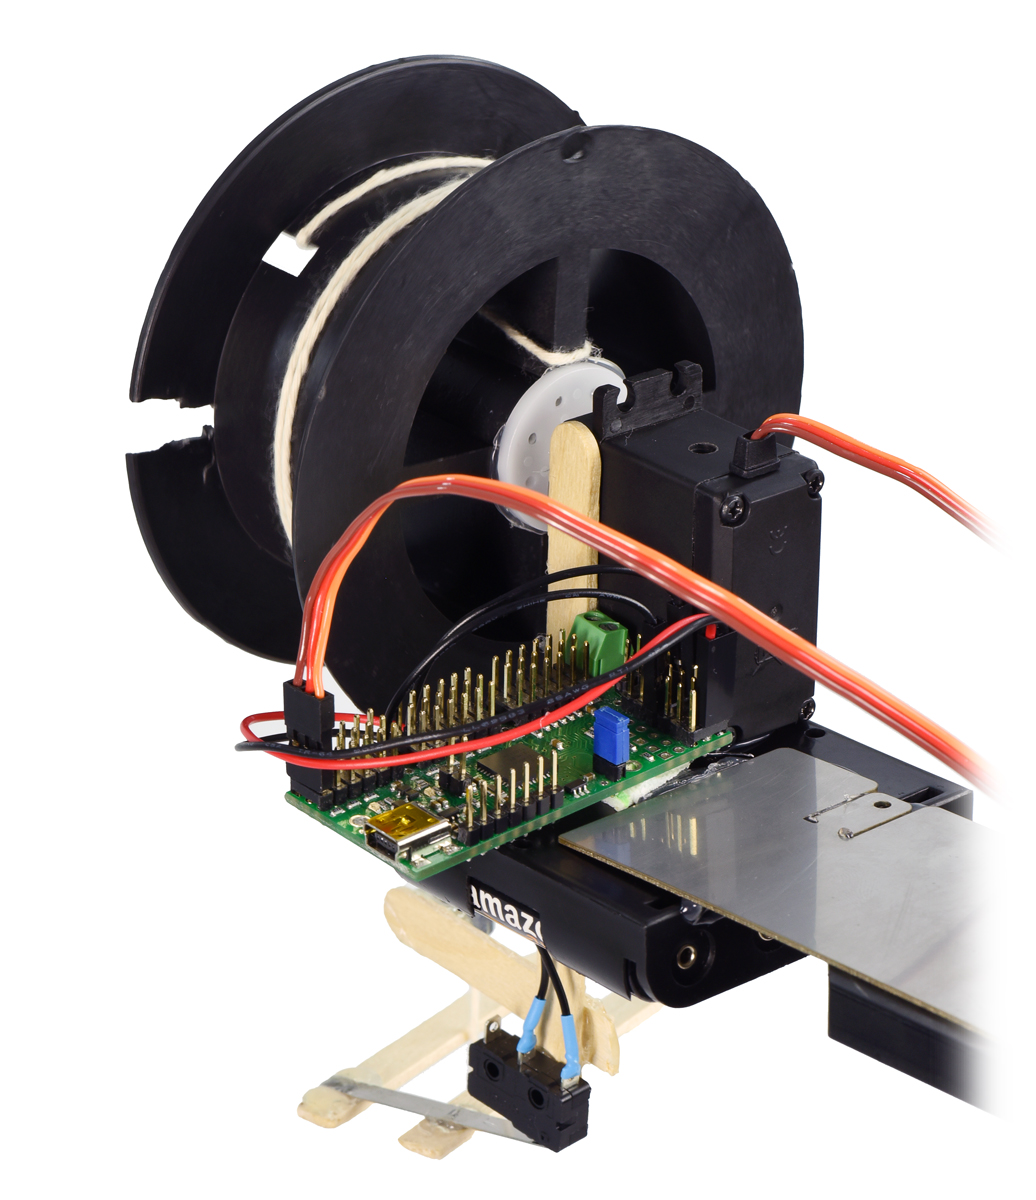
I selected a lightweight decorative spider and a wide diameter wire spool so I could get relatively quick spider movement with little to no servo strain. For movement, I used a Power HD AR-3606HB continuous rotation servo; I hot-glued one of the included servo arms to the spool and screwed it into the servo. The system uses a Mini Maestro 24-channel servo controller, mostly because it was the most available servo controller I had in my office. However, this setup only uses two channels (one for the servo and another to read the state of the switch), so if you want to replicate this project, you could save some space and use the 6-channel version. The servo and Maestro were mounted to a 4-AA battery holder with hot-glue and double-sided tape, respectively. I used some popsicle sticks to set up the location of a snap-action switch, which I used to trigger the change in direction of the spider movement. To connect the switch, I cut apart two premium jumper wires with female terminations, and soldered them between the switch leads and the male header pins on the Maestro. The switch is specifically connected to one of the Maestro channels with an internal pull-up resistor. If you read my last post, you might have noticed that I find our basic sumo blades useful as general-purpose rigid plates, which is why I hot-glued one to the back of the battery holder. Doing so allows the electronics setup to be easily clamped to parallel surfaces.
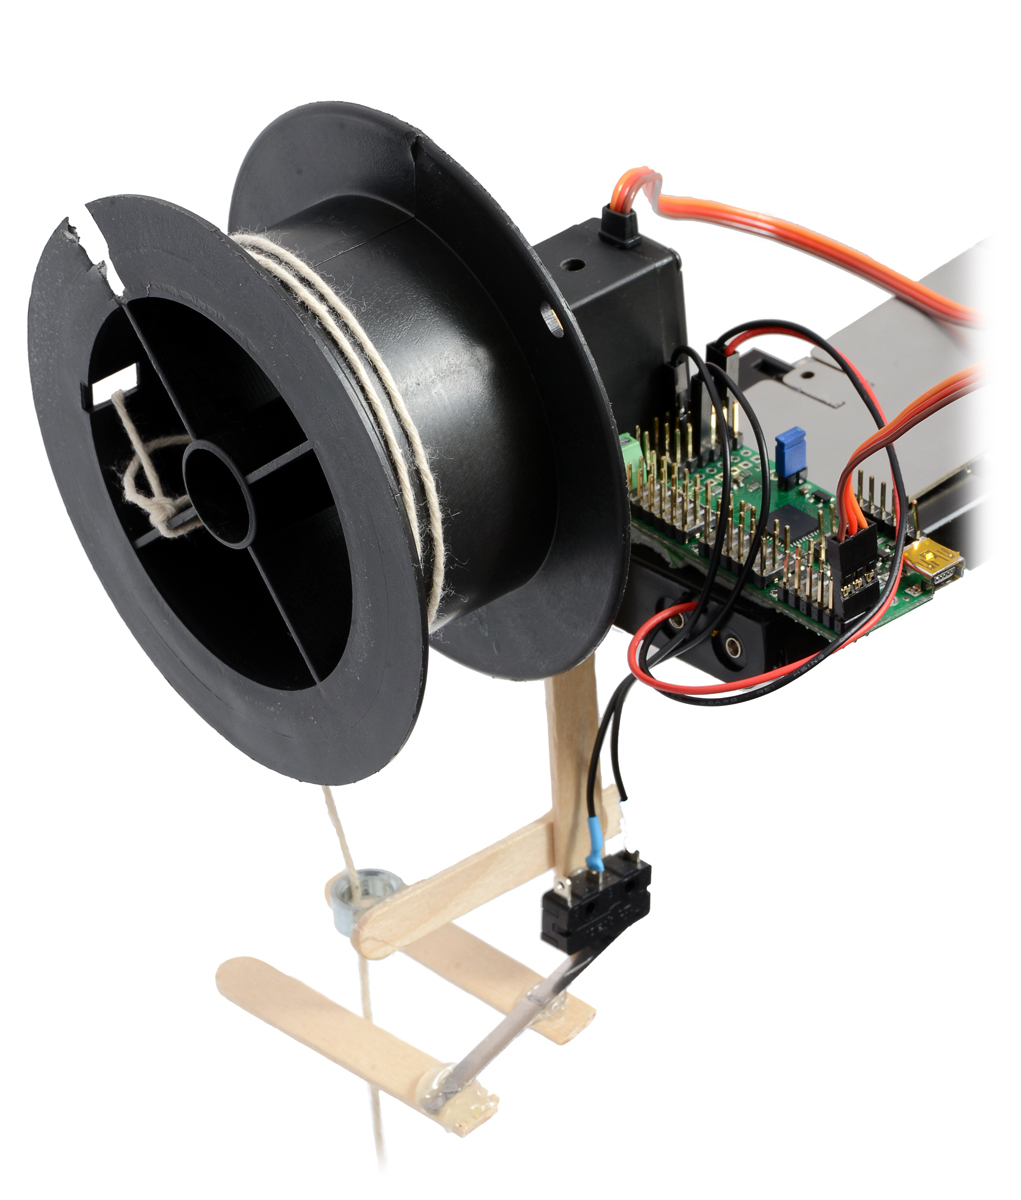 |
After some initial tests, I learned that the spider’s body would wobble too much and the twine would sway enough for the spider to either completely miss the switch or accidentally rub up against the lever arm while the spider was ascending, which would give a false reading. To overcome this, I built a guide for the twine to help keep it centered between the popsicle sticks connected to the switch. (I used a skateboard spacer, but you could probably use any smooth round object with a small diameter.)
 |
The spider prop in action. |
|---|
Here is the simple script that is running on the Maestro:
begin
6000 0 servo #set the servo to zero speed
20 get_position while #wait until the switch is pressed to begin
repeat

8800 0 servo #set a target speed
500 delay #small delay in case of switch bouncing

begin

20 get_position logical_not if #wait until the switch is pressed to switch directions
0 get_position 8800 equals if
3200 0 servo
else
8800 0 servo
endif
1000 delay #small delay in case of switch bouncing (or the spider hitting multiple times)
endif

repeat
Parts list
- Mini Maestro 24-Channel USB Servo Controller
- Power HD Continuous Rotation Servo AR-3606HB
- a snap-action switch
- a 4-AA battery holder
- 4 AA batteries
- a flat and rigid plate like this sumo blade
- a washer or other smooth round object with a small diameter (I used a skateboard spacer)
- an empty wire spool (or something else with a similar shape)
- a Halloween spider prop
- string (I used twine)
- popsicle sticks
 |
Related products


-
New products: Six new Mini Plastic Gearmotors
- 16 October 2014Our family of Mini Plastic Gearmotors is growing! We have added HP versions with more powerful motors for increased torque and speed, and we are...
-

Candy bowl surprise
- 24 October 2014Anyone who has gone trick-or-treating has seen the house that puts a bowl of candy on the front porch and knows that there are those greedy...
0 comments
Post a comment


Home | Forum | Blog | Support | Ordering Information | Lists | Distributors | BIG Order Form | About | Contact
© 2001–2026 Pololu Corporation
