Support » Programming Orangutans and the 3pi Robot from AVR Studio 4 »
3. Compiling an example program
A very simple demo program for Pololu’s Orangutan robot controllers or 3pi robot is available in the folder examples\atmegaXXX\simple-test, where atmegaXXX is the model of the microcontroller on your board. The examples folder can be found in the directory where you installed the Pololu AVR C/C++ Library, which is C:\libpololu-avr\ by default.
Note: If you are using a new Orangutan X2 with an ATmega1284P user microcontroller, you should use the examples in examples\atmega1284p_x2; if you are using the Orangutan SVP-1284, you should use the examples in examples\atmega1284p.
Double-click on the file test.aps, and the project should open automatically in AVR Studio 4, showing a C file that uses a few basic commands from the Pololu AVR Library:
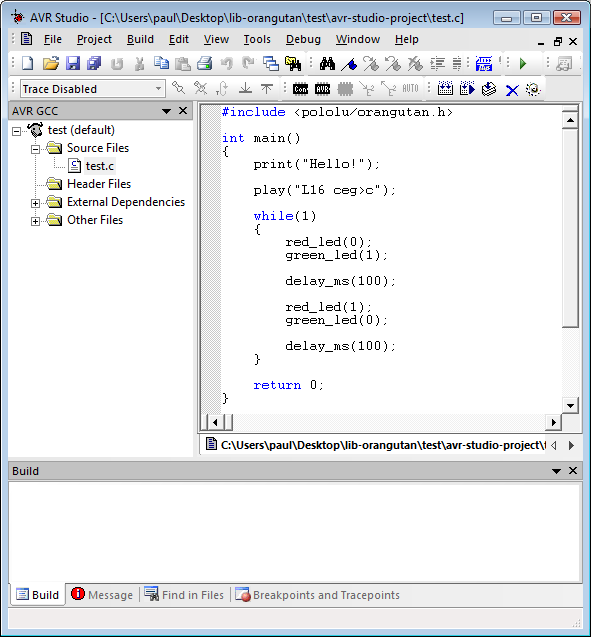 |
AVR Studio 4 showing the sample program. |
|---|
To compile this program, select Build > Build or press F7. Look for warnings and errors (indicated by yellow and red dots) in the output displayed below. If the program compiles successfully, the message “Build succeeded with 0 Warnings…” will appear at the end of the output, and a file test.hex will have been created in the simple-test\default folder.
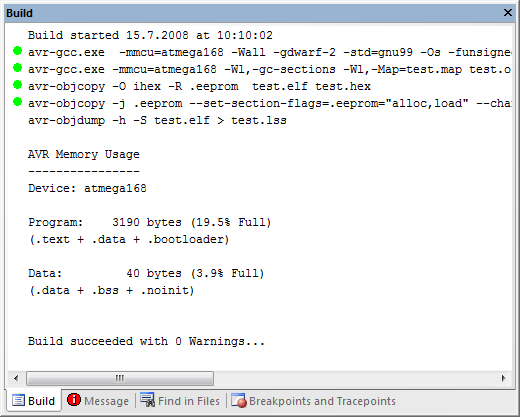 |
AVR Studio 4 build window, compiling the example project. |
|---|
Connect your programmer to your computer and your Orangutan board or 3pi robot, and turn on the target’s power. If you are using the Pololu USB AVR Programmer, the yellow LED should be blinking, indicating that it detects the target’s power. If you are using the Orangutan SVP, make sure the blue power LED is on.
Select Tools > Program AVR > Connect to connect to the programmer. Select “STK500” as the platform and select the COM port of your programmer, as indicated in the Device Manager. When you click the “Connect” button, the STK500 programming window should appear.
Select the Main tab. In the dropdown box that lists AVR models, select the type of AVR on your device. For an Orangutan or 3pi robot, this will either be ATmega48, ATmega168, ATmega328P, ATmega324PA, ATmega644P, or ATmega1284P.
Select the Program tab. Click “…” in the Flash section and select file test.hex that was compiled earlier. Note that you have to first navigate to your project directory. Now click “Program” in the Flash section, and the test code should be loaded onto your Orangutan or 3pi.
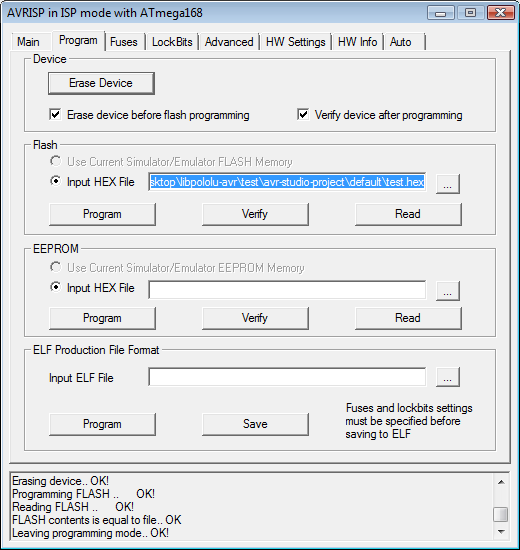 |
Programming the Orangutan from AVR Studio. |
|---|
If your controller was successfully programmed and you not using a Baby Orangutan, you should hear a short tune, see the message “Hello!” on the LCD (if one is present and the contrast is set correctly), and the LEDs on the board should blink. If you are using a Baby Orangutan B, you will just see the red user LED blink.
Related products


Home | Forum | Blog | Support | Ordering Information | Lists | Distributors | BIG Order Form | About | Contact
© 2001–2026 Pololu Corporation
