Pololu Blog » User Profile: Jeremy »
Posts by Jeremy
You are currently viewing a selection of posts from the Pololu Blog. You can also view all the posts.
Popular tags: community projects new products raspberry pi arduino more…
New products: ACHS-7121/7122/7123 current sensor carriers

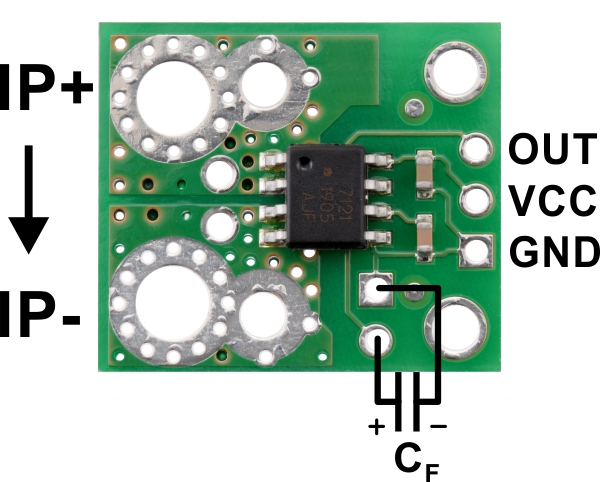 |
We are excited to offer new carriers for Hall effect-based linear current sensors from Broadcom. These easy-to-use bidirectional current sensors are available in three current range options:
- ACHS-7121 Current Sensor Carrier -10A to +10A
- ACHS-7122 Current Sensor Carrier -20A to +20A
- ACHS-7123 Current Sensor Carrier -30A to +30A
The ±10A and ±30A version have the same output sensitivity as our older ±5A and ±30A Allegro ACS714 Hall effect-based linear current sensor, respectively, so they should work as a drop-in replacement in many applications.
Introductory special
As usual, we are offering an extra introductory special discount on the ACHS-712x current sensor carriers, to help share in our celebration of releasing a new product. The first hundred customers to use coupon code ACHSINTRO can get up to five units for just $3 each!
Related products


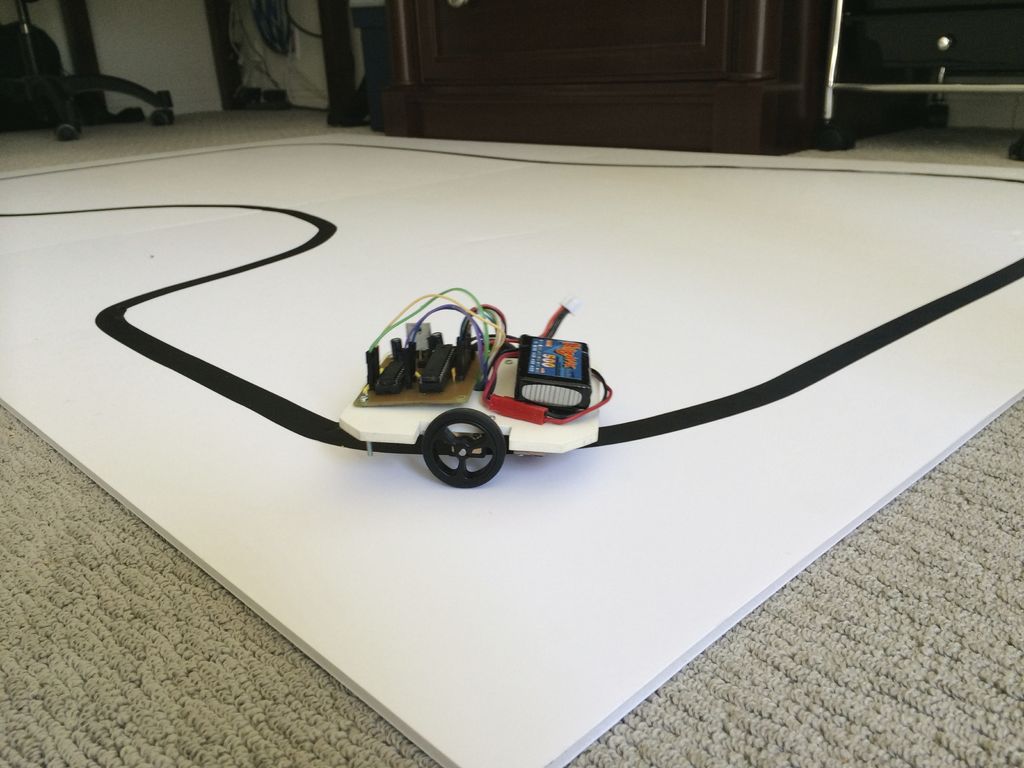
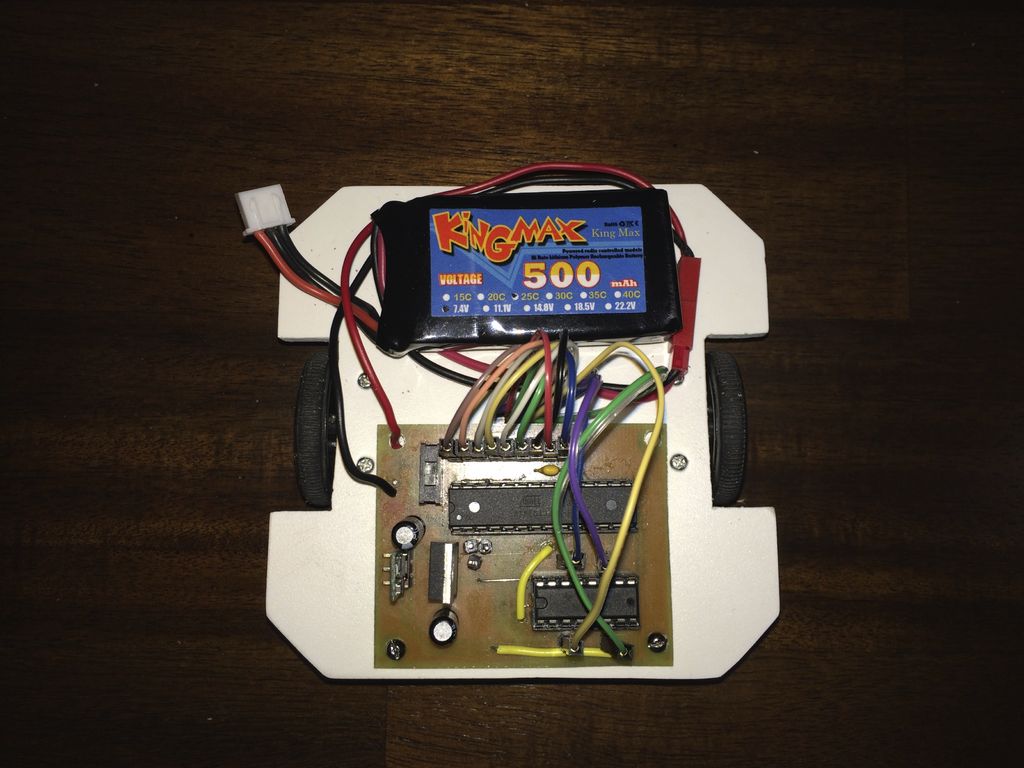
Jeremy's line following robot: Zumo Slim
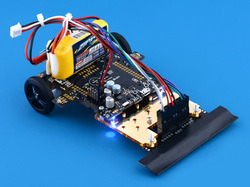
I recently competed in the LVbots line following robot challenge, where I took third place with the fourth fastest robot (due to lucky placement in the bracket). This was my second line following competition. I learned some valuable lessons from my first competition, such as bigger motors are not always good for going faster, so I focused my build on making a lightweight robot this time. Continued…
PiBot-A: mobile robot with a Raspberry Pi
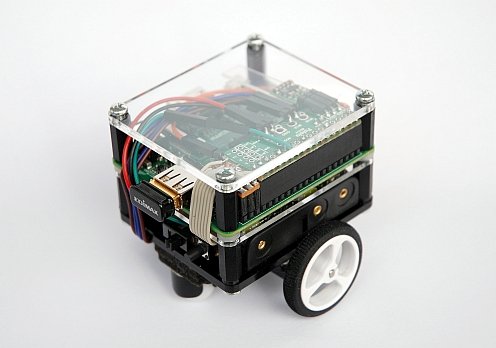 |
Thomas Schoch, who previously built the PiBot-B we blogged about, built another robot with a Raspberry Pi. His robot, the PiBot-A, uses our DRV8835 Dual Motor Driver Kit for Raspberry Pi B+ with a Raspberry Pi Model A+ to control two 100:1 Micro Metal Gearmotors. The robot also uses our S7V7F5 Switching Step-Up/Step-Down Regulator to supply the Raspberry Pi with 5 V from the motor power supply, allowing the whole robot to be powered form a single source.
|
|

The PiBot-A is controlled by a Web-App from Thomas’s iPhone. It communicates over WiFi to the Raspberry Pi, which is running lighttpd and PHP. The Python program on the PiBot-A uses the WiringPi library to send signals to the motor driver kit to drive two 100:1 Micro Metal Gearmotors that are connected to the chassis with our Micro Metal Gearmotor Brackets. Thomas also added an array of Sharp digital distance sensors to give the robot obstacle detection. You can find a video of the PiBot-A avoiding boxes below:
For a complete write-up of the robot, check out the PiBot-A page. It is written in German, but it has a link at the top to translate it into English using Google Translate.
11 February 2015 update: Thomas added support for our QTR-3A Reflectance Sensor Array to his PiBot-A to make a line follower and posted about it on Let’s Make Robots. The sensor array is interchangeable with the array of Sharp digital sensors used for obstacle detection. You can find a video of his robot following a line below:
Related products


Darth Vader Santa Claus Sumo Bot
 |
Happy Holidays everyone! I thought it would be fun to share this sumo bot that features Darth Vader/Santa Claus and uses our Zumo chassis.
The sumo bot was made by forum user Erich, and you can read more the sumo bot in this forum post and on this blog post from his website.
Erich has also posted to our forum about his projects before; you can find a list of the forum posts he made that we blogged about below:
March 2013: Zumo Robot with FRDM-KL25Z Board
September 2013: Zumo Robot with Pololu Plug-in Modules
October 2013: Zumo Robot with Pololu Plug-in Modules, assembled
December 2013: Zumo Tournament Videos
May 2014: Optical Motor Shaft Encoder in Zumo with Signal Processing
July 2014: Modding the Zumo: Encoders, WiFi, GPS, USB and 120 MHz
Related products

Video: Introducing the DRV8835 Dual Motor Driver Kit for Raspberry Pi B+
We have a new video for our DRV8835 Dual Motor Driver Kit for Raspberry Pi B+. The video gives an overview of some of its features and mentions a few considerations for working with it. Check it out, and get some ideas for a cool Raspberry Pi robot!

Simple Animatronic Skull, Part 2

As promised in my previous animatronic skull post, this is the update where I integrate the skull with a baby doll. I would like to introduce you to Daisy Spooks. Continued…
Simple Animatronic Skull
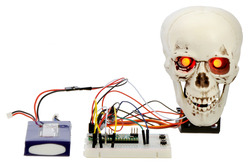
If you have been following our blog, you have seen some fun and scary Halloween projects posted by my coworkers here at Pololu. Well, this is the first part of my prop for my costume for this upcoming Halloween. After watching an animatronic devil baby terrorize New York City, I knew I wanted to build a similar demon baby that would be attached to me with a baby carrier. Continued…
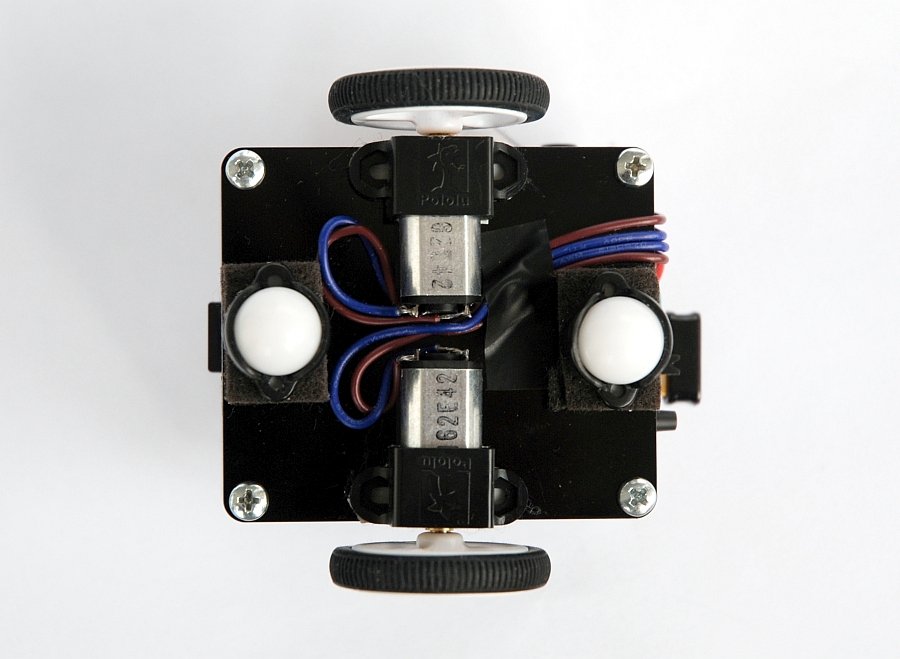
Community project: 2pi, a simple line following robot
 |
The 2pi, built by Mark Moran, is a line following robot based on our 3pi robot. The 2pi uses our 100:1 micro metal gearmotors, motor brackets, 32mm wheels, 1/2″ ball caster, QTR-8RC reflectance sensor array, and U3V12F9 switching step-up voltage regulator. All those components are mounted to a chassis that was cut from PVC foam.
 |
The robot uses a custom made PCB with an ATmega328 as the brain (the same AVR chip used in the Arduino Uno, some of our Orangutan Robot Controllers, and, of course, the 3pi). You can see the 2pi following a line in the video below.
For more information about how Mark built his robot, check out his Instructables guide.
Related products


Troubled Child, a full-size autonomous vehicle
The folks from SHARC have converted a Jeep into an autonomous robot for SparkFun’s annual Autonomous Vehicle Competition that took place last weekend. Their robot, Troubled Child, won first place in its class and the “Crowd Favorite” award.
 |
Long-time customer Michael Shimniok (our first blog post — from before we called it a blog — was about a tutorial he wrote for programming AVRs from a Mac) used his 1986 Jeep Grand Wagoneer to explore the back roads of Colorado and Utah before converting it into an autonomous vehicle. The autonomous Jeep uses our D15V35F5S3 switching step-down voltage regulator for powering the on-board electronics, and our dual relay board for running the warning horn and deactivating the pneumatic brake failsafe.
 |
You can check out their final run from inside the vehicle in the video below.
For more information on Troubled Child and the team behind the build, check out their build page or forum post.
Related products


Aluminalis, a sixteen-legged walking robot
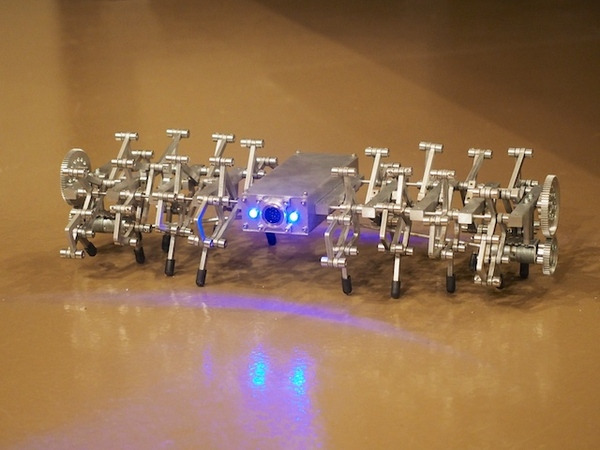 |
The Beatty family is at it again with their amazing robot builds (if you missed it, check out their Mars Rover). They completed Aluminalis, a sixteen-legged walking robot made mostly out of machined aluminum components.
The video above shows their magnificent sixteen-legged walking robot. It is all controlled by an Arduino Nano and uses Pololu 20D 73:1 metal gearmotors with matching brackets to move all of its aluminum legs.
For more information on Aluminalis, check out its build page.
Related products


Home | Forum | Blog | Support | Ordering Information | Wish Lists | Distributors | BIG Order Form | About | Contact
© 2001–2024 Pololu Corporation


