Support » Pololu Wixel User’s Guide » 10. Writing Your Own Wixel App »
10.c. Using the Eclipse IDE
 |
Using Eclipse with the Wixel SDK to develop Wixel applications. |
|---|
You can develop Wixel applications using any text editor. If you use the free, open source Eclipse IDE, you can benefit from some of its advanced C/C++ editing features. The following is a tutorial on how to set up Eclipse for use with the Wixel SDK.
- Install the Wixel SDK on your computer and compile an example app by following the instructions in the previous sections.
- Download and install the Eclipse IDE for C/C++ Developers. You might need to install a Java Runtime Environment (JRE) before you can run Eclipse.
- Run Eclipse. It will ask you to choose a workspace folder. Eclipse does not allow the workspace and project folders to be the same. Therefore, we recommend making a new folder called something like
eclipse_workspace, moving thewixel-sdkfolder inside of it, and choosing that new folder to be your Eclipse workspace location. By doing this, you can avoid having a large number of files in your workspace. You can switch your workspace location later if you need to. - After choosing your workspace folder, you will see a welcome screen that says “Welcome to the Eclipse IDE for C/C++ Developers” and has several circular icons on it. Click the icon with the yellow arrow in it to go to the Workbench.
- Select File > New > Other… in Eclipse. In the window that opens, expand the C/C++ folder, select C Project, and click Next. You should now see a window entitled “C Project”.
- For the Project name, enter
wixel-sdk. The Location box should now show the correct location of yourwixel-sdkfolder. Eclipse will show a warning at the top of the window that says “Directory with specified name already exists.” (this is good). - Under Project type, select Makefile project > Empty Project. It does not matter what toolchain you select.
- Click the Finish button to finish creating the wixel-sdk project.
- Press Ctrl+B or select Project > Build All to build the project. This is equivalent to running
make allin thewixel-sdkfolder. You can see the build output by selecting the Console tab at the bottom or by going to Window > Show View > Console. - In the left-hand pane, you will see the “C/C++ Projects” or “Project Explorer” view. This view should display one entry entitled
wixel-sdkwhich represents the project you just created. Double click on the project name to expand it and see all the folders and files inside it. - Navigate to the
apps/example_blink_ledfolder and double-click onexample_blink_led.c. This will open the file in the center pane. - Make a small change to
example_blink_led.c, such as removing a blank line or adding a comment. Save the file by pressing Ctrl+S or by selecting File > Save. - Press Ctrl+B or select Project > Build All to rebuild the project. When you do this, Eclipse runs
makein thewixel-sdkfolder, which builds all of the apps and the libraries they depend on. Once again, you can see the build output by selecting the Console tab at the bottom or by going to Window > Show View > Console. The Wixel SDK’s Makefile should detect thatexample_blink_led.chas changed, so it should rebuild the app. The output in the Console view should look something like this: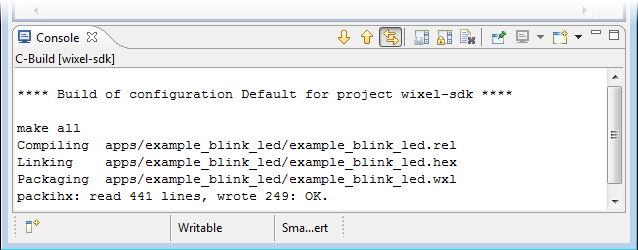
- Congratulations! You have made your first change to an app and recompiled it using the Eclipse IDE.
- When you are ready to load the app onto a Wixel, open up a Command Prompt, navigate to the
wixel-sdkdirectory, and runmake load_APPNAMEwhere APPNAME is the name of the app. We do not have a way of loading apps onto the Wixel that is integrated into Eclipse.
Improving the configuration of Eclipse
- In the Project menu, select Properties. Under C/C++ General > Paths and Symbols > Includes, click the Add… button. Enter the full path to SDCC’s include directory. If you are on a 64-bit machine and SDCC is installed in the default location, this will be “C:\Program Files (x86)\SDCC\include”. Check the “Add to all languages” box and click OK. This will allow Eclipse to find the headers provided by the compiler, such as
stdio.h, which will reduce the number of warnings you see from Eclipse while developing apps. - In the Window menu, select Preferences. Under C/C++ > Code Analysis, uncheck the boxes for “Type cannot be resolved” and “Field cannot be resolved”. We found that these two errors were not working correctly under Eclipse Indigo Service Release 1, and they will be caught by the compiler regardless of how you configure Eclipse.
- In the Window menu, select Preferences. Under General > Workspace, check Save automatically before build. This makes Eclipse save your code automatically before building, so you do not have to remember to do that.
Advanced Features of Eclipse
The attraction of using Eclipse is the large number of advanced C/C++ editing features it provides. Here are just a few of these features:
- Eclipse supports C syntax highlighting.
- If an error occurs during the build, you can double-click on the error from the Console or Problems view in order to jump directly to the line of code that has the problem.
- If you put your text cursor on a function name, variable name, preprocessor macro, or include directive, then you can quickly jump to the place where that item is defined by pressing F3 or by right-clicking and selecting Open Declaration.
- Pressing Ctrl+Tab inside a source (.c) file opens up the corresponding header (.h) file, and vice-versa. This is especially useful if you are writing a Wixel library.
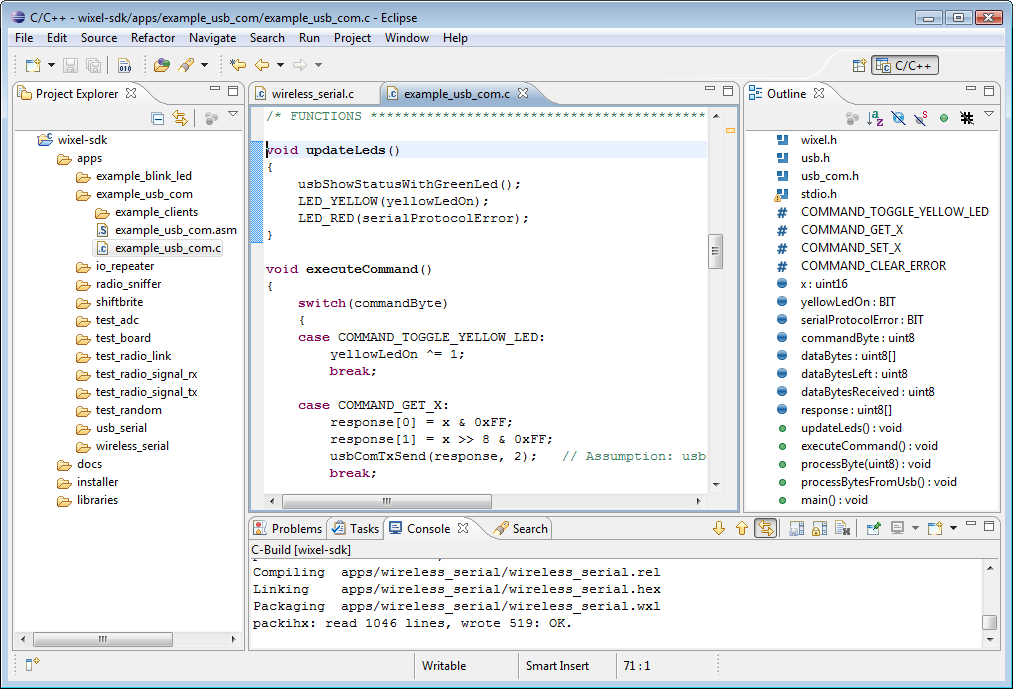
- The Outline view shows all the variables and functions defined in the current file. You can click on one of them to quickly jump to its definition. You can even drag them within the Outline view to change their order in your file.
- If you put your cursor on a function name, you can see all the places where that function is called by typing Ctrl+Alt+H or right-clicking and selecting Open Call Heirarchy.
- Eclipse makes it easy to rename selected objects (variables, methods/functions, etc.) by automatically propagating the changes to other files in the project. You can access this feature by putting your cursor on a name and then right-clicking and selecting Refactor > Rename…
- Eclipse scans your files for comments containing “TODO”. These comments are aggregated in the Tasks view, and you can also easily find them in your current file by clicking on the little blue rectangles to the right of the vertical scroll bar. Each blue rectangle represents the location of a TODO item in your file.
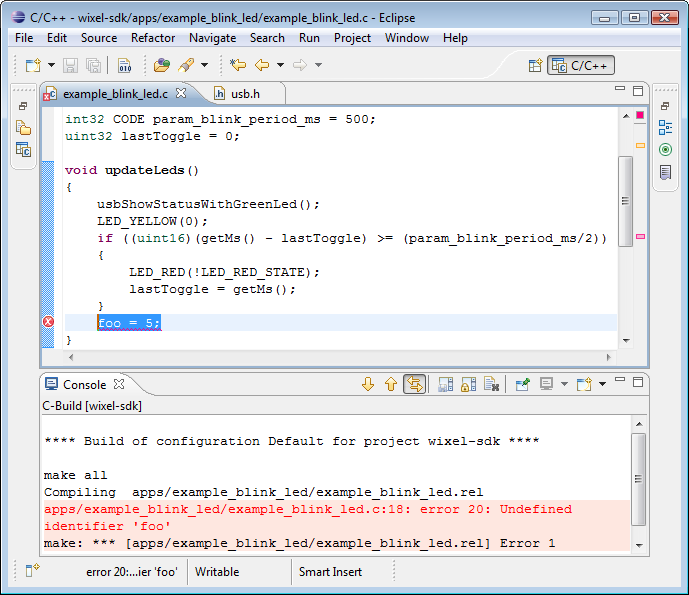 |
If there is an error during compilation in Eclipse, you can double-click on the error message to jump to the source of the error. |
|---|
Hiding Unused Features
By default, Eclipse has a large number of toolbar buttons, views (panes), and menu items that are not needed for developing Wixel applications. You can greatly simplify the user interface of Eclipse by hiding those items.
To hide unused toolbar and menu commands, select Window > Customize Perspective…. This brings up the “Customize Perspective C/C++” window. Select the “Command Groups Availability” tab. By unchecking a command group in this tab, you can automatically remove all the commands in that group from the toolbars and the menus. The only useful command groups for developing Wixel applications are:
C/C++ Coding, C/C++ Editor Presentation, C/C++ Element Creation, C/C++ Navigation, C/C++ Open Actions, C/C++ Search, Editor Navigation, Editor Presentation, Keyboard Shortcuts, Open Files, Search
If you want further customization, you can use the “Tool Bar Visibility” and “Menu Visibility” tabs to show or hide individual commands.


Home | Forum | Blog | Support | Ordering Information | Wish Lists | Distributors | BIG Order Form | About | Contact
© 2001–2024 Pololu Corporation
