Pololu Blog » Posts tagged “community projects” »
Posts tagged “community projects” (Page 10)
You are currently viewing a selection of posts from the Pololu Blog. You can also view all the posts.
Popular tags: community projects new products raspberry pi arduino more…
Pi Wars 2015
There is a nice recap on the Raspberry Pi blog of the Pi Wars 2015 competition that was held last weekend on December 5th, 2015. It is a robotics competition held in Cambridge, UK that focuses on robots controlled by a Raspberry Pi. I noticed a lot of Pololu parts on the robots in the videos. Just a few examples are wheels and tracks, motors, and reflectance sensors. I didn’t see any A-Star 32U4 robot controllers in the videos, but I think that would make a great controller for a robot in the next competition because it can be used as a Raspberry Pi expansion board!
You can check out the Pi Wars 2015 post for more details.


Patrick's mini sumo robot: Covert Ops
Hi, my name is Patrick. I am an engineering intern at Pololu and am studying at the University of Nevada, Las Vegas to earn a mechanical engineering degree. I decided to build a custom robot to compete in the recent LVBots mini-sumo competition here at Pololu. It was my first competition at LVBots. I started out by watching a compilation video of the previous sumo competition at LVBots since I had never competed in a mini-sumo competition before. My goal was to create a robot that could out maneuver other robots and had as few vulnerabilities as possible. To achieve this goal, I decided to build a robot that would be high speed and able to push opponents from both sides of the robot with a lot of force. The result of my efforts is the robot I call Covert Ops. Continued…
Kevin's mini-sumo robot: Roku
My robot, Roku, was the champion of LVBots’ August mini-sumo competition. While I didn’t have the time or inspiration to make it look like anything more interesting (like a Star Wars droid) or make use of especially innovative tactics, I think I managed to build a robot that not only is effective but also looks fairly clean and well put together. In addition, it’s a good demonstration of how the Pololu A-Star 32U4 Robot Controller can be used as a standalone main board for a small robot. Continued…
Video: MyoWare Muscle Sensor demonstration with Maestro servo controller
 |
I got your torque right here ;) |
|---|
Now that we are carrying Advancer Technologies’ MyoWare Muscle Sensor, it is time to update our demonstration video! I’ve had two whole years to add some mass to my biceps (during which time I continuously worked on those bad boys for a grand total of four weeks), and now I can proudly present to you these sick gains.
The demonstration is basically a redo of the original muscle sensor demo with the new sensor, except for a few small differences (honestly, my biceps are not that much bigger). In this setup, a 6-channel Maestro reads the muscle sensor’s analog voltage output and commands the position of a Power HD servo. The Maestro’s +5 V (out) pin supplies power to the MyoWare Muscle Sensor, and the servo and Maestro are powered by 4 rechargeable AA batteries. On a personal note, I found it really satisfying to use a single power source for this demonstration, which is not something you can do with the previous version of this muscle sensor, as it requires two supplies. (Be sure to check out the MyoWare Muscle Sensor’s product page to read about more ways the new muscle sensor improves upon the older version!)
This Maestro script is slightly more interesting than the script in the last demo, since the servo’s default direction of rotation was the opposite of the motion for a bicep curl (and we were already quite happy with the servo’s orientation with respect to my arm for the planned video footage). To get around this, and make the servo arm movement match the position of my arm during a bicep curl, I did some basic math and came up with an equation that you can see in the code below:
# Sets servo 1 to a position based on the analog input of the MyoWare Muscle Sensor.
begin
  8000            # put this value on the stack (for why, see line 5)
  0 get_position   # get the value of the muscle sensor's signal connected to channel 0
  4 times minus    # y = -4x + 8000 , which is an equation we use to deal with the servo's
                   # default direction of rotation and scale the Maestro's Target
                   # value to roughly 4000-8000 (approximately 1-2 ms)
                   # which is the range of servo pulses that corresponds
                   # to the motion we want.
  1 servo          # set servo 1 accordingly
repeat
You can, of course, use other devices to read the analog voltages from the MyoWare Muscle Sensor. If you have not already, you might try using one of our A-Stars!
If you have a project that uses the MyoWare Muscle Sensor, we would be pumped to hear about it!
Related products


One-sixth scale Mark 1 British Heavy Tank by Helen Lawson
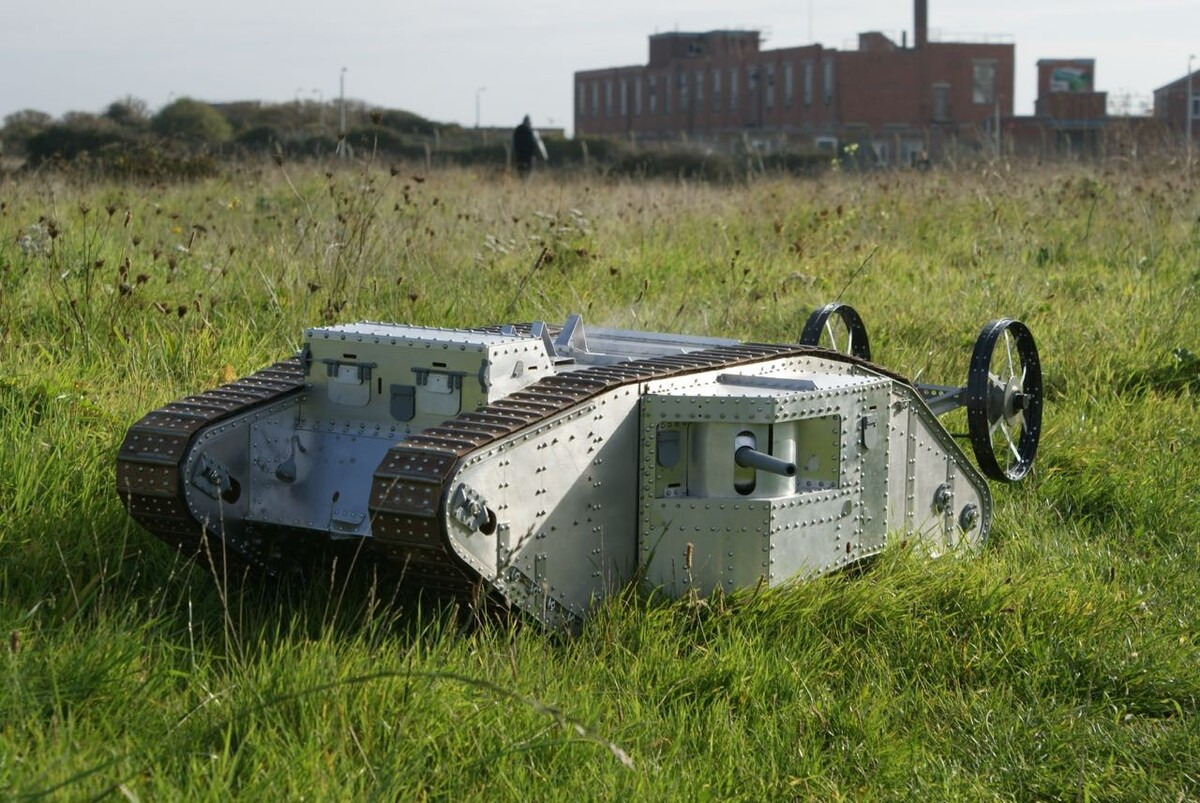 |
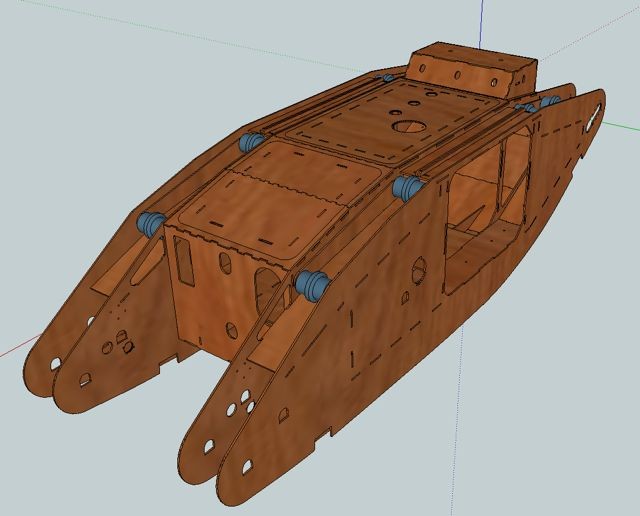
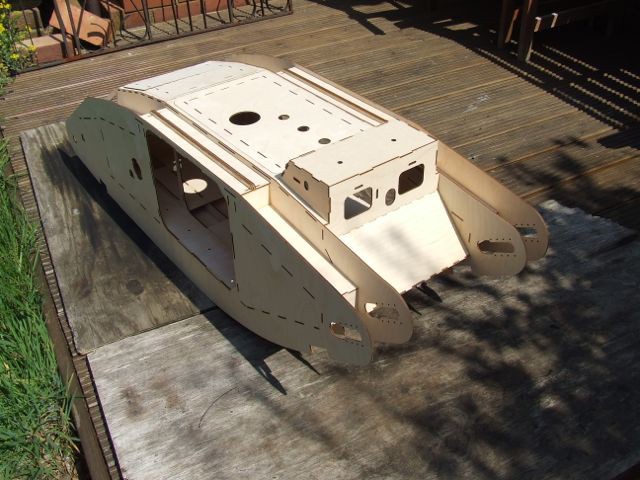
Helen Lawson designed and built a one-sixth scale Mark 1 British Heavy Tank replica that is a functional, radio controlled robot. The replica has been a work in progress for around three years and is now reaching completion. Helen designed the main chassis out of laser-cut wood and made other aspects of the chassis from aluminum and 3D printed parts.
|
|
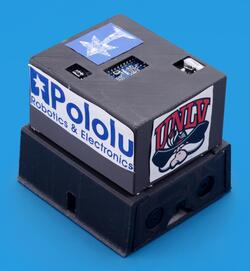
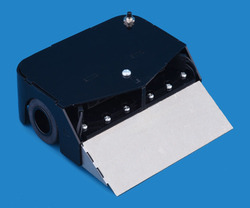
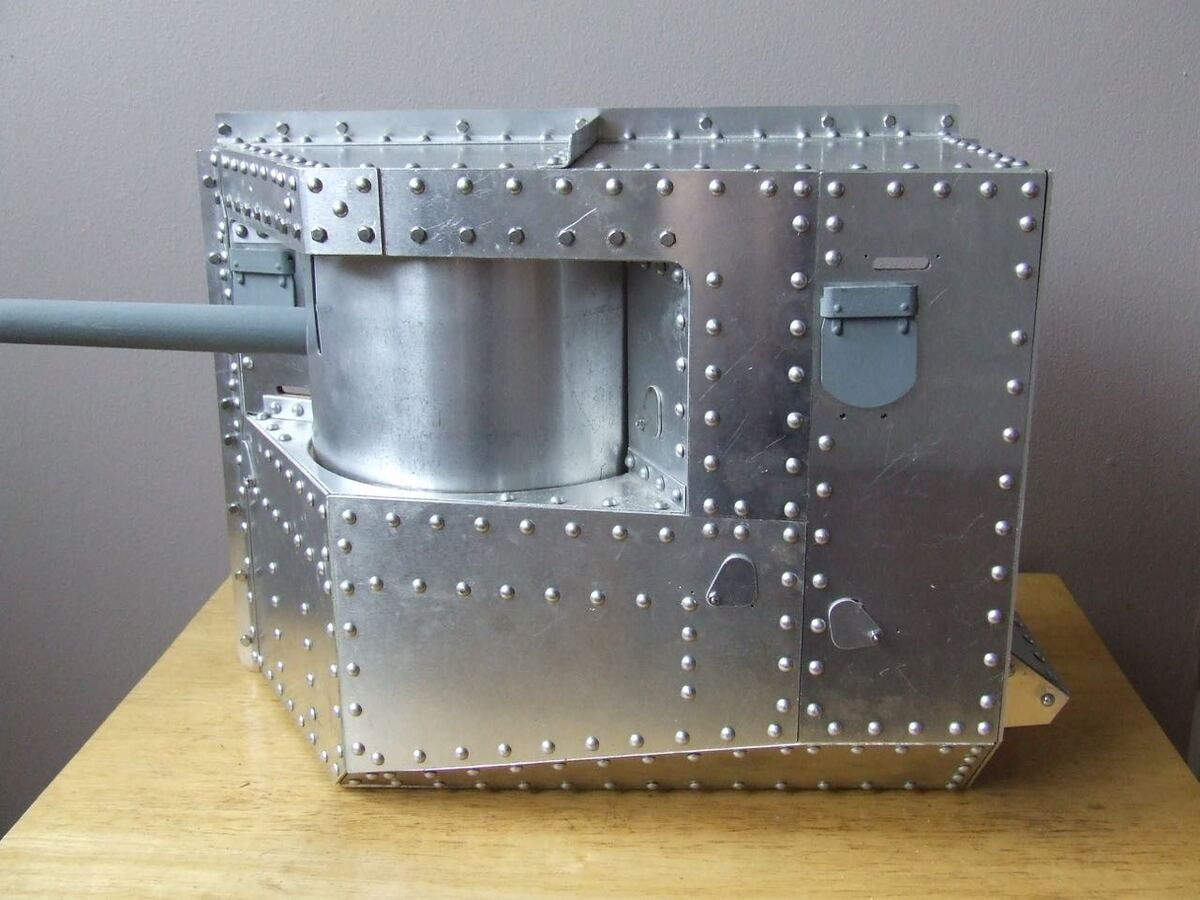
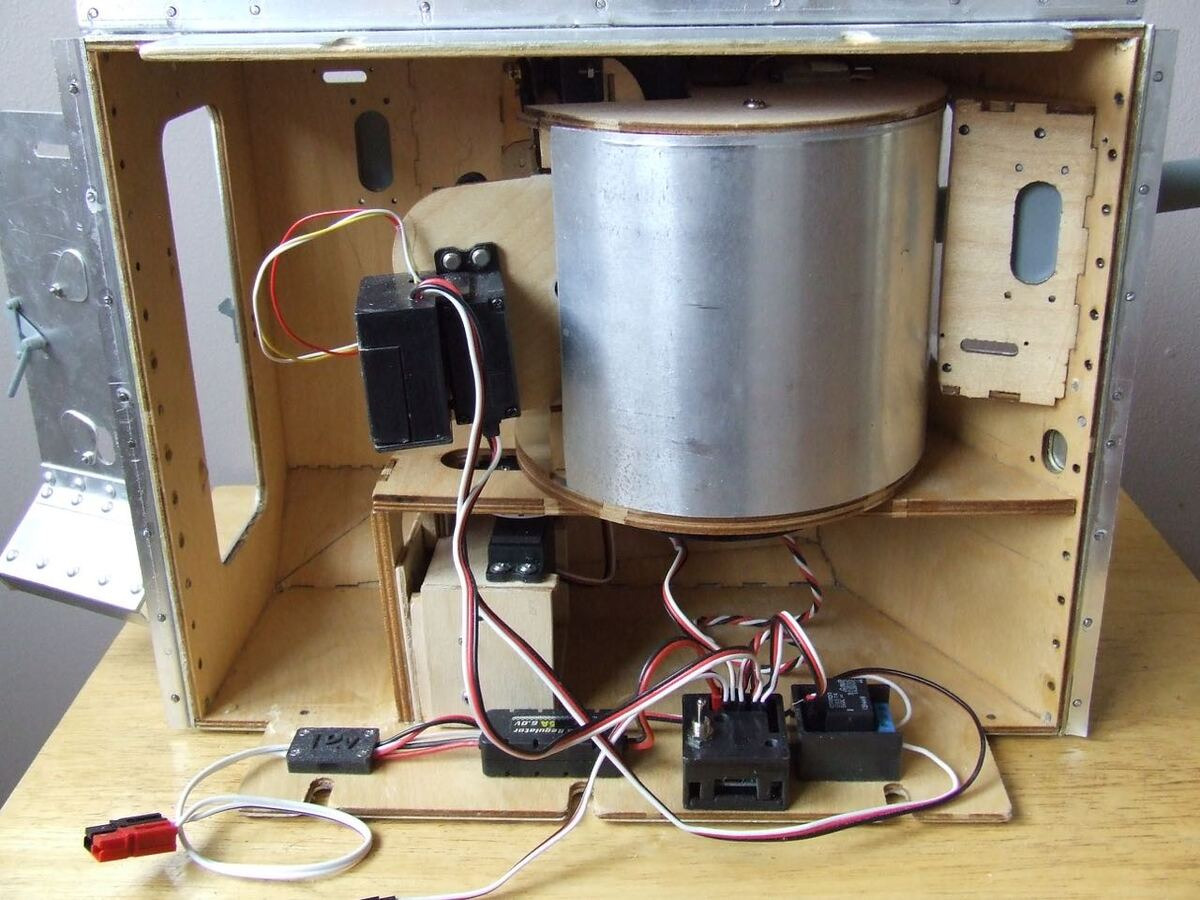
One distinguishing feature of a MK 1 British Heavy Tank is the lack of a central turret. Instead, it has a sponson on each side. This proved challenging for Helen’s build since most electronics made for RC tanks only allow for a single gun and turret. To make the sponsons functional, Helen used a combination of an RC receiver, an RC switch with digital output, an RC switch with relay, a Micro Maestro servo controller, a few servos, and a Taigen gun flash unit. You can find more detailed information about this part of the system (including a wiring diagram and Maestro script) in her post on our forum. The images below show each side of one of the completed sponsons:
|
|
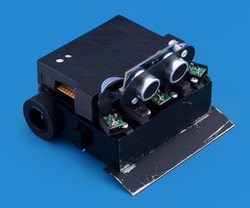
She also made a 3D-printed case for the Maestro (shown in the photo on the right) and a few of the other electronic components, which she made available on her Thingiverse page.
You can see a video of the robot in action on this Portsmouth Model Boat Display Team Armoured Division Facebook page, and even more information on her build, including many more pictures, in Helen’s forum thread at landships.net.
Related products


Brandon's mini sumo robot: Black Mamba
Before I started designing my entry into this year’s LVBots mini sumo competition, I watched several videos of other competitions. I noticed a majority of the victories came from engaging the opponent from the side or back; a pattern I also noticed during the last LVBots mini sumo competition. For that competition, I made a robot that used a blade and sensors on the front and back of the robot (basically making the robot have two fronts and no back). However, my strategy in that competition was to roam the ring and search for the opponent, which I suspect increased the chances of the opponent engaging from a suboptimal angle. This time, I wanted to try having my robot spin in place looking for the opponent and striking once it was found. This ultimately resulted in my newest mini sumo robot, Black Mamba. For those unfamiliar, a black mamba is a snake with a reputation for being highly aggressive and is one of the longest and fastest-moving snakes in the world. A black mamba’s venom is highly toxic, and it is capable of striking at considerable range, occasionally delivering a series of bites in rapid succession. Black Mamba is also Kobe Bryant’s self-appointed nickname (yes, I am a Lakers fan). Continued…
Prototyping hexapod motion with a Maestro USB servo controller
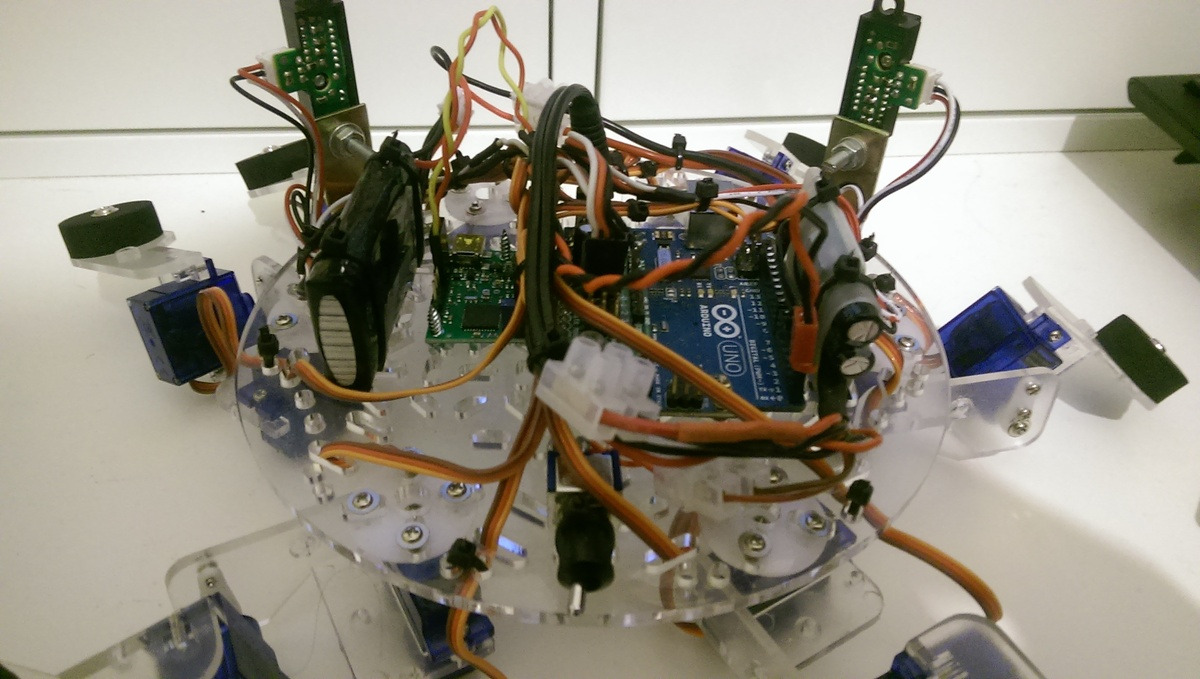 |
Chris Barlow posted this interesting write-up about how he is using the USB connection of a Mini Maestro servo controller to prototype motion control for his hexapod robot. He has been going over the build in detail on his blog, so check it out over there, and be sure to take a look at this short video below:
Motion tracking skeleton at Cedar Gables Inn
Forum user Ken constructed a spine-chilling Halloween project that is featured at the Cedar Gables Inn Bed and Breakfast in Napa, California. His project is based on Brandon’s Motion Tracking Skull Halloween prop, but instead of just using a head-turning skull, Ken used a full-scale skeleton body to complete the creepy look.
 |
Motion tracking skeleton at the Cedar Gables Inn. |
|---|
Just like in Brandon’s example, Ken used two Sharp GP2Y0A60SZ analog distance sensors to detect objects (or humans) and a Micro Maestro servo controller to read the output values from the sensors and control the servo that moves the head. Ken improved on Brandon’s code by returning the skeleton’s head to its starting position after a short delay so the skeleton wouldn’t stare rudely at the inn’s guests.
 |
For more information about Ken’s Halloween project, see his forum post, and if you happen to be in the Napa Valley area this Halloween, stop by the Cedar Gables Inn and check it out in person!
In case you missed it, we have Maestros and Sharp distance sensors on sale right now as part of our Polo-BOO! Halloween Sale. The sale ends in less than two days, so if you want to try doing a project like this, now is the time to get started!

Related products

Raspberry Pi Solar Tracker
Jay Doscher posted on his blog at Polyideas.com about his 2-axis solar tracker designed to provide the optimal amount of power output with a portable setup. In the build, Jay uses a Raspberry Pi A+ topped with our Dual MC33926 Motor Driver for Raspberry Pi to control the motion of the system, which is accomplished using a Concentric 4″ linear actuator with feedback. In lieu of a GPS unit, the tracker uses hard-coded longitude and latitude coordinates with Pysolar, an open-source Python library, to calculate the sun’s predicted position. The system keeps the solar panel pointed at the calculated position with the help of a Razor IMU from SparkFun. The video above is time lapse footage of a mechanical test of the system that shows the unit tracking the sun (although it is indoors).
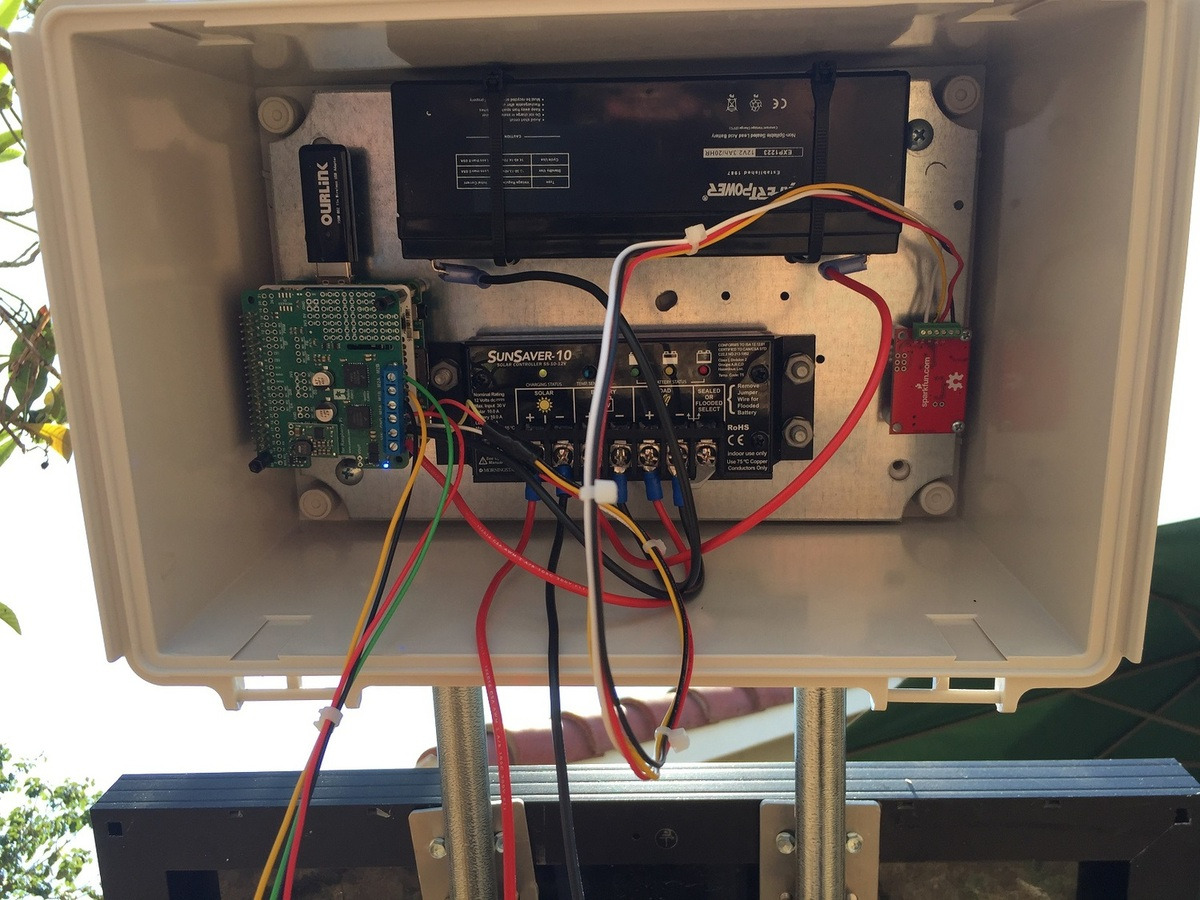 |
In the picture above, you can see the Raspberry Pi and dual MC33926 driver board on the left and the IMU on the right. The Dual MC33926 Driver for Raspberry Pi fits on top of the Raspberry Pi mainboard, eliminating a lot of wiring and making it easy to use while also leaving the setup looking clean and organized. Additionally, the Dual MC33926 Driver for Raspberry Pi provides a set of three through-holes where an appropriate voltage regulator can be conveniently connected, allowing the motor supply to also power the Raspberry Pi. You can see one of our D24V10F5 switching step-down regulators mounted on top of the dual MC33926 driver board to serve this purpose in the picture above as well.
 |
This project was also a 2015 Hackaday Prize entry and made it to the quarterfinals!
For more information about this project, see Jay’s blog post, which has additional photos and details including a parts list and links to his code.
Related products


Zippy: an Arduino Nano-based balancing robot
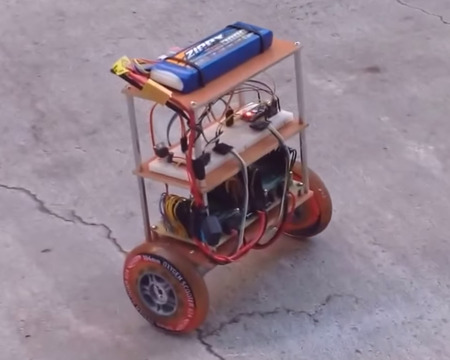 |
Zippy is an RC balancing robot created by Larry McGovern. It uses an Arduino Nano to read pulses from an RC receiver and accelerometer and gyroscope data from an MPU6050. After processing that information, the Nano commands two ST motor driver development boards, which each control a 30:1 37D mm gearmotor with encoder. The whole system is powered by a 3S LiPo (brand: Zippy, of course!). You can watch Zippy scoot around on pavement below:
In the video description, Larry mentions that he modeled Zippy after the Balanduino robot, but we would like to highlight one noticeable difference: he used his own pair of wheels, which are mated to the output shaft of his gearmotors with our 6mm scooter wheel adapters! I had a major role in designing these, so on a personal note, it is especially exciting to see someone get a good use out of them. (It also looks like our stamped aluminum L brackets are used to mount the motors.)
Related products


Home | Forum | Blog | Support | Ordering Information | Wish Lists | Distributors | BIG Order Form | About | Contact
© 2001–2024 Pololu Corporation


