Pololu Blog »
Inflatable ghost
After doing the creepy mask, I wanted to do something a bit more festive. This Halloween prop was inspired by those inflated decorations people put on their lawns. In this case, I wanted something a bit smaller since I wanted it to fit indoors. I also wanted to use one of our addressable 8mm RGB LEDs, so I could make it light up all sorts of colors instead of just a single color like I had often seen. I decided to make an inflatable ghost because I wasn’t sure I would be able to control the shape that well and figured a ghost would give me more leeway in shape.
Implementation
I decided I would make the inflatable part out of a plastic bag because it was the right size and easy to obtain. I also chose a more opaque bag because it diffused the light better (it also hid the stuff inside better than a clear bag). To inflate the bag, I used a 80mm computer fan because they are cheap and easy to get. This size of fan worked out nicely because it just happened to fit the polystyrene cups we have by the water cooler (the cup made it easier to mount the plastic bag and LED to the fan). I cut the bottom off one of these cups and mounted the addressable LED to the inside using hot glue. I connected some jumper wires to the LED and ran them out the side of the cup where the fan wires were. The cup was then mounted to the fan using hot glue, which I also used to seal the small gaps between the cup and fan. Before attaching the plastic bag to the cup, I asked one of my more artistic coworkers to draw a ghost face on the bag (because my attempt at the drawing the face was lacking in details). I also added standoffs to the bottom of the fan to make sure the fan’s intake could always get air.
To control the LED, I used an A-Star 32U4 Mini SV. The main reason I chose that A-Star was that I wanted to directly power the computer fan at 12 V (typical voltage for computer fans), but needed to power the LED at 5 V. The built in regulator on the A-Star 32U4 mini SV allowed me to power the LED at 5 V but accept the 12 V from a power supply. Using a desktop power supply, I determined my system was not going to need more than a couple hundred milliamps, so I used one of our 12VDC, 1A wall power supplies. To connect the barrel jack on the wall power supply to my system, I used a DC Barrel Jack to 2-Pin Terminal Block Adapter. Fortunately, the fan I was using had two power connectors coming off the power cable which allowed me to simply cut one off and connect it to the terminal blocks on the adapter (the other connector on the fan was used to power the A-Star).
 |
For the code controlling the LED, I used the LedStripRainbow example from our library for the addressable RGB LED strips. The only thing I modified in the code was the LED_COUNT constant; since I only had one LED, I set the constant to 1. I wanted something fun, so I kept the rainbow pattern, but if you make your own, feel free to make your own lighting pattern.
 |
Complete parts list
- A-Star 32U4 Mini SV
- Addressable Through-Hole 8mm RGB LED with Diffused Lens, WS2811 Driver
- DC Barrel Jack to 2-Pin Terminal Block Adapter
- 12VDC, 1A wall power adapter
- Premium jumper wires
- Four 1.25″ aluminum standoffs and #4-40 nuts
- A computer fan
- A polystyrene cup
- A plastic bag
Further thoughts
After making the ghost, I got several comments about the shape looking more like a tooth than a ghost, to which I say: “how do you know what a ghost looks like?” While sealing the bag, I found that you need to balance the weight or the whole thing tilts over. I also noticed that the fan seemed to be at its limit with that size bag, so for a larger inflation a powerful fan or more fans would probably be required to keep the prop firmly inflated.
Related products


-
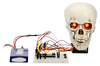
Simple Animatronic Skull
- 10 October 2014If you have been following our blog, you have seen some fun and scary Halloween projects posted by my coworkers here at Pololu. Well, this is the...
-

Free magazines: October 2014 Circuit Cellar and Elektor
- 15 October 2014Get FREE copies of Circuit Cellar magazine’s October issue and Elektor magazine’s October issue with your order, while supplies last....
0 comments
Post a comment


Home | Forum | Blog | Support | Ordering Information | Wish Lists | Distributors | BIG Order Form | About | Contact
© 2001–2024 Pololu Corporation
